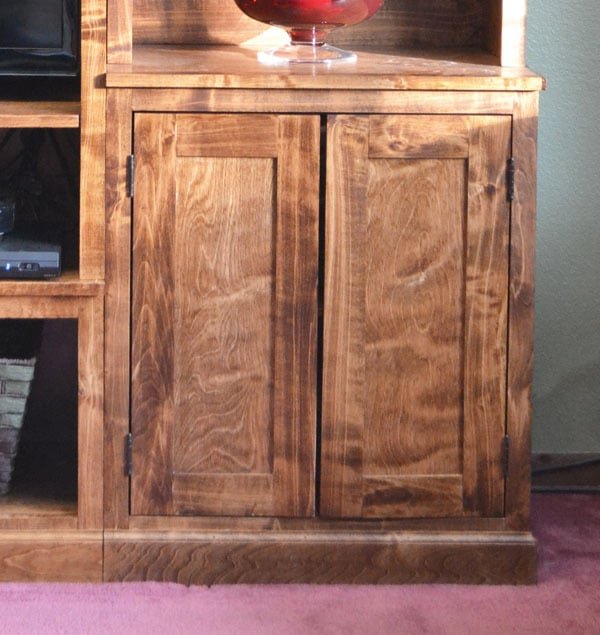
Smith Media Wall: Side Base Cabinet
to build a media wall. This plan is for the side base unit. Plans designed by
Specifications
| Project type | Media and Entertainment Centers |
|---|---|
| Room | living room |
| Style | Farmhouse Furniture |
| Difficulty | Advanced |
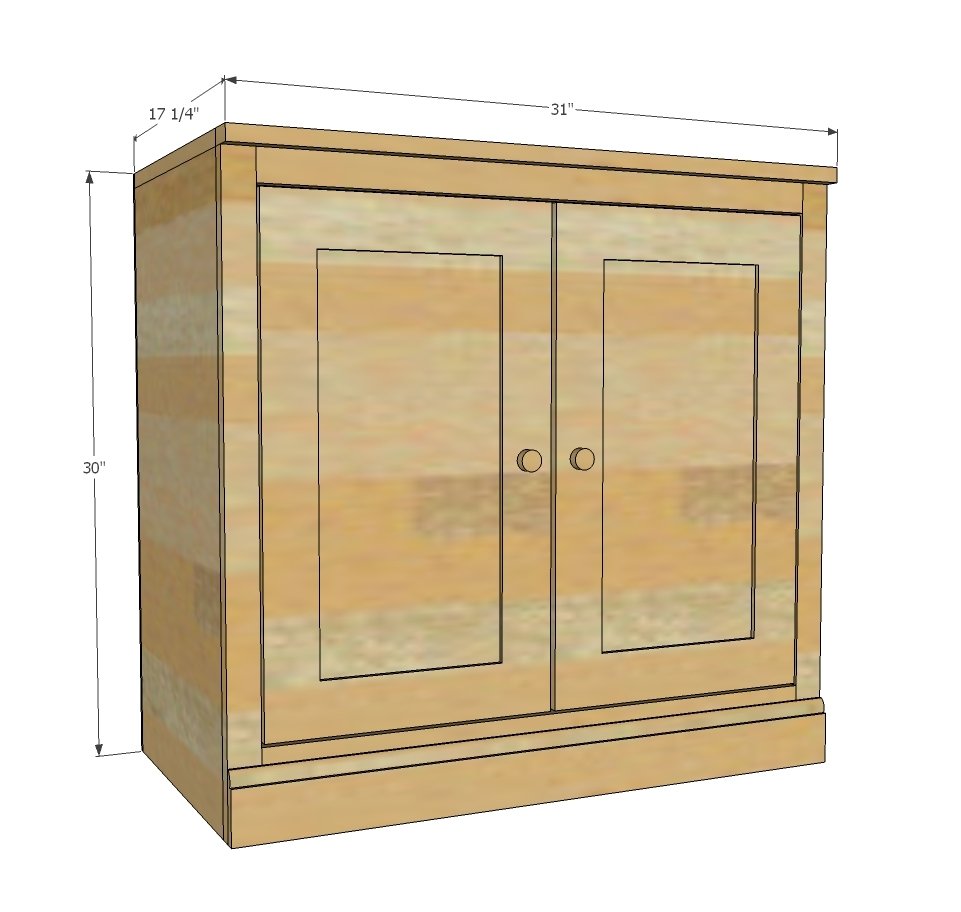
Dimensions
Use the size-specific shopping and cut lists below.
Shopping List
1/2 sheet of 3/4” plywood ripped into strips 15 3/4” wide (referred to as 1x16 in this plan)*
1/2 sheet of 1/4” plywood
2 - 1x2 @ 8 feet long
12 feet of 1x3 boards for doors
31” of 3 1/4” base moulding
1 set of inset style drawer hinges designed to work with doors with 1/8" gap around doors (or you can build your doors to fit the openings and your hinges as recommended)
*We used PureBond Formaldehyde Free Plywood in Birch for the carcass and then used Alaskan Birch for the face frames and door frames. The door panels are made of PureBond Formaldehyde Free Plywood in birch, 1/4" thickness.
*Note if you are making multiple pieces for this collection, you may wish to figure the entire cut list as there will be scraps and you may need less materials than called for in shopping lists
This cabinet was built using 1 1/4" pocket hole screws and 1 1/4" finish nails for attaching plywood and face frames
Cut List
1 - 1x16 @ 31” (Top)
2 - 1X16 @ 29 1/4” (Sides)
2 - 1X16 @ 29 1/2” (Shelves)
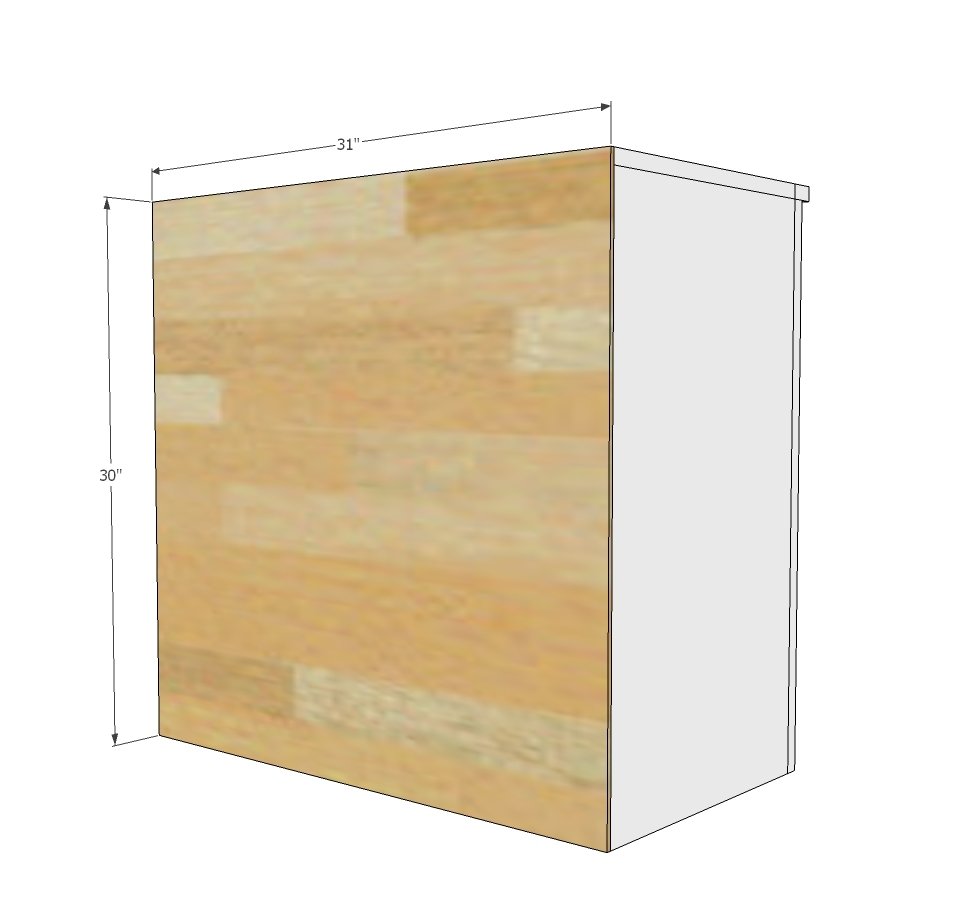
1/4” PLYWOOD 31” x 30” (Back)
FACE FRAME
1 - 1x2 @ 31”
2 - 1x2 @ 28”
2 - 1x2 @ 29 1/4”
BASE MOULDING
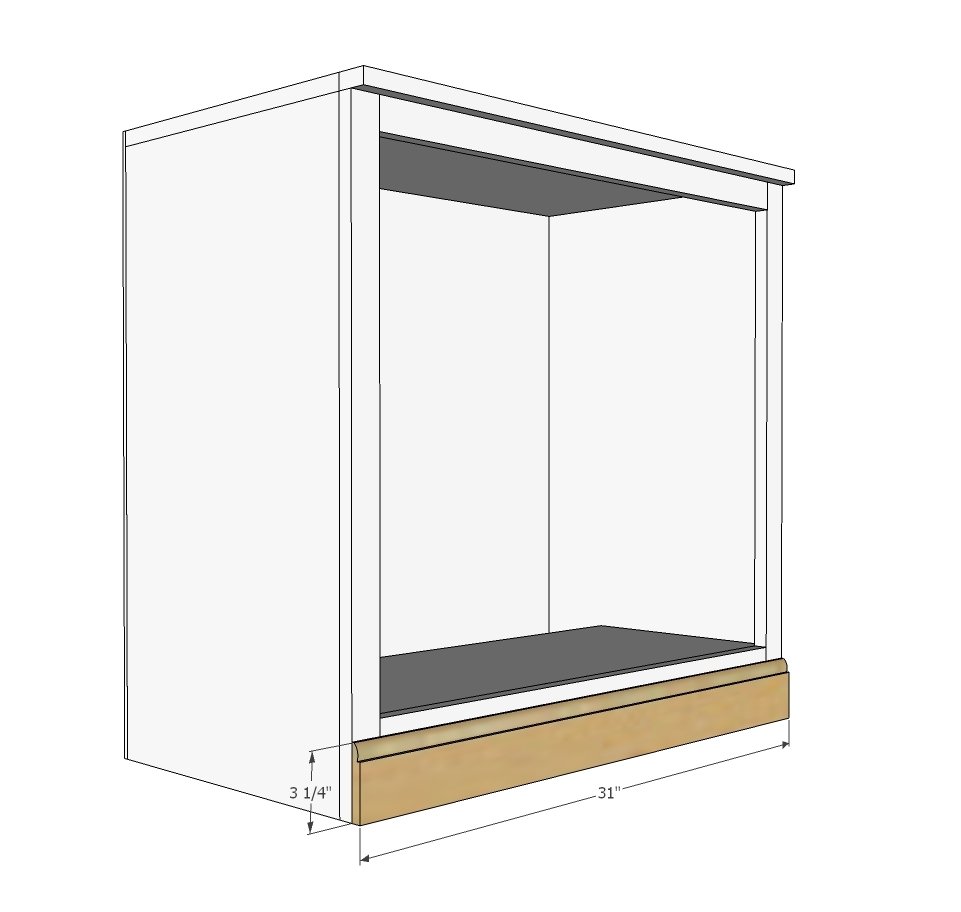
1 - 3 1/4” base moulding @ 31”
DOORS (for 2 doors)
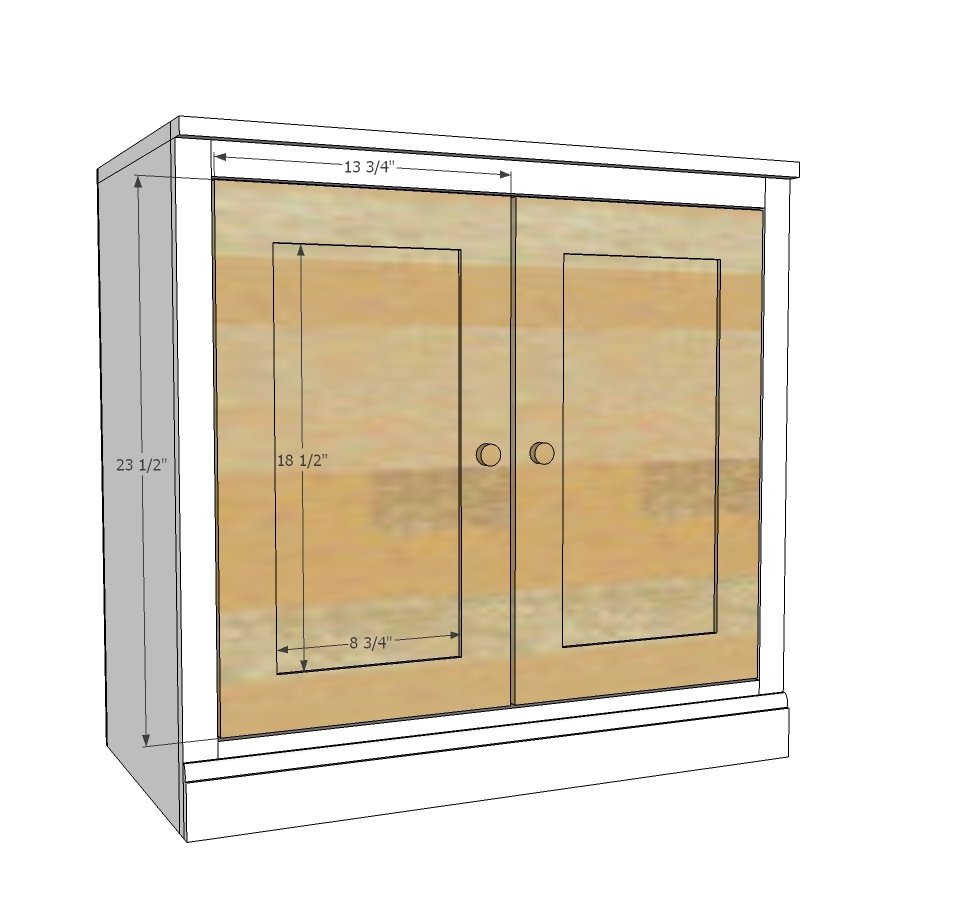
4 - 1x3 @ 13 3/4”
4 - 1x3 @ 18 1/2”
Plywood inset for 1/4” inset is 19” x 9 1/4”
Tools
- measuring tape
- square
- pencil
- safety glasses
- hearing protection
- kreg-jig
- drill
- circular saw
- compound miter saw
- nailer
- sander
Step-by-step Instructions
Step 1
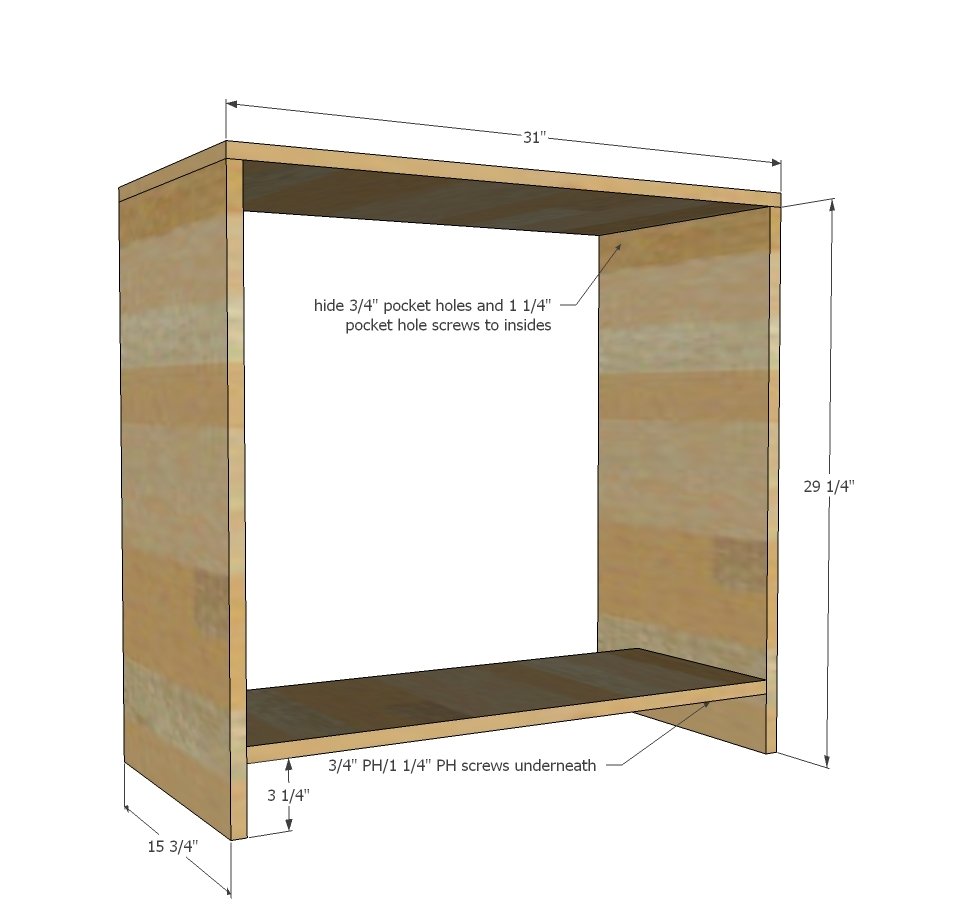
First, build the box. If you are using adjustable shelf pin holes, drill those first - it will be much easier than later on, after the back and face frame are attached.
Step 2
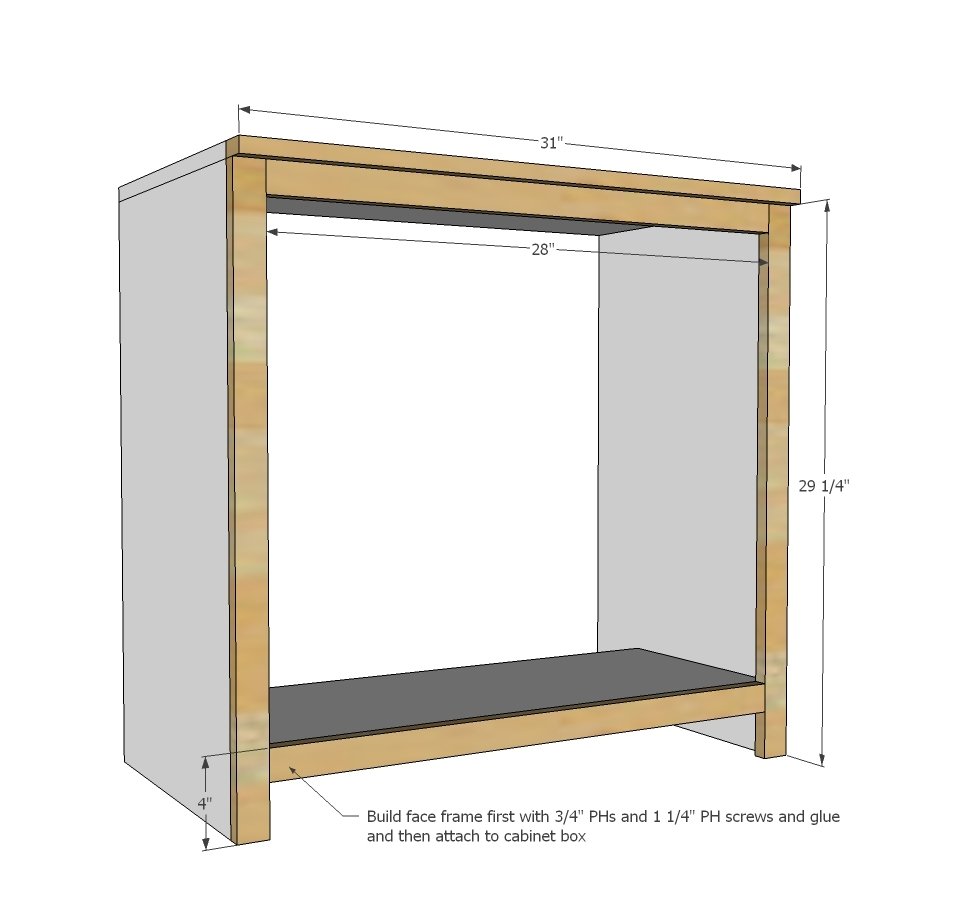
Build face frame separately, including adding the top lip with pocket hole screws. Then attach entire face frame to front of cabinet.
Step 3
Attach back with finish nails and wood glue.
Step 4
Attach base moulding with finish nails and wood glue.
Step 5
Finishing
Sand all surfaces, starting with a medium grit and finishing with fine. Wipe off the dust, fill any holes or gaps with wood filler, and sand smooth once dry. Apply primer if you're painting, then finish with your choice of paint or stain and seal with a durable clear topcoat. For outdoor projects, use exterior-rated primer, paint or stain, and sealer so the piece stands up to the weather.
Source (temporary): https://www.ana-white.com/woodworking-projects/smith-media-wall-side-base-cabinet