Square Coffee Table with Drawers
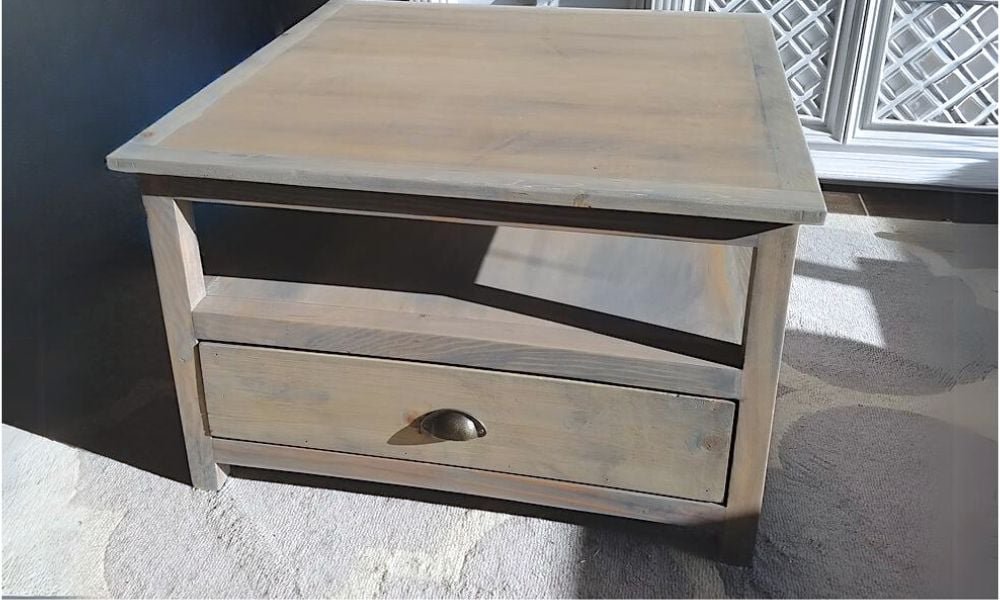
A square coffee table with lower drawers and an optional large shelf, this woodworking plan is easy to modify in size and functionality. We love the square size and the wood construction, you can paint or stain it any color you please..
Specifications
| Project type | Coffee Tables |
|---|---|
| Room | living room |
| Style | Cottage Style Furniture Plans |
| Difficulty | Advanced |
| Estimated cost | $50 - $100 |
Dimensions
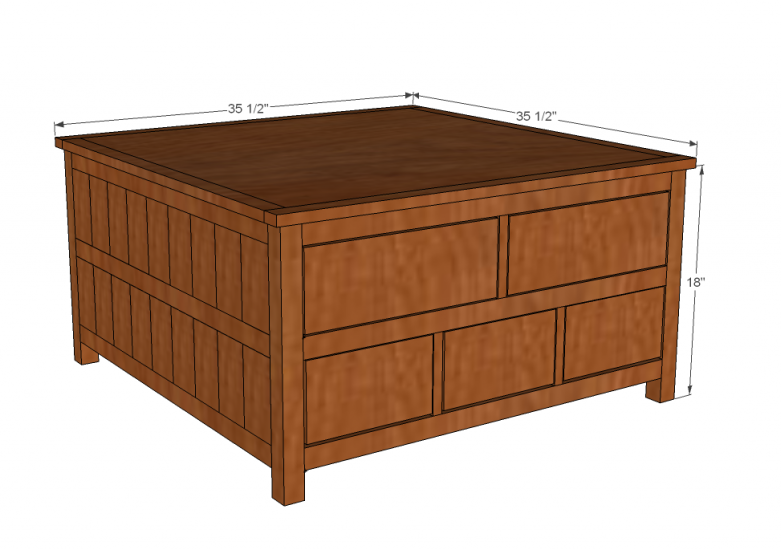
Use the size-specific shopping and cut lists below.
Shopping List
- 7- 2×2 @ 8 feet long
- 5- 1×2 @ 8 feet long
- 3- 1×4 @ 8 feet long
- 5- 1×6 @ 8 feet long
- 1/2 sheet of 3/4″ hardwood plywood
- drawer slides & drawer pulls/handles
- screws, nails
- finishing supplies
Cut List
- 4 – 2×2 @ 18″ (legs)
- 15 - 2×2 @ 31 1/2″ (parts of front back sides & drawer supports)
- 6 – 1×2 @ 5 3/4″ (front and back drawer dividers)
- 7 – 1×2 @ 31 1/2″ (drawer slide supports)
- 36 – 1×4 @ 5 3/4″ (planks for sides)
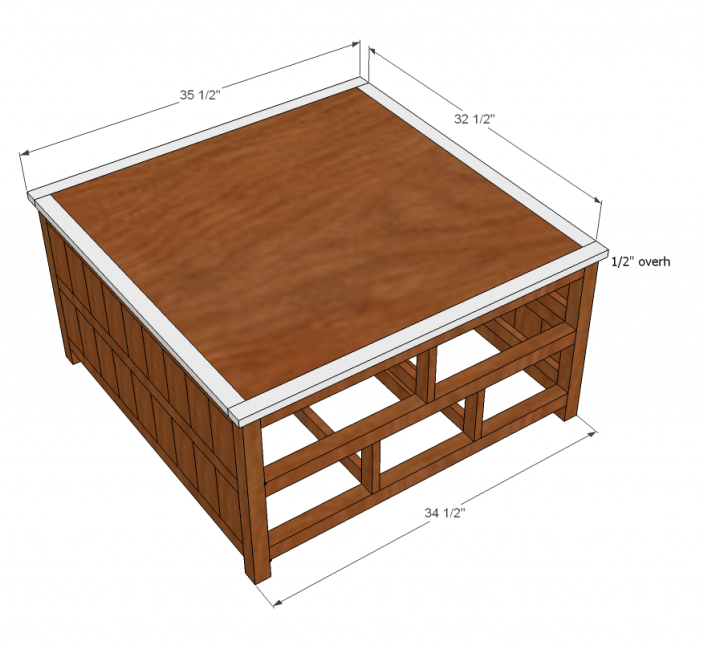
- 2 – 1×2 @ 32 1/2″ (top trim)
- 2 – 1×2 @ 35 1/2″ (top trim)
- 1 – 3/4″ plywood @ 32 1/2″ x 32 1/2″ (top) IF YOU ARE PAINTING just use a solid piece of MDF: 35 1/2″ x 35 1/2″ no trim pieces needed
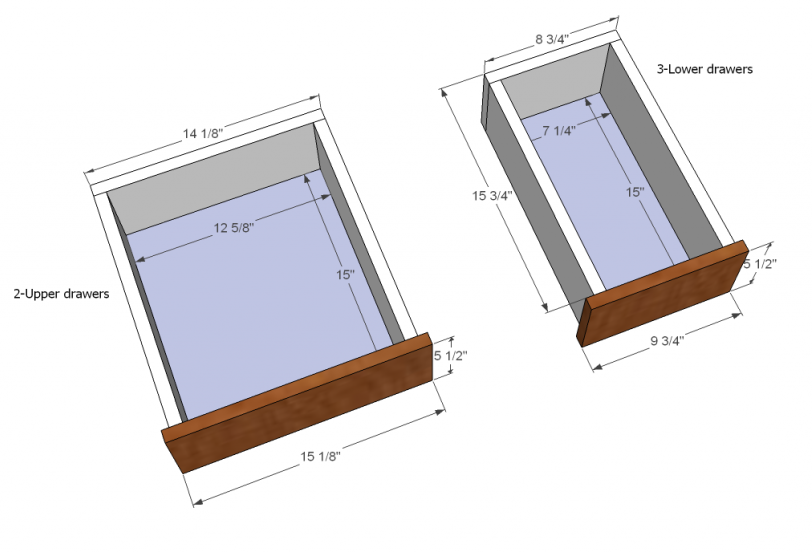
- 2 – 1×6 @ 14 1/8″ (lg drawer back)
- 2 – 1×6 @ 15 1/8″ (lg drawer front)
- 20 – 1×6 @ 15″ (lg & sm drawer sides)
- 3 – 1×6 @ 8 3/4″ (sm drawer back)
- 3 – 1×6 @ 9 3/4″ (sm drawer front) for the drawer bottoms use the left over plywood or mdf
- 6 – 3/4″ plywood @ 7 1/4″ x 15″ (sm drawer bottoms)
- 4 – 3/4″ plywood @ 12 5/8″ x 15″ (sm drawer bottoms)
Tools
- measuring tape
- square
- pencil
- safety glasses
- hearing protection
- kreg-jig
- drill
- circular saw
- nailer
- sander
- level
- countersink drill bit
Step-by-step Instructions
Step 1
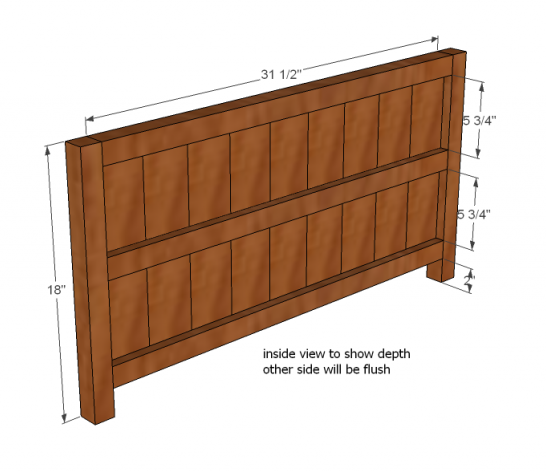
Build 2 of these side pieces. I would use the Kreg Jig™ and pocket hole screws for this project but maybe nails and wood glue would also work. A flat work surface is a must.
Step 2
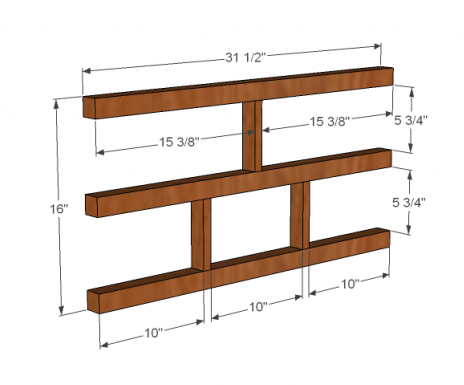
Build 2 of these pieces. One for the front and back. Make sure your measurements are right on and square for a proper drawer fit.
Step 3
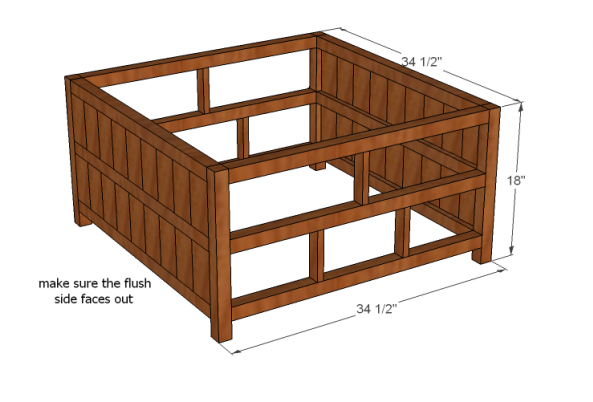
Attach the front, back, and sides together. Make sure your box is square.
Step 4
Attach the boards for the drawer slides. There are 4 in this step 2 on each side.
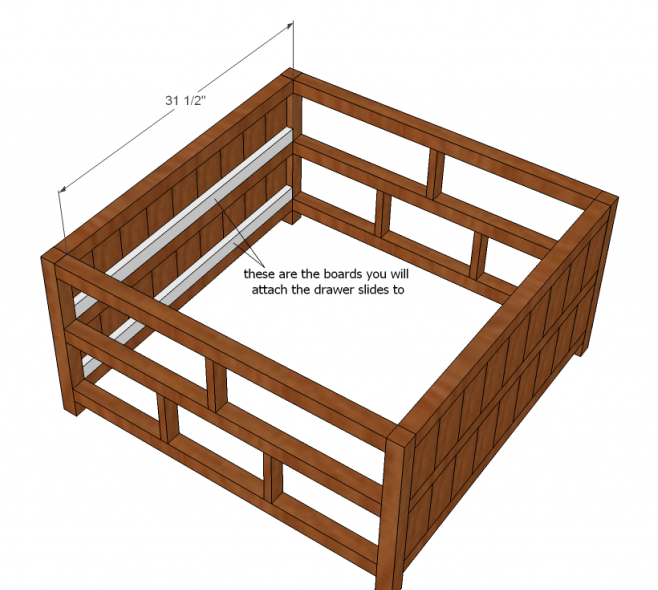
Step 5
Step 6
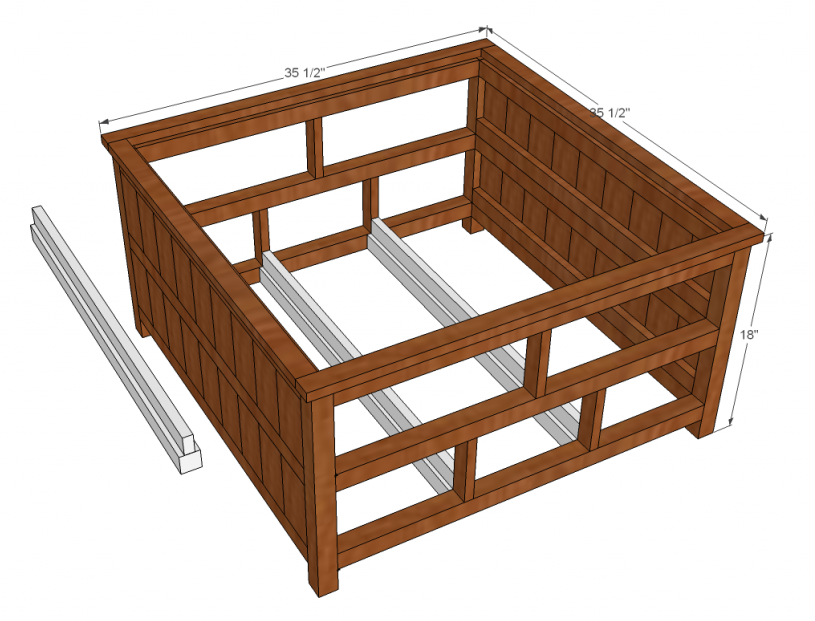
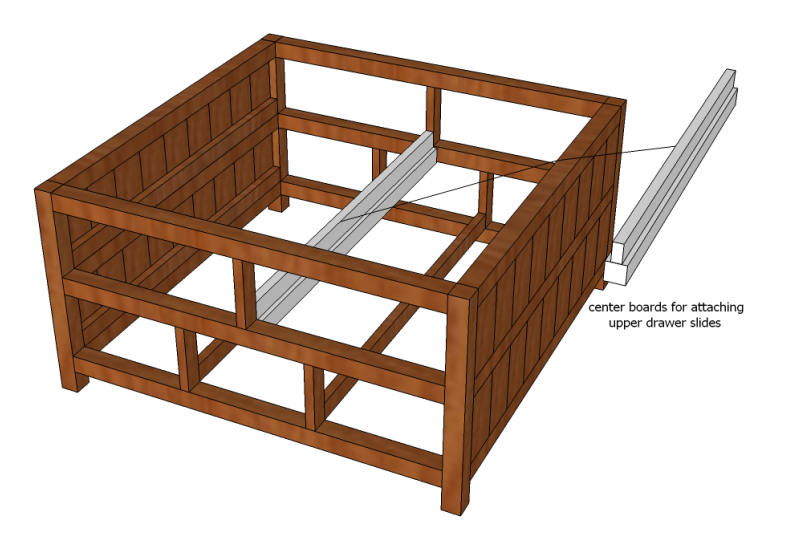
Attach the support for the top drawer slides. Same as step 5.
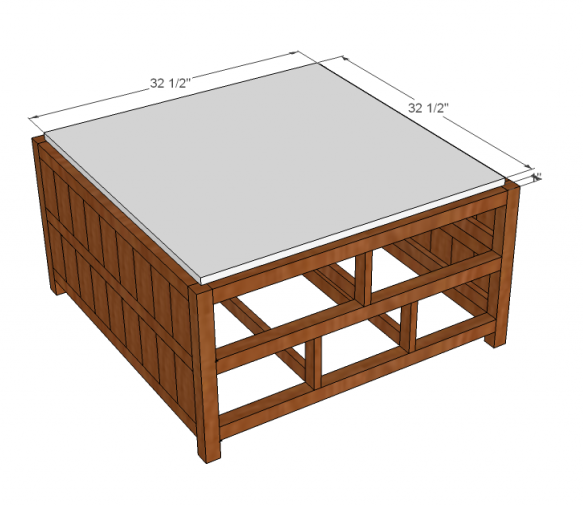
Center the top piece on the frame and attach with 2″ nails and glue.
IF YOU ARE PAINTING and went with a solid piece of MDF for the top piece, center it on the top of the box with a 1/2″ overhang and attach with 2″ nails and glue.
Attach the trim with 2″ nails and glue. There should be a 1/2″ overhang on each side.
If you used MDF for the full top skip this step.
Build your drawers around the drawer bottom. Be precise with your measurements and keep them square.
Install drawer slides and drawer pulls.
This is an idea if you don’t need as many drawers.
I have a bin that I throw scraps of wood in and this plan will definitely use a lot of those scraps. I estimated the cost of wood by using furring strips. I will be painting and distressing mine so I am going to use MDF for the top piece. In between each layer of paint I rub the surface down with steel wool and wipe off the dust with a damp cloth. Thinner coats are better.
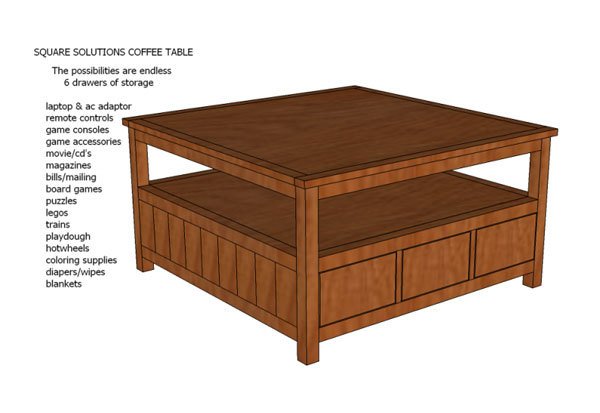
Finishing
Sand all surfaces, starting with a medium grit and finishing with fine. Wipe off the dust, fill any holes or gaps with wood filler, and sand smooth once dry. Apply primer if you're painting, then finish with your choice of paint or stain and seal with a durable clear topcoat. For outdoor projects, use exterior-rated primer, paint or stain, and sealer so the piece stands up to the weather.
Source (temporary): https://www.ana-white.com/woodworking-projects/square-coffee-table-drawers