Square Farmhouse Pedestal Table
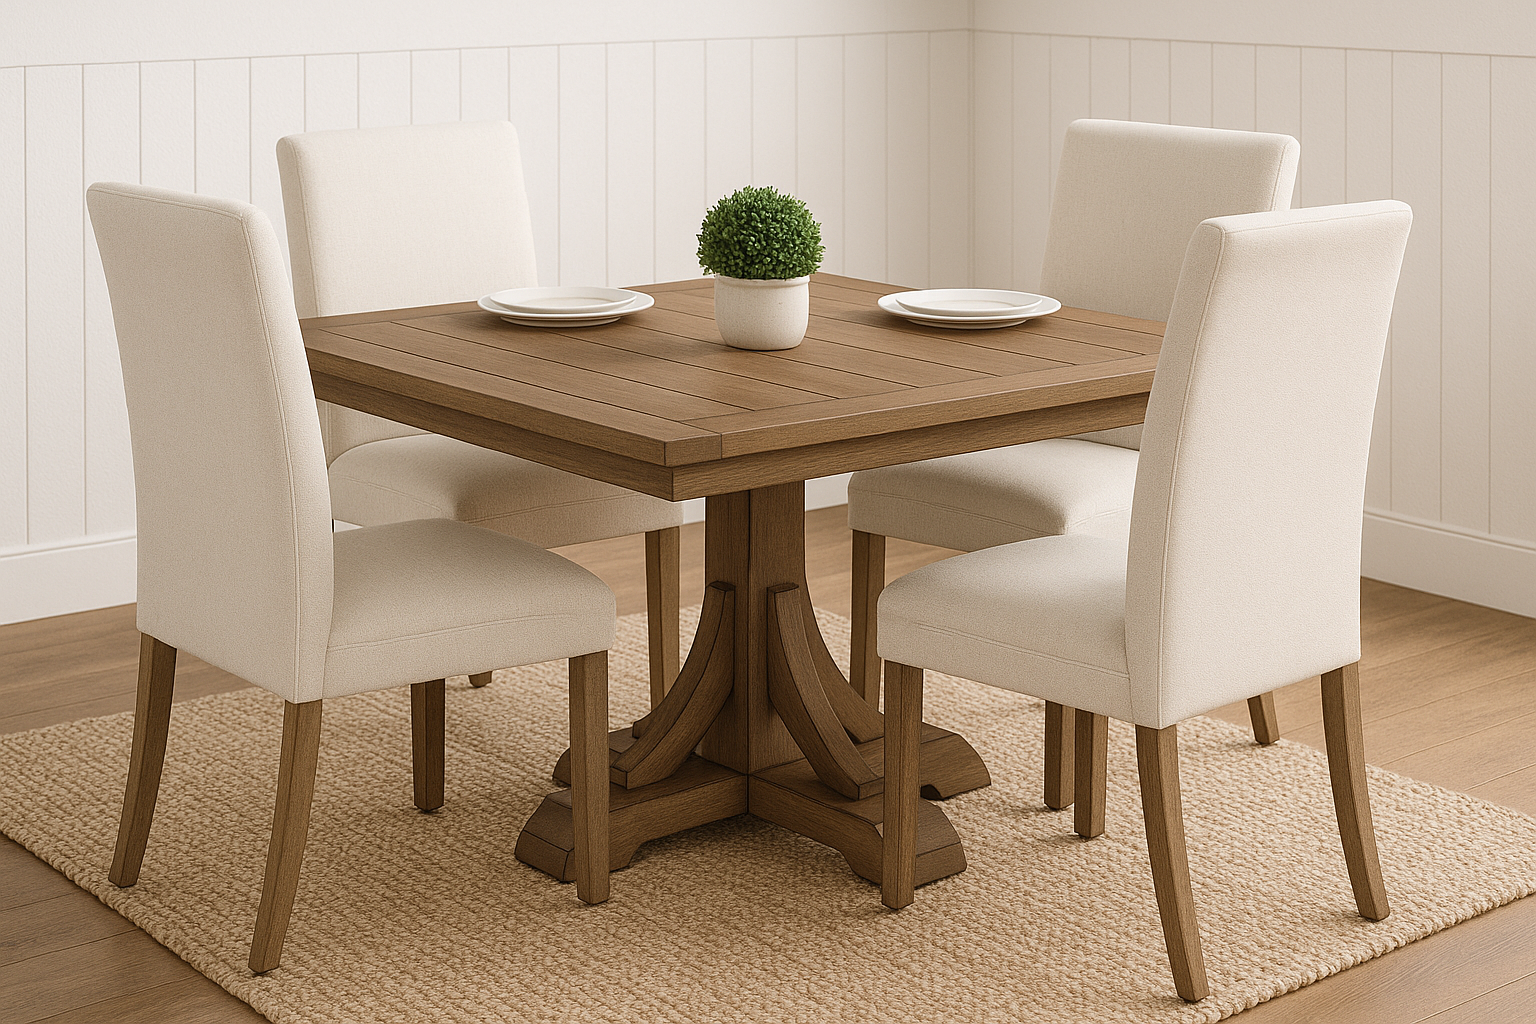
How to build a square farmhouse pedestal table. This pretty base pairs with a simple top to make a beautiful table. All 2x lumber base, this is a great way to use up scrap wood for a table base. from
Specifications
| Project type | Dining Table Plans |
|---|---|
| Room | dining room |
| Style | Farmhouse Furniture |
| Difficulty | Advanced |
Dimensions
Use the size-specific shopping and cut lists below.
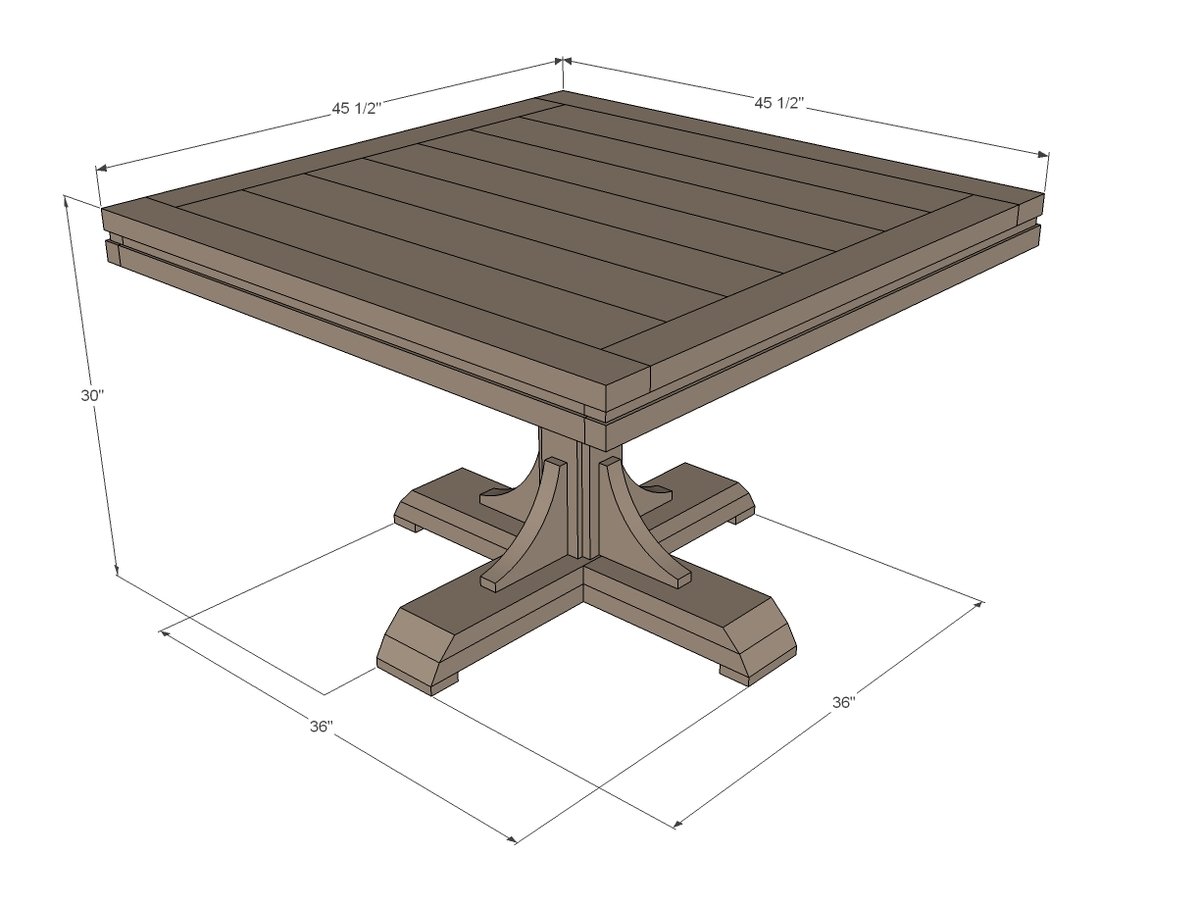
Shopping List
- 3 - 2x4 @ 8 feet long
- 1 - 1x4 @ 6 feet long
- 1 - 2x8 @ 6 feet long
- 7 - 2x6 @ 8 feet long
- 2 - 1x2 @ 8 feet long
- 2 - 2x2 @ 8 feet long
- 2 1/2" or longer screws, use self tapping star bit
- 2 1/2" pocket hole screws (recommended for top)
- 1 1/4" and 2" brad nails
- wood glue
Cut List
PEDESTAL CENTER
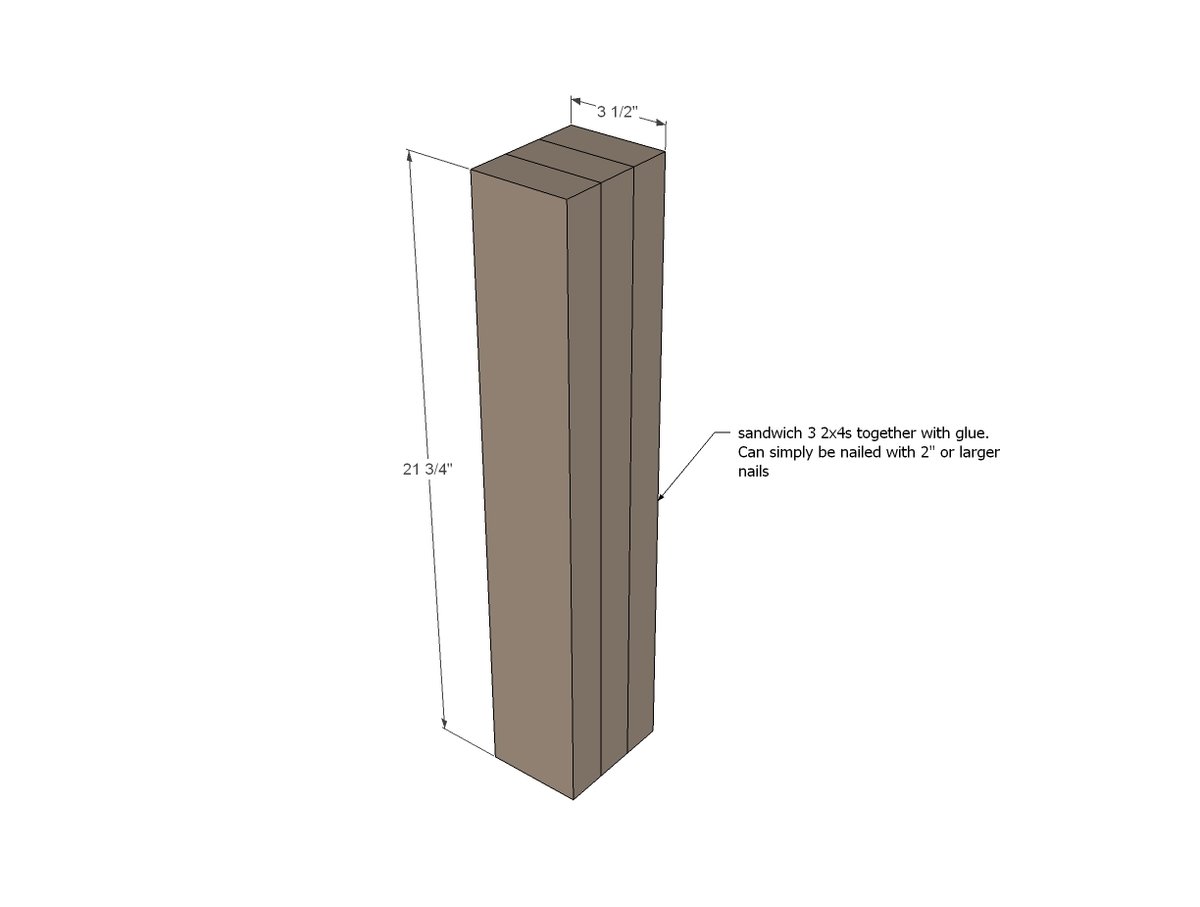
- 3 - 2x4 @ 21 3/4" (base center)
- 2 - 1x4 @ 21 3/4" (side trim)
- 8 - 2x8 @ 7 1/4" (decorative supports, cut into arch shape)
BOTTOM BASE PIECES
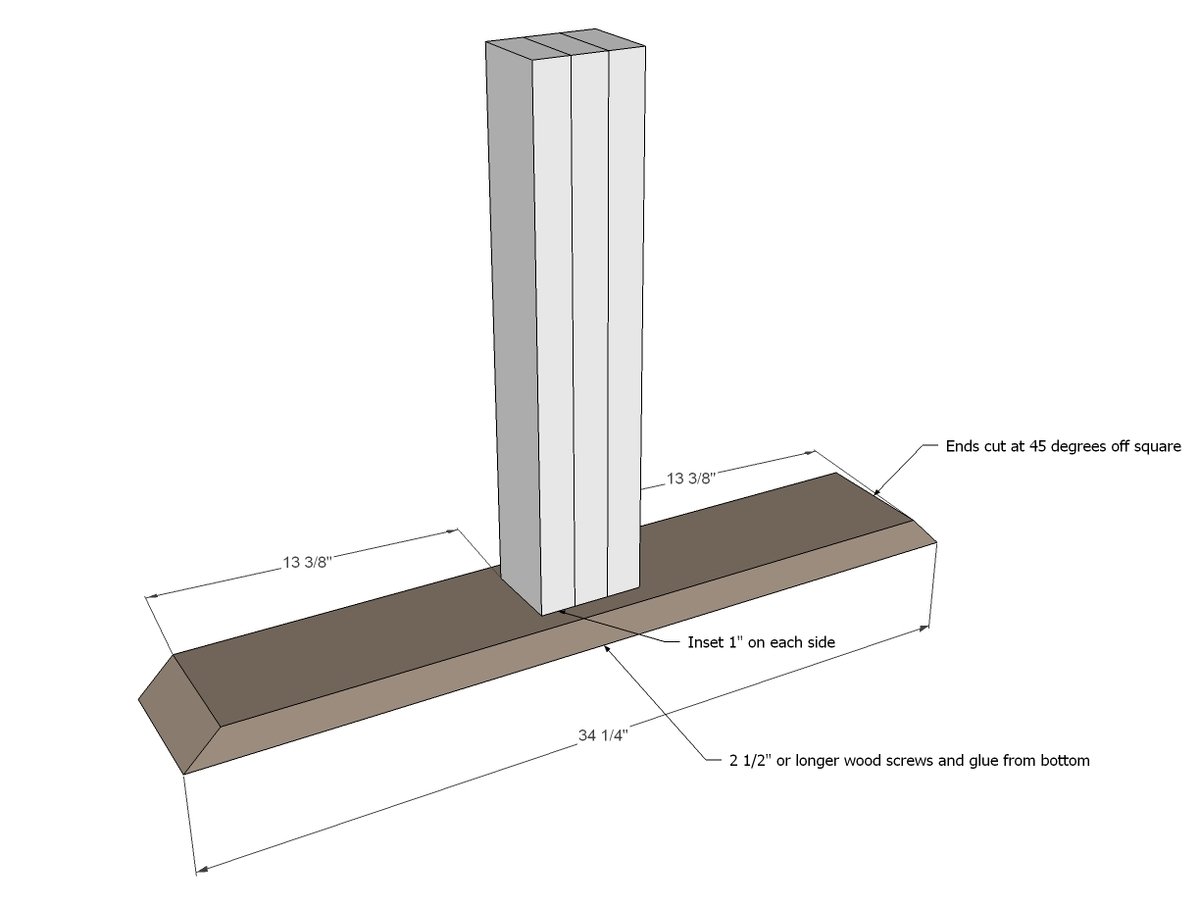
- 1 - 2x6 @ 34 1/4" (longest point measurement - both ends cut NOT parallel at 45 degrees BEVEL)
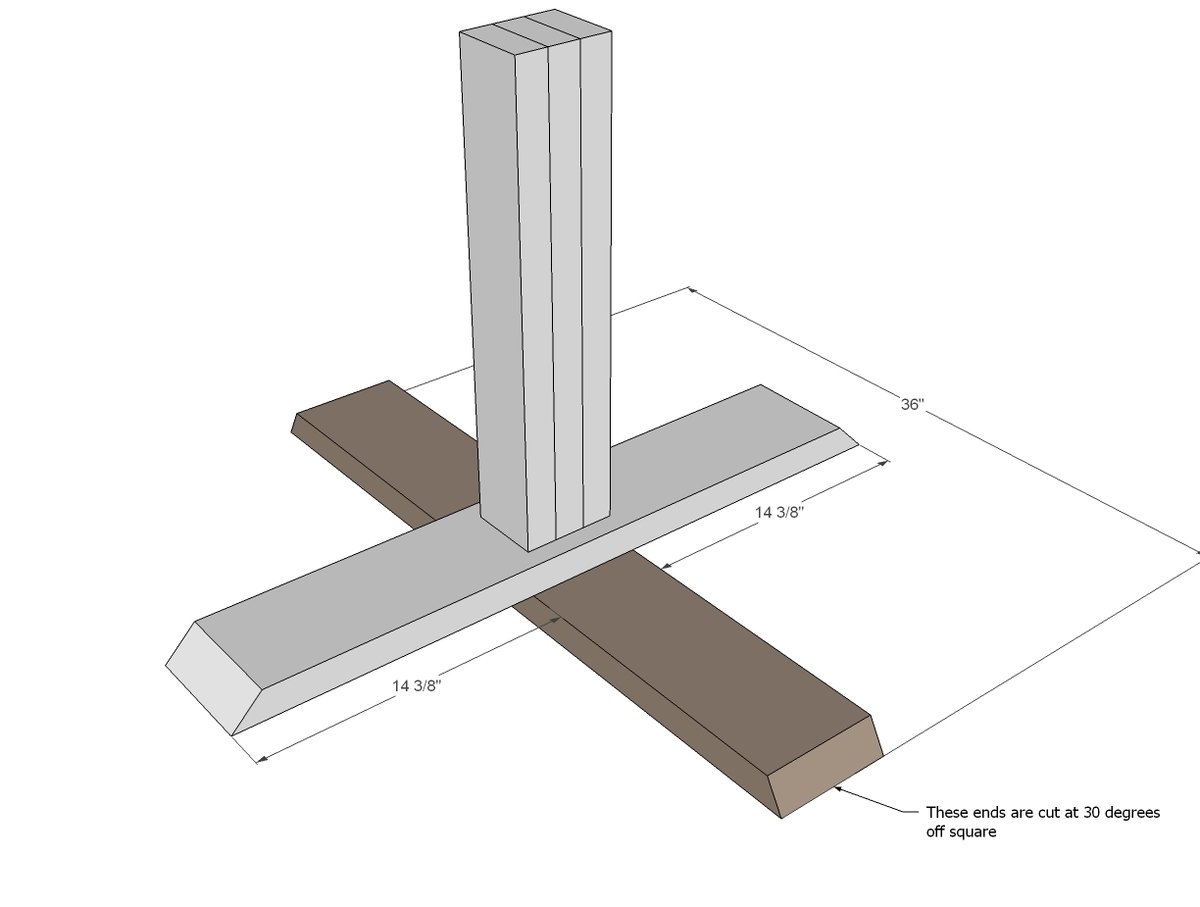
- 1 - 2x6 @ 36" (longest point measurement - both ends cut NOT parallel at 30 degrees off square BEVEL)
- 2 - 2x6 @ 14 3/8" (longest point measurement - ONE ends cut at 45 degrees off square BEVEL)
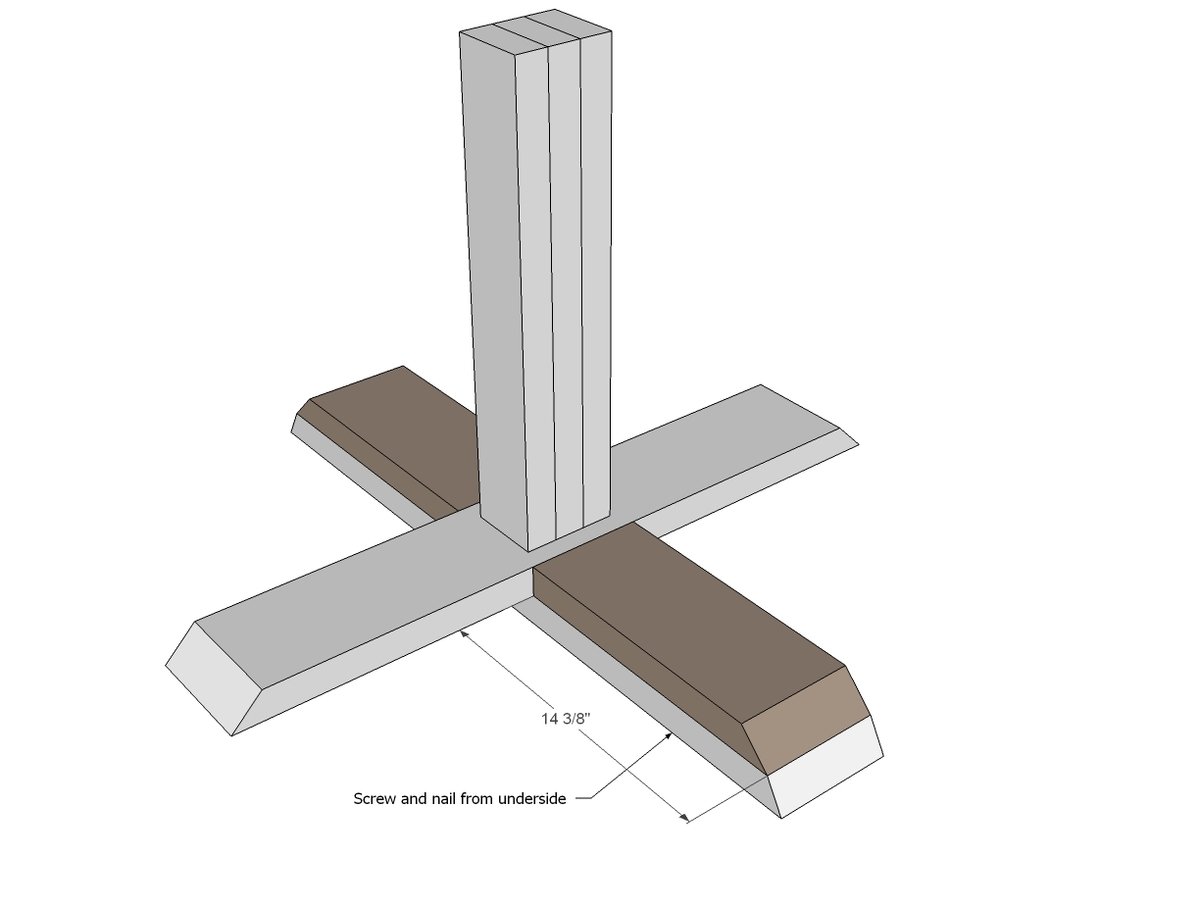
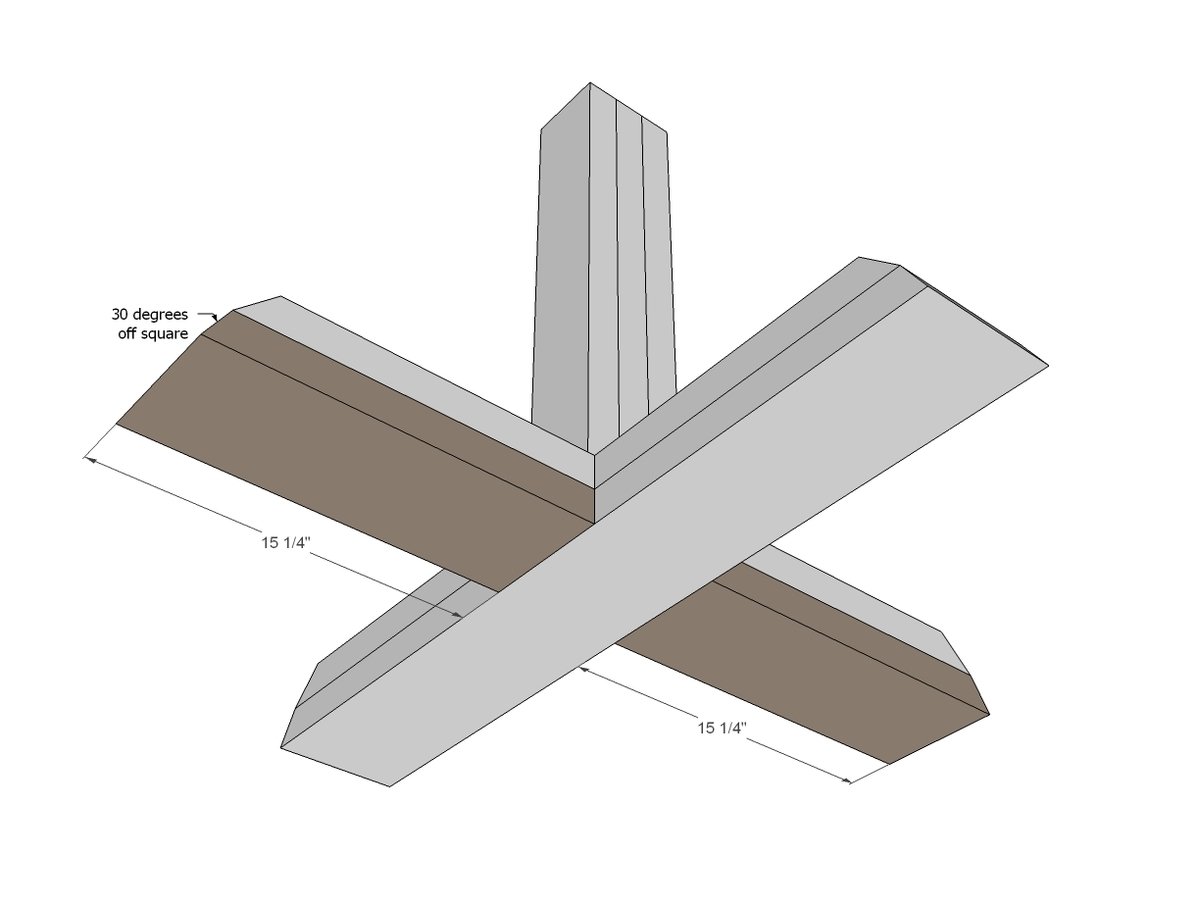
- 2 - 2x6 @ 15 1/4" (longest point measurement - ONE ends cut at 30 degrees off square BEVEL)
- 4 - 1x4 @ 5 1/2"
TOP BASE PIECES
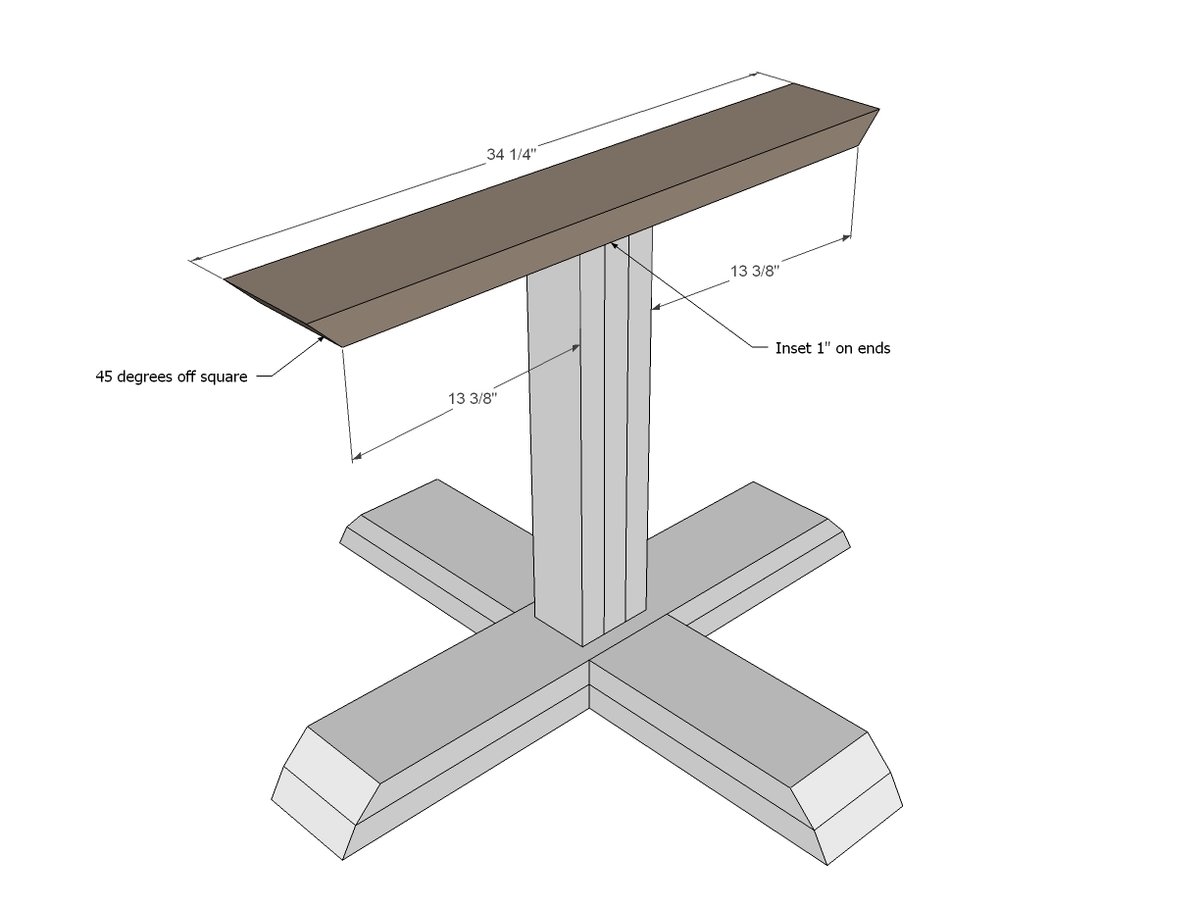
- 1 - 2x6 @ 34 1/4" (longest point measurement - both ends cut NOT parallel at 45 degrees BEVEL)
- 1 - 2x6 @ 42" 2 - 2x6 @ 15 1/2" (longest point measurement - ONE ends cut at 45 degrees off square BEVEL)
- 2 - 2x6 @ 18 1/4"
TABLETOP
- 2 - 2x4 @ 38 1/2" (CUT TO FIT!!!)
- 2 - 2x4 @ 45 1/2"
- 7 - 2x6 @ 45 1/2"
- 2 - 1x2 @ 42"
- 2 - 1x2 @ 45" (CUT TO FIT!!!!)
- 2 - 2x2 @ 42 1/2"
- 2 - 2x2 @ 45 1/2" (CUT TO FIT!!!!)
Tools
- measuring tape
- square
- pencil
- safety glasses
- hearing protection
- kreg-jig
- drill
- jigsaw
- compound miter saw
- nailer
- sander
- countersink drill bit
Step-by-step Instructions
Step 1
Start by sandwiching the center 2x4s together with glue and nails. Use glue and the longer screws for the first two. Then for the third 2x4, use the 2" brad nails and wood glue.
Step 2
Now mark and measure the placement of the bottom board and attach from underside. Glue and the star bit screws and make sure you are square to the center pedestal.
Step 3
Then add the next board. Remember this one is the 30 degrees off square bevel. TIP: Use the boards from step 4 as a guide in placing. Attach with the star bit screws.
Step 4
Now fill in with the spare boards. When you go to finish the base, sand joint to create a nice pretty curve on the ends.
Step 5
Fill in the bottom of the pedestal with the remaining 2x6 boards. Use the longer screws and glue.
Step 6
Now we'll start working on the top. Mark placement of top board and attach to center pedestal.
Step 7
Mark placement of next board and attach with screws and glue.
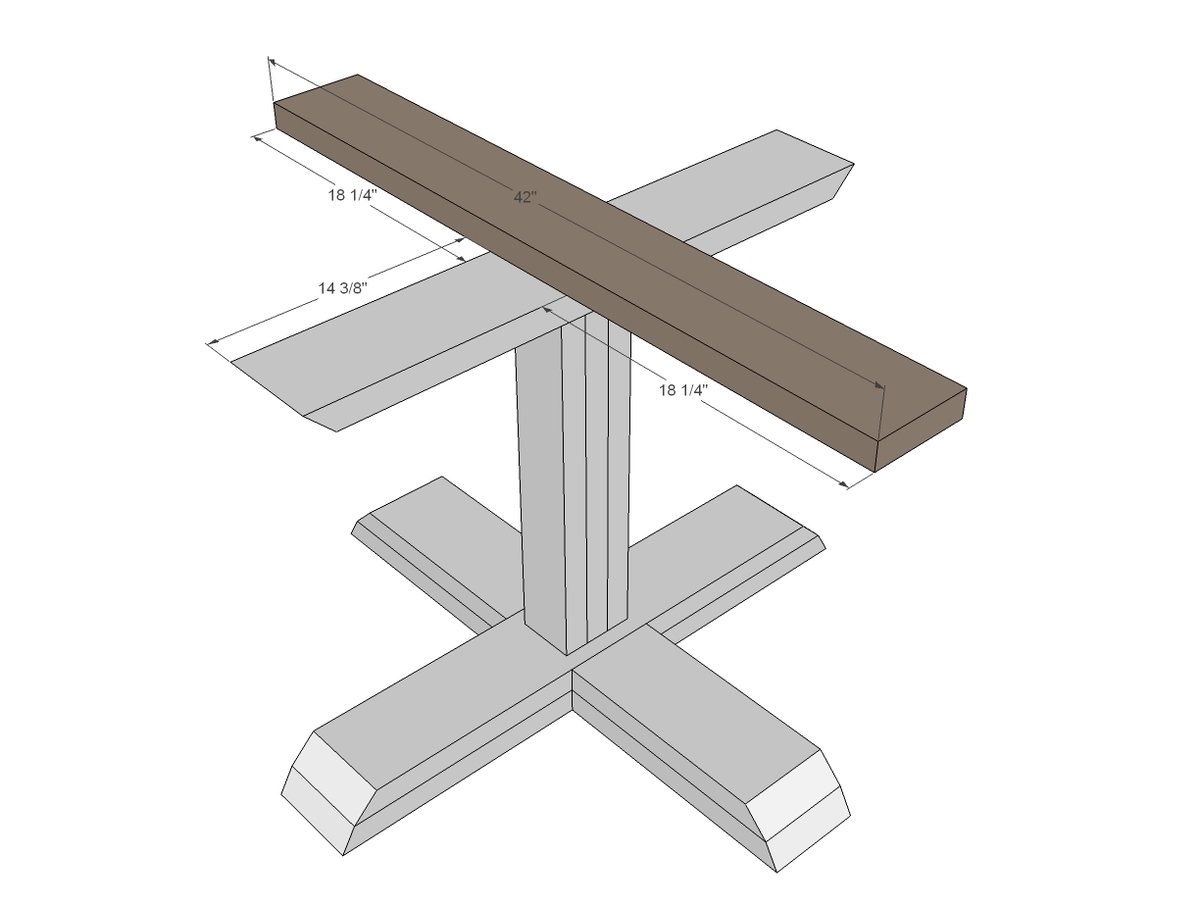
Step 8
Fill in as shown here. Use 2 1/2" screws and wood glue, keeping outside edges flush.
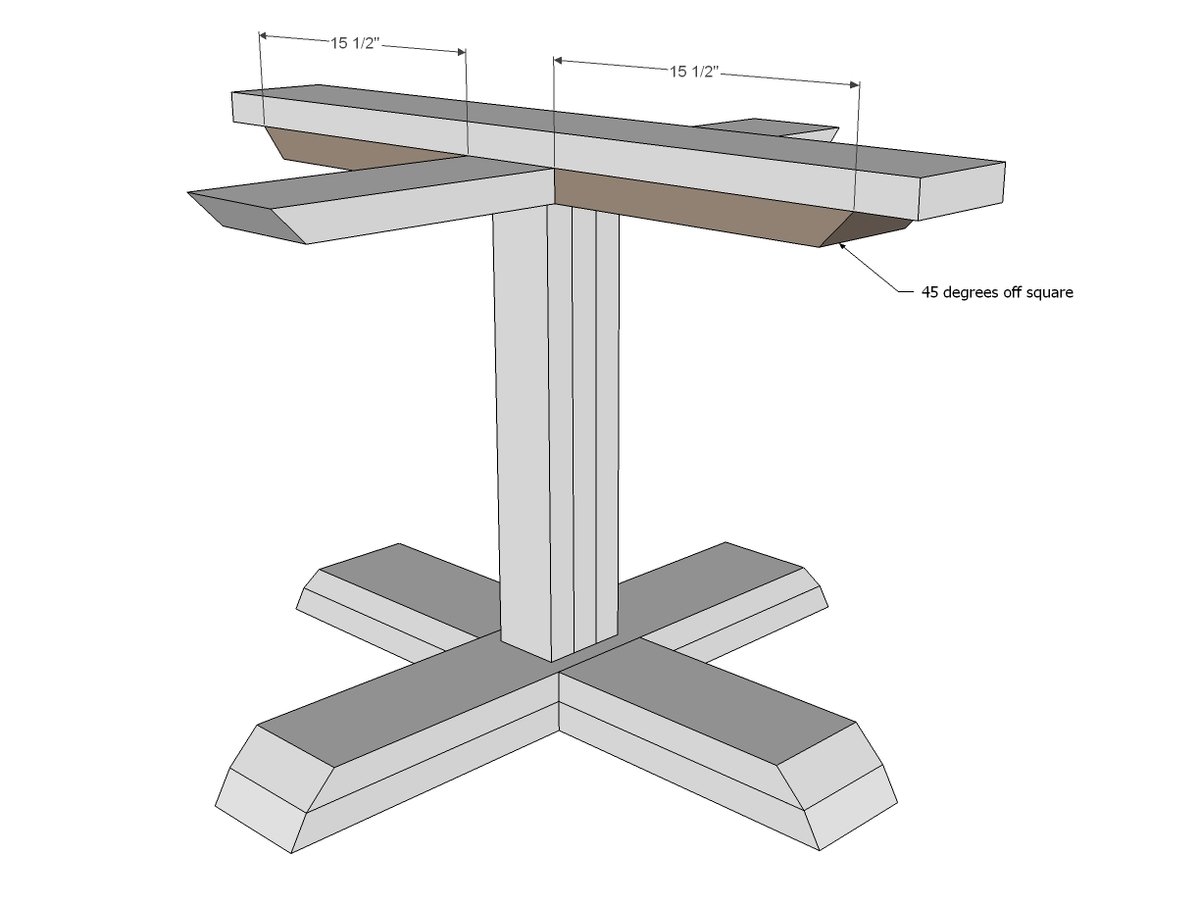
Step 9
And then fill in your last boards, again 2 1/2" screws and glue.
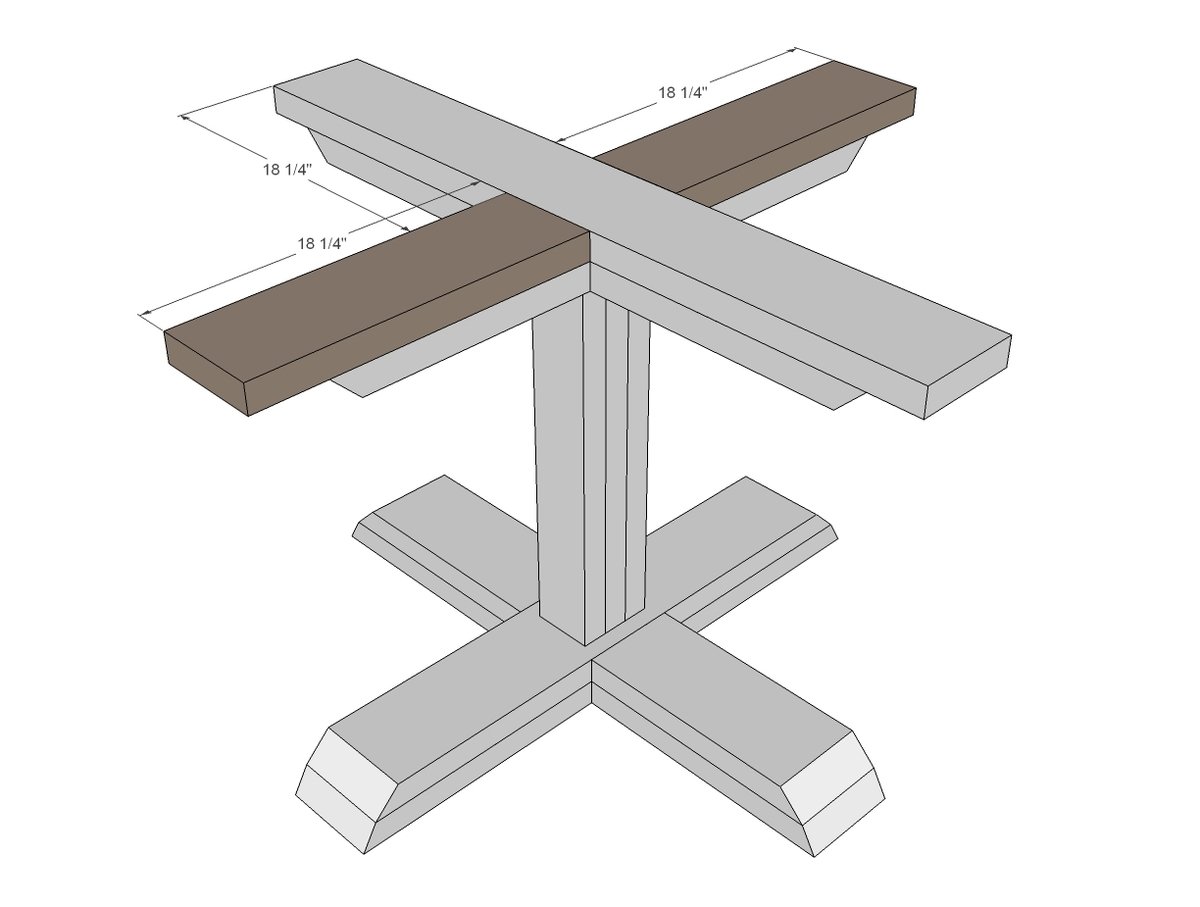
Step 10
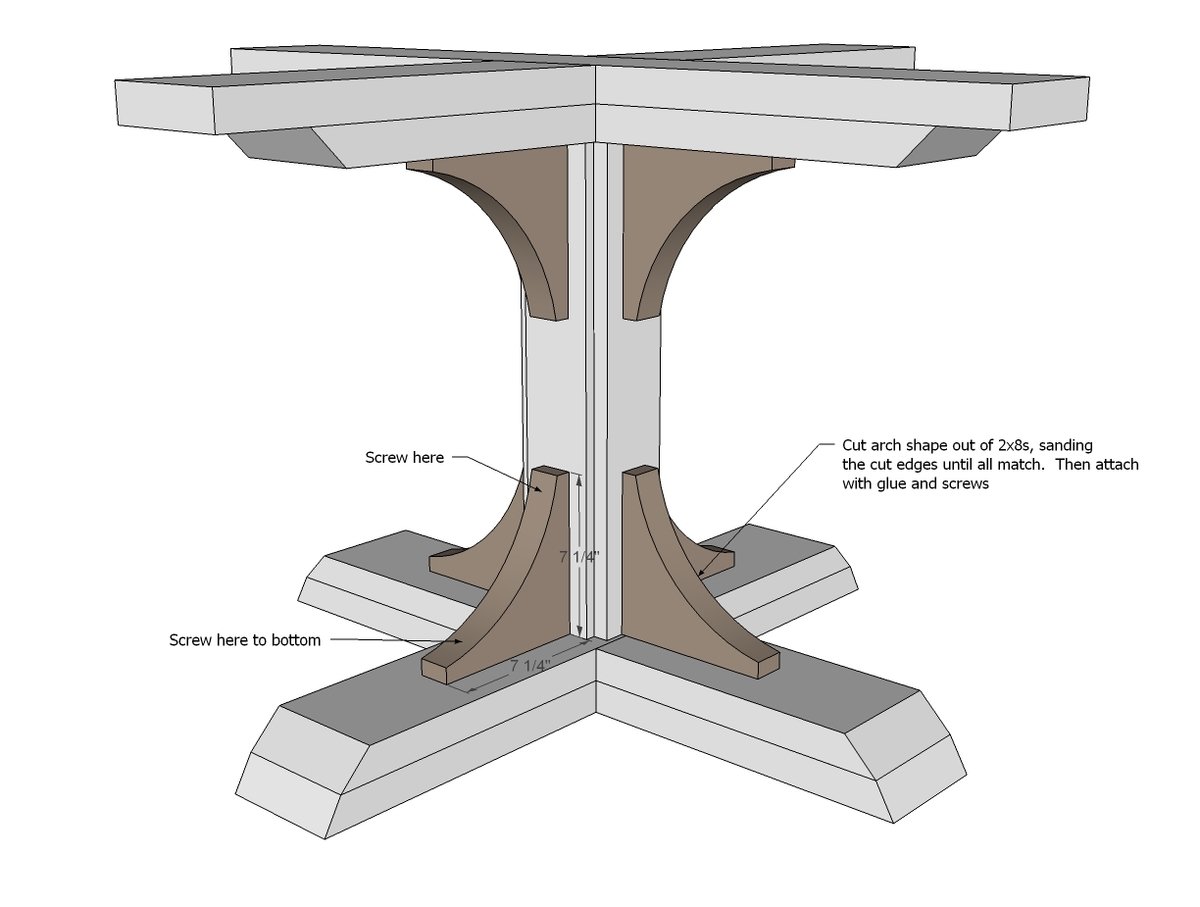
Now let's trim out that pedestal with 1x4s to make a little prettier.
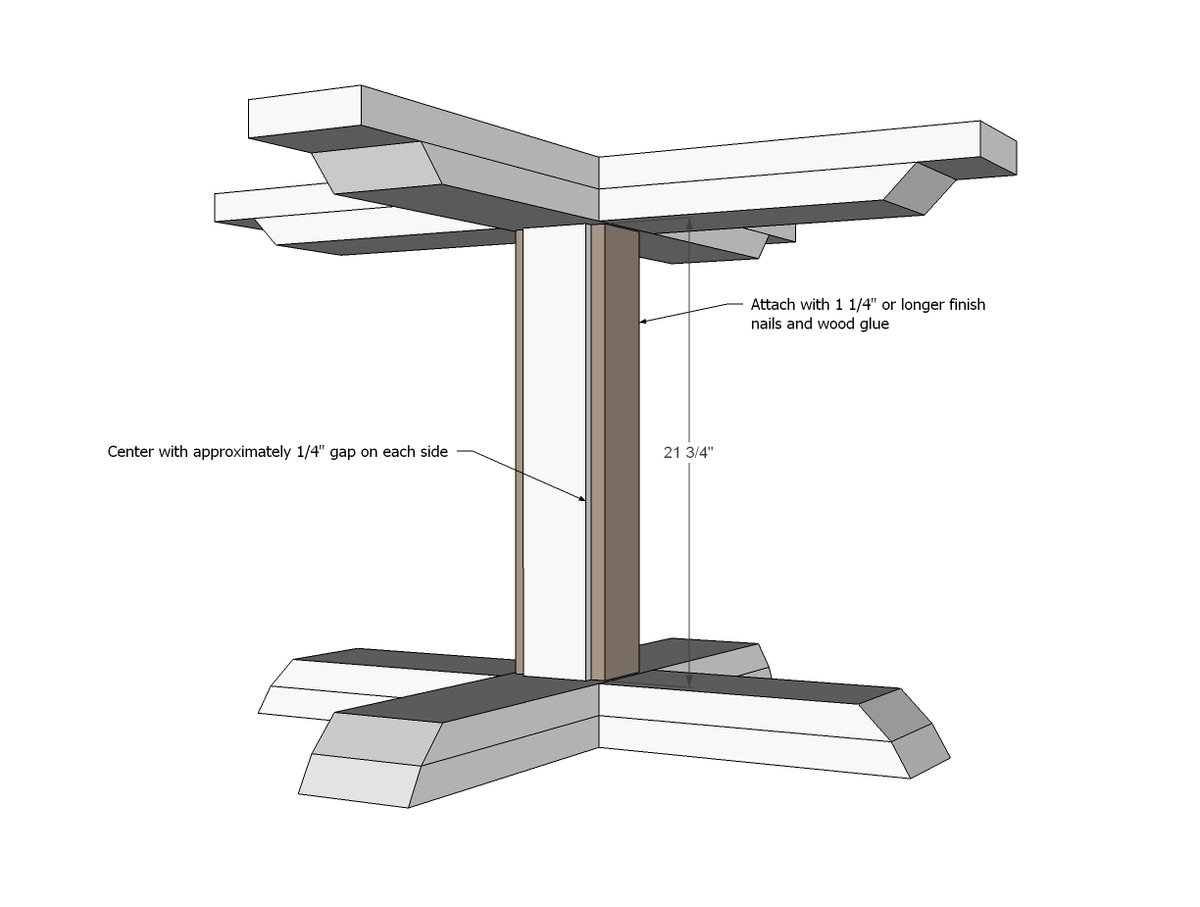
Step 11
Cut with a jigsaw the curved pieces if using, and attach with screws and glue.
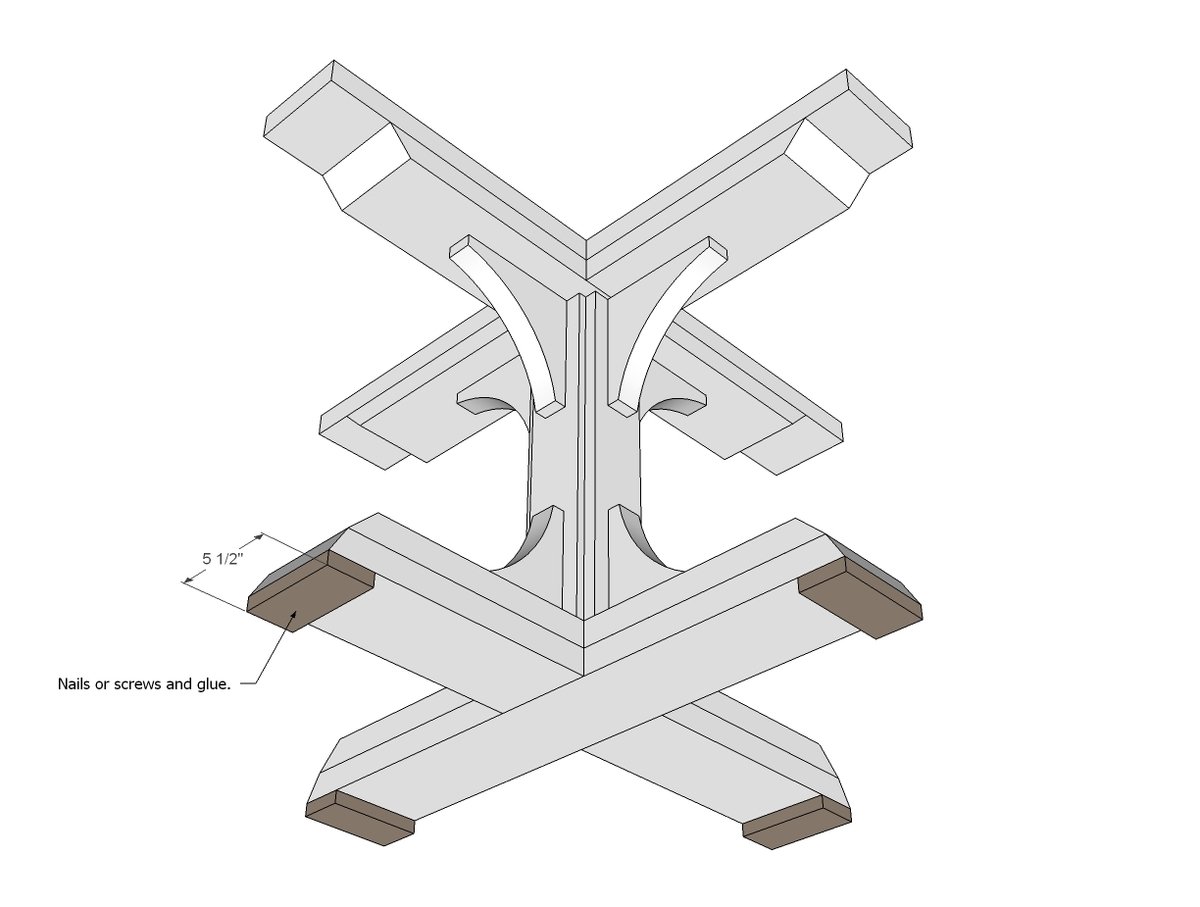
Step 12
You'll want to add these so your table doesn't rock on uneven floors. You can additionally add cork pads to protect your floors underneath.
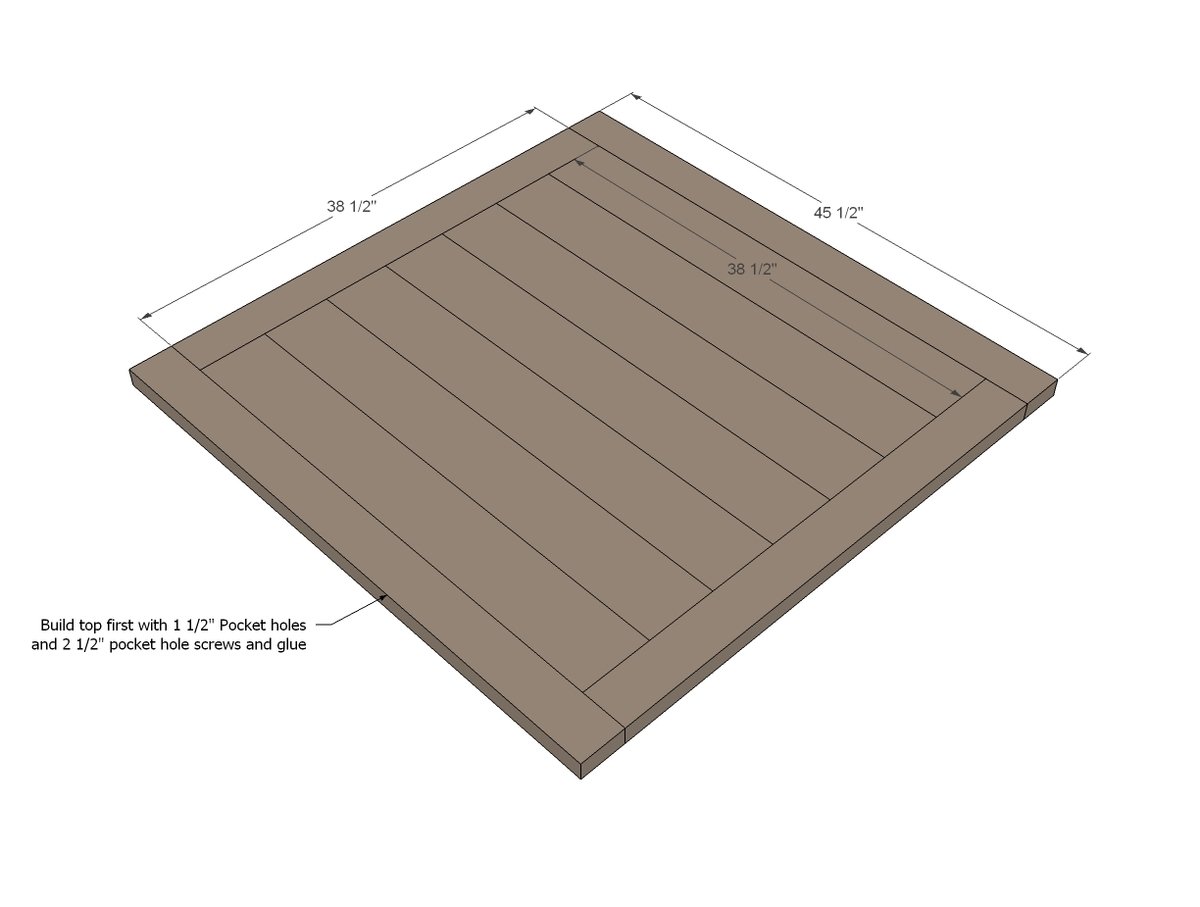
Step 13
Let's move on to the top. I highly recommend building to first with a pocket hole jig on the 1 1/2" setting, using 2 1/2" pocket hole screws.
Step 14
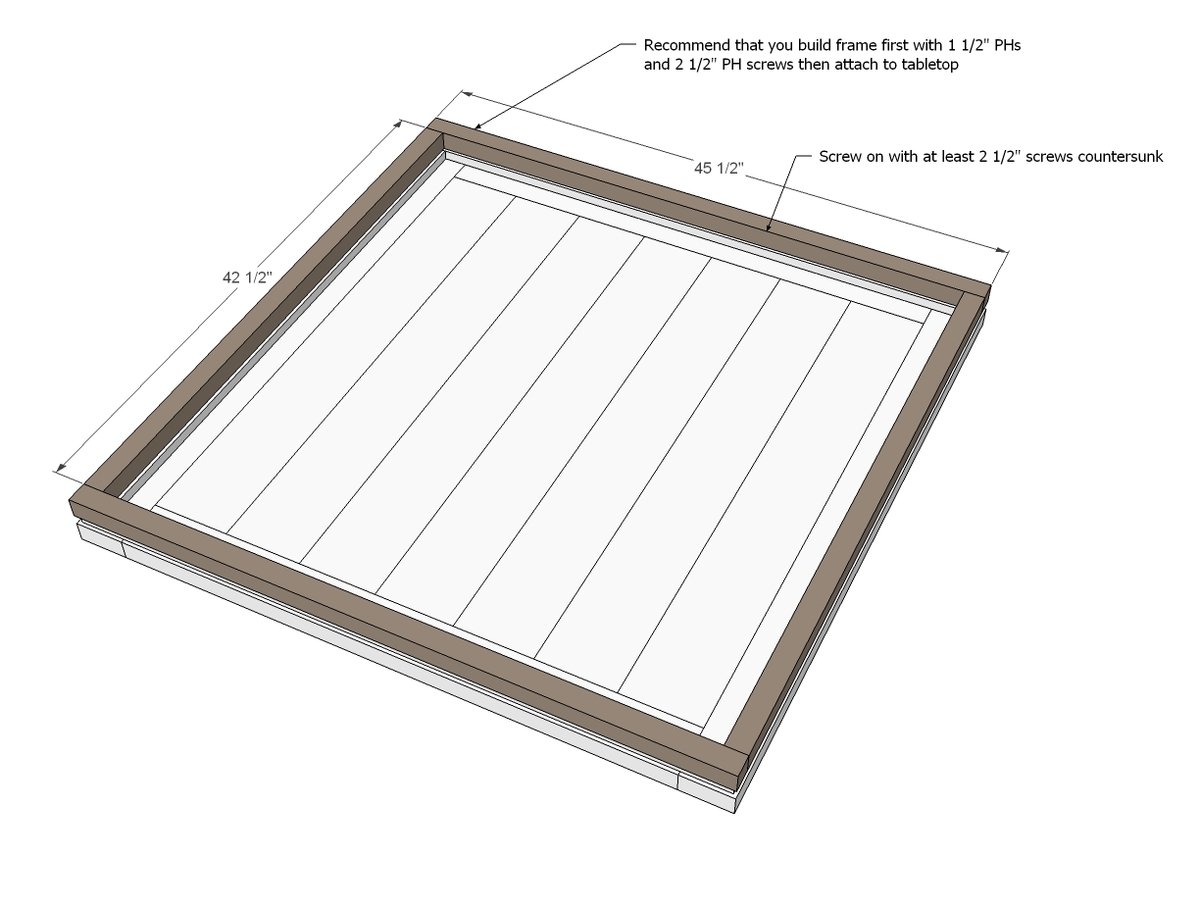
These are really decorative - you don't have to put them on, but to keep the look, nail the 1x2s to the underside.
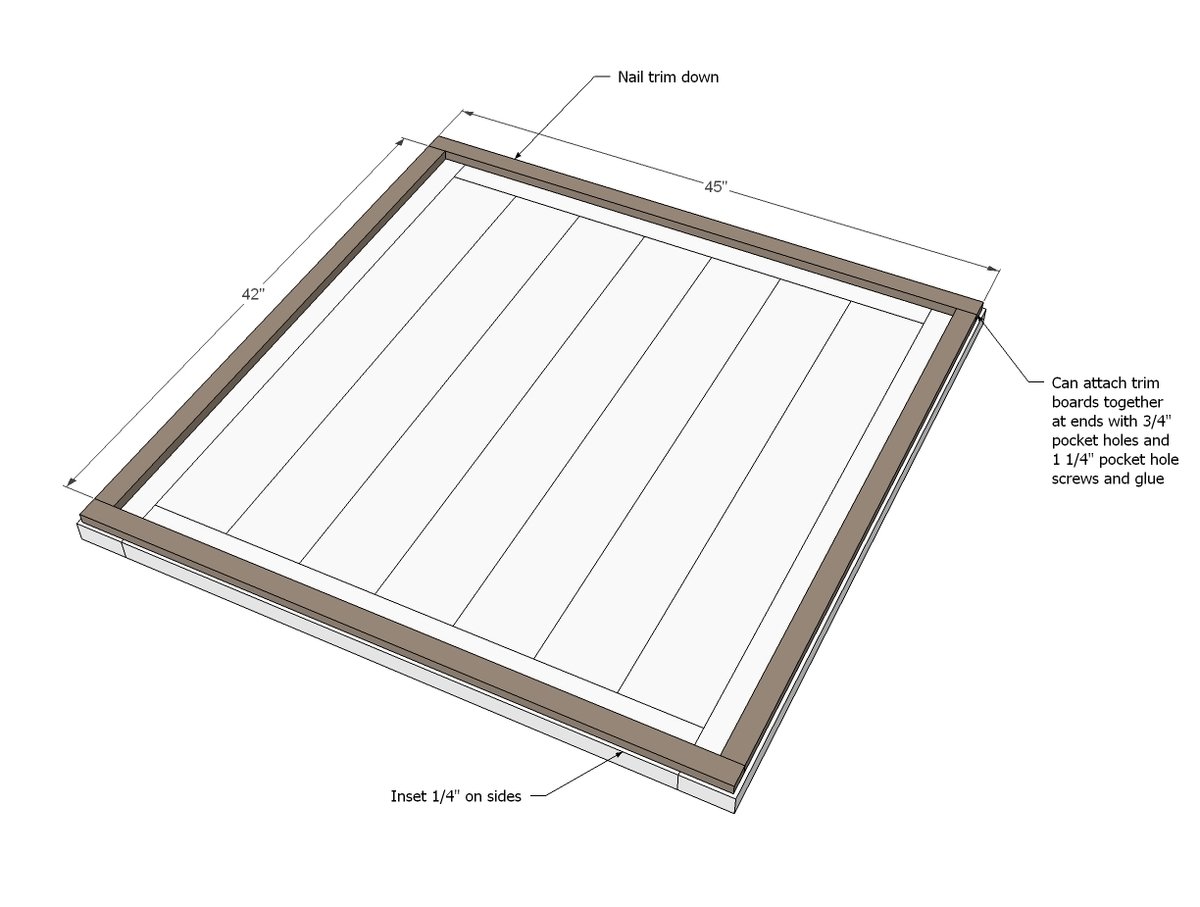
And then add the 2x2 frame.
This frame is decorative and can be omitted.
Step 16
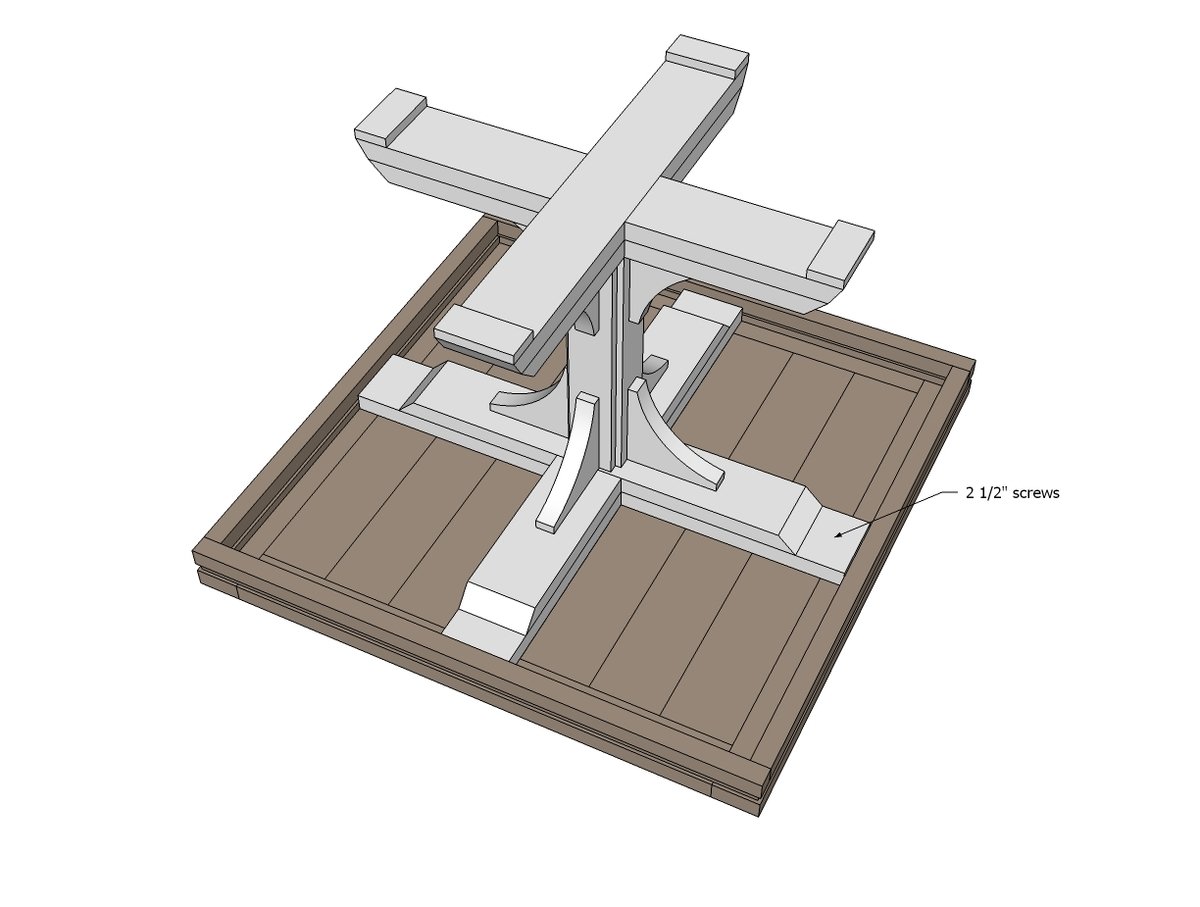
And finally, screw the top to the base! I'd leave the glue off here so you can dis-assemble/reassemble to move.
Finishing
Sand all surfaces, starting with a medium grit and finishing with fine. Wipe off the dust, fill any holes or gaps with wood filler, and sand smooth once dry. Apply primer if you're painting, then finish with your choice of paint or stain and seal with a durable clear topcoat. For outdoor projects, use exterior-rated primer, paint or stain, and sealer so the piece stands up to the weather.
Source (temporary): https://www.ana-white.com/woodworking-projects/square-farmhouse-pedestal-table