Square Parsons Coffee Table
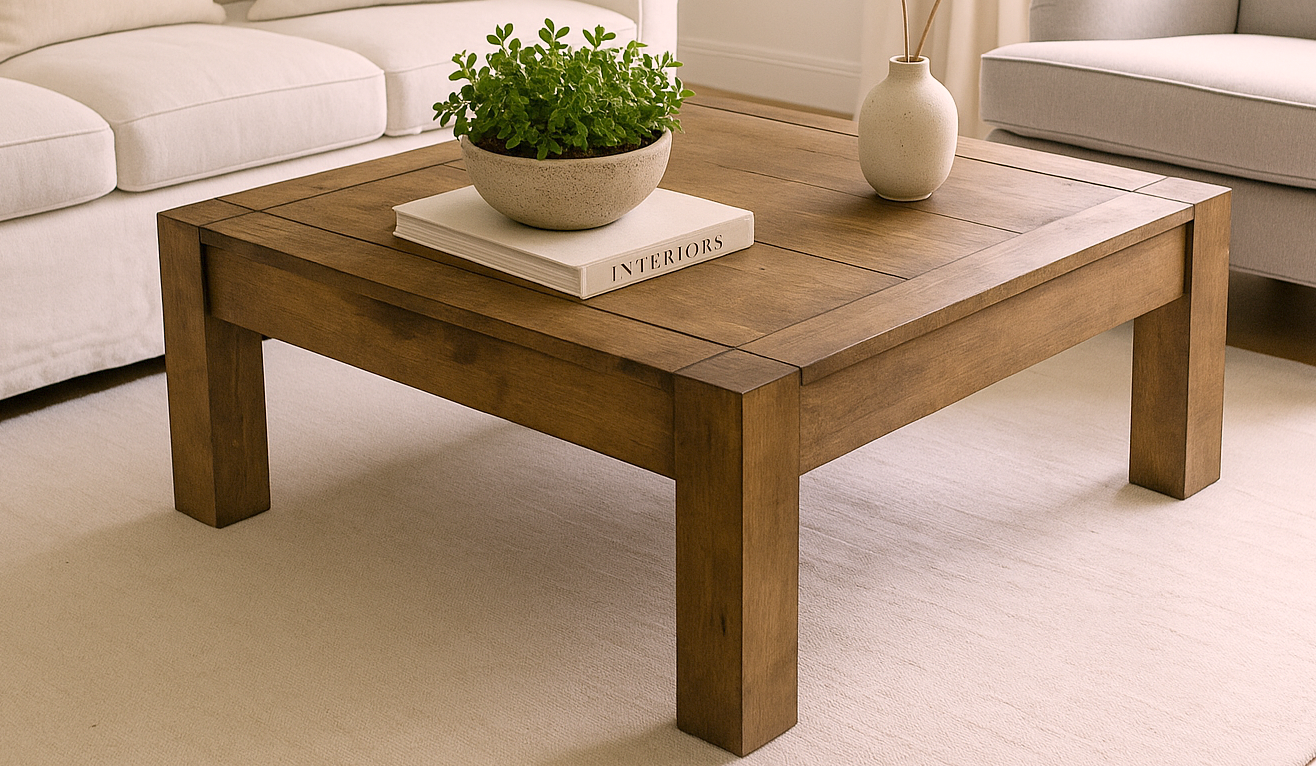
Rustic Square Coffee Table – Bring warmth and modern simplicity into your living room with this solid wood square coffee table. Designed with clean lines, chunky legs, and a rustic farmhouse-inspired top, this table combines durability with timeless style. Perfect for family spaces, it’s large enough for board games, cozy gatherings, or displaying decor, yet simple enough for beginners to build. include: • Full shopping list • Cut list • Detailed diagrams • Easy-to-follow instructions Build your own beautiful, budget-friendly furniture and enjoy a piece that will last for years—all with just basic tools and materials.
Specifications
| Project type | Coffee Tables |
|---|---|
| Room | living room |
| Style | Modern Style Furniture Plans |
| Difficulty | Intermediate |
| Estimated cost | $50 - $100 |
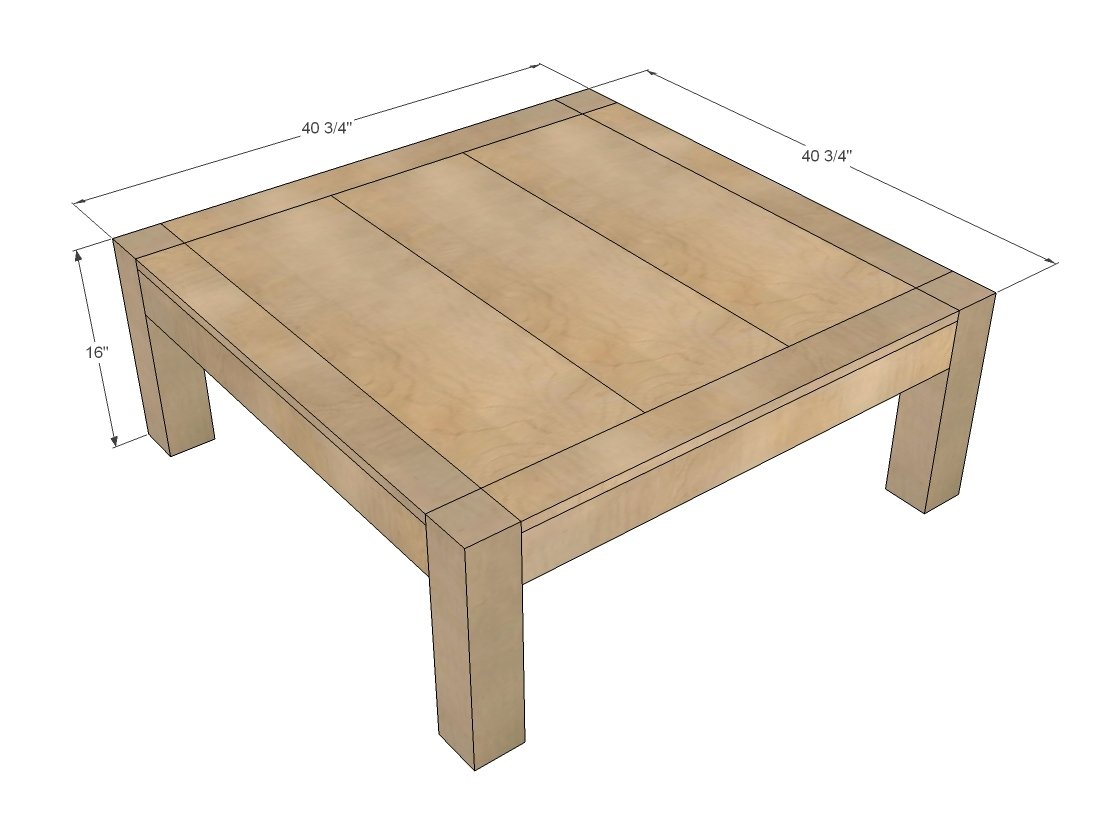
Dimensions
Use the size-specific shopping and cut lists below.
Shopping List
- 2 – 1x4 @ 12 feet long
- 1 – 1x12 @ 10 feet long OR 3/4" plywood panel (half sheet)
- 1 – 4x4 @ 6 feet long
- 1 1/4" Pocket Hole screws
- Wood glue
- 2 – 2x4 @ 8 feet or stud length (optional supports)
IMPORTANT: This coffee table in the plans uses a 1x12 inset top. If your coffee table will be in an environment that has changing humidity, the 1x12s may expand or shrink. This could cause problems with the joints. Instead, use a piece of 3/4" plywood for the inset top as it is dimensionally stable and you won't have these issues.
Cut List
- 8 – 1x4 @ 33 3/4"
- 3 – 1x12 @ 33 3/4" long
- 4 – 4x4 @ 16” long (can be longer up to 18” for coffee table height)
OPTIONAL SUPPORTS
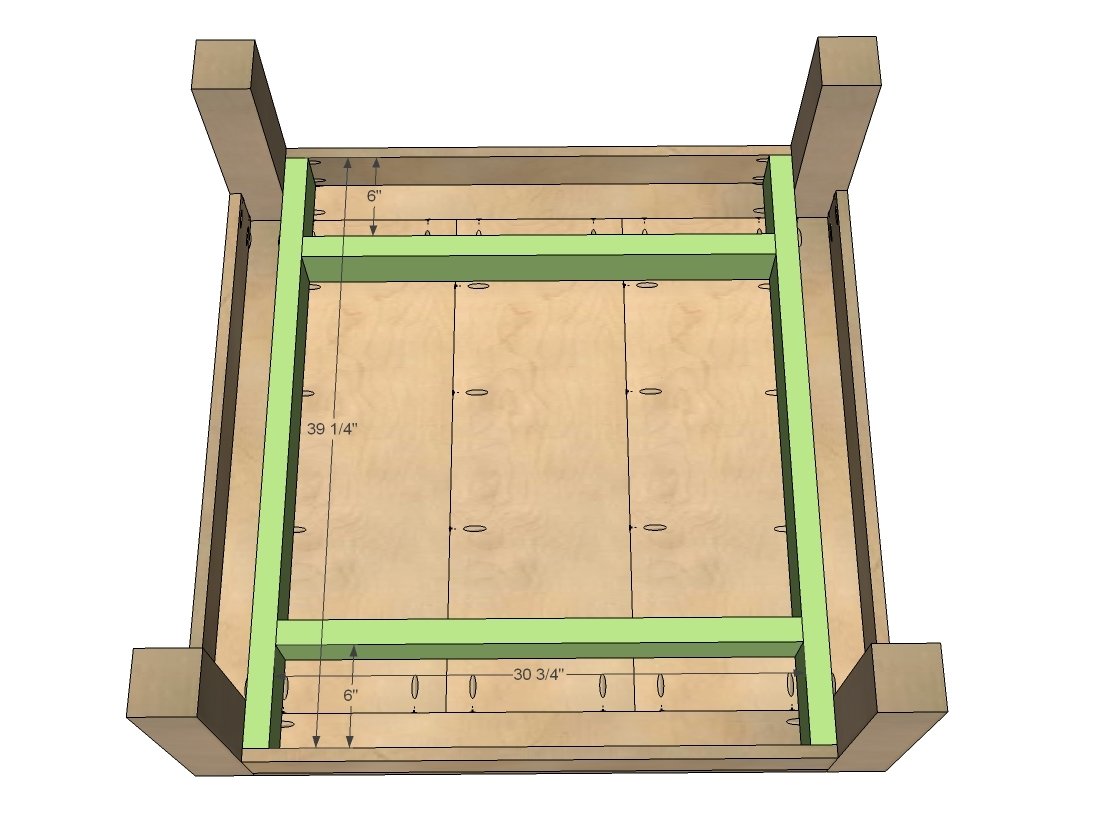
- 2 – 2x4 @ 39 ¼”
- 2 – 2x4 @ 30 ¾”
Tools
- measuring tape
- square
- pencil
- hammer
- safety glasses
- kreg-jig
- drill
- circular saw
- sander
Step-by-step Instructions
Step 1
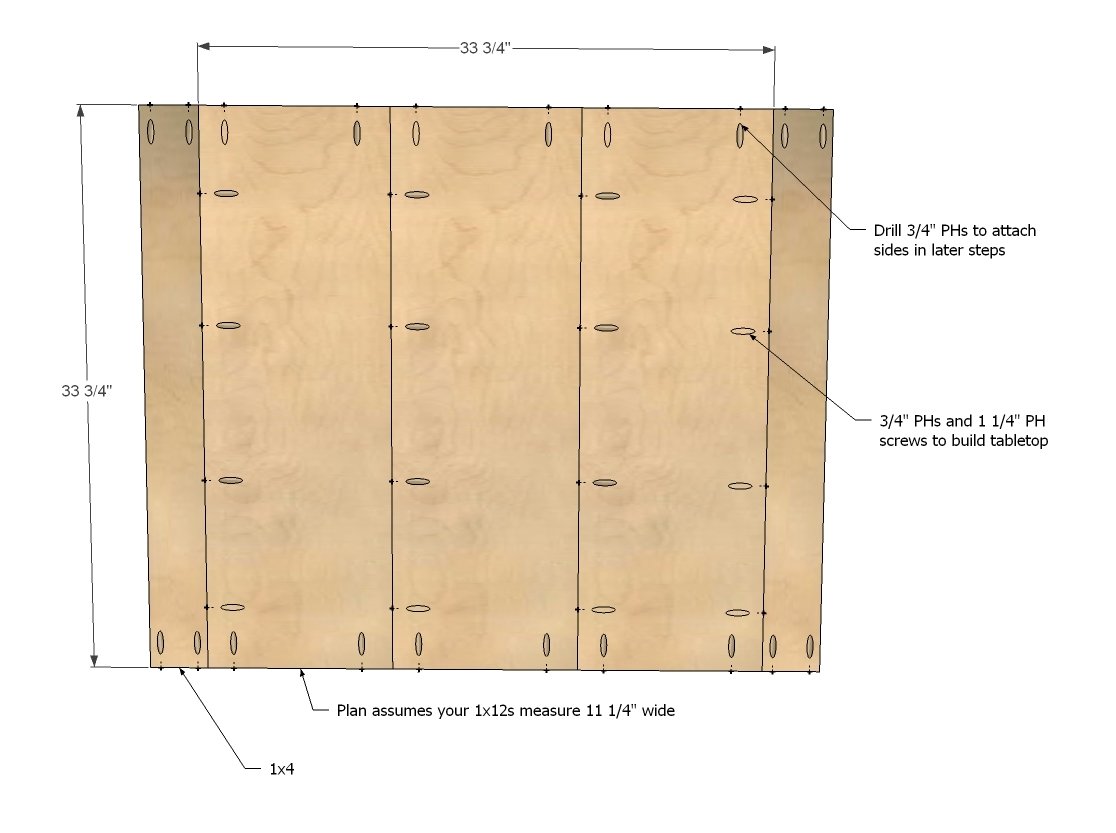
For a smooth top, I recommend using a Kreg Jig to attach the boards together. Another option would be to use hardwood plywood for the center panel. Make sure you drill all of your PHs now - much easier to do now than later!
Step 2
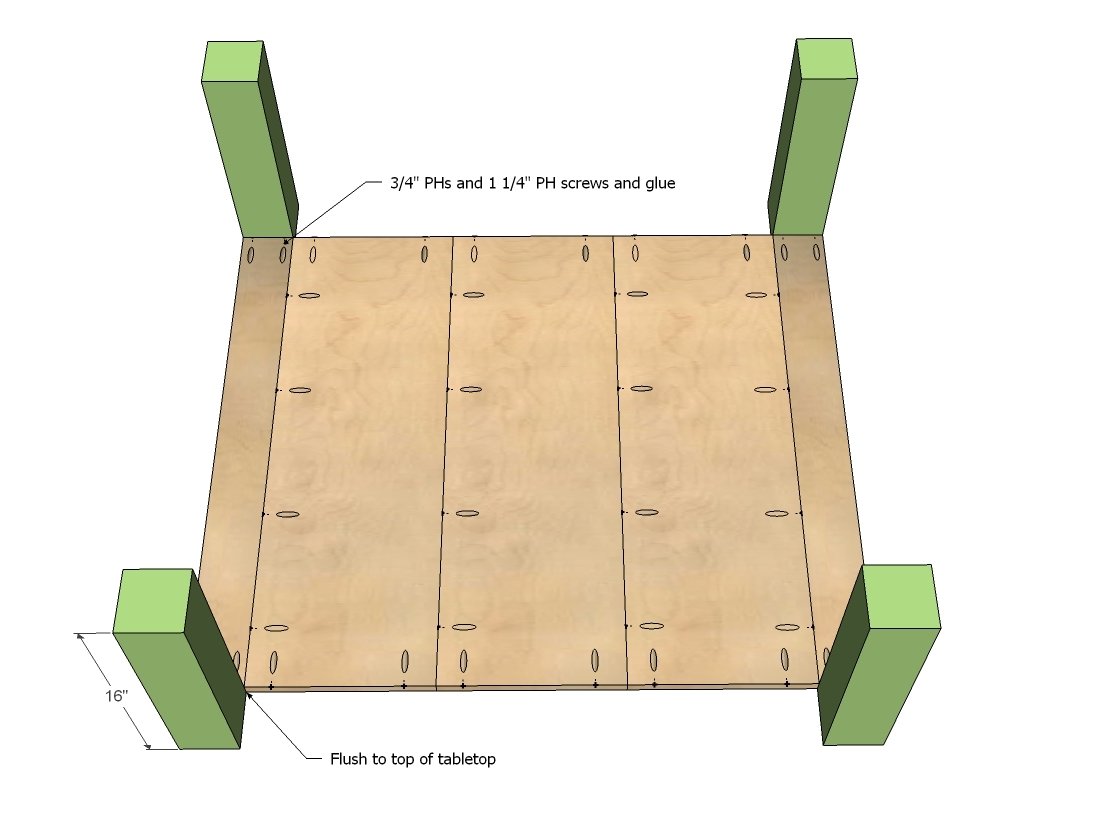
Then attach legs to table top.
Step 3
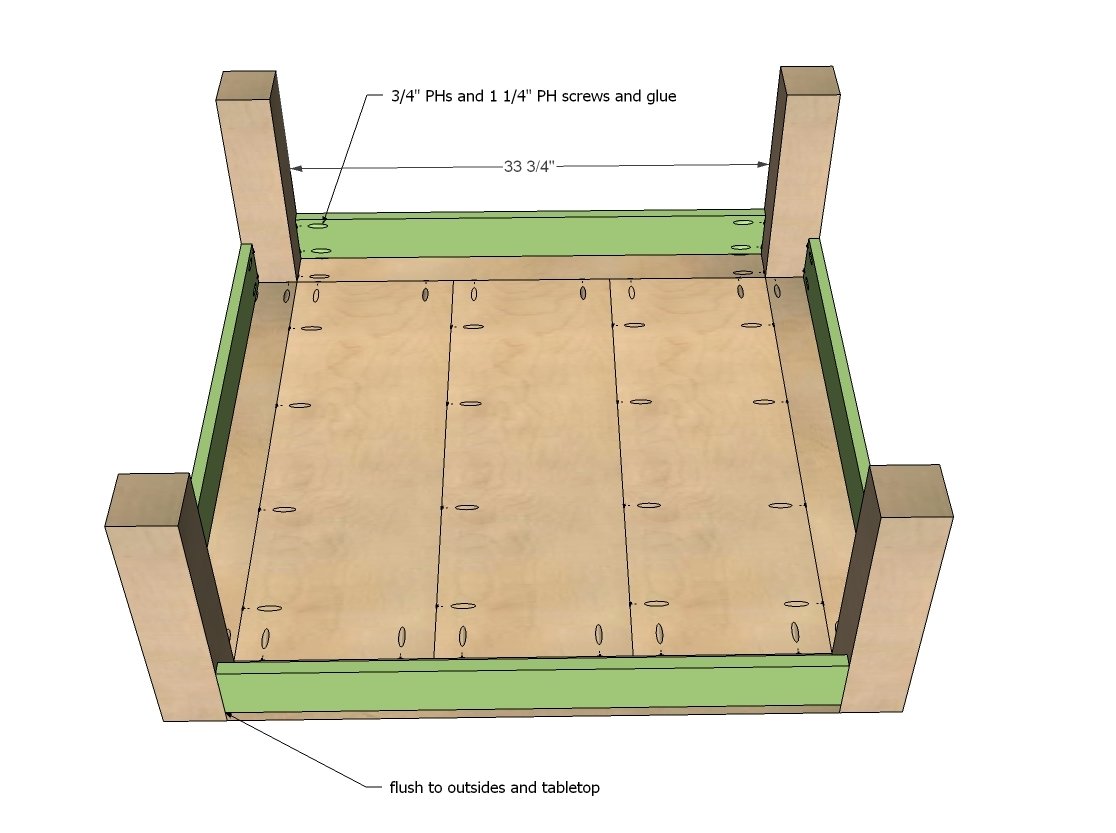
Followed by the remaining breadboard sides.
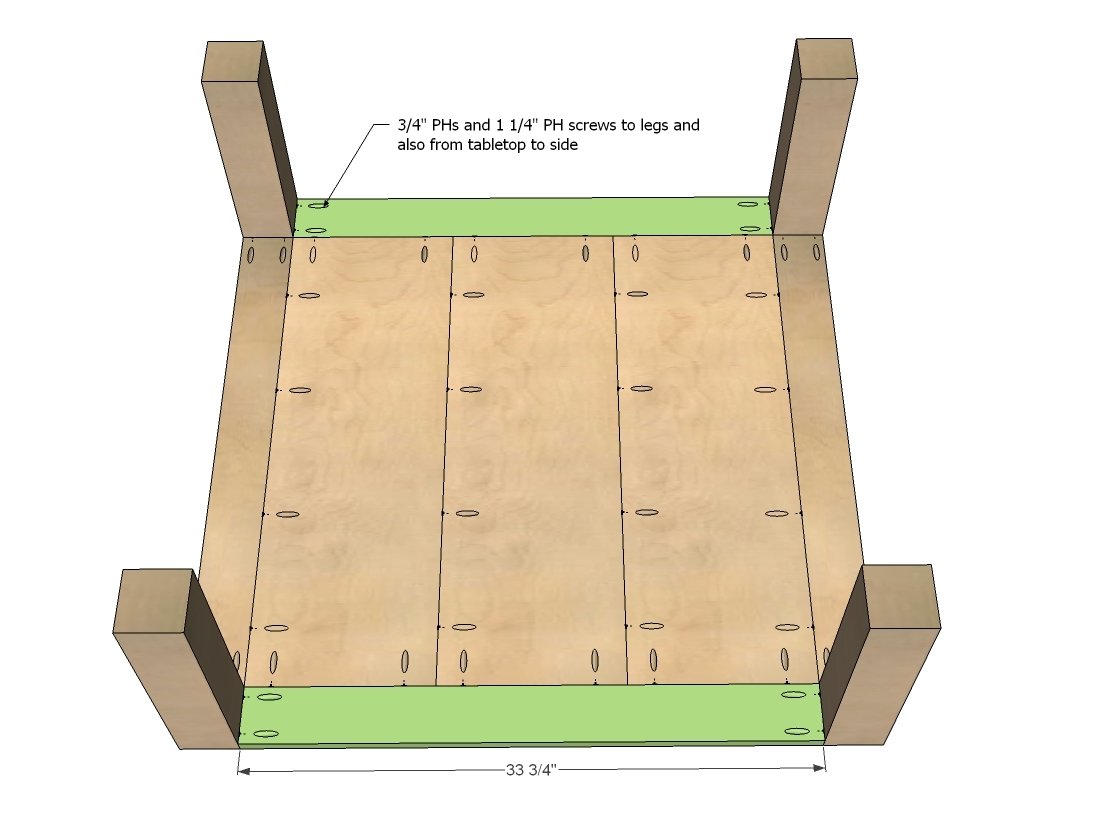
Step 4
Jeff recommends also drilling PHs facing upward to connect aprons to tabletop with hidden joints.
Step 5
Step 6
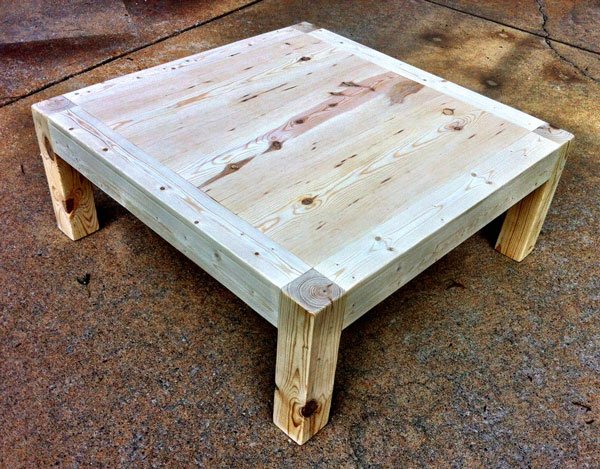
Make sure you go visit Jeff and Kristin from A Touch of Arkansas for more details on building and finishing this table!
Finishing
Sand all surfaces, starting with a medium grit and finishing with fine. Wipe off the dust, fill any holes or gaps with wood filler, and sand smooth once dry. Apply primer if you're painting, then finish with your choice of paint or stain and seal with a durable clear topcoat. For outdoor projects, use exterior-rated primer, paint or stain, and sealer so the piece stands up to the weather.
Source (temporary): https://www.ana-white.com/woodworking-projects/square-parsons-coffee-table