Square Picnic Table
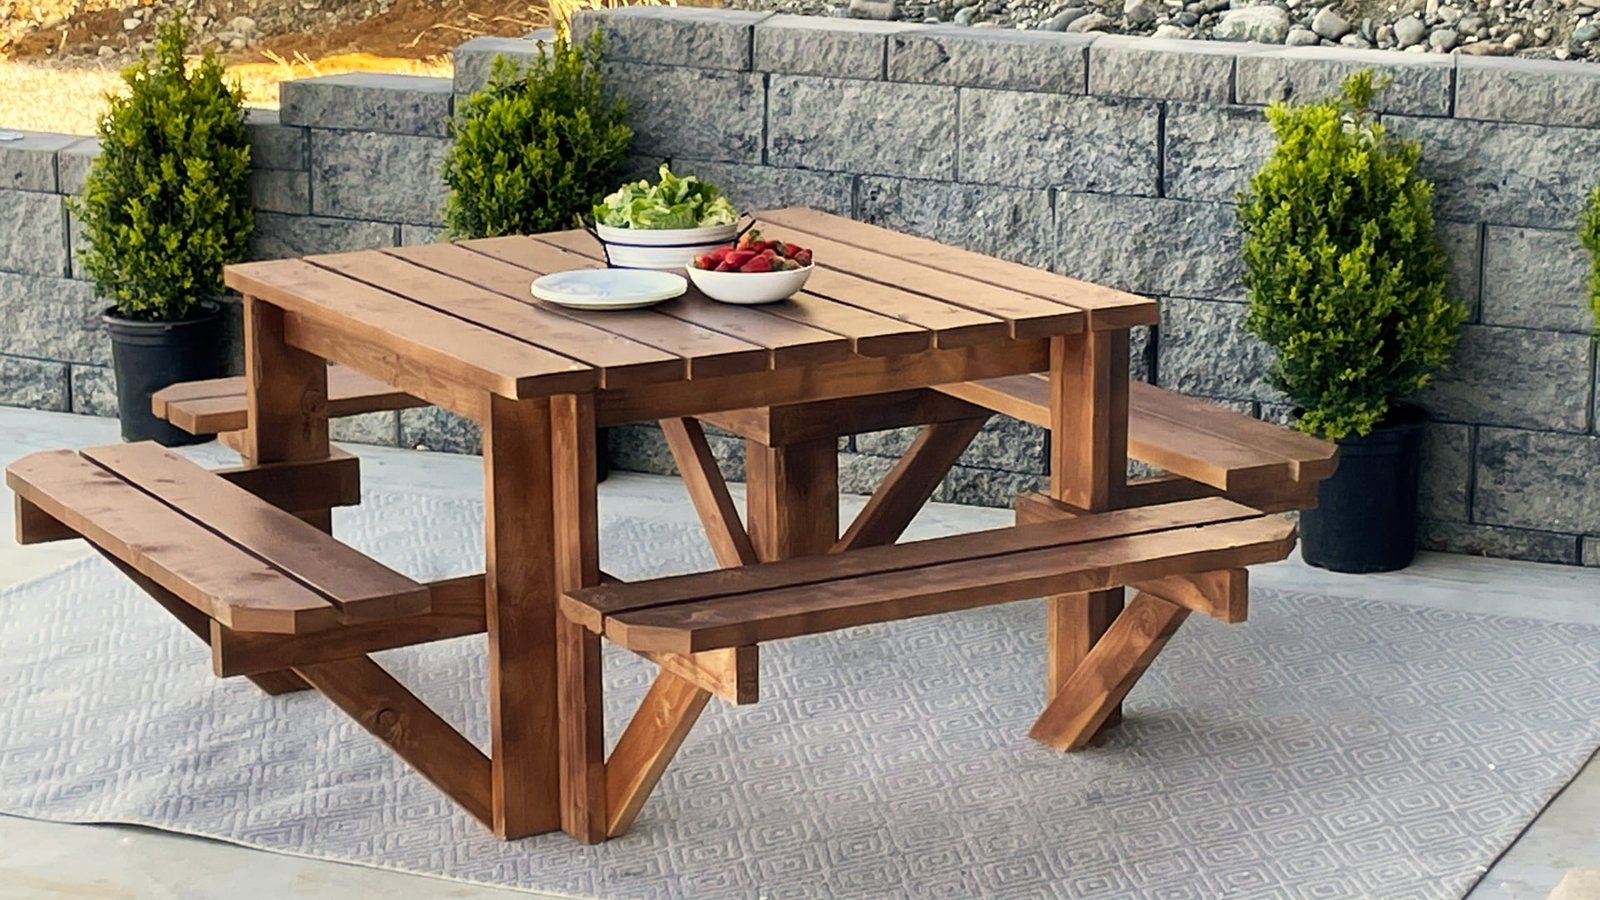
Build your own square picnic table with free
Specifications
| Project type | Picnic Tables and Outdoor Dining |
|---|---|
| Room | Outdoor |
| Difficulty | Intermediate |
Dimensions
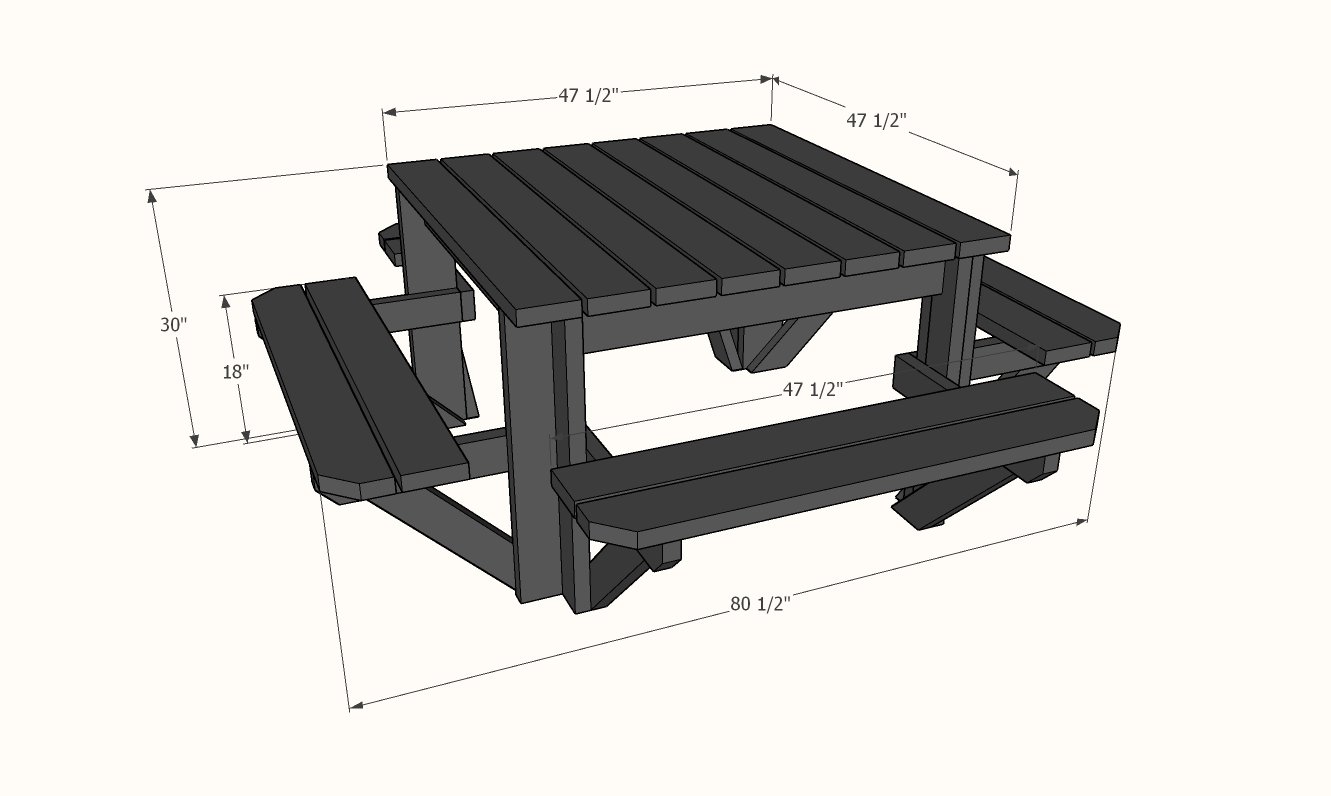
Use the size-specific shopping and cut lists below.
Shopping List
- 1 - 2x6 @ 10 feet long
- 1 - 2x4 @ 10 feet long
- 6 - 2x4 @ 8 feet long
- 8 - 2x6 @ 8 feet long
- About 170 - 2-1/2" to 2-3/4" long self tapping exterior wood screws, star-bit self drilling recommended
Cut List
- 4 - 2x6 @ 28-1/2" (cut from the 10' long 2x6 board)
- 4 - 2x4 @ 28-1/2" (cut from the 10' long 2x4 board)
- 2 - 2x4 @ 36-1/2" - aprons between 2x4 legs
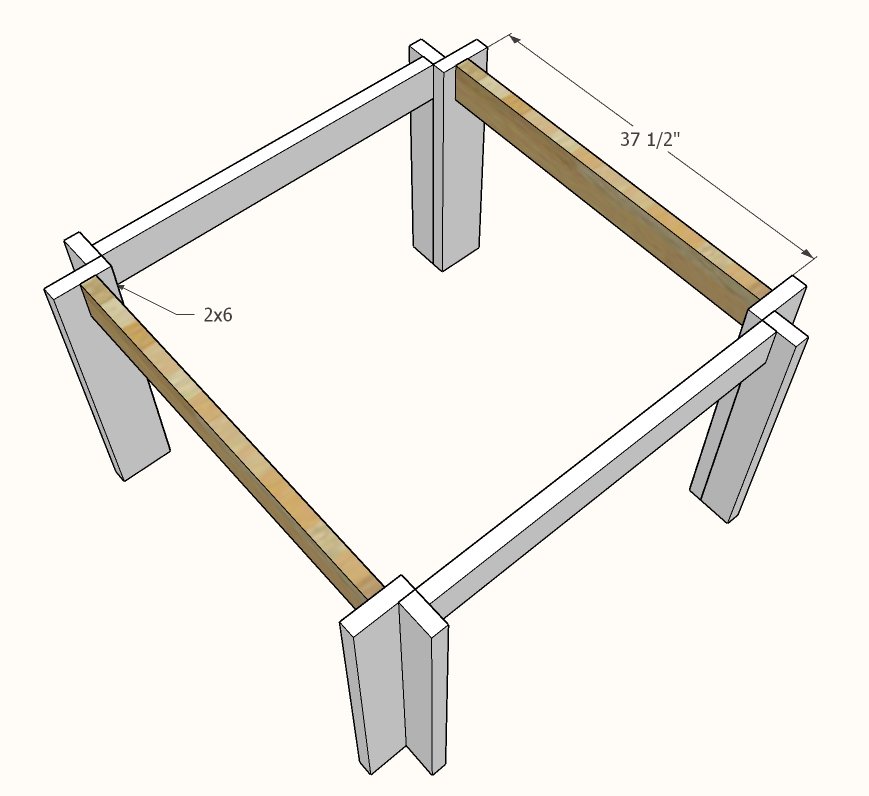
- 2 - 2x4 @ 37-1/2" - aprons between 2x6 legs
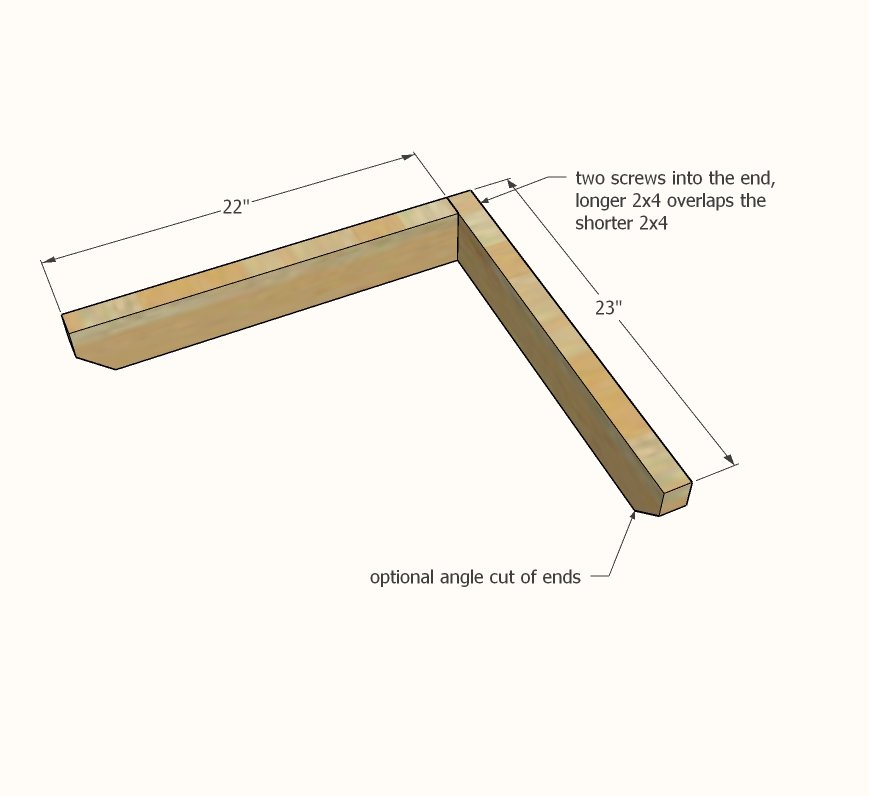
- 4 - 2x4 @ 23" - long seat supports
- 4 - 2x4 @ 22" - short seat supports
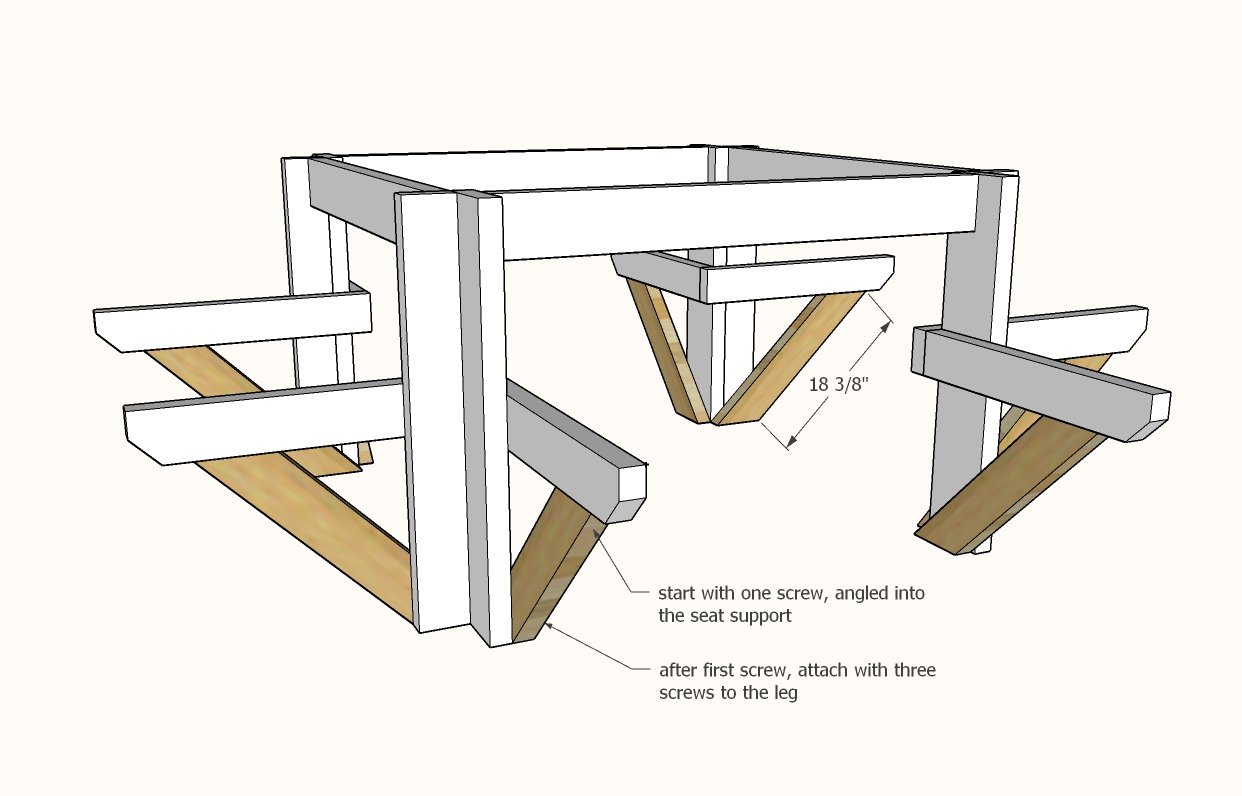
- 8 - 2x4 @ 18-3/8" - both ends cut at 45 degrees, ends are parallel, long point to short point measurement
- 16 - 2x6 @ 47-1/2" - tabletop and seat boards
Tools
- measuring tape
- square
- pencil
- safety glasses
- drill
- circular saw
- sander
Step-by-step Instructions
Step 1
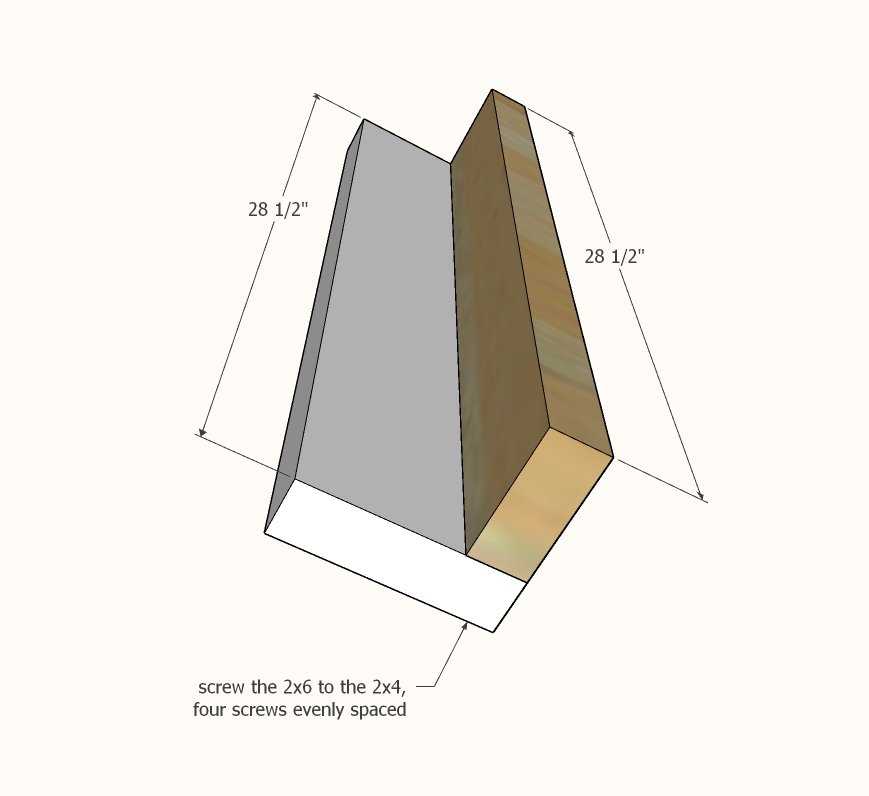
Screw the 2x6 leg piece to the 2x4 leg piece with four screws, outside edge is flush. Best face of both boards should be faced inward. Build four identical.
Step 2
Attach the 2x4 leg side to the shorter, 2x4 apron (36-1/2" long) with two screws per end. This is important, as it may affect the overall tabletop size. Double check to make sure the overall leg width is 47-1/2" from outside of leg to outside of leg after attaching. Slightly angling the screws will create more strength in the joint.
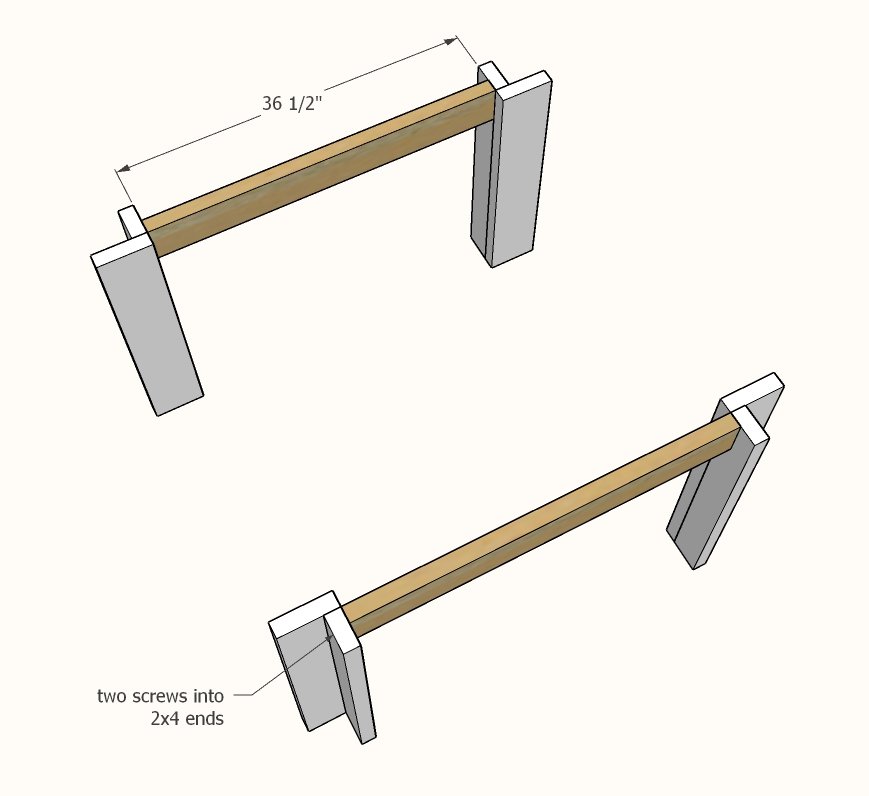
Repeat with the longer (37-1/2") from the two 2x6 sides of the legs.
Double check that the tabletop dimensions are 47-1/2" x 47-1/2" at the widest part of the legs.
Step 4
Build four of the seat supports by attaching the longer 2x4 to the shorter 2x4s.
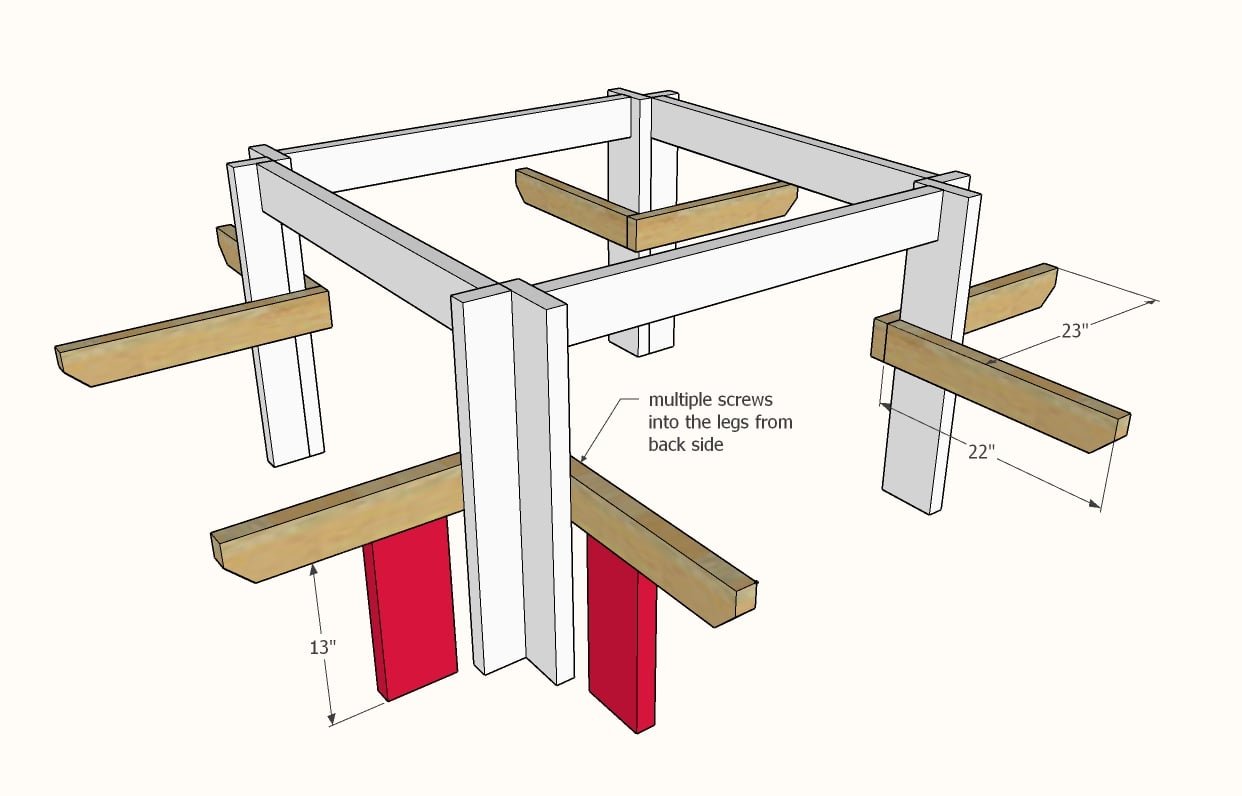
TIP: Cut two blocks 13" and use as a spacer to help set the seat supports in the right height.
Attach the seat supports to each of the legs. Make sure the shorter seat support piece (22") is attached to the 2x6 part of the leg, and the longer (23") seat support piece is attach to the 2x4 side.
Cut the 2x4s at a 45 degree angle.
Set in place and attach first at the top to the underside of the seat support. Then attach to the legs on the inside with multiple screws.
Adjust the table frame for square.
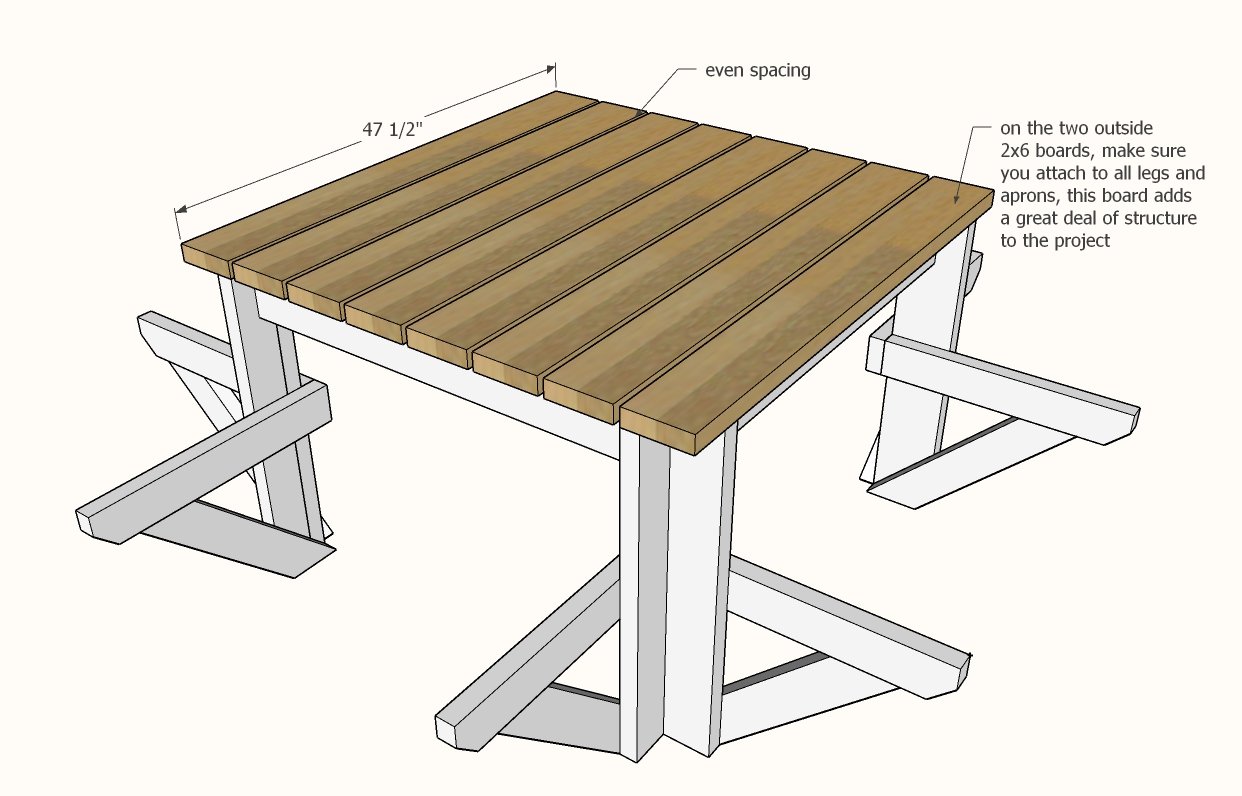
Attach the tabletop boards to the frame with screws. On the end boards, add extra screws into the aprons and tops of the legs, the end boards are structural.
Step 8
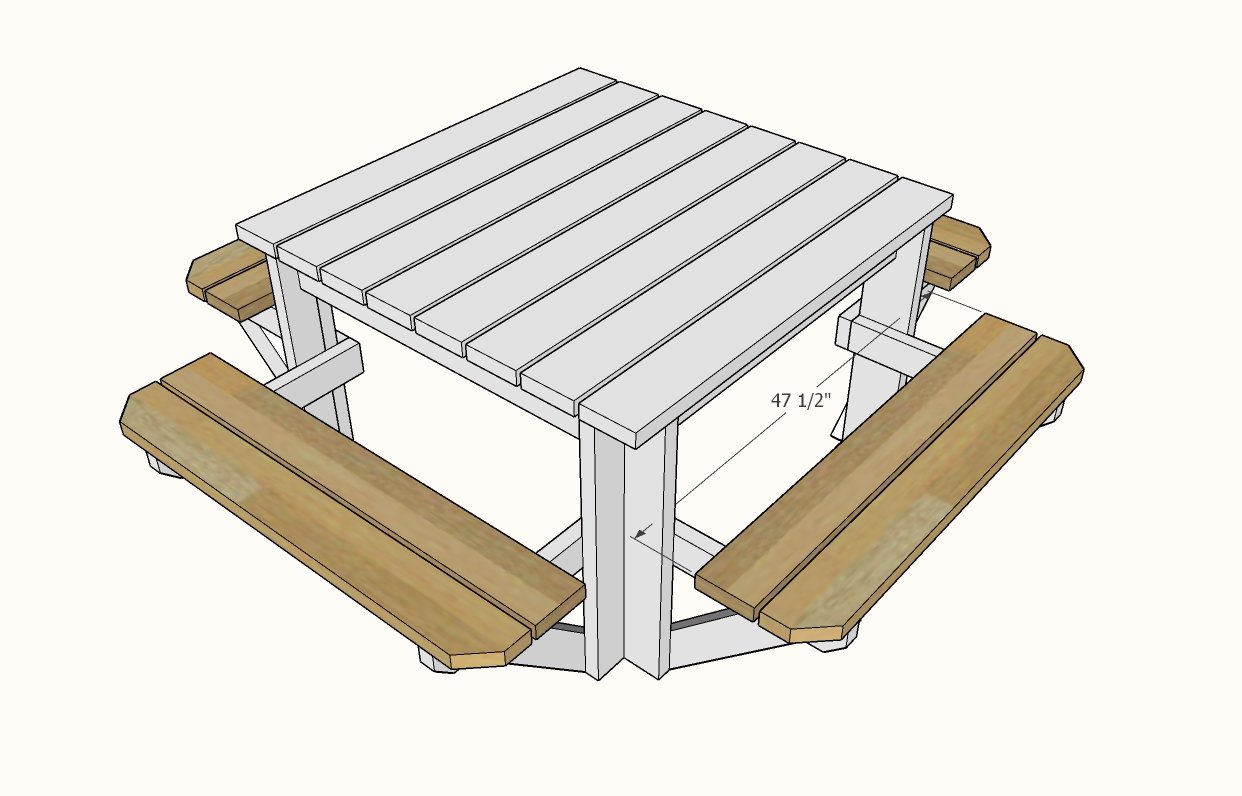
Add the seat boards to the seat supports.
Step 9
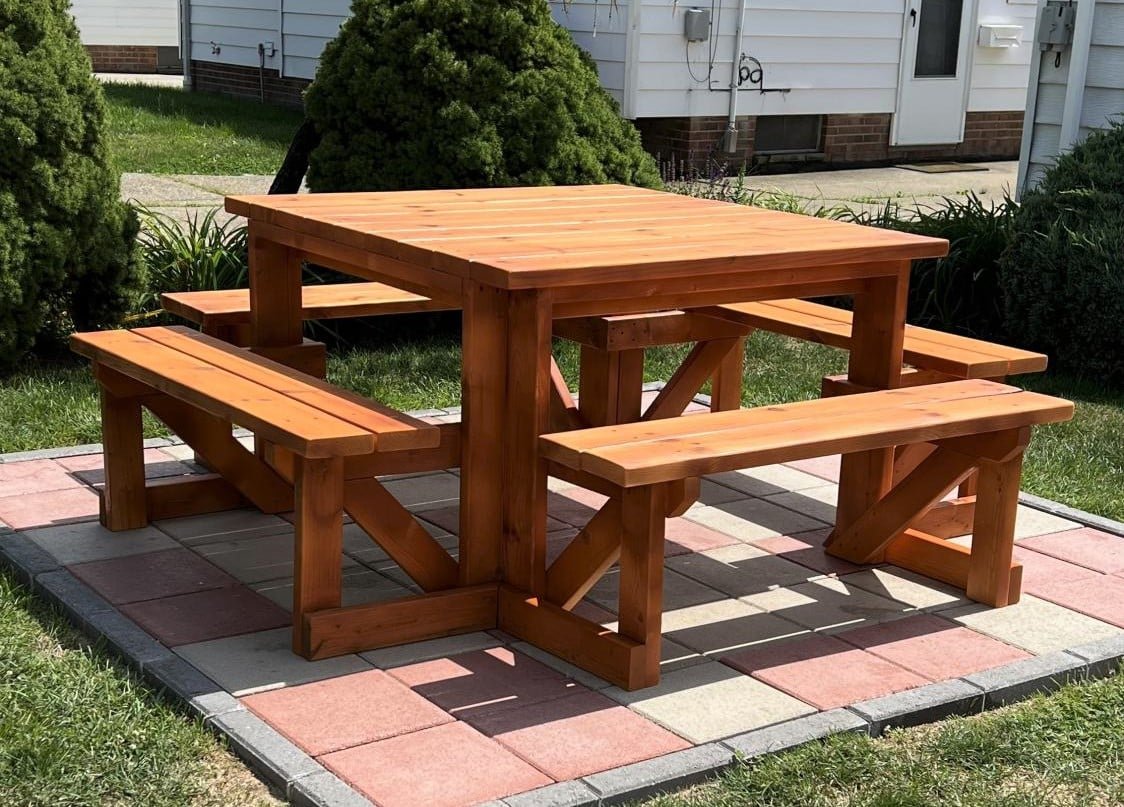
Optional seat bracing idea
Finishing
Sand all surfaces, starting with a medium grit and finishing with fine. Wipe off the dust, fill any holes or gaps with wood filler, and sand smooth once dry. Apply primer if you're painting, then finish with your choice of paint or stain and seal with a durable clear topcoat. For outdoor projects, use exterior-rated primer, paint or stain, and sealer so the piece stands up to the weather.
Source (temporary): https://www.ana-white.com/woodworking-projects/square-picnic-table