Squared2 Chair
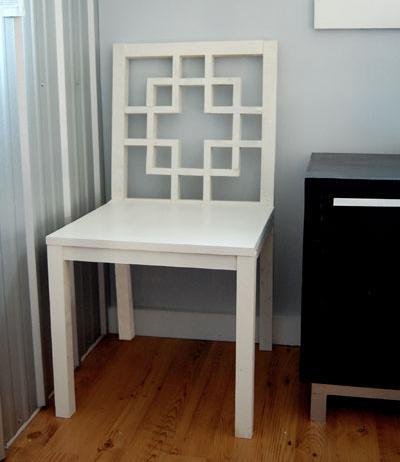
A stylish modern chair. Large seat, low back.
Specifications
| Project type | Chairs |
|---|---|
| Room | dining room |
| Style | Modern Style Furniture Plans |
| Difficulty | Advanced |
| Estimated cost | Under $20 |
Dimensions
Use the size-specific shopping and cut lists below.
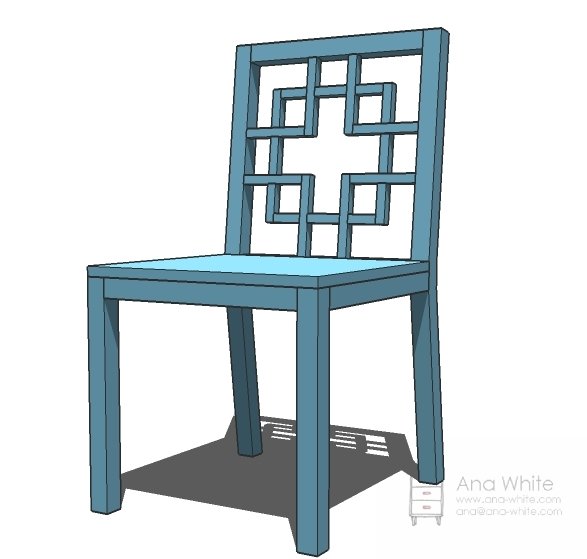
Shopping List
1 – 2×2 Board, 8′ Long
1 – 1×2 Board, 8′ Long
1 – 1×4 Board, 10′ Long OR 19″x19″x3/4″ Plywood Panel for seat
1 – 2×4, stud length or 8′ long ( pick one that is straight with minimal knots and lightweight – means it’s drier)
2″ Pocket hole screws
1 1/4″ Pocket hole screws
Cut List
2 – 2×4@36″ (Back Legs)
6 – 2×2 @ 16″ (Seat Back and Aprons)
2 – 2×2 @ 17 1/4″ (Front Legs)
1 – 1×2 @ 16″ (Seat Back Seat Top)
2 – 1×2 @ 6 1/2″
4 – 1×2 @ 5 3/4″
2 – 1×2 @ 6 7/8″
6 – 1×2 @ 3 1/4″
2 – 1×2 @ 3″
4 – 1×2 @ 2 1/2″
5 – 1×4 @ 19″ OR 19″x19″ Plywood seat top
Tools
- measuring tape
- square
- pencil
- safety glasses
- hearing protection
- kreg-jig
- drill
- circular saw
- sander
- level
Step-by-step Instructions
Back Legs
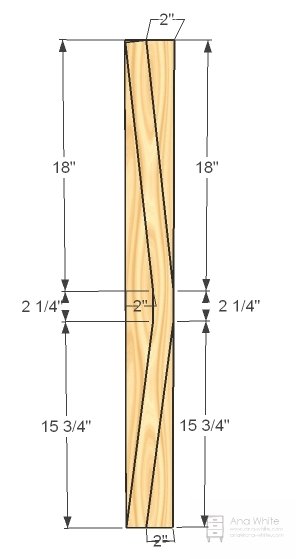
CAREFULLY cut out your chair legs as shown above. Use either a circular saw or a jigsaw. Sand the legs so that they match each other. Transfer the middle markings around the leg so you know where the seat goes.
Build the Seat Back Frame
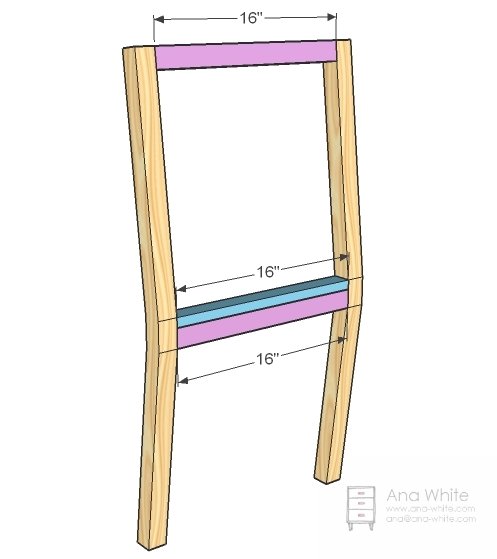
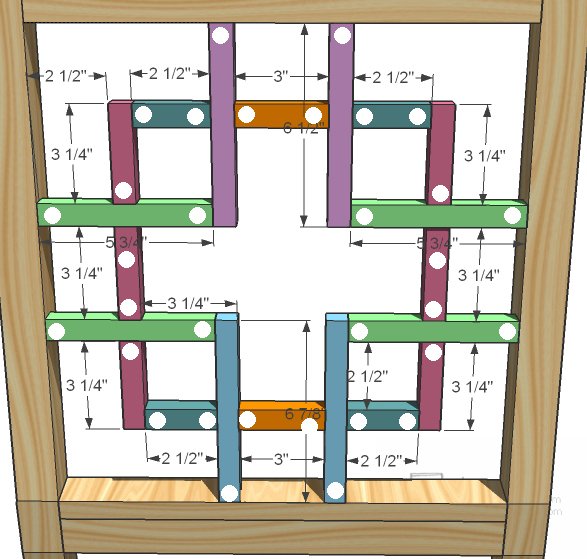
Build the seat back frame as shown above. Use 2″ pocket hole screws when joining 2x2s and 1 1/4″ pocket hole screws when joining 1x2s. Make sure you set your jig accordingly. Use glue.
Squares
Okay, this part isn’t hard so much that it is tedious and super easy to get off square. A trick that I used was to drill all my pocket holes on the back so filling pocket holes (and sanding) as super easy. If you are staining, you may consider using wood dowels. Anyway, cut out all the pieces and arrange. Drill all the pocket holes and arrange again. Start by screwing together the longer 90s first. Then build all the smaller 90s. Then arrange, mark, and attach the smaller 90s to the inside of the larger 90s. Then add the joining pieces to connect all the square. I promise, this step is quiet easy. Use glue. And yes, the chair back is super strong and looks fine with a 1×2. Looks so good, I must also put plans up for the headboard and more! Oh, yes, CHECK FOR SQUARE before the glue dries! Finally, screw the squares into the back of the chair. Set the back aside.
Chair Front
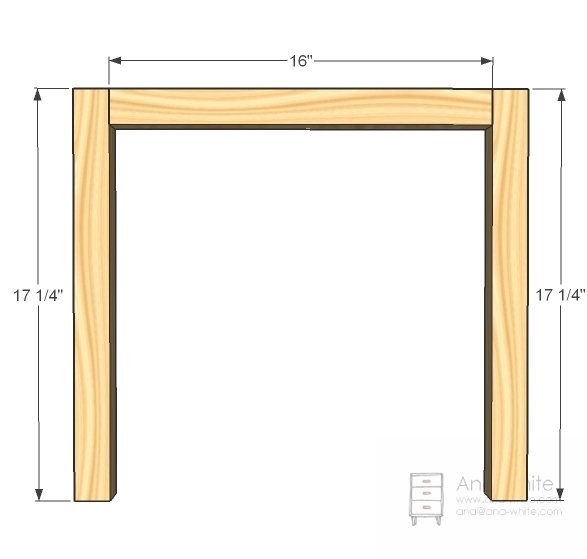
Attach chair front legs to the front apron. Use glue and 2″ pocket hole screws.
Step 5
Back Apron
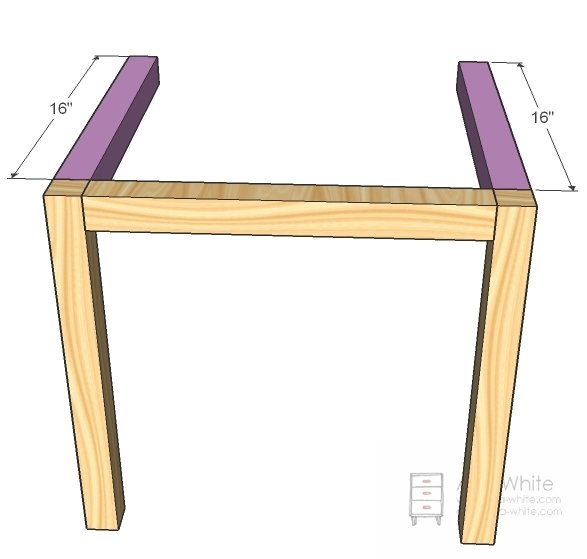
Now the back apron. Keep using 2″ pocket hole screws and glue.
Top
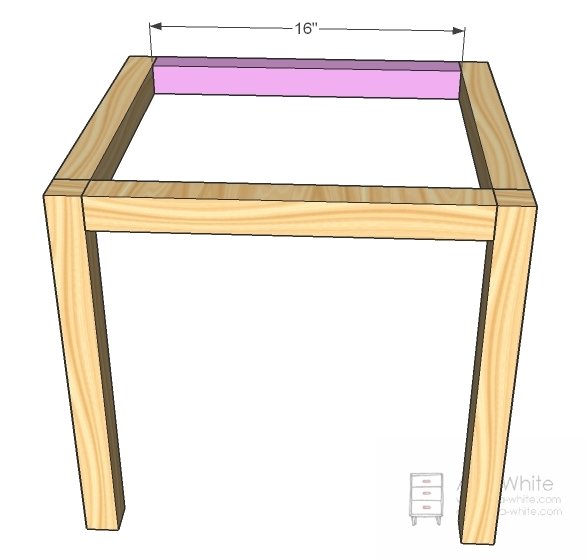
If you choose to go the 1×4 route, join all the 1x4s together as shown above with 1 1/4″ pocket holes screws. Then screw the top to the aprons and front legs.
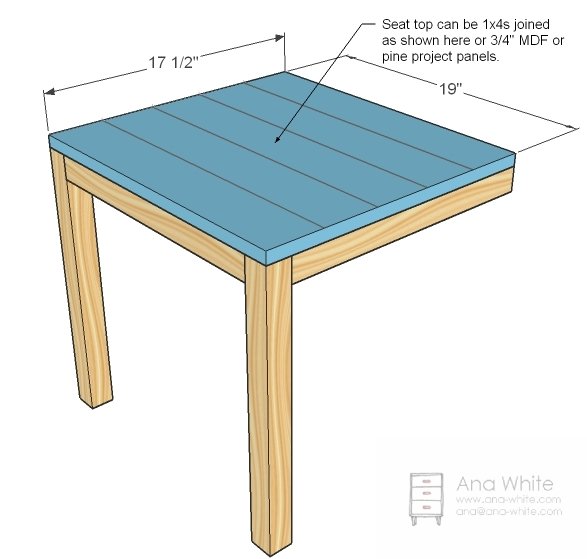
Assembly
Attach the seat to the chair back as shown above. I suggest using bolts, but screws would work too – especially pocket hole screws – but be warned, screws may loosen up over time. Bolts will too, but you can just tighten again.
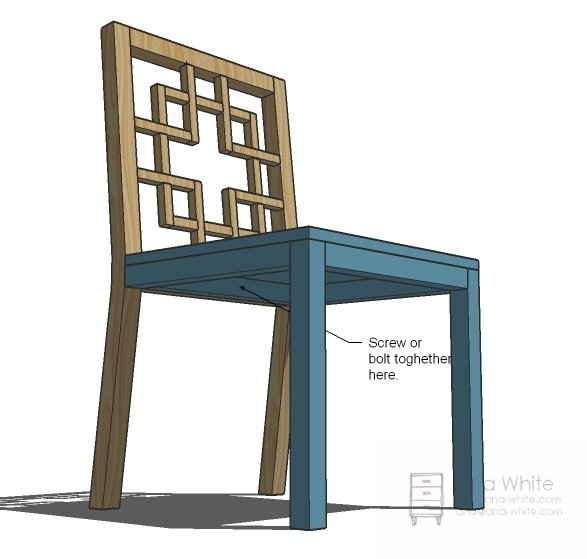
Finishing
Sand all surfaces, starting with a medium grit and finishing with fine. Wipe off the dust, fill any holes or gaps with wood filler, and sand smooth once dry. Apply primer if you're painting, then finish with your choice of paint or stain and seal with a durable clear topcoat. For outdoor projects, use exterior-rated primer, paint or stain, and sealer so the piece stands up to the weather.
Source (temporary): https://www.ana-white.com/woodworking-projects/squared2-chair