Stackable Fruit & Vegetable Storage Crates
Bring the charm of a farmer's market into your kitchen with these easy-to-build, stackable produce crates. Designed for both function and style, these wooden bins are perfect for organizing fruits and vegetables right on your countertop. include build photos, step by step diagrams, shopping list, cut list and more!
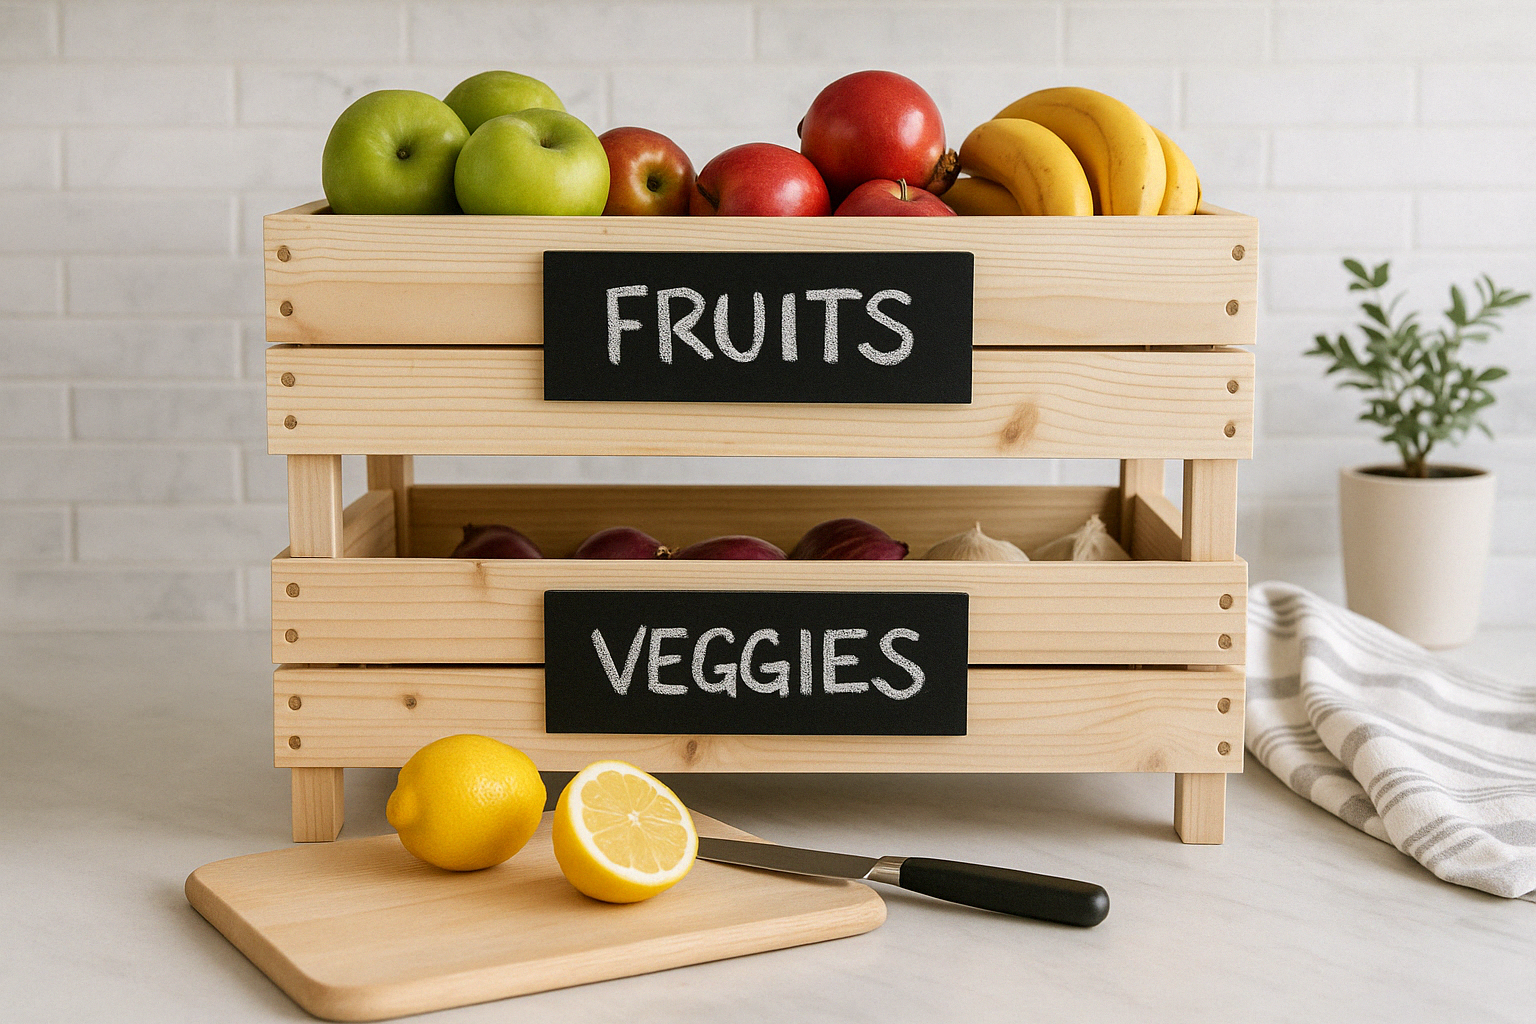
Specifications
| Project type | Pantry Organization |
|---|---|
| Room | kitchen |
| Style | Green or Eco-Friendly Style Furniture |
| Difficulty | Starter Projects |
| Estimated cost | Under $20 |
Dimensions
Use the size-specific shopping and cut lists below.
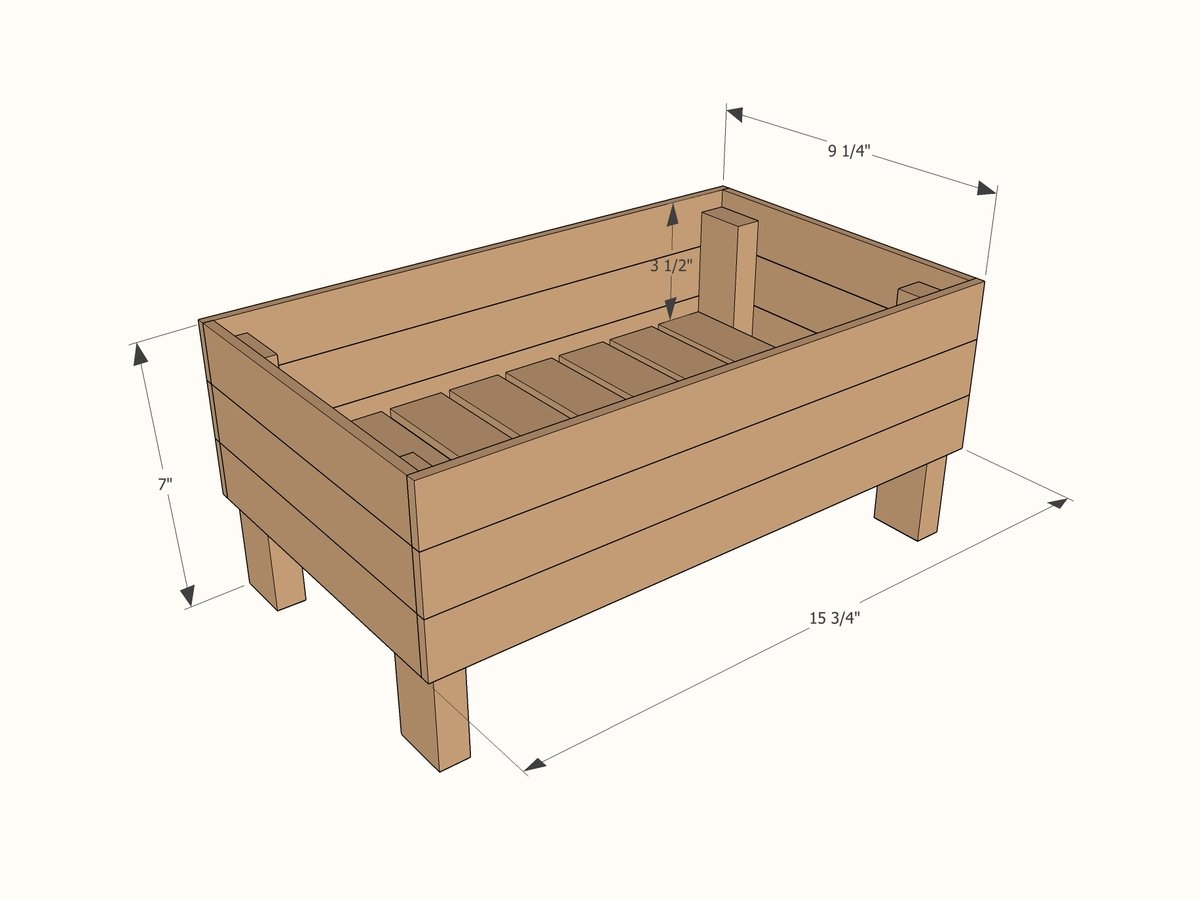
Shopping List
- 1 - 1 x 2 x 8
- 5 - 4' wood lath pieces, usually comes in a bundle of 50 (you can also use 1x2s here or any scrap wood really)
- This shopping list is for 1 crate. You will need to multiply by the number of crates you want.
Cut List
- 4 - 1 x 2 @ 6 1/2" Legs
- 2 - 1 x 2 @ 13 3/4" Bottom supports between legs
- 6 - Wood Lath Pieces @ 8 3/4" end slats
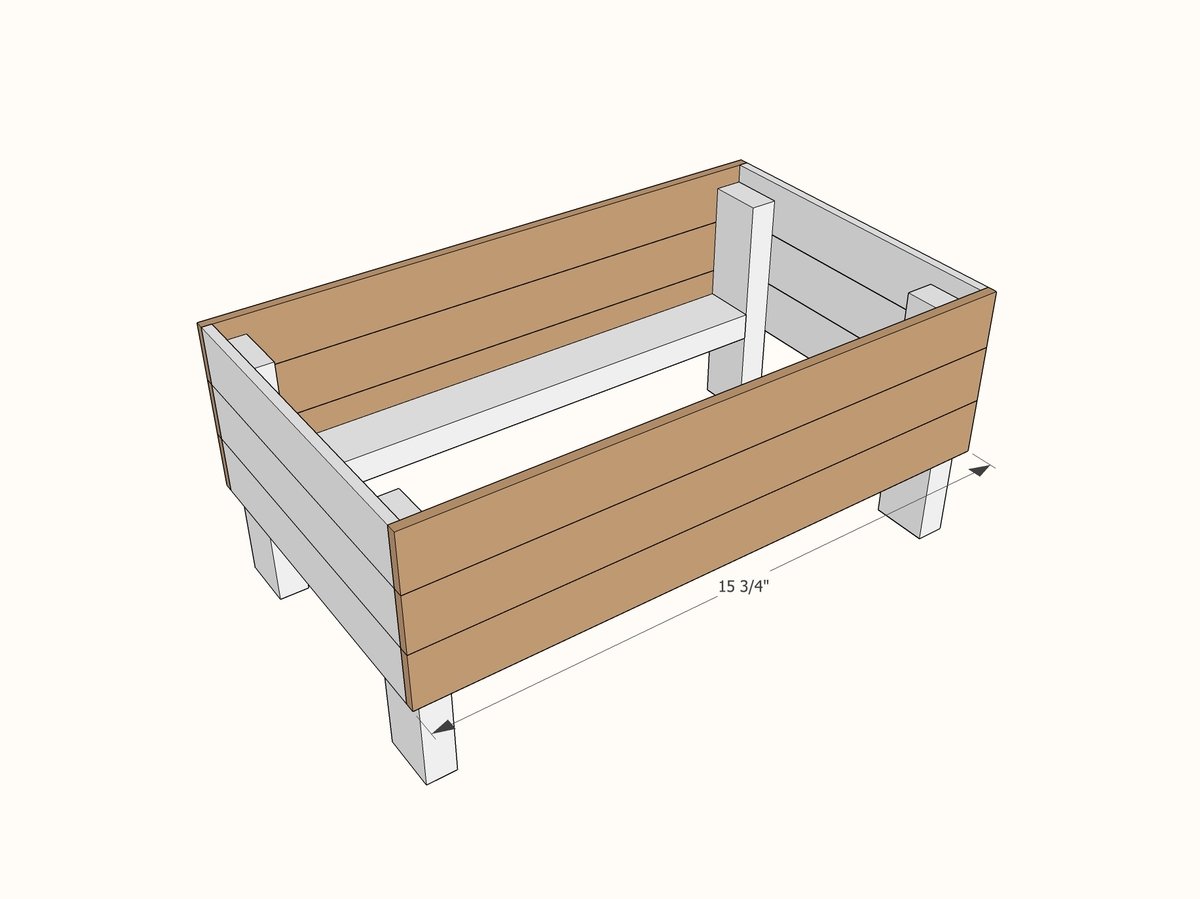
- 6 - Wood Lath Pieces @ 15 3/4" side slats, or cut to fit
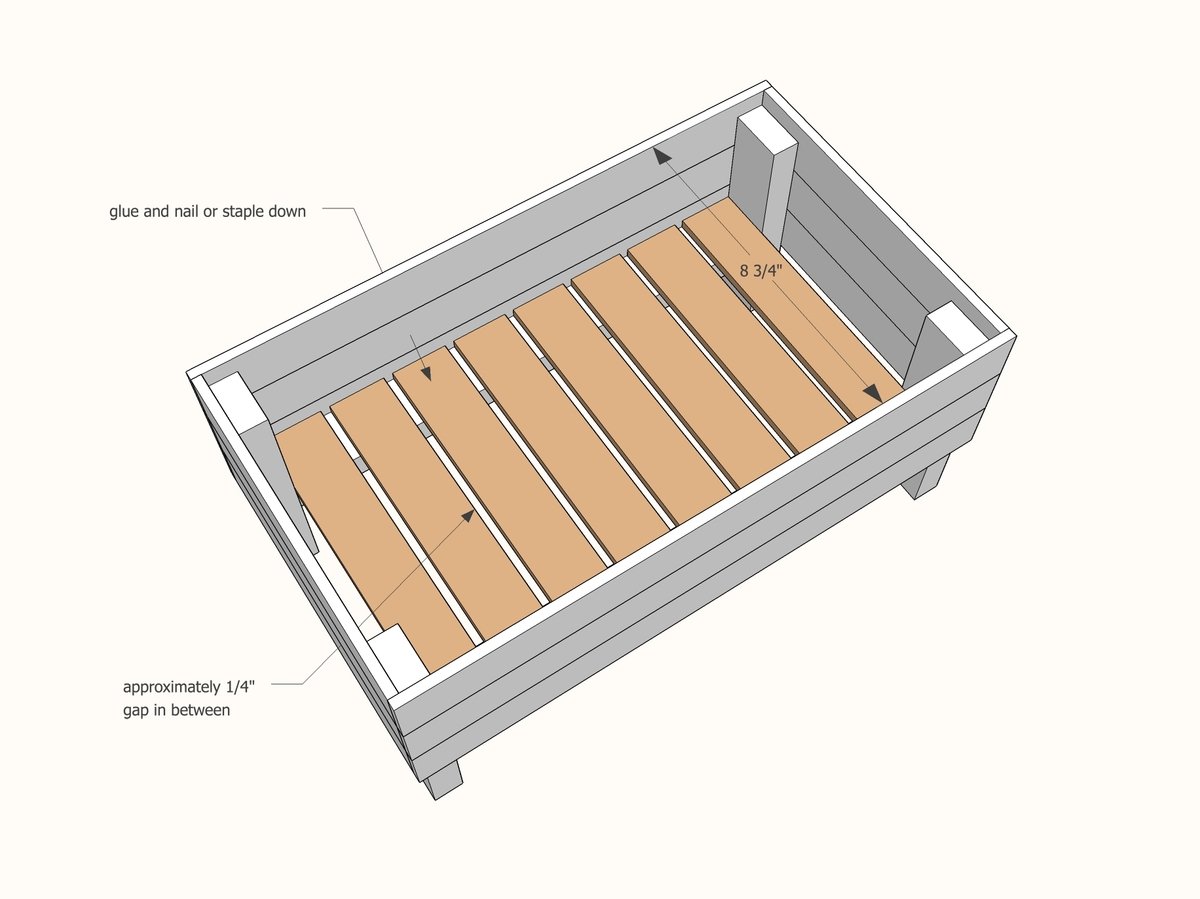
- 8 - Wood Lath Pieces @ 8 3/4" inside bottom slats
This is the cut list per crate. Depending on how many stacking crates you want, you need to multiply by that number.
Tools
- measuring tape
- pencil
- safety glasses
- hearing protection
- kreg-jig
- drill
- compound miter saw
- nailer
- sander
Step-by-step Instructions
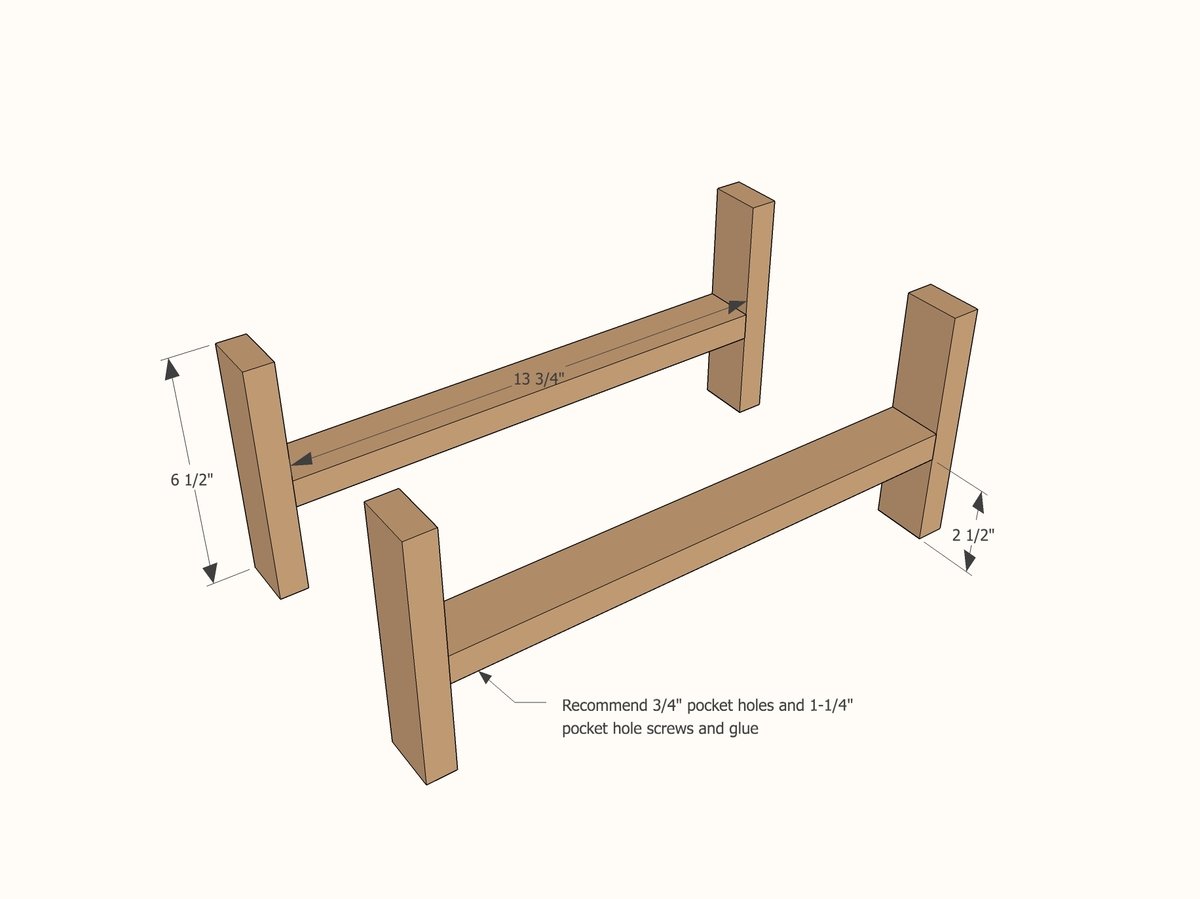
Step 1
Build legs. Drill pocket holes in the bottom of the longer 1 x 2's on each side. Attach to shorter 1 x 2's (legs) with 1 1/4" PH screws and glue.
Step 2
Attach End Slats with 3/4 inch nails and wood glue. Notice to start 2 1/2" from bottom, which will put the top wood lath slat above the top of the 1 x 2
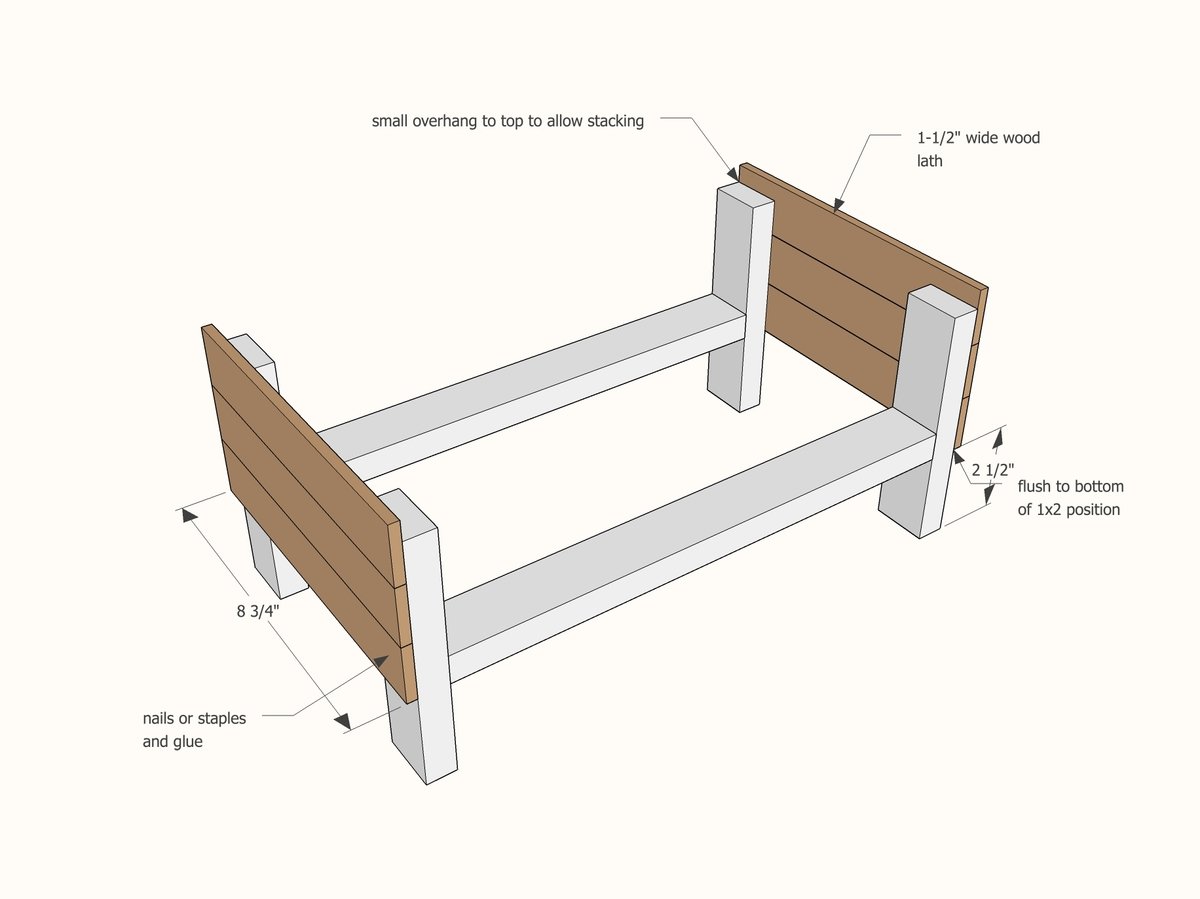
Step 3
Attach the side slats the same way 3/4" nails and glue. I cut to fit after have the end slats holding the legs together.
Step 4
Set slats in bottom of crate. No need to glue and nail for easy removal.
Finishing
Sand all surfaces, starting with a medium grit and finishing with fine. Wipe off the dust, fill any holes or gaps with wood filler, and sand smooth once dry. Apply primer if you're painting, then finish with your choice of paint or stain and seal with a durable clear topcoat. For outdoor projects, use exterior-rated primer, paint or stain, and sealer so the piece stands up to the weather.
Source (temporary): https://www.ana-white.com/woodworking-projects/stackable-fruit-vegetable-storage-crates-free-diy-woodworking-plan