Stacking Cubes
I really loved these, but I personally could never afford $365 per cube.
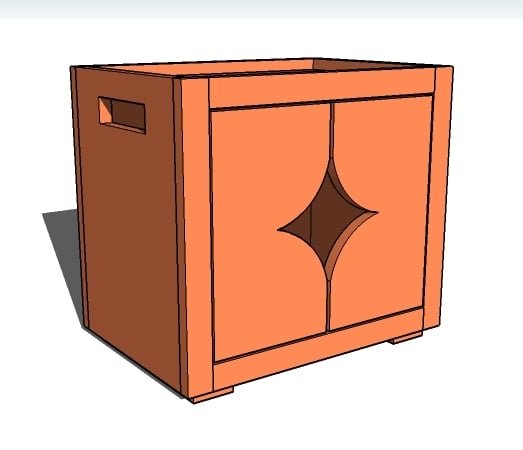
Specifications
| Project type | Cubby Project Plans |
|---|---|
| Room | Bedroom |
| Style | Modern Style Furniture Plans |
| Difficulty | Intermediate |
| Estimated cost | $20 - $50 |
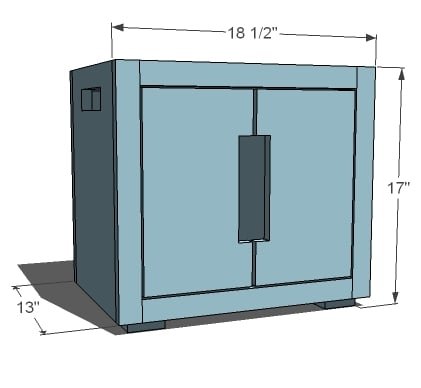
Dimensions
Use the size-specific shopping and cut lists below.
Shopping List
6 feet of 1×12
26″ of 1×8 (for optional doors)
1/4″ Plywood
1×2 – 8′ Long
24″ of 1×3 (for feet, you can use a 1×2 but I like the chunkier look better of a 1×3)
2″ Finish Nails
1 1/4″ Finish Nails
2″ Screws or 1 1/4″ Pocket Hole Screws
Cut List
2 – 1×12 @ 16 1/4″ (Sides)
2 – 1×12 @ 17″ (Top and Bottom)
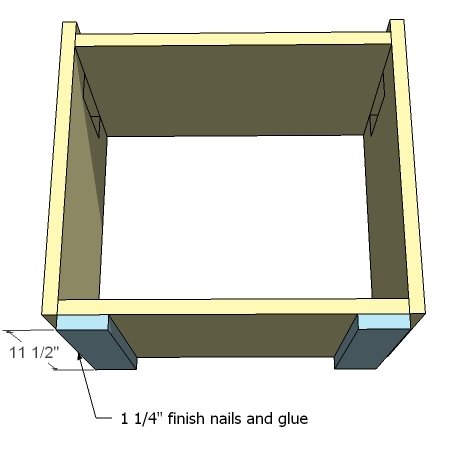
2 – 1×3 @ 11 1/2″ (Feet)
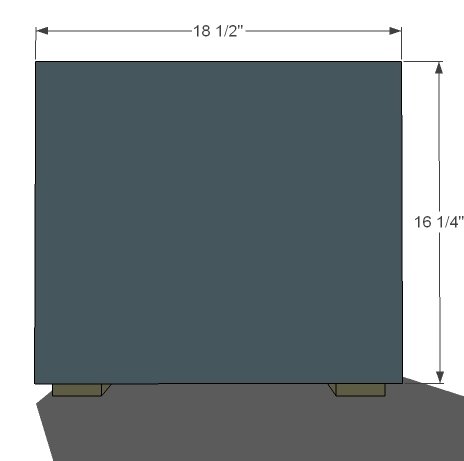
1 – 1/4 Plywood @ 18 1/2″ x 16 1/4″ (Back)
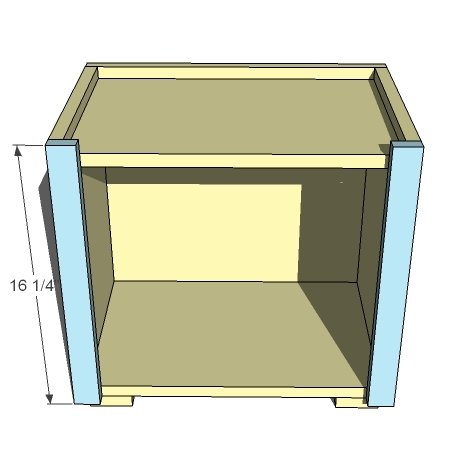
2 – 1×2 @ 16 1/4″ (Face Frame Sides)
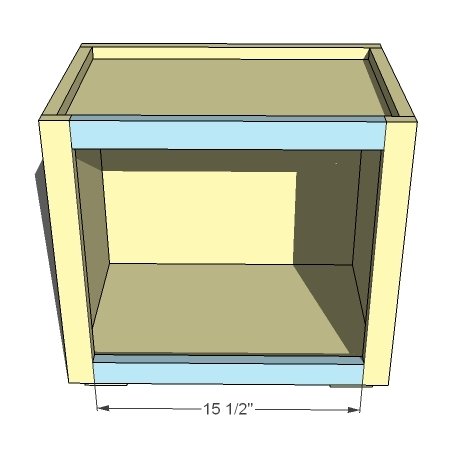
2 – 1×2 @ 15 1/2″ (Face Frame Top and Bottom)
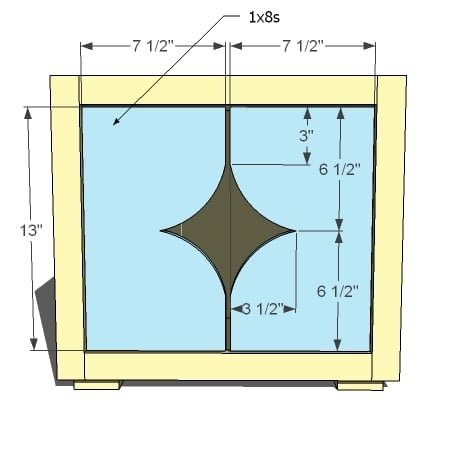
2 – 1×8 @ 13″ (Doors, Optional
Tools
- measuring tape
- square
- pencil
- safety glasses
- hearing protection
- drill
- circular saw
- sander
- countersink drill bit
Step-by-step Instructions
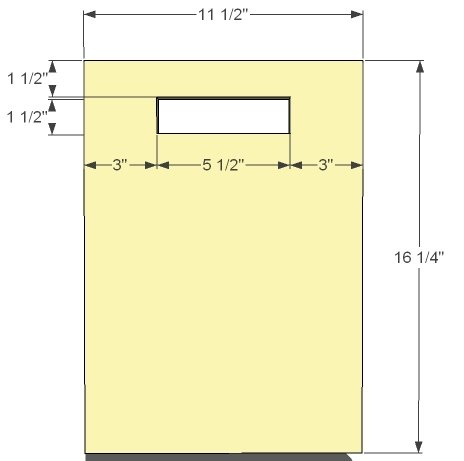
Handles
These have got to have handles! Measure and cut the handles out with a jigsaw. Prefer a rounded corner on the handles? Visit this post for instructions on how to do that. Just make sure the top of the handle is at least 1 1/2″ from the to
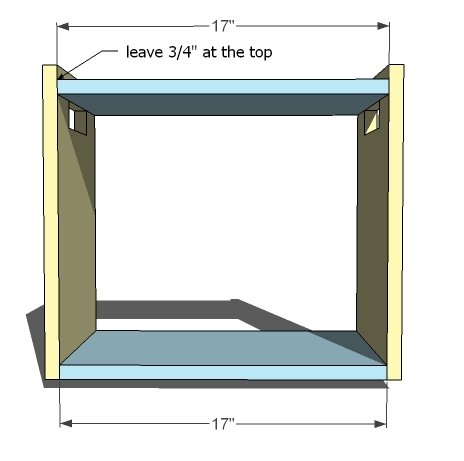
Build the Box
I highly recommend using pocket holes to build your box. But if you do not have a Kreg Jig™, you can use finish nails with a nailer or 2″ screws and glue. All joints will be reinforced with a face frame and back.
Feet
Use 1 1/4″ finish nails and glue to attach the feet. Notice how the feet do not overlap the sides.
Back
Tack the back on with 1 1/4″ nails and glue.
Step 5
Face Frame Top and Bottom
Finish the face frame by attaching the top and bottom with 2″ finish nails and glue.
Doors
If you choose to add doors, use hinges to attach doors to face frame. Cut out shape as desired to act as a handle with a jigsaw.
Finishing
Sand all surfaces, starting with a medium grit and finishing with fine. Wipe off the dust, fill any holes or gaps with wood filler, and sand smooth once dry. Apply primer if you're painting, then finish with your choice of paint or stain and seal with a durable clear topcoat. For outdoor projects, use exterior-rated primer, paint or stain, and sealer so the piece stands up to the weather.
Source (temporary): https://www.ana-white.com/woodworking-projects/stacking-cubes