Stair Baluster Play Vanity
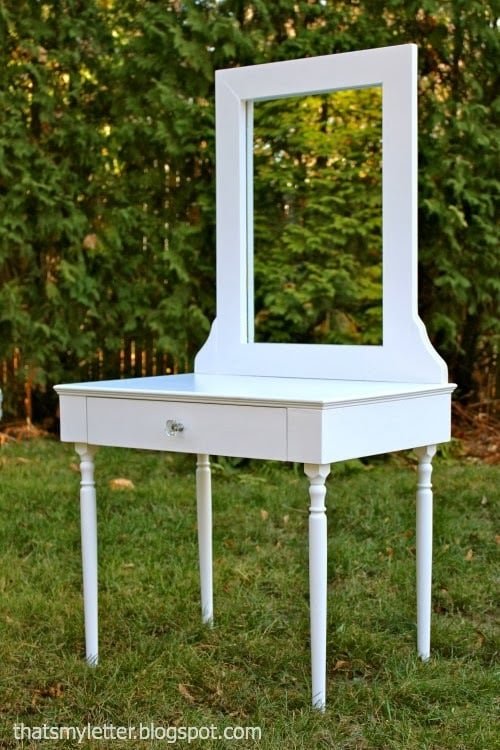
Build a play vanity with drawers and stair baluster legs! Plans from
Specifications
| Project type | Toys |
|---|---|
| Room | Kids and Toys |
| Style | Children's and Kid's Room Furniture and Toy Plans |
| Difficulty | Intermediate |
| Estimated cost | $20 - $50 |
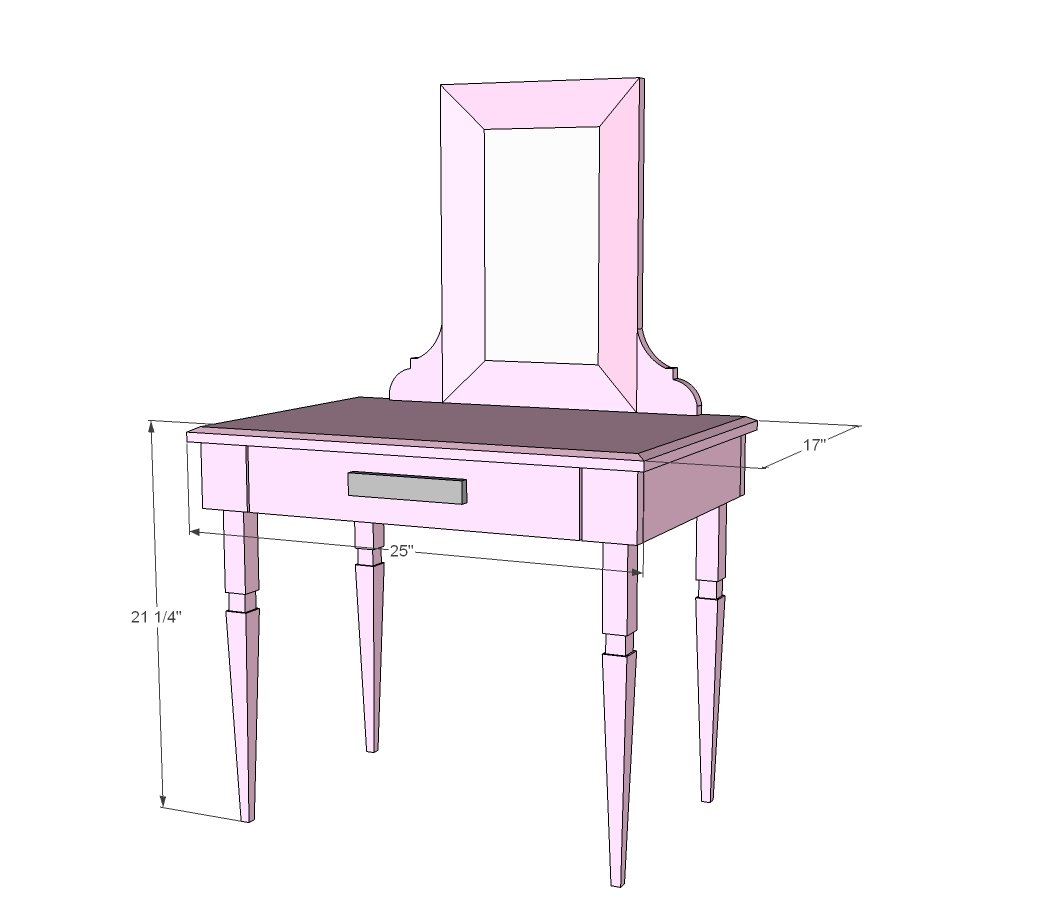
Dimensions
Use the size-specific shopping and cut lists below.
Shopping List
4 - Stair Balusters like these
2 - 14” drawer slides (Home depot has them)
Small mirror (12”-16” wide)
2 - small corbels (depending on mirror size)
1 knob or handle
1 - 1x4 @ 10 feet long
1 - 1x3 @ 6 feet long
1 - 3/4” panel or plywood @ 24” x 16”
1 - 1/4” plywood piece 14” x 17-1/2”
Nails and screws
Cut List
4 - 1x4 @ 14-1/2”
2 - 1x4 @ 2-3/4”
1 - 1x4 @ 24”
1 - 3/4” panel or plywood @ 16” x 24”
4 - stair balusters cut at 20-1/2”
DRAWER - Cut to fit slides and opening!!!
2 - 1x3 @ 14”
2 - 1x3 @ 16”
1 - 1/4” plywood @ 17-1/2” x 14”
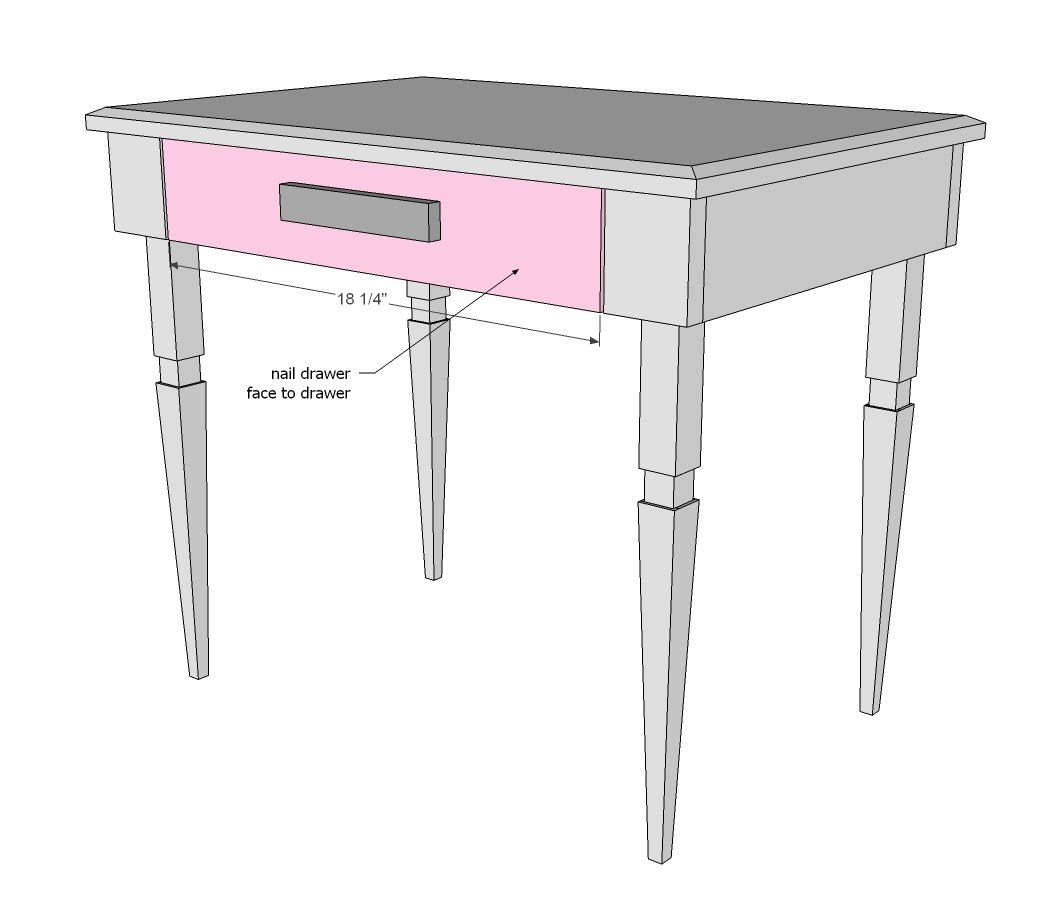
1 - 1x4 @ 18-1/4” (drawer face)
3/4” thick moulding for trimming out top
Tools
- measuring tape
- square
- pencil
- safety glasses
- hearing protection
- drill
- compound miter saw
- nailer
- sander
Step-by-step Instructions
Step 1
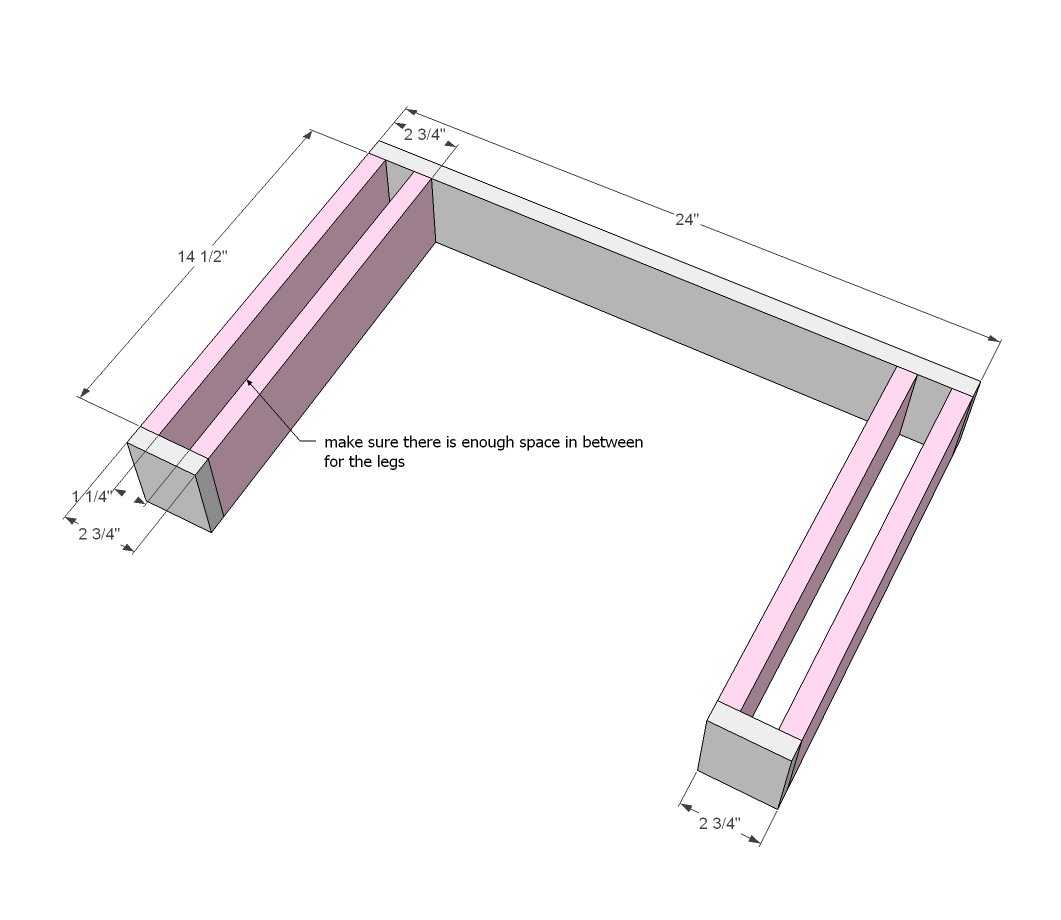
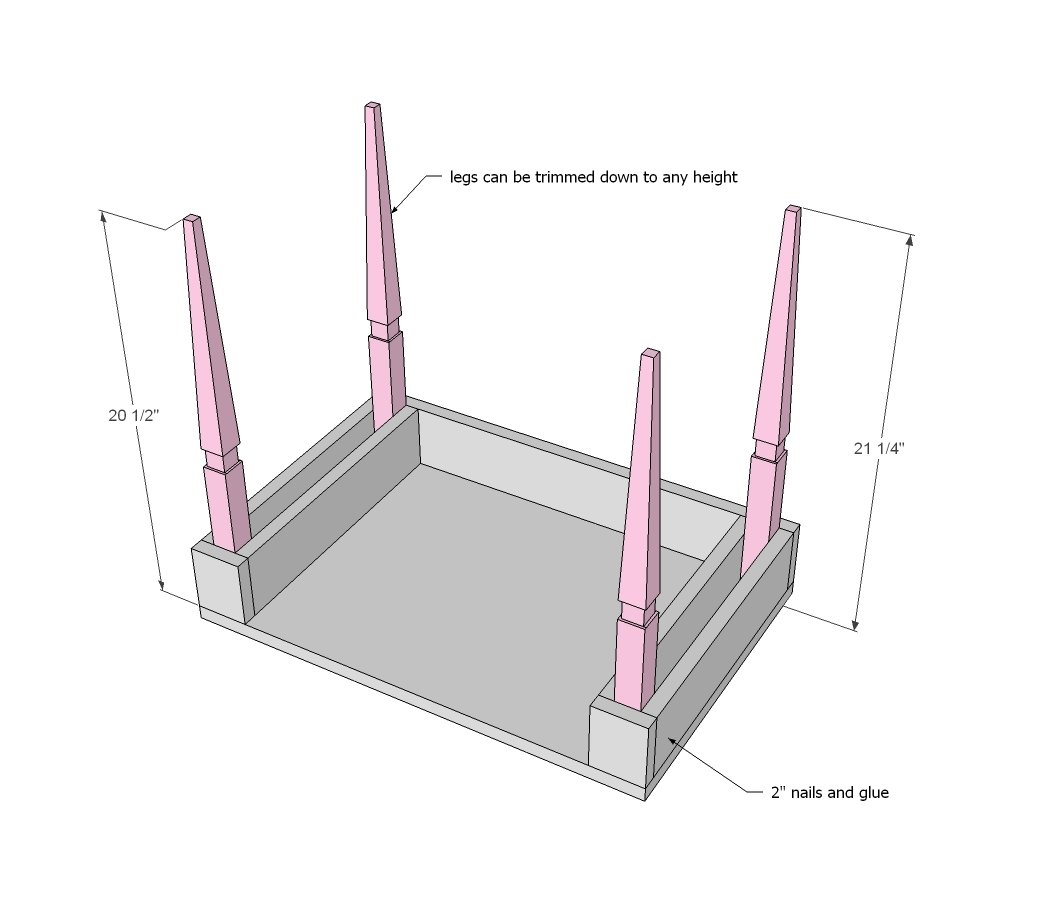
Use the 1x4s to build the base. Make sure the legs can fit in the spaces - otherwise, adjust the plans to fit your legs.
Step 2
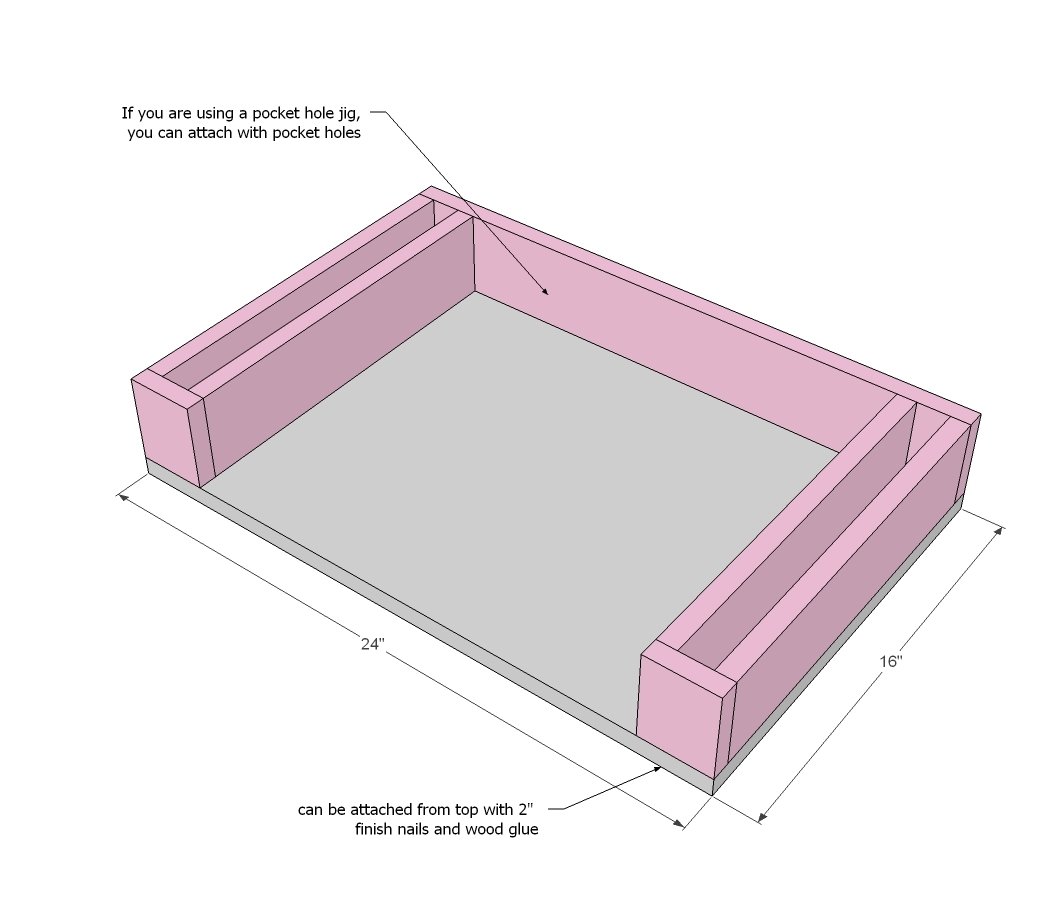
Attach top - the easiest way is to attach with finish nails and glue from top, but 3/4" pocket holes would work pretty good from the underside too.
Step 3
Place the legs inside the base, and nail or screw to the base.
Step 4
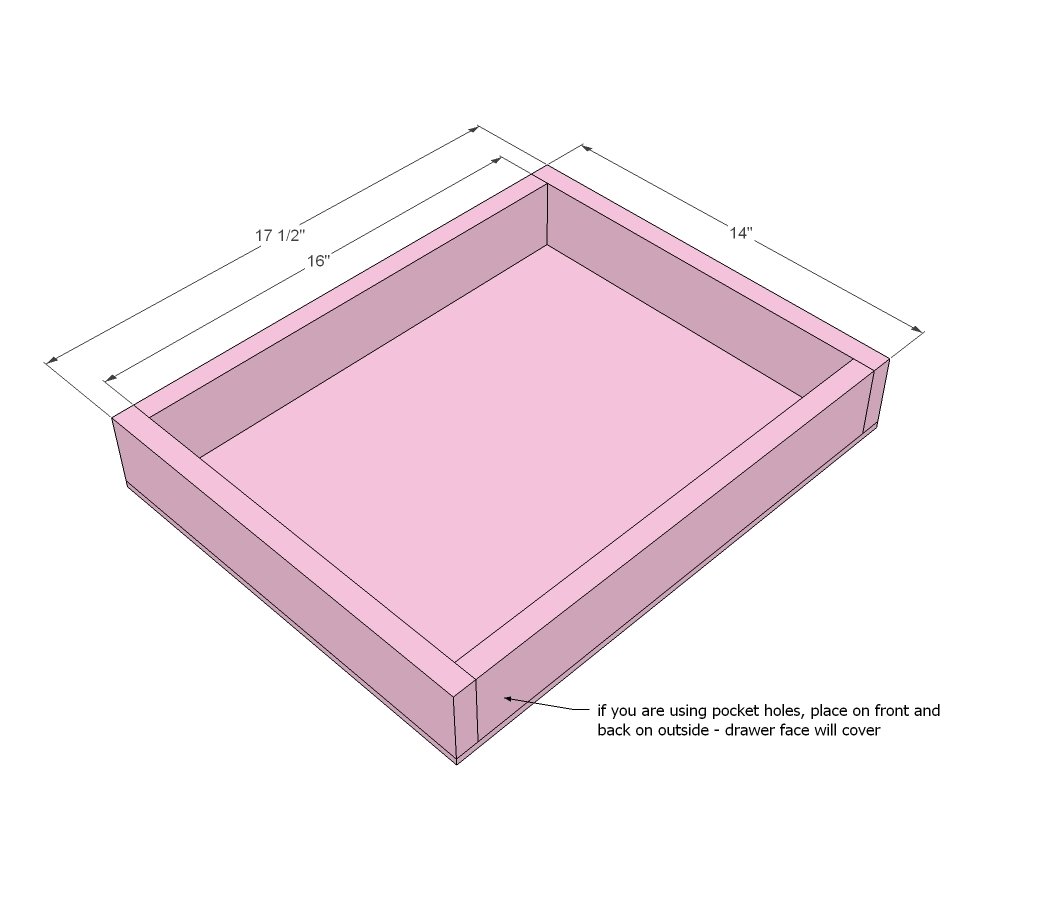
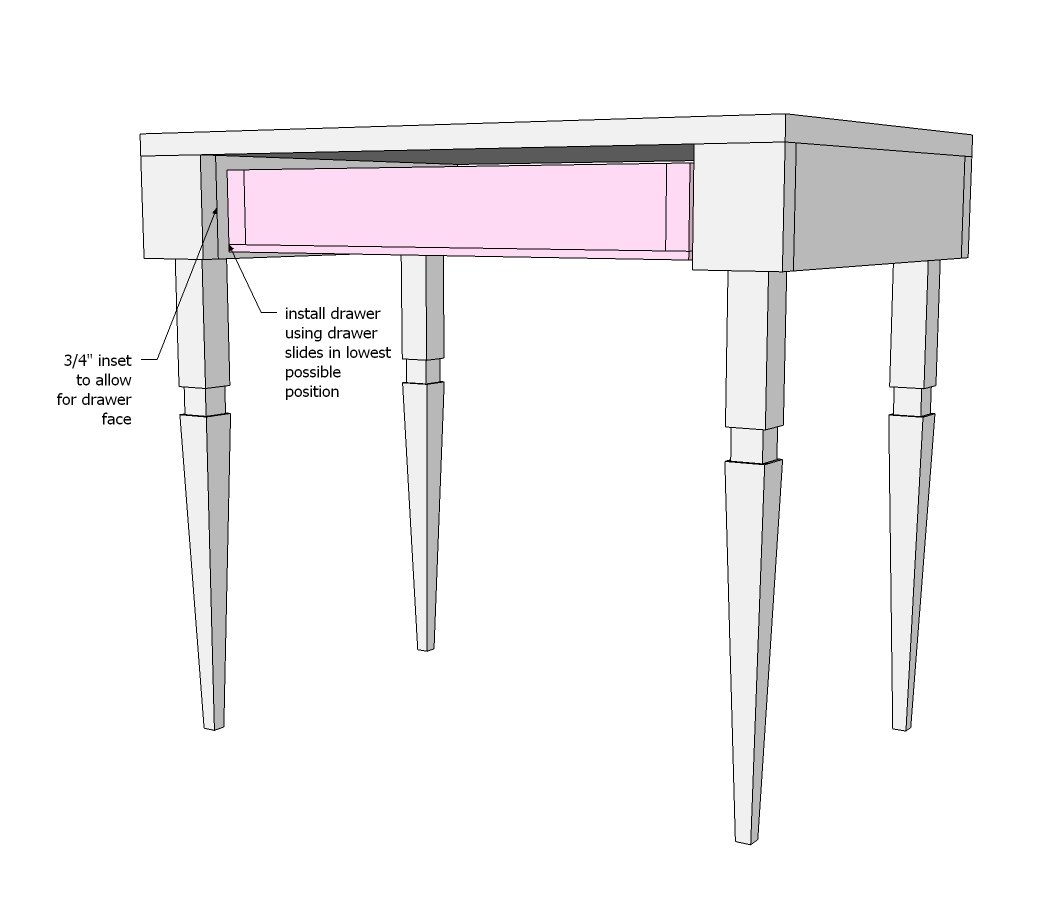
Build your drawer to fit the opening and your slides. This is most likely 1" less in overall width of the inside opening (1/2" for drawer slides on each side is standard) but double check your drawer slides.
Step 5
Step 6
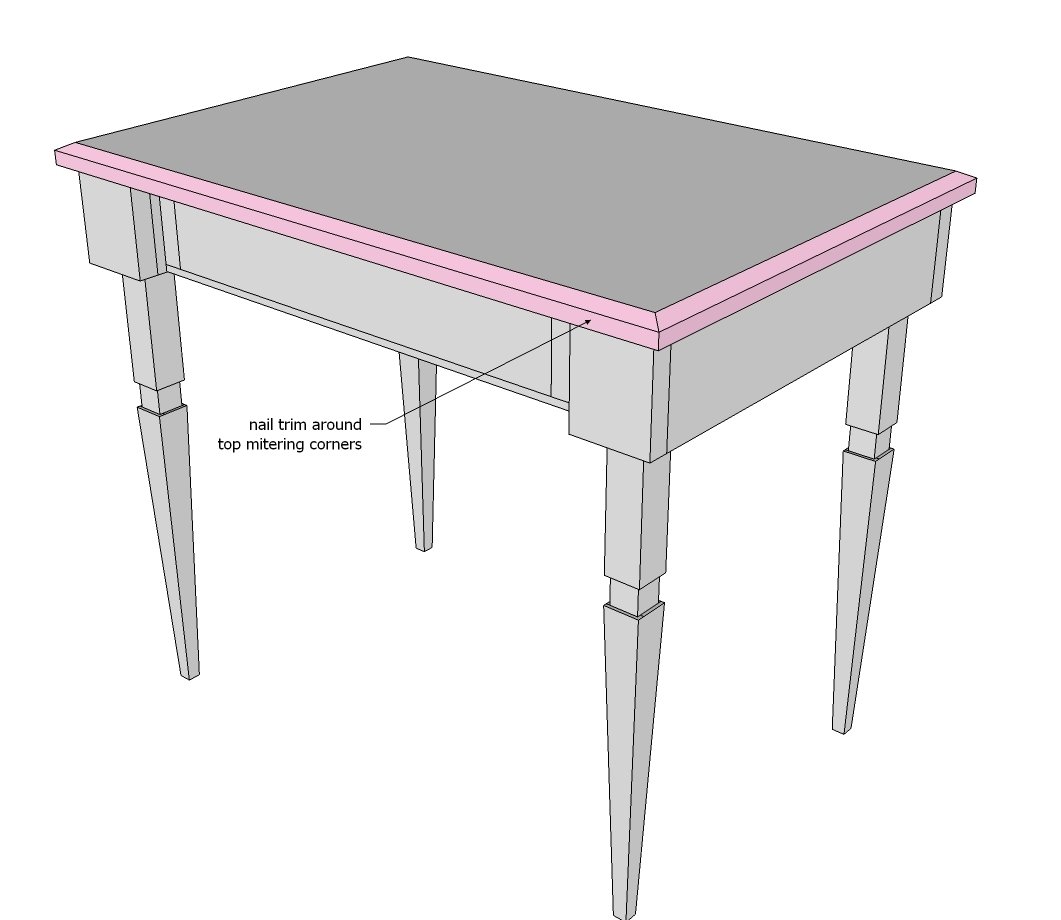
Trim out the top with an edge moulding - optional. This will finish your plywood edges and add a little extra fancy to the edges.
Step 7
Attach drawer face to drawer, leaving an 1/8" gap on each side.
Step 8
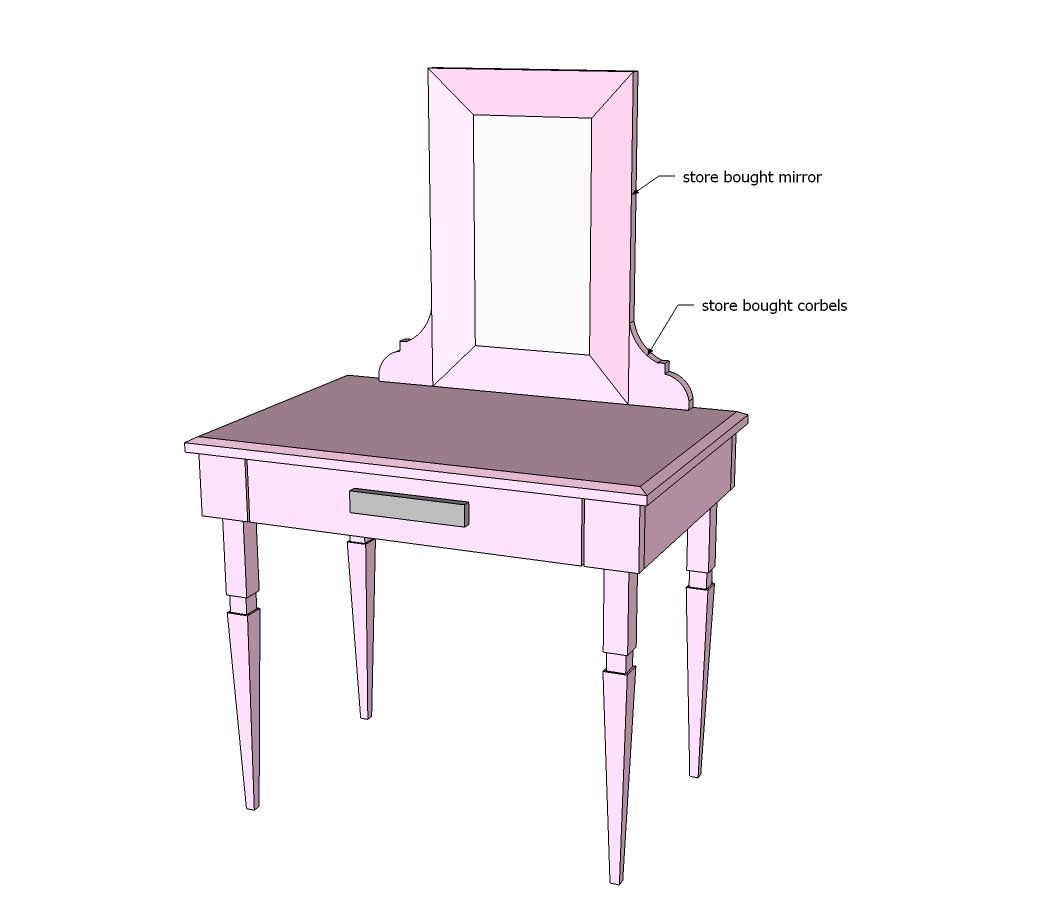
Depending on your mirror, you'll have to support it as you see fit. The corbels may need to be attached at an angle - especially if you have a taller mirror.
Finishing
Sand all surfaces, starting with a medium grit and finishing with fine. Wipe off the dust, fill any holes or gaps with wood filler, and sand smooth once dry. Apply primer if you're painting, then finish with your choice of paint or stain and seal with a durable clear topcoat. For outdoor projects, use exterior-rated primer, paint or stain, and sealer so the piece stands up to the weather.
Source (temporary): https://www.ana-white.com/woodworking-projects/stair-baluster-play-vanity