Stair Leg Flip Top Console Table
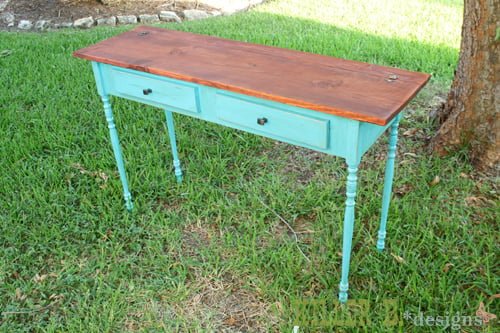
Make this flip top console table from DIY it today!
Specifications
| Project type | Console Table Plans |
|---|---|
| Room | dining room |
| Style | Cottage Style Furniture Plans |
| Difficulty | Beginner Projects |
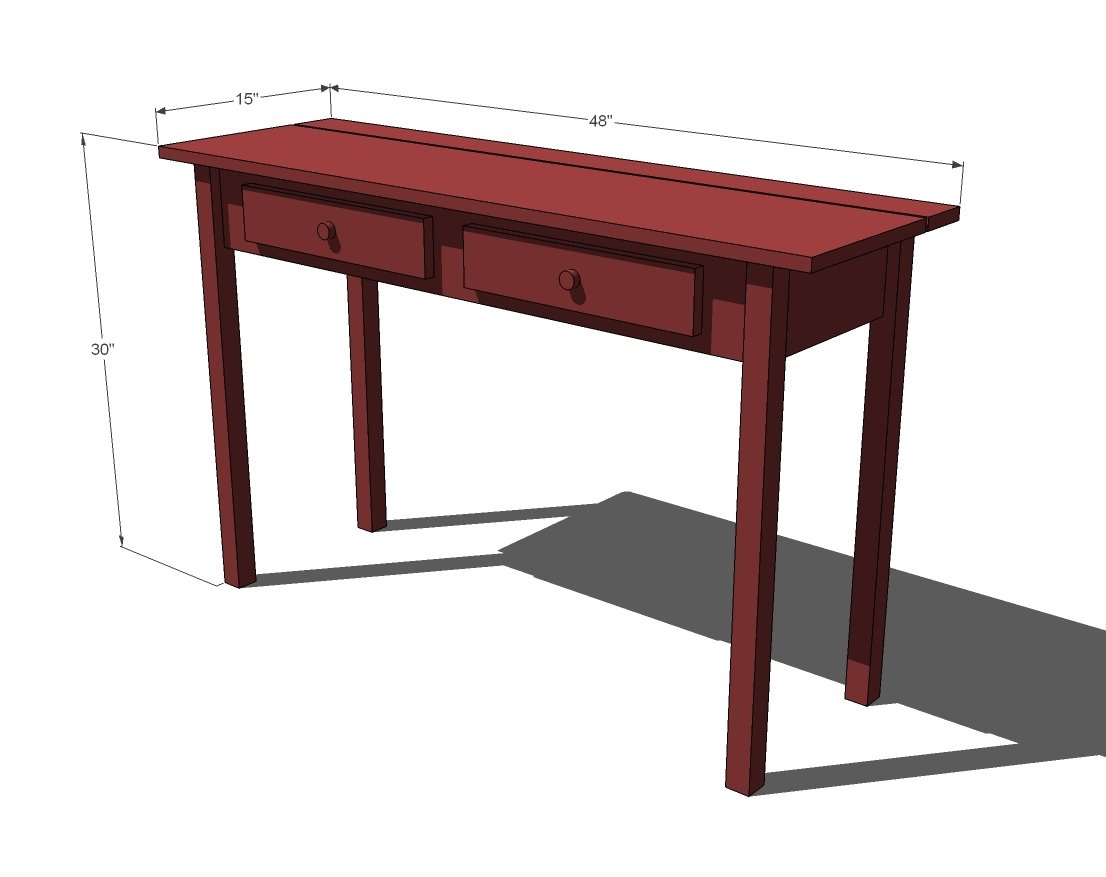
Dimensions
Use the size-specific shopping and cut lists below.
Shopping List
1 – set narrow profile hinges
2 knobs
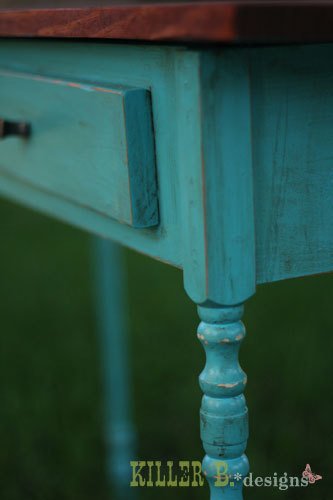
2 – 2x2 @ 8 feet long or other legs (Brooke used stair parts)
1 – 1x6 @ 10 feet long
1 – 1x12 @ 8 feet long
1 – 1x4 @ 8 feet long
Cut List
4 – 2x2 @ 29 ¼” (legs)
2 – 1x6@ 11 ¼” (assumes your 1x12s are 11 ¼” wide – side aprons)
1 – 1x12 @ 40” (bottom shelf)
2 – 1x6 @ 40” (Front/back aprons)
2 – 1x4 @ 15 ½” (false drawer faces)
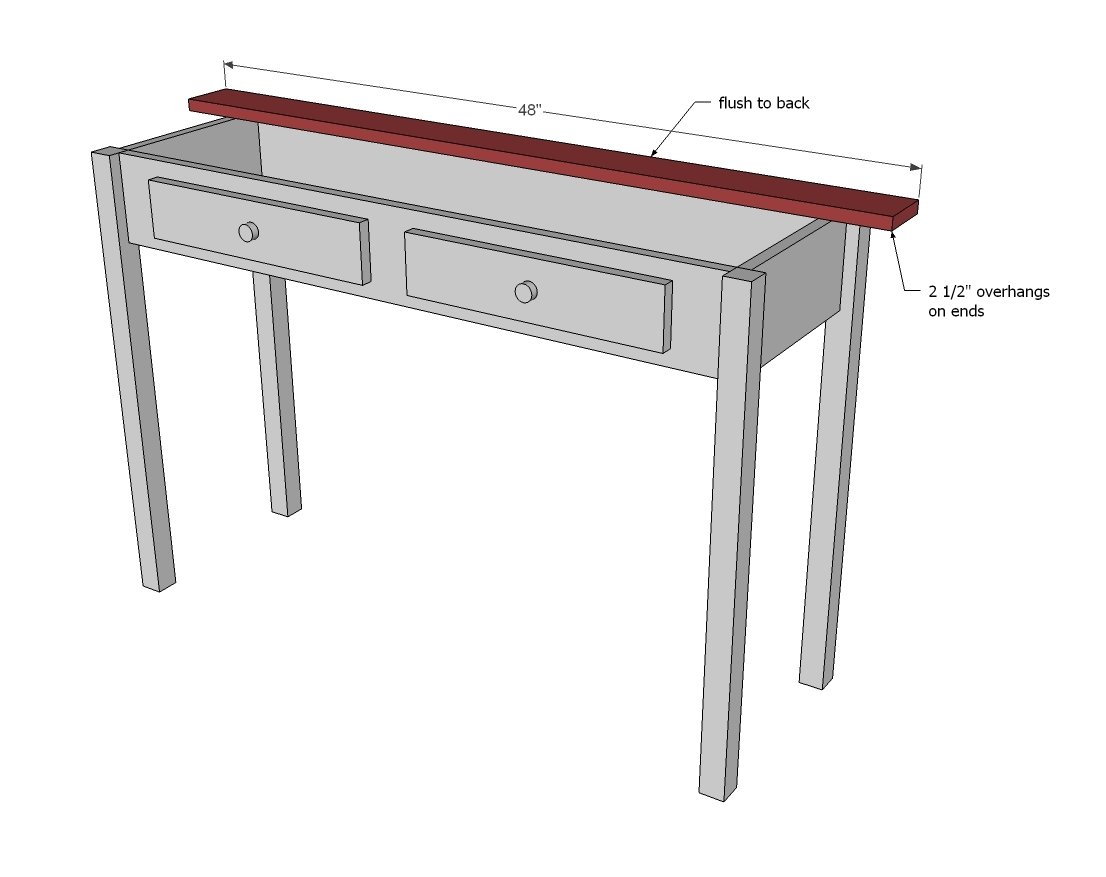
1 – 1x4 @ 48” (back top)
1 - 1x12 @ 48” (front top)
Tools
- measuring tape
- square
- pencil
- safety glasses
- hearing protection
- kreg-jig
- drill
- circular saw
- nailer
- sander
Step-by-step Instructions
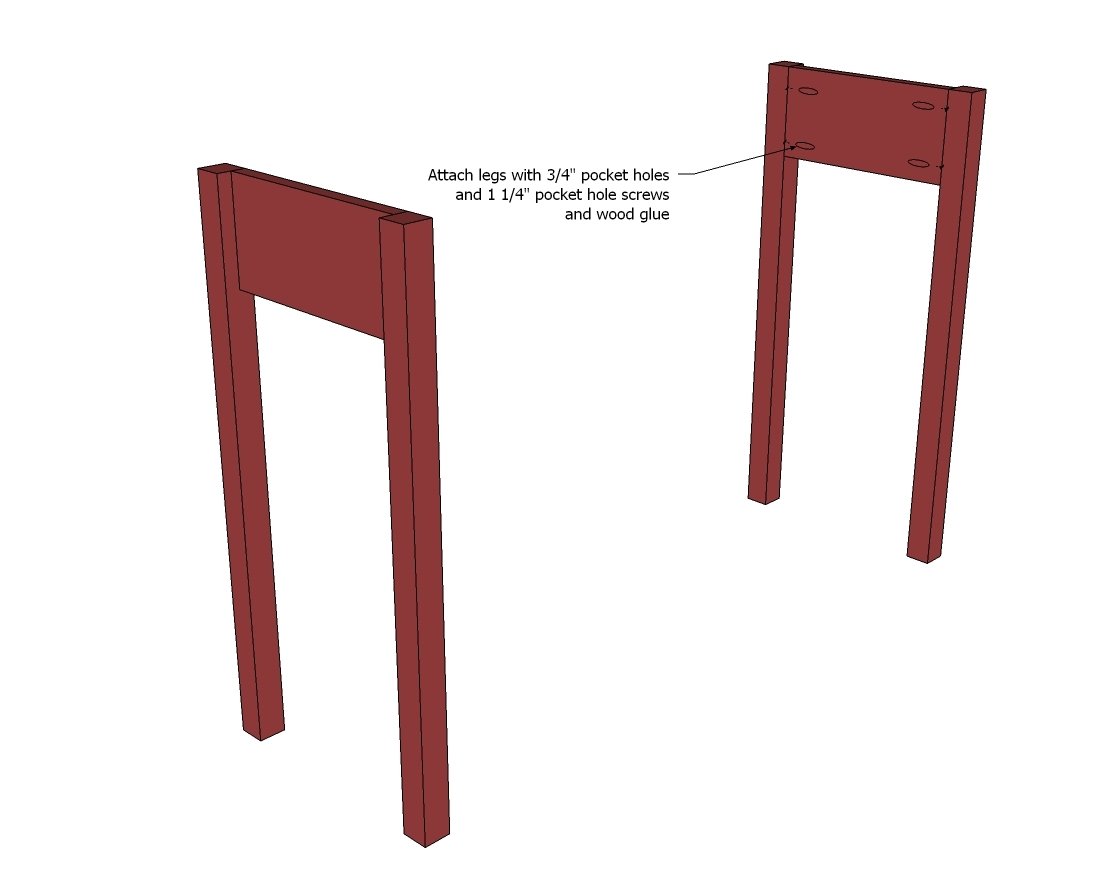
Step 1
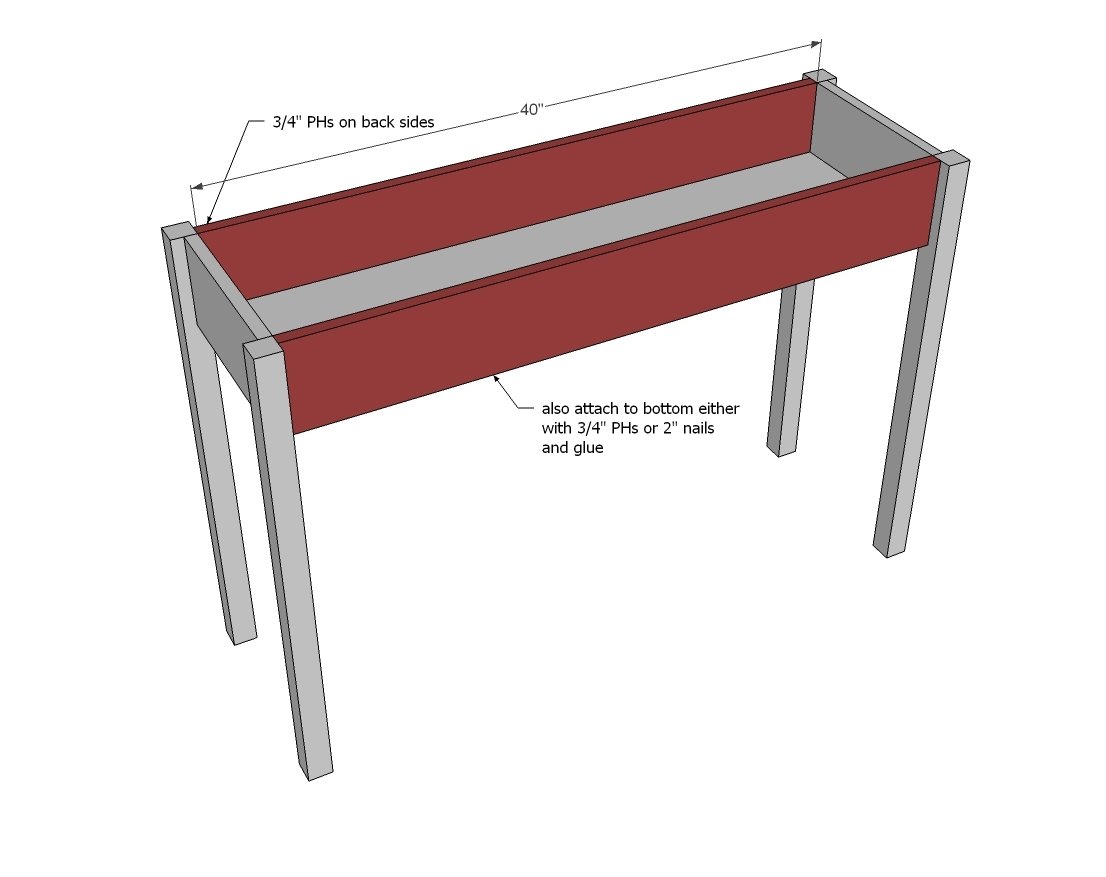
Attach side aprons to legs, flush to insides. The best method is a Kreg Jig set for 3/4" stock and 1 1/4" PH screws.
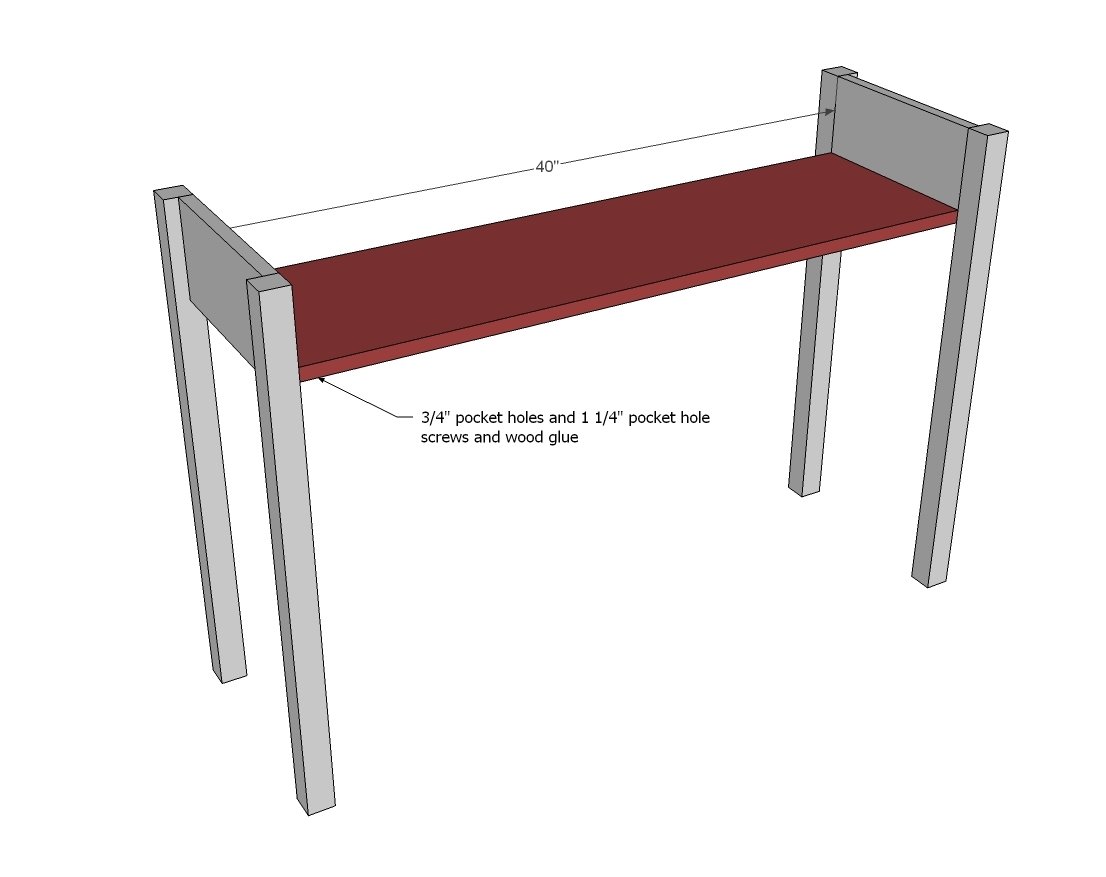
Step 2
Now add bottom shelf. TIP - drill 3/4" PHs around all sides of bottom to attach to side and front and back aprons.
Step 3
Add the front and back aprons attaching to legs and bottom.
Step 4
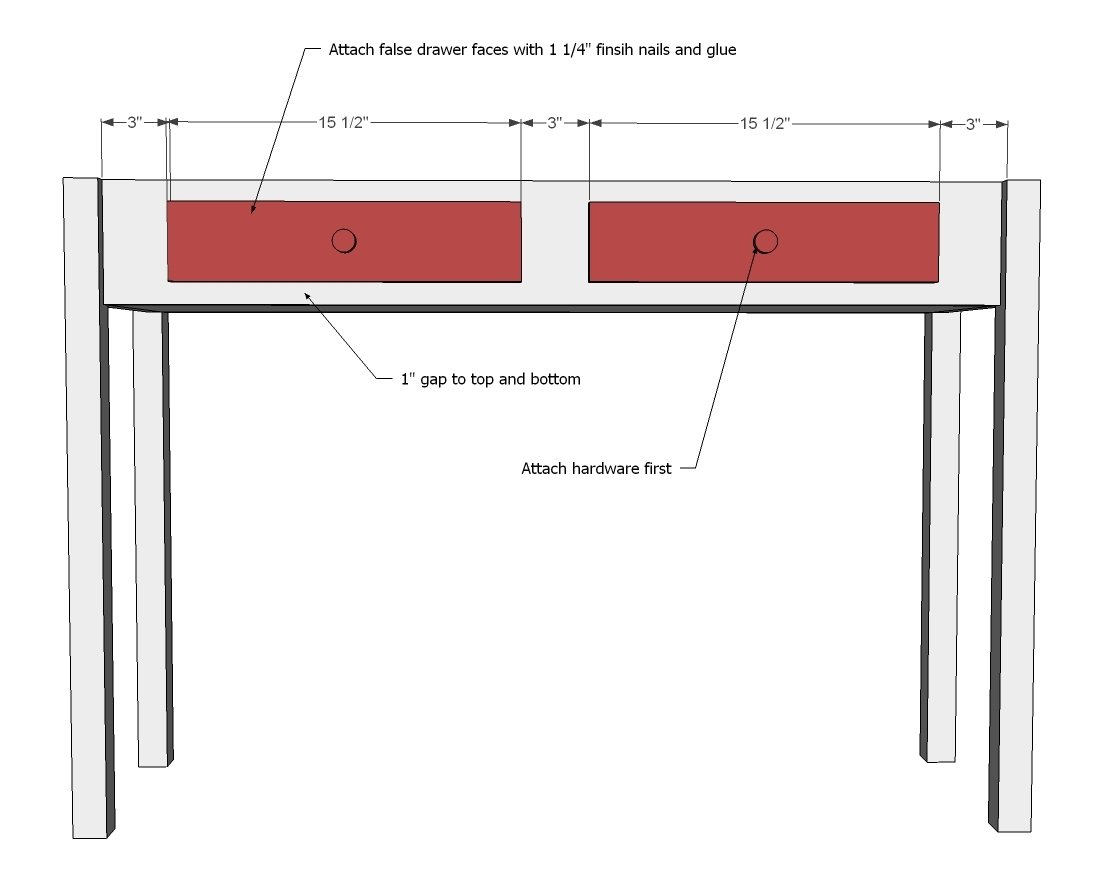
Now nail and glue the false drawer fronts on. TIP: Attach hardware first so you don't have to drill through two layers of wood.
Step 5
Step 6
And then hinge on the front top. Done deal!!!!
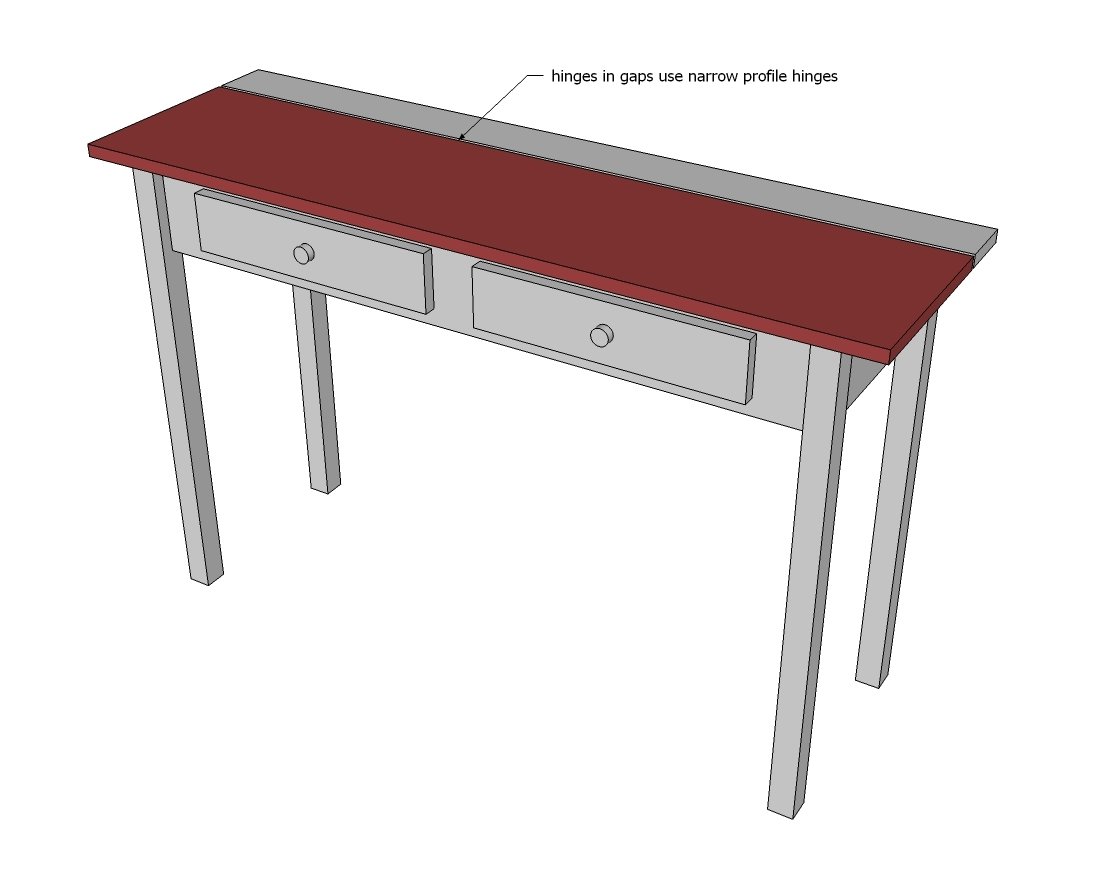
Brooke finished this console with a turquoise chocolate glaze - the tutorial is here.
Thanks Brooke!
Finishing
Sand all surfaces, starting with a medium grit and finishing with fine. Wipe off the dust, fill any holes or gaps with wood filler, and sand smooth once dry. Apply primer if you're painting, then finish with your choice of paint or stain and seal with a durable clear topcoat. For outdoor projects, use exterior-rated primer, paint or stain, and sealer so the piece stands up to the weather.
Source (temporary): https://www.ana-white.com/woodworking-projects/stair-leg-flip-top-console-table