Standing Jewelry Holder
This shows you step by step how to build your own standing jewelry holder — the perfect addition to a nightstand, dresser, vanity, or closet. Made with simple materials and basic tools, it’s an easy DIY project anyone can build in an afternoon. Use it to organize earrings, necklaces, and bracelets in style, or make one as a thoughtful handmade gift. With clean lines and a modern look, this DIY jewelry holder is a fun, beginner-friendly project that adds function and beauty to your space.
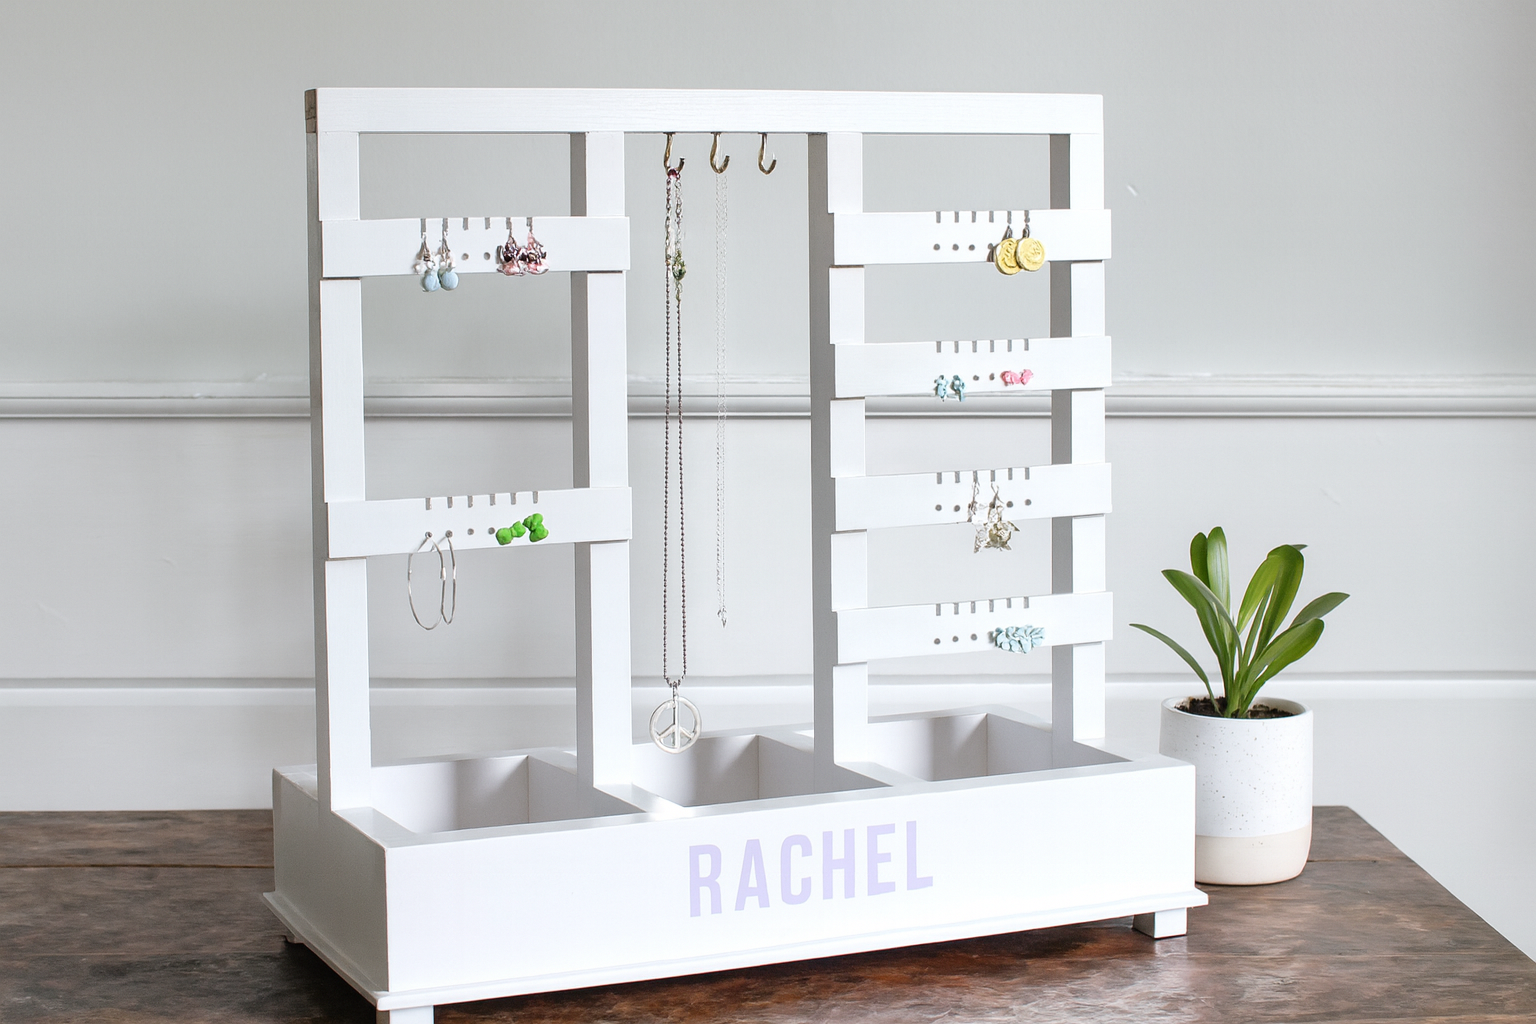
Specifications
| Project type | Other Projects |
|---|---|
| Room | Teens |
| Style | Farmhouse Furniture |
| Difficulty | Beginner Projects |
| Estimated cost | Under $20 |
Dimensions
Use the size-specific shopping and cut lists below.
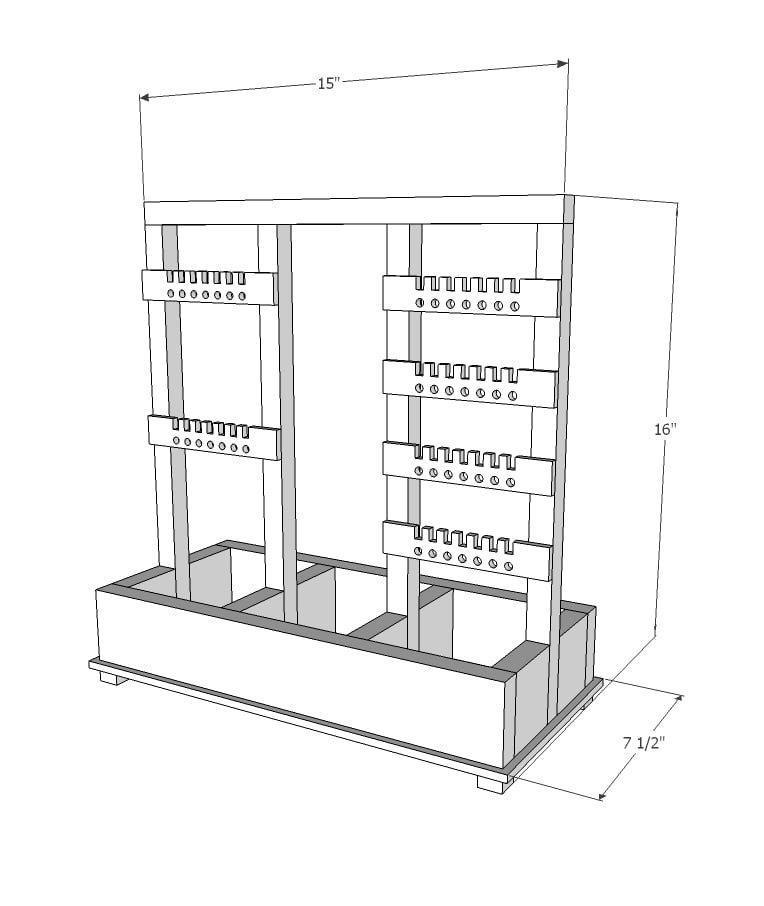
Shopping List
- 3/4" square wood dowels (1x1) - 5 feet total needed
- 4 feet of 1x3 boards
- 1/4" plywood at least 16" x 12"
- 1-1/4" and 3/4" brad nails
- hot glue (recommended)
Cut List
- 3 - 1x1 @ 14-1/2"
- 6 - 1x3 @ 2-3/8"
- 1 - 1x1 @ 15"
- 2 - 1x3 @ 15"
- 1 - 1/4" plywood 15-1/2" x 7-1/2"
- 4 - 1x1 @ 1/2"
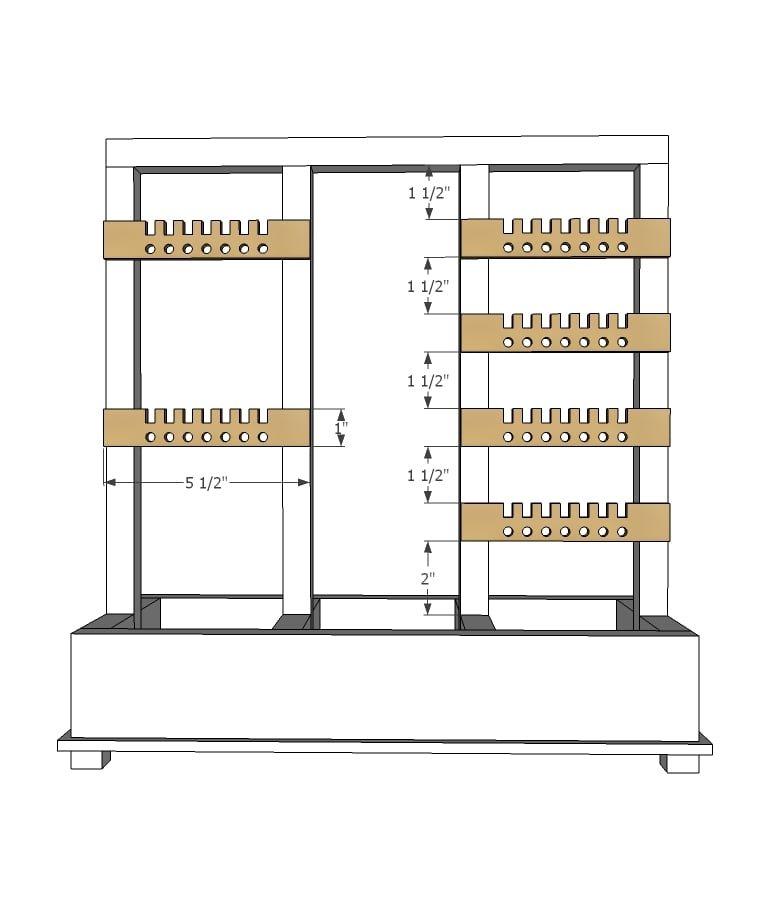
- 6 - 1/4" plywood @ 1" x 5-1/2"
Tools
- measuring tape
- square
- pencil
- safety glasses
- hearing protection
- drill
- compound miter saw
- nailer
- sander
- countersink drill bit
Step-by-step Instructions
Step 1
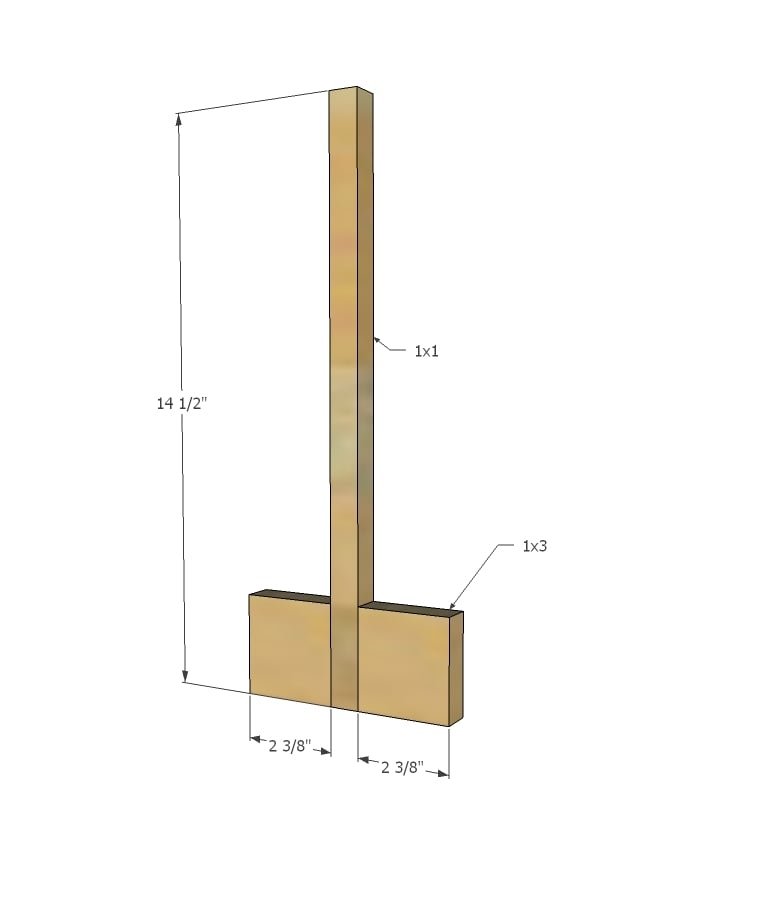
Build three of the uprights. Jaime and I designed this way for added strength. Start by attaching the 1x upright to one of the 1x3s with glue and 1-1/4" brad nails. Then glue and clamp the second 1x3 to the upright, and angle nail from the 1x3 into the 1x1. Let dry.
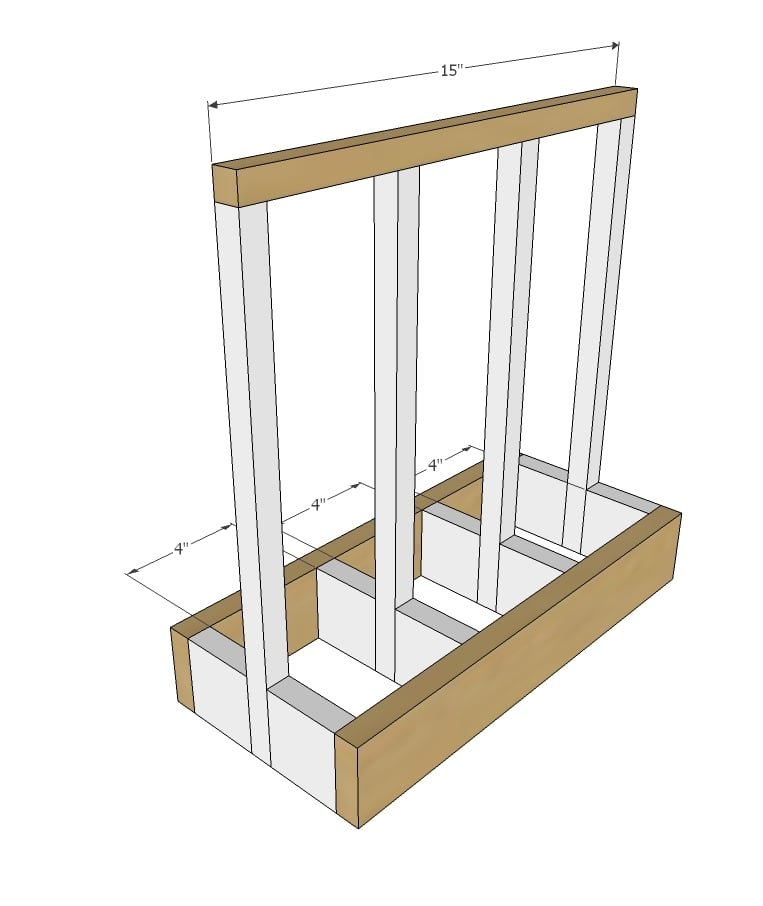
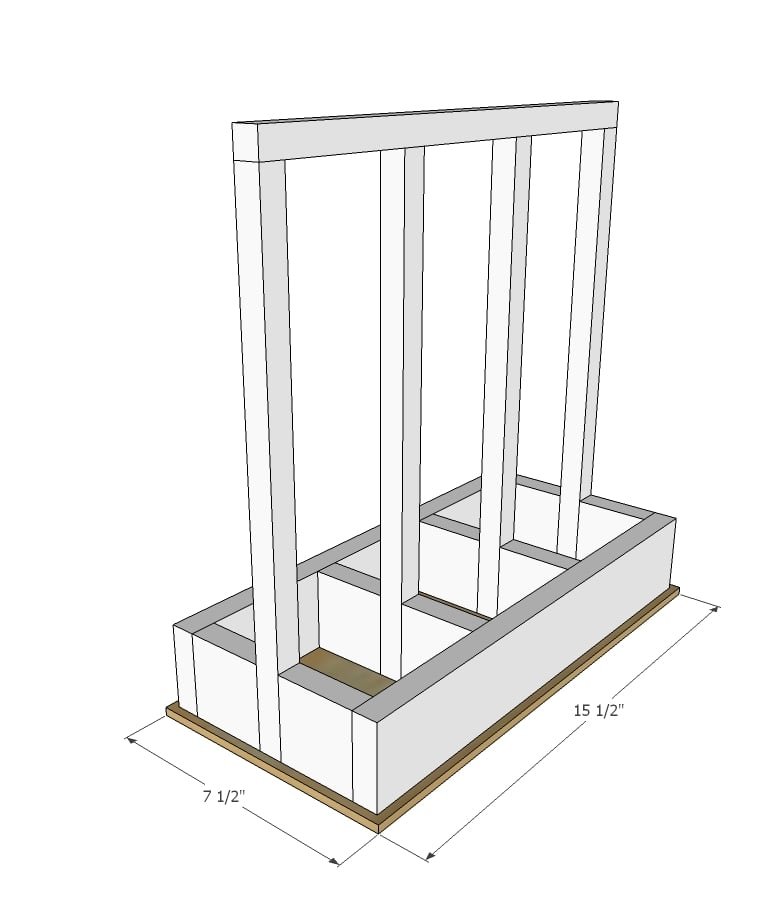
Attach side 1x3s to the uprights to make the tray withglue and 1-1/4" nails.
Attach top 1x1 to the top of uprights with 1-1/4" nails and wood glue.
Step 3
Attach base plywood with even overhangs on all sides with 3/4" brad nails and wood glue.
Step 4
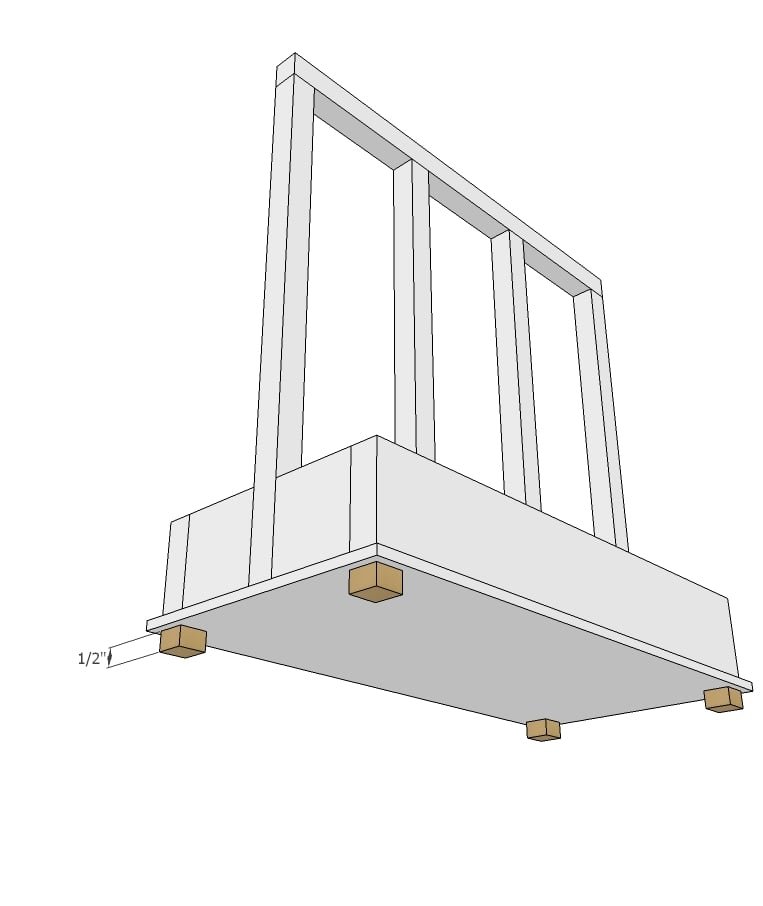
Attach "legs" with 1-1/4" brad nails and wood glue, with legs lined up with organizer tray sides (not plywood edges).
Step 5
Finishing
Sand all surfaces, starting with a medium grit and finishing with fine. Wipe off the dust, fill any holes or gaps with wood filler, and sand smooth once dry. Apply primer if you're painting, then finish with your choice of paint or stain and seal with a durable clear topcoat. For outdoor projects, use exterior-rated primer, paint or stain, and sealer so the piece stands up to the weather.
Source (temporary): https://www.ana-white.com/woodworking-projects/standing-jewelry-holder-free-woodworking-plan