Steel Magnet Wall
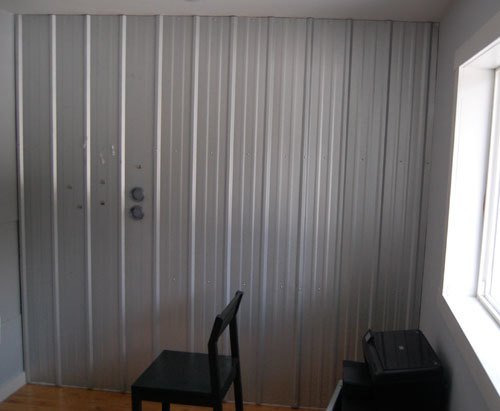
A magnetic steel wall is both indestructable and cool looking! Super functional in an office or children's space. Also makes small rooms appear larger because of the light reflection.
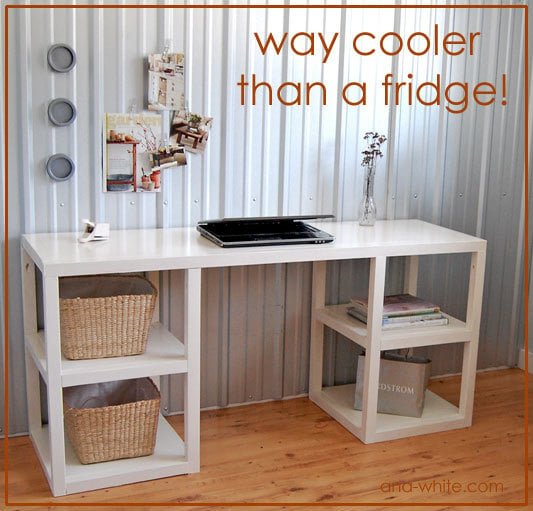
Specifications
| Project type | Home DIY |
|---|---|
| Room | Kids and Toys |
| Style | Modern Style Furniture Plans |
| Difficulty | Intermediate |
| Estimated cost | $50 - $100 |
Shopping List
1 sheet of 8′ galvanized steel roofing for every 3′ of horizontal wall space that you want to cover
3 – 1×2 furring strips (I can’t post a post without 1x2s!)
for every 8′ of horizontal wall space you will cover 3/4″ lath screws or roofing screws
2″ wood screws
tin snips
metal circular saw blade (if you need to cut the sheets)
Cut List
Cut to fit your wall as instructed in the directions.
Tools
- measuring tape
- square
- pencil
- safety glasses
- hearing protection
- drill
- circular saw
- level
Step-by-step Instructions
Measure your wall
My wall is 8′ tall and 103″ wide. So I can use a full sheet of 8′ tin, but need to rip the last piece because each piece of tin is 3 feet wide. If your wall is less than 96″ tall, you will need to trim all the sheets of tin carefully with the metal saw blade. Be very careful, clamp, wear hearing and eye protection, don’t attempt if you have not cut metal before. It’s different than plywood. It has ridges and sparks. You may be able to have the company that you purchase the tin from cut your metal. My tin came from Blue and was $24 a sheet.
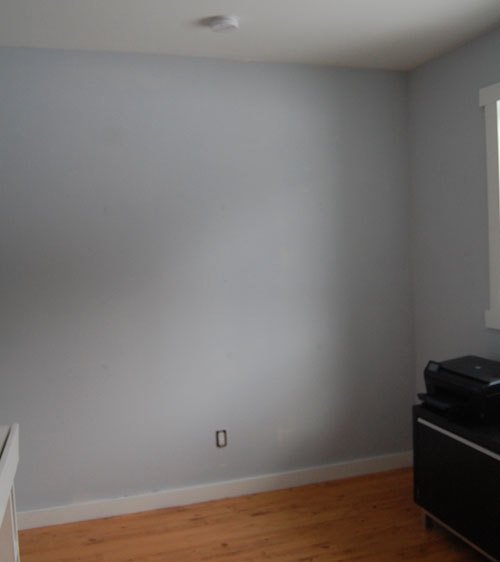
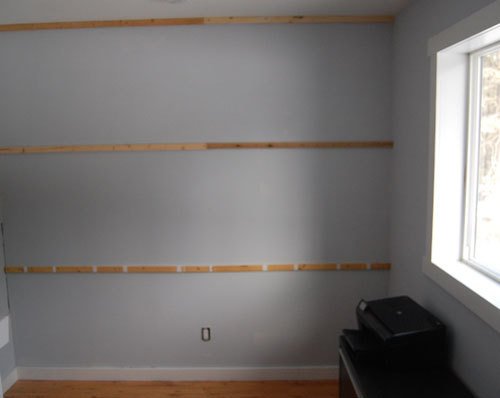
Furring Strips
You need something horizontal to screw the tin to. So I screwed furring strips to the studs in the wall. Space the furring strips so that the centers are 32″ apart. Then carefully measure, double check, and write down the location of the furring strips from the ceiling downward. Transfer this measurement to your tin and predrill holes in your tin to line up with the furring strips (TIP: You can drill through multiple layers of tin at the same time). Take note of how my screws are in a pattern. If your baseboard is not 3/4″ thick, add a furring strip to the bottom (slightly above the baseboard) as well. Take note of the bottom furring strip when you predrill your metal.
Roof it
If you did the first two steps correctly, this is the easy part. Screw the metal to the furring strips through the predrilled holes. Make sure your tin is square with the room. Use tin snips to cut around any baseboards.
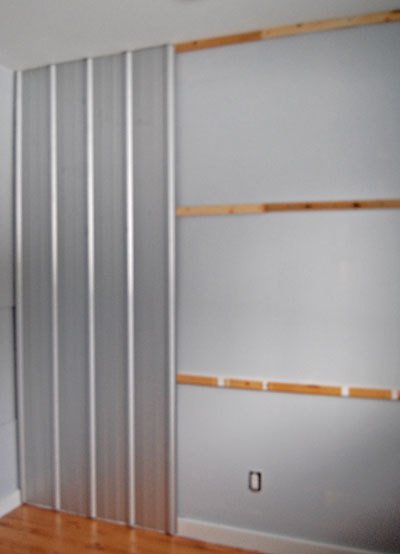
More Tin
Continue screwing tin to the furring strips. When you get to the last sheet, you may need to rip it to fit. Use the metal saw blade and a circular saw. Snip around any baseboards. And yes, that is my beloved angle chair The great thing about this project is there is no finish required. It’s done. Get your magnets out!
Finishing
Sand all surfaces, starting with a medium grit and finishing with fine. Wipe off the dust, fill any holes or gaps with wood filler, and sand smooth once dry. Apply primer if you're painting, then finish with your choice of paint or stain and seal with a durable clear topcoat. For outdoor projects, use exterior-rated primer, paint or stain, and sealer so the piece stands up to the weather.
Source (temporary): https://www.ana-white.com/woodworking-projects/steel-magnet-wall