Stocking Stand
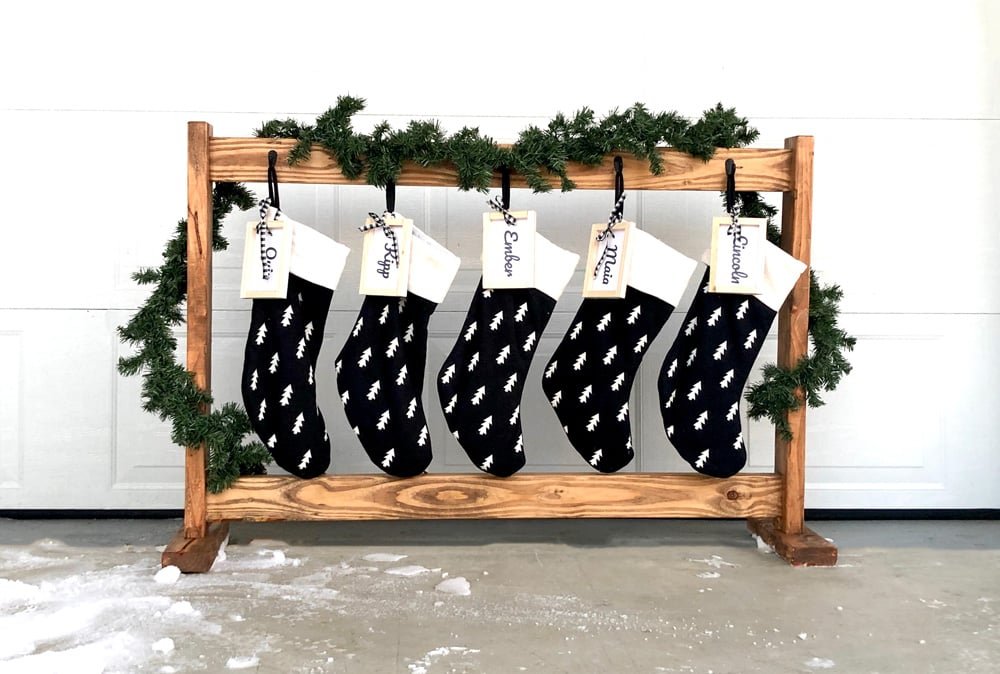
Hang the stockings without a fireplace or drilling holes in the wall! This quick and easy to build stocking stand cost under $20. from
Specifications
| Project type | Other Projects |
|---|---|
| Room | living room |
| Style | Farmhouse Furniture |
| Difficulty | Beginner Projects |
| Estimated cost | Under $20 |
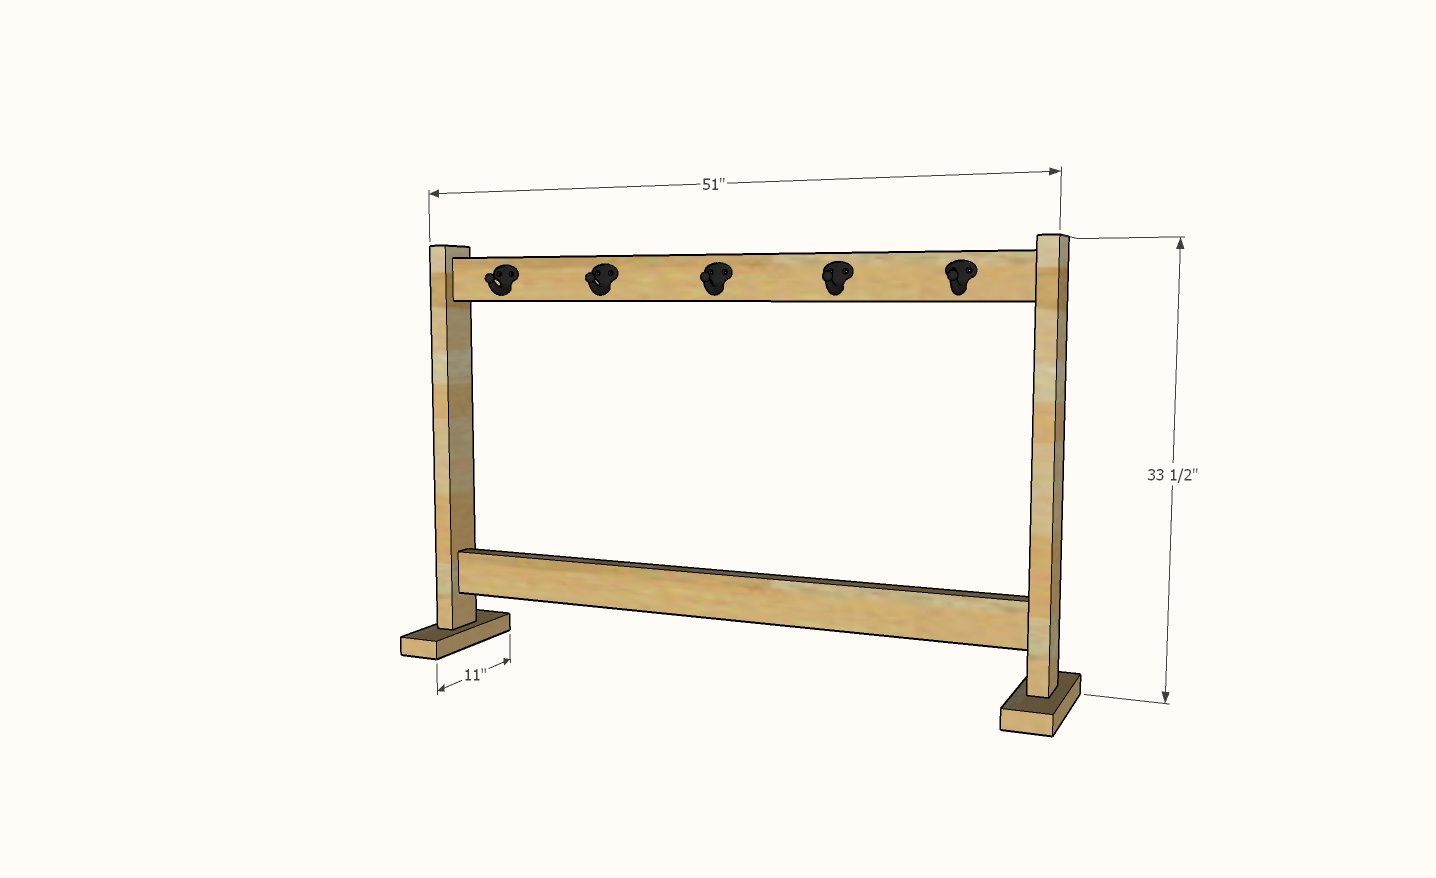
Dimensions
Use the size-specific shopping and cut lists below.
Shopping List
- 2 - 2x4 @ 8' or stud length
- 12 - 2-1/2" long self tapping wood screws like these
- 5 coat hooks or cup hooks or knobs
Coat hooks are about $2 a piece. Cut hooks are about 10 cents each. If you have leftover knobs, or Christmas themed knobs, use them for a fun touch.
Cut List
- 2 - 2x4 @ 32"
- 2 - 2x4 @ 10-1/2"
- 2 - 2x4 @ 46"
Tools
- measuring tape
- square
- drill
- circular saw
Step-by-step Instructions
Step 1
Build two of the legs by attaching the shortest 2x4 to the medium length one. Use two screws per joint.
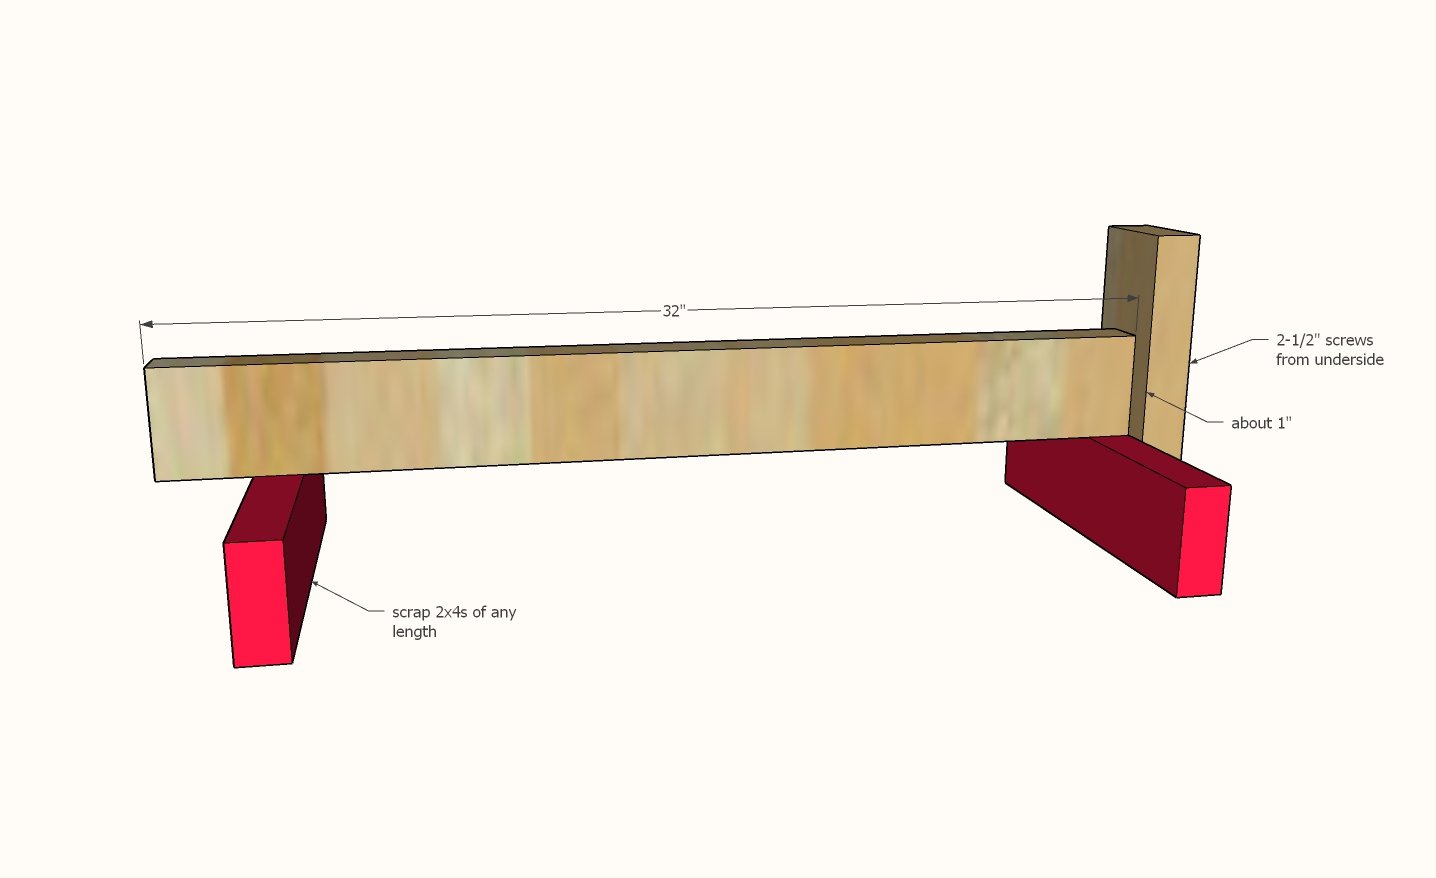
Attach the bottom lengthwise 2x4 to the two legs, two screws per joint.
Then attach the top 2x4 with screws.
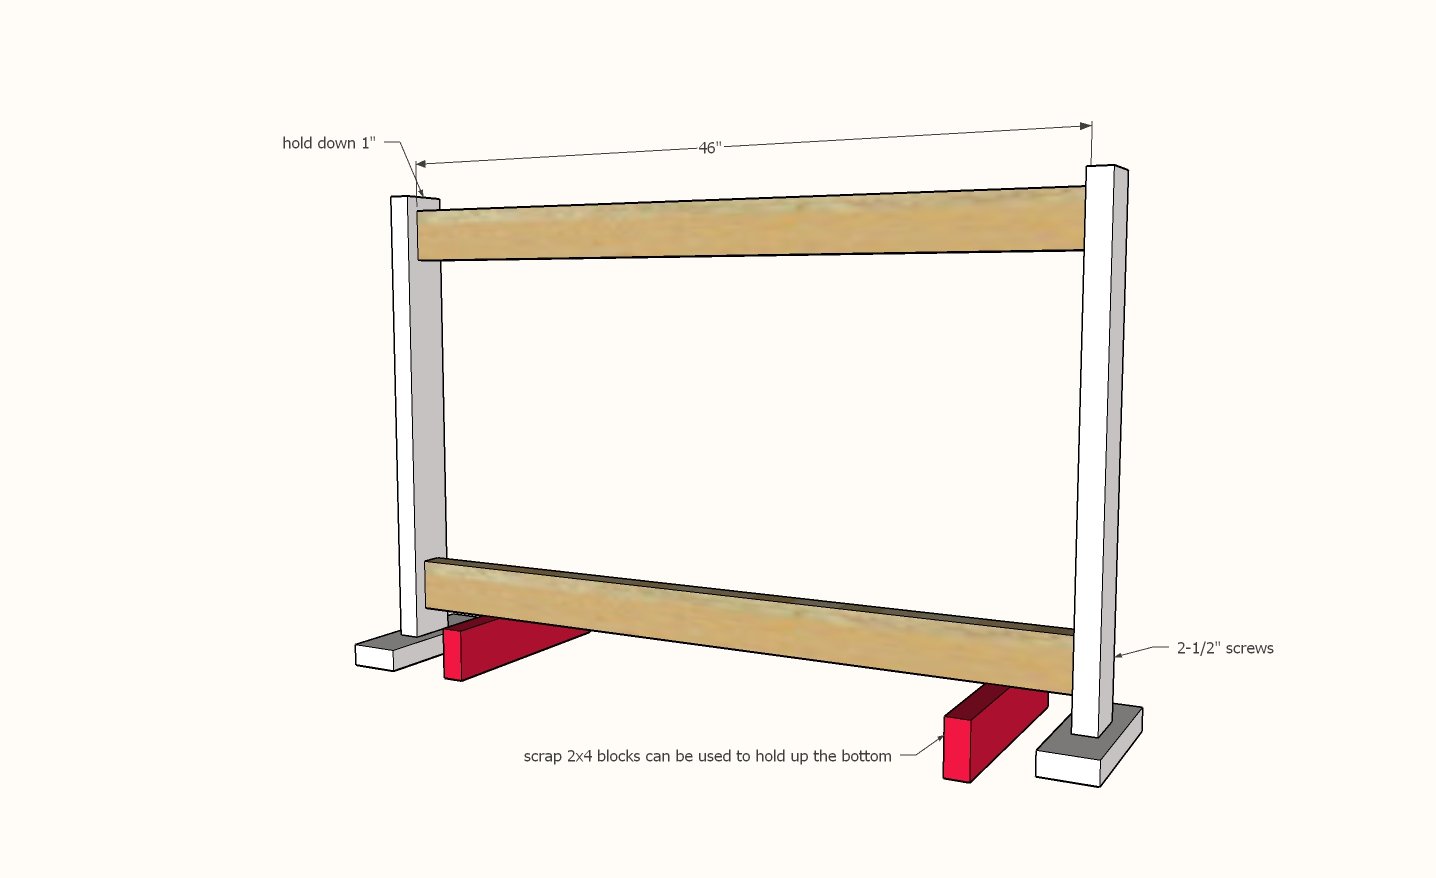
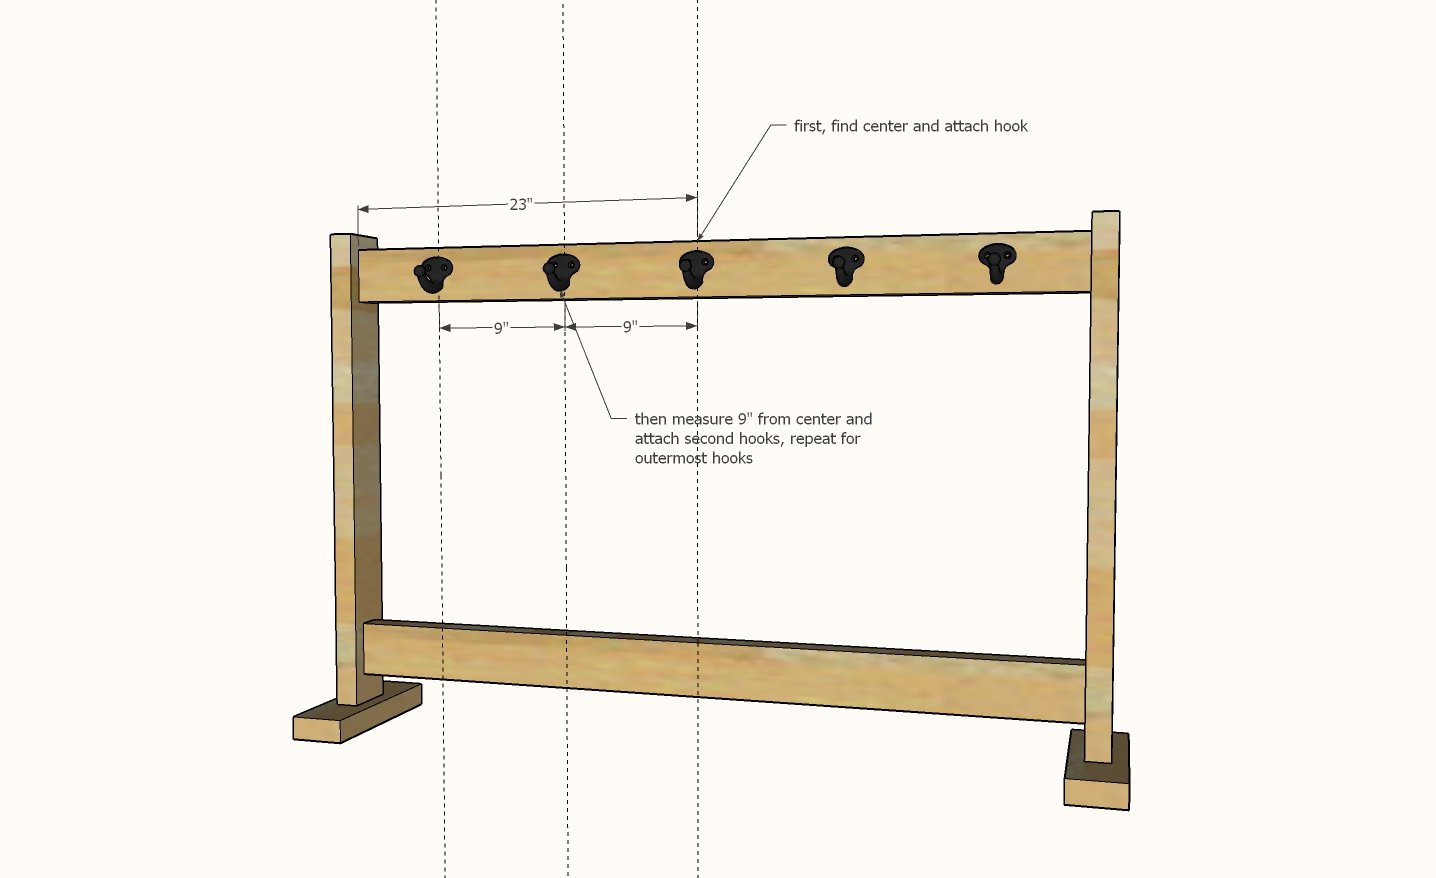
Find the center of the top 2x4 and attach hook.
Measure off the center 9" and attach next hooks. Repeat for third row of hooks.
Finishing
Sand all surfaces, starting with a medium grit and finishing with fine. Wipe off the dust, fill any holes or gaps with wood filler, and sand smooth once dry. Apply primer if you're painting, then finish with your choice of paint or stain and seal with a durable clear topcoat. For outdoor projects, use exterior-rated primer, paint or stain, and sealer so the piece stands up to the weather.
Source (temporary): https://www.ana-white.com/woodworking-projects/stocking-stand