Storage Daybed or Captains Bed (Full Depth Storage)
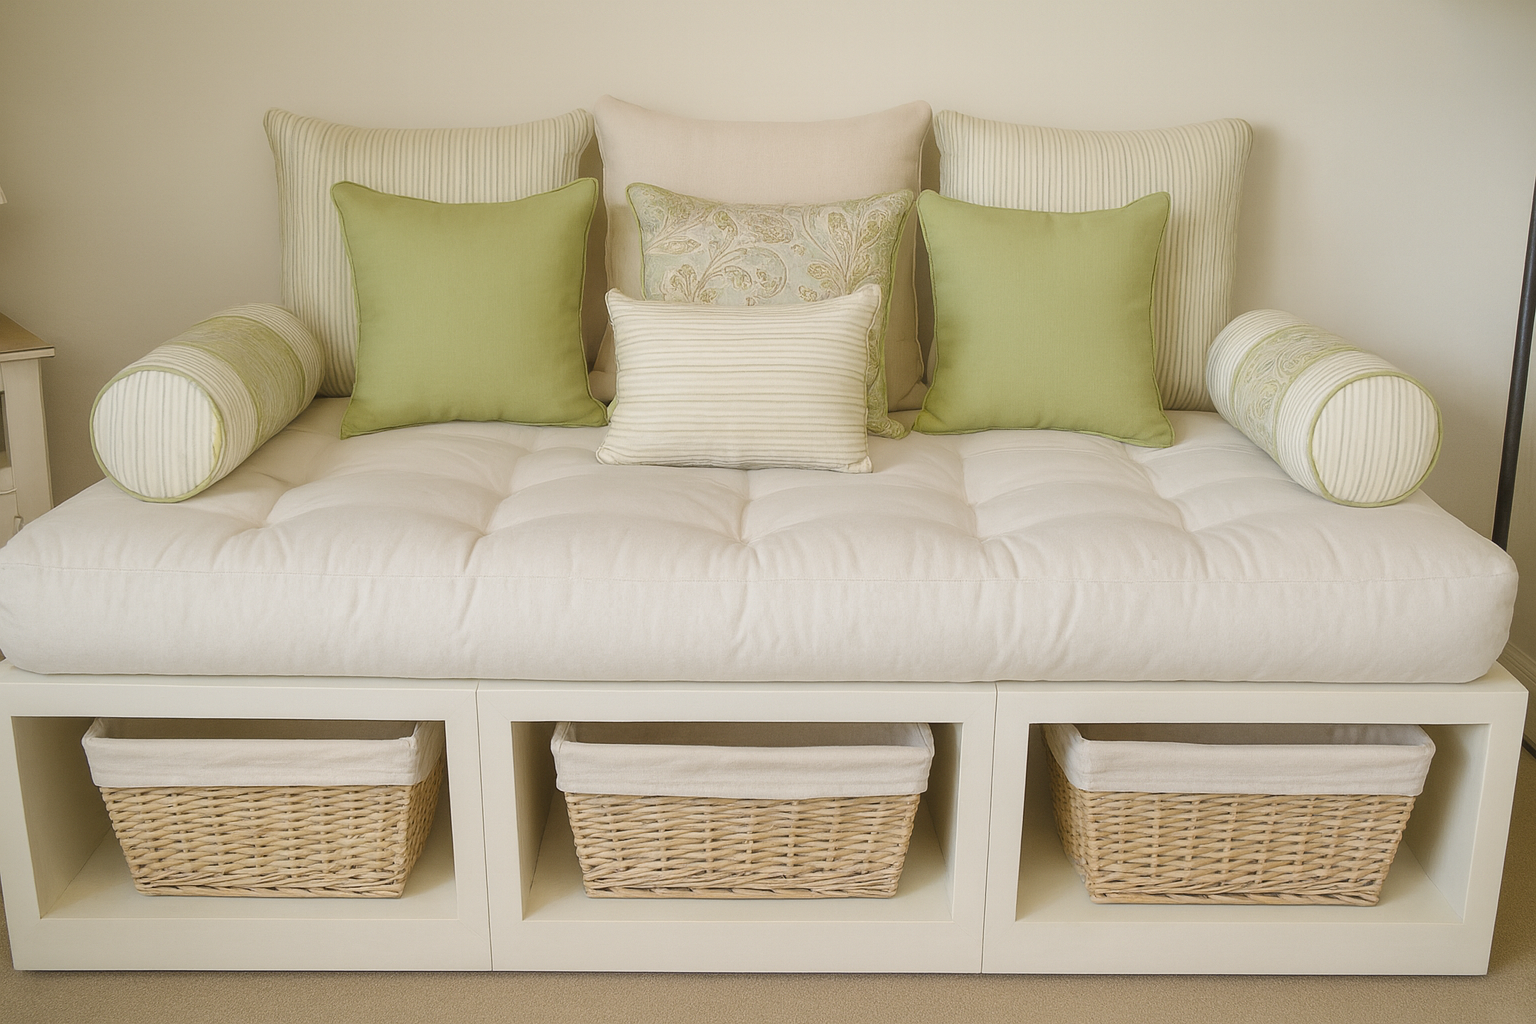
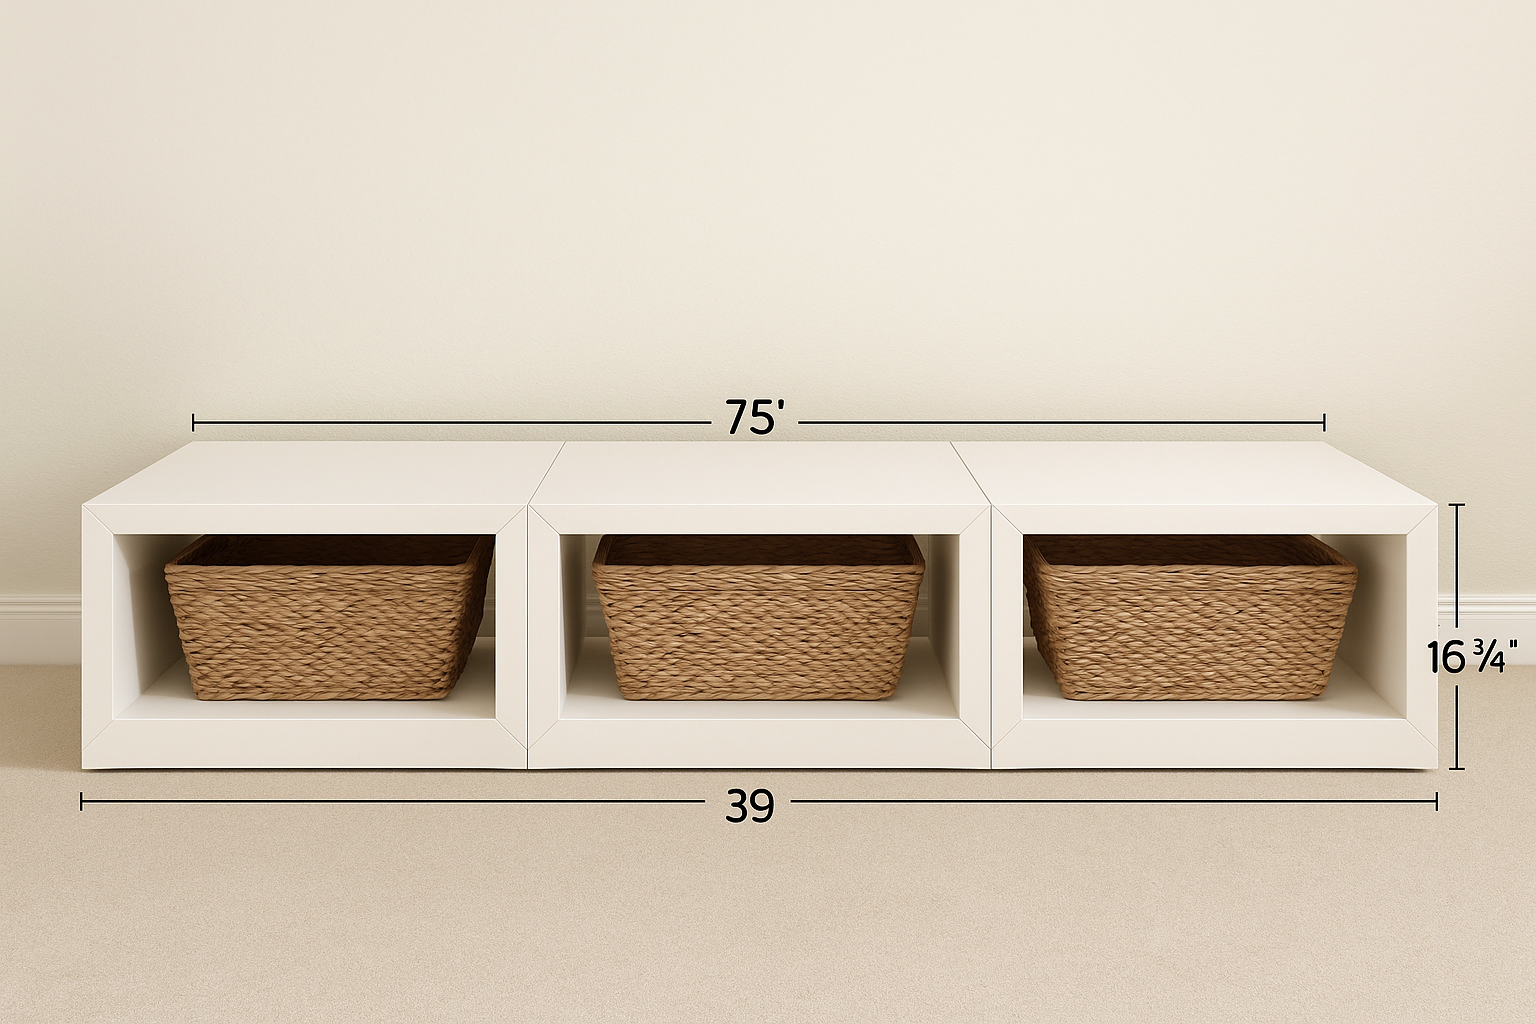
Transform any room with this versatile captain’s bed style daybed base that doubles as seating or sleeping space. Built from three modular bench units, the frame measures 75" long x 39" deep x 16-3/4" tall and features openings that extend all the way through, providing complete storage access beneath the bed. Use it as a daybed in a guest room, extra seating in a home office, or a smart extra bed for overnight guests. The full pass-through cubbies are ideal for baskets, totes, or bins, keeping bedding, toys, or office supplies organized and out of sight. Key Features: • Overall size: 75"L x 39"D x 16-3/4"H • Three separate bench units for flexible setup • Full pass-through cubbies for complete under-bed storage • Works as a daybed, captain’s bed, office seating, or extra bed • Fits large baskets and bins for organized living
Specifications
| Project type | Beds and Bed Frames |
|---|---|
| Room | Bedroom |
| Difficulty | Intermediate |
| Estimated cost | $100-$150 |
Dimensions
Use the size-specific shopping and cut lists below.
Shopping List
- 3 sheets of 3/4 inch plywood
- 3 - 1x4 @ 8 feet
- 6 - 1x2 @ 8 feet
- recommend joinery is 1-1/4" pocket hole screws but can use 1-1/4" brad nails or 2" self tapping screws
- wood glue
- wood filler
- paint and finishing supplies
Cut List
Pieces to Frame 3 Benches
- A) 6 – 3/4″ Plywood cut at 16″ X 39″ (Sides of Benches)
- B) 3 – 3/4″ Plywood cut at 23 1/2″ X 39″ (Bottoms of Benches)
- C) 3 – 3/4″ Plywood cut at 23 1/2″ X 12 1/2″ (Center Cubby Dividers)
- D) 3 – 3/4″ Plywood cut at 25 X 39″ (Top of the Benches) Trim Pieces for all three Benches
- E) 6 – 1×4 @ 25″ (Bottom Trim, Top 1 1/2″ upper corners mitered off at 45 degrees, see diagrams below)
- F) 6 – 1×2 @ 25″ (Top Trim, Ends mitered off at 45 degrees, see diagrams)
- G) 12 – 1×2 @ 14 3/4″ (Side Trim, ends mitered off at 45 degrees, see diagrams) Trim Pieces for the 2 Outer Benches, Exposed Edges
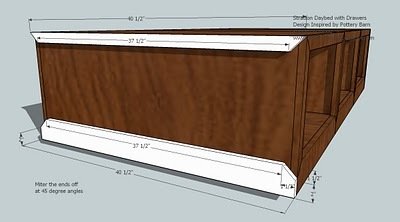
- H) 2 – 1×4 @ 40 1/2″ (Bottom Trim, top 1 1/2″ upper corners mitered off at 45 degrees, see diagrams)
- I) 2 – 1×2 @ 40 1/2″ (Top Trim, ends mitered off at 45 degrees, see diagrams)
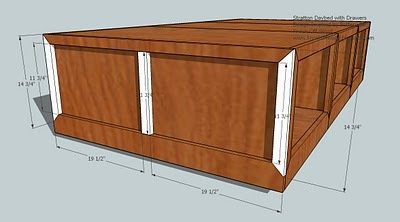
- J) 4 – 1×2 @ 14 3/4 (Side Trim, ends mitered off at 45 degrees, see diagrams)
- K) 2 – 1x2s @ 11 3/4″ (Middle trim for the outside end benches) Optional Drawer Pieces
- L) 6 – 3/4″ Plywood cut at 20 1/4″ x 18 1/4″ (Drawer Bottoms)
- M) 6 – 1×12 @ 20 1/4″ (Backs of Drawers)
- N) 12 – 1×12 @ 19″ Sides of Drawers
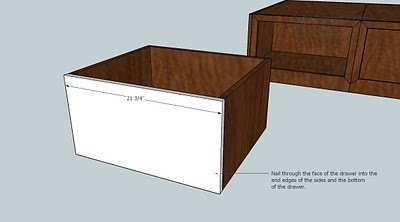
- O) 6 – 1×12 @ 21 3/4″
Tools
- measuring tape
- square
- pencil
- hammer
- safety glasses
- hearing protection
- circular saw
- compound miter saw
- nailer
- sander
Step-by-step Instructions
Step 1
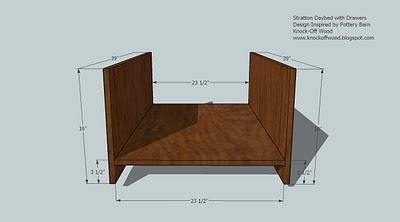
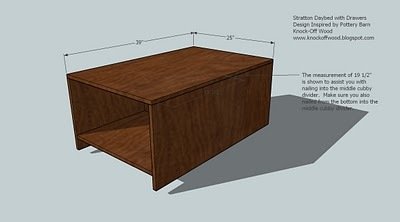
You will make 3 of the following benches: Start by nailing through the sides, A, into the bottom B. Use the measurements above to guide you.
Step 2
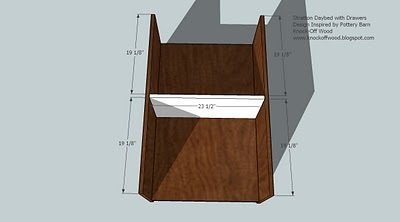
Then nail the center cubby divider, C, in place as shown above. Make sure you also nail from the bottom of the benches into the center cubby divider.
Step 3
Nail the top of the bench, D, to the benches, as shown above. Make sure you nail into the center cubby divider, C, from step 3.
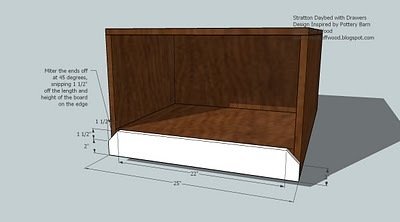
Step 4
Cut trim piece E as shown above. Then nail to the bench on the top and ends, keeping all outside edges flush.
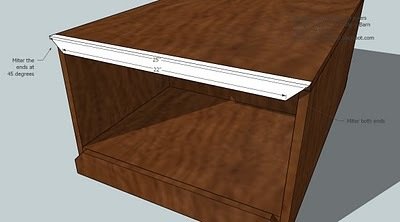
Step 5
Add the top trim.
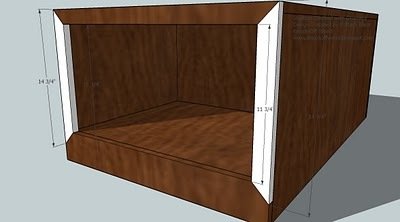
Step 6
Cut pieces G as shown above and nail to the sides of the bench, keeping outside edges flush. Make sure you use 2″ nails to nail from the outside edges of G into the ends of the top and bottom trim pieces.
Step 7
Line the three benches up and on the outsides of the outer two benches, add the following trim pieces: Cut H and I as shown above. Then nail in place, keeping outside edges flush. Use 1 1/4″ nails.
Step 8
Cut J and K as shown above and nail in place. Use 1 1/4″ nails.
Optional Drawer Assembly
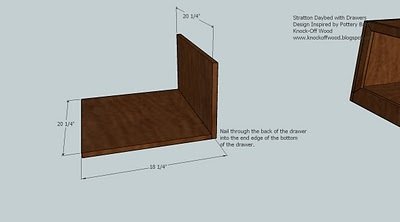
If your bench openings are not perfectly square, your drawers will not slide right. Assemble the drawer by nailing the back of the drawer, M, to the bottom of the drawer, L, as shown above. Keep outside edges flush.
Step 10
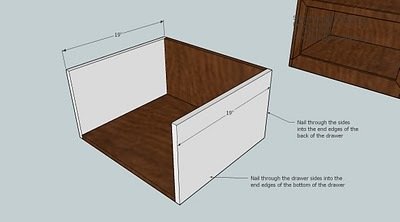
Add the drawer sides, N, as shown above.
Step 11
My “trick” to getting the perfect drawer front is to mount the drawer box into the slides in the benches without the face. Then, with the faceless drawer pushed in, center the drawer face on the opening (and not the actual drawer). When you are happy with the gap around the drawer, nail the face to the sides and bottom of the drawer.
Finishing
Sand all surfaces, starting with a medium grit and finishing with fine. Wipe off the dust, fill any holes or gaps with wood filler, and sand smooth once dry. Apply primer if you're painting, then finish with your choice of paint or stain and seal with a durable clear topcoat. For outdoor projects, use exterior-rated primer, paint or stain, and sealer so the piece stands up to the weather.
Source (temporary): https://www.ana-white.com/woodworking-projects/storage-daybed-or-captains-bed-full-depth-storage