Storage Dining Table Base
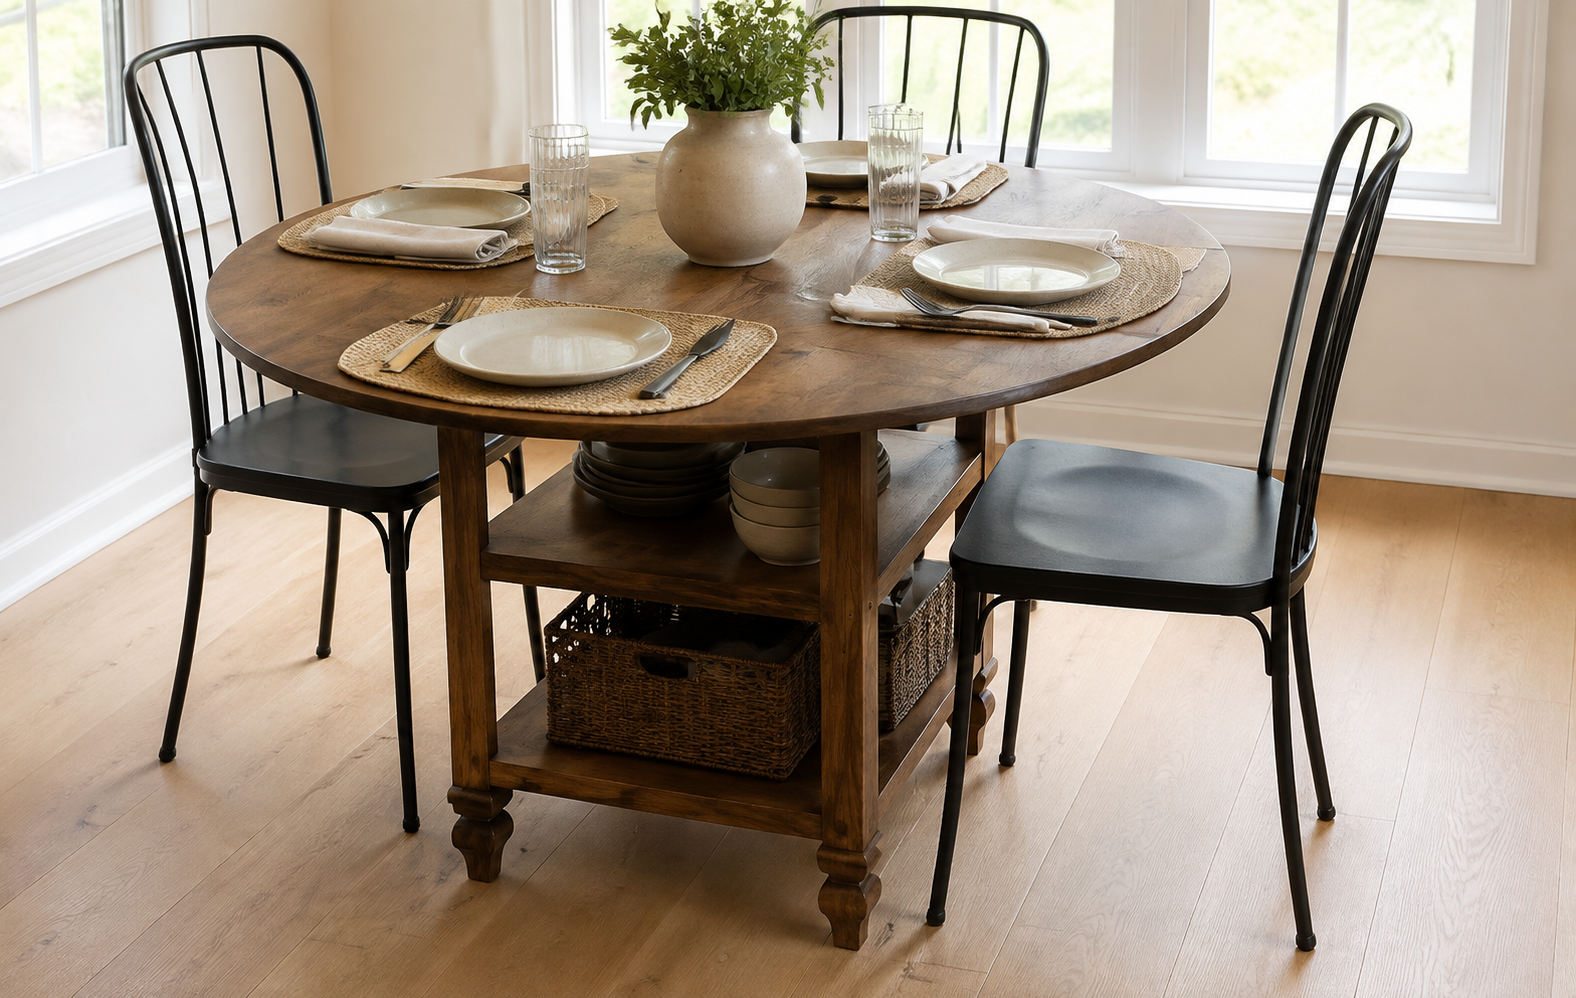
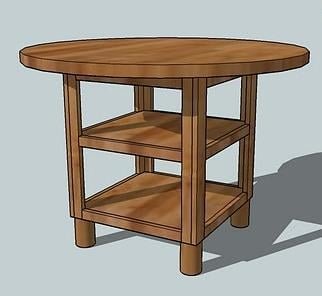
Round dining tables are idea for small dining spaces because they still seat the same number of people, but you can easily move around the table. Take greater advantage of your small space needs by building a round storage dining table. This simple plan uses a standard round tabletop, standard bun feet, and an easy to build storage center. RELATED: Round Tabletop Building Guide
Specifications
| Project type | Dining Table Plans |
|---|---|
| Room | Storage Solutions |
| Style | Cottage Style Furniture Plans |
| Difficulty | Intermediate |
| Estimated cost | scraps |
Dimensions
Use the size-specific shopping and cut lists below.
Shopping List
- 1 – 42″ – 48″ Unfinished Round Tabletop (Available at Lowes and Home Depot)
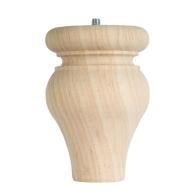
- 4 – 4 3/4″ Precut Unfinished Feet (Available at Lowes and Home Depot)
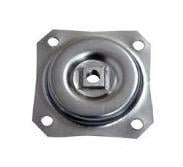
- 4 – Surface Mount Hardware Brackets (see above)
- 3/4″ Hardwood Plywood or MDF (if you are painting) (about 1/4 of a sheet)
- 2 – 1×3 boards
- 4 - 1×2 boards
Cut List
A) 4 – 1×2 @ 28 1/2″ (1×2 Part of the Legs)
B) 4 – 1×3 @ 28 1/2″ (1×3 Part of the Legs)
C) 2 – 3/4″ Plywood @ 20″ x 20″ (Shelves)
D) 2 – 1×2 @ 20″ (Inner Apron on the 1×2 Sides)
E) 2 – 1×2 @ 18 1/2″ (Inner Apron on the 1×3 Sides)
F) 2 – 1×3 @ 17″ (Apron on the 1×2 sides)
G) 2 – 1×3 @ 16 1/2″ (Apron on the 1×3 sides)
H) 4 – 1×2 @ 17″ (Shelf Trim on the 1×2 Sides)
I) 4 – 1×2 @ 16 1/2″ (Shelf Trim on the 1×3 Sides)
J) 42 ” Round Tabletop
Tools
- measuring tape
- square
- pencil
- safety glasses
- hearing protection
- drill
- circular saw
- nailer
- sander
Step-by-step Instructions
Step 1
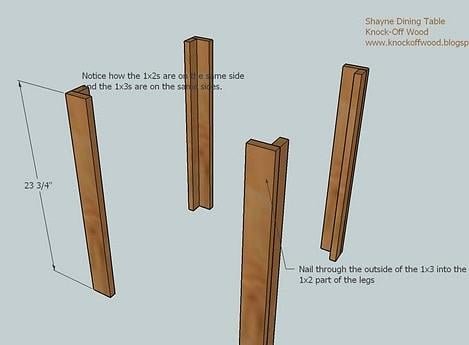
Legs. Build your legs as shown above. Use pieces A and B.
Step 2
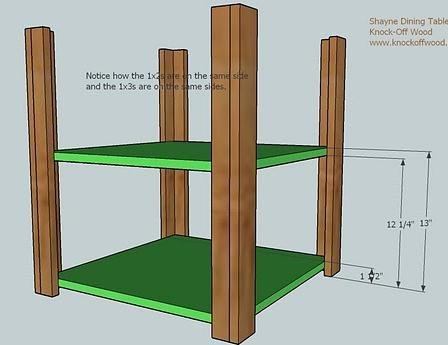
Shelves. Use the diagram above to fasten the shelves (C) shown in green above to the legs. Nail through the outsides of the legs into the shelves.
Step 3
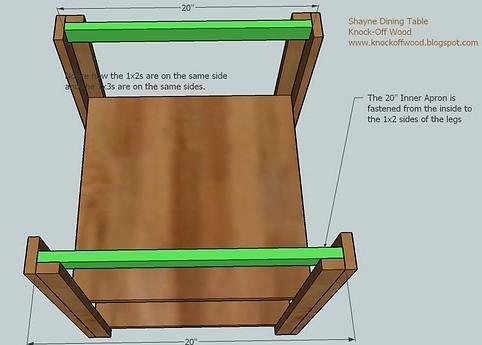
Inner Apron, 1×2 Sides. Attach the inner apron, pieces D, to the 1×2 parts of the legs. Use the 1 1/4″ nails to nail to the 1x2s and also nail through the 1×3 legs into the end edges of the inner apron.
Step 4
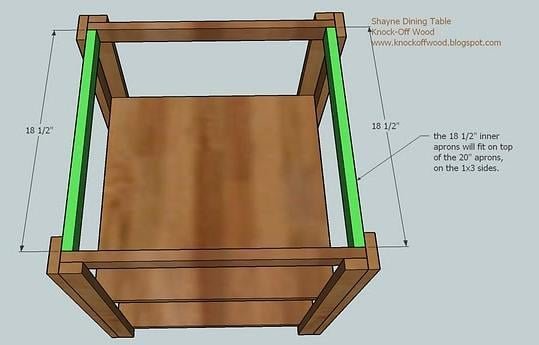
Inner Apron, 1×3 Side. Use pieces E to complete the inner apron, as shown above. Follow the same steps as step 3.
Step 5
Step 6
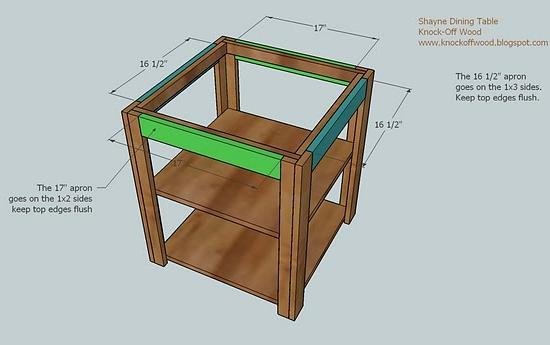
Apron Pieces. Use pieces F and G to complete the apron. Follow the directions shown in the diagram above. Keep top edges flush.
Step 7
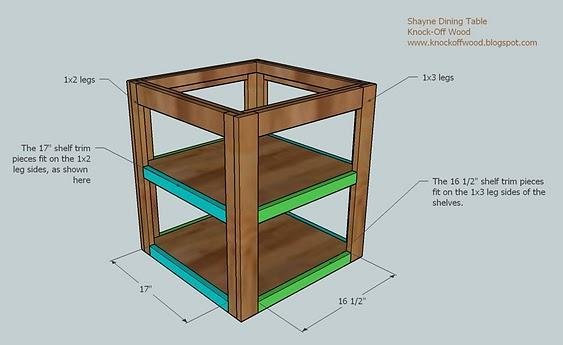
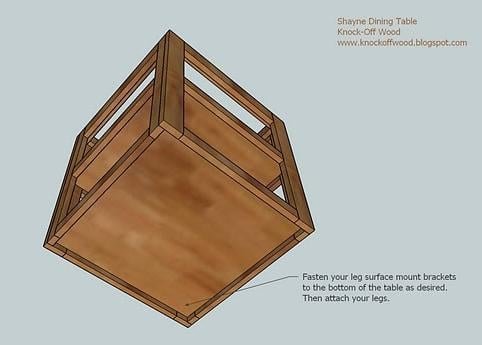
Legs. Fasten the legs according to the directions of your legs. If your legs do not come with a hanger bolt, you can simply screw through the top of the bottom shelf into the legs. Just use a long screw and predrill first to prevent splitting.
Step 8
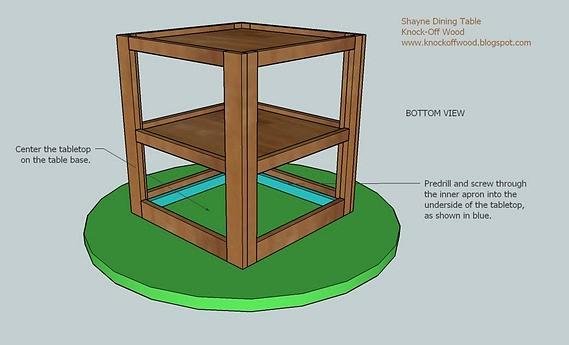
Tabletop. Attach the tabletop as shown above, centering the base on the tabletop. Predrill through the blue highlighted inner apron piece into the underside of the table. Be cautious of drilling through the tabletop.
Step 9
Mount the leg plates to the bottom of the table base.
Step 10
Screw the bun feet in.
Finishing
Sand all surfaces, starting with a medium grit and finishing with fine. Wipe off the dust, fill any holes or gaps with wood filler, and sand smooth once dry. Apply primer if you're painting, then finish with your choice of paint or stain and seal with a durable clear topcoat. For outdoor projects, use exterior-rated primer, paint or stain, and sealer so the piece stands up to the weather.
Source (temporary): https://www.ana-white.com/woodworking-projects/storage-dining-table-base-free-plans