Storage Sofa
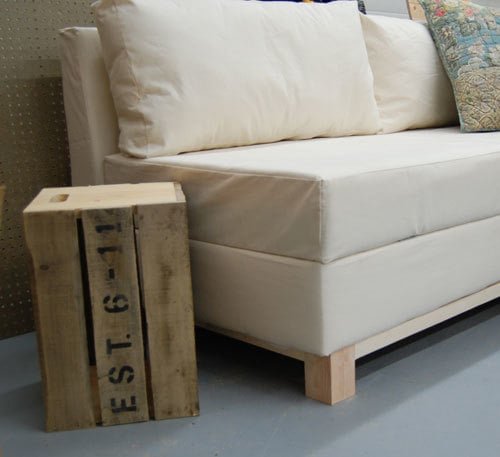
A sofa that you can build with a fold out seat perfect for storing extra pillows and blankets. Based off a sleeping pad foam cushion, so seating surface doubles as a guest bed.
Specifications
| Project type | Beds and Bed Frames |
|---|---|
| Room | living room |
| Style | Modern Style Furniture Plans |
| Difficulty | Advanced |
| Estimated cost | $100-$150 |
Dimensions
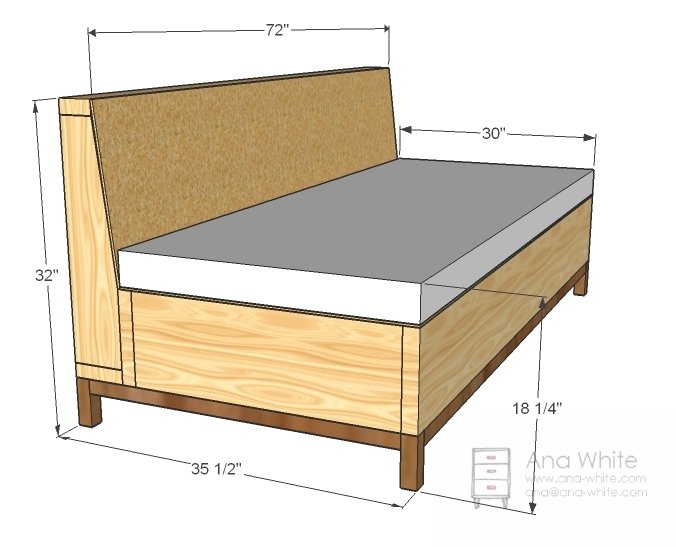
Use the size-specific shopping and cut lists below.
Shopping List
1 – 30″ x 72″ x 3 1/2″ Foam Camping Pad or Cushion
1 – 9×12 Paint Drop Cloth
6 yards upholstery batting
2 20 oz bags of pillow stuffing
2 1/2 yards of burlap
staples
3″ screws or 2″ pocket hole screws
1 1/4″ screws
wood glue
spray adhesive
2 – 2×4
2 – 2×6
2 – 2×2
4×4 (You only need about 2 feet for the sofa legs)
1 – 12′ AND 1-8′ 2×10
2 – sheets of 1/4″ plywood
Cut List
1 – 2×4 @ 72″
1 – 2×6 @ 72″
4 – 2×6 @ 24″ (Tapered as shown in step 1)
3 – 2×4 @ 22″
1 – 1/4″ Plywood @ 17 5/8″ x 72″
2 – 1/4″ Plywood @ 72″ x 30″ (Top and Bottom of Seat)
2 – 2×10 @ 72″
3 – 2×10 @ 27″
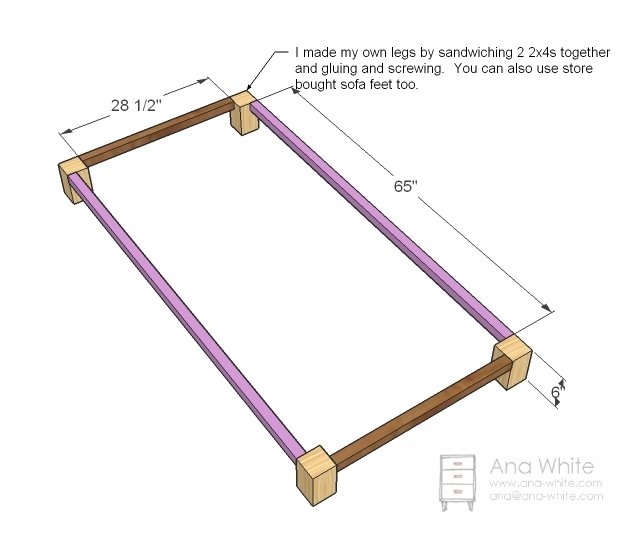
2 – 2×2 @ 65″
2 – 2×2 @ 28 1/2″
4 – 4×4 @ 5″ (Sofa Feet)
Tools
- measuring tape
- square
- pencil
- hammer
- safety glasses
- hearing protection
- drill
- circular saw
- nailer
- sander
- staple gun
- level
- countersink drill bit
Step-by-step Instructions
Back
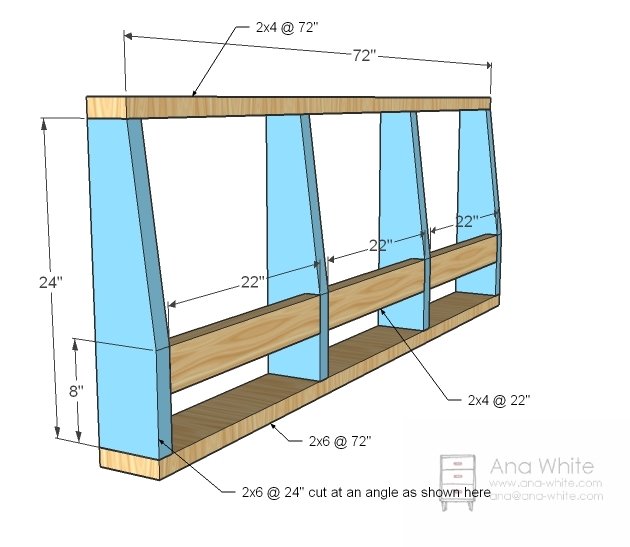
Screw the back together with 3″ screws or 2″ pocket hole screws as shown above. Use glue and adjust for square.
Back
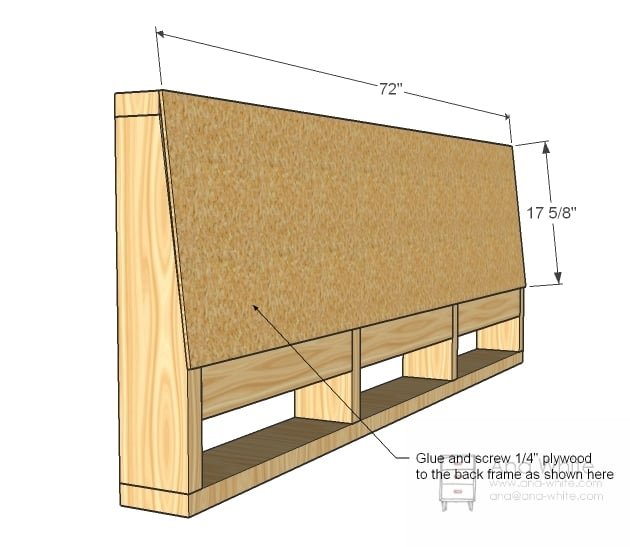
Now attach the 1/4″ plywood to the back with 1 1/4″ screws and glue as shown above.
Back Batting
Now wrap the back that is not covered in plywood with the burlap and staple in place on the bottom edge. The burlap should be tight. Then use spray adhesive to glue the batting to the back as shown above. Read the direction on the can of the spray adhesive for the best adhesion.
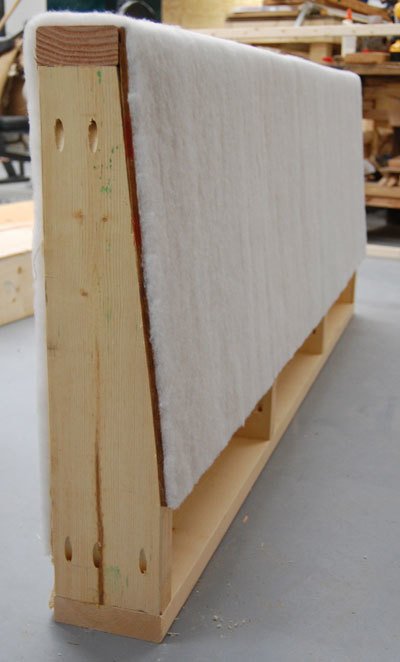
Side Batting
Now glue pieces to the ends with the spray adhesive and then trim to fit as shown above. Set the back aside.
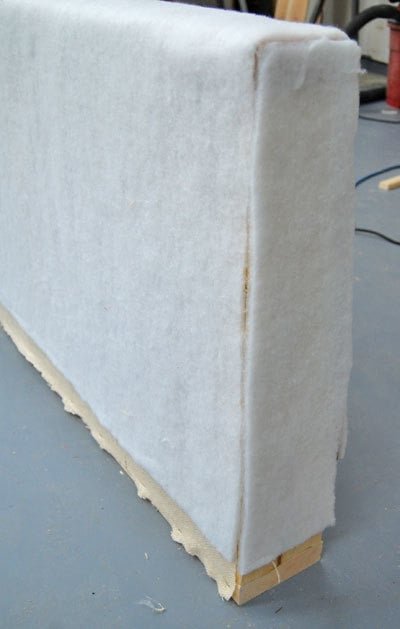
Step 5
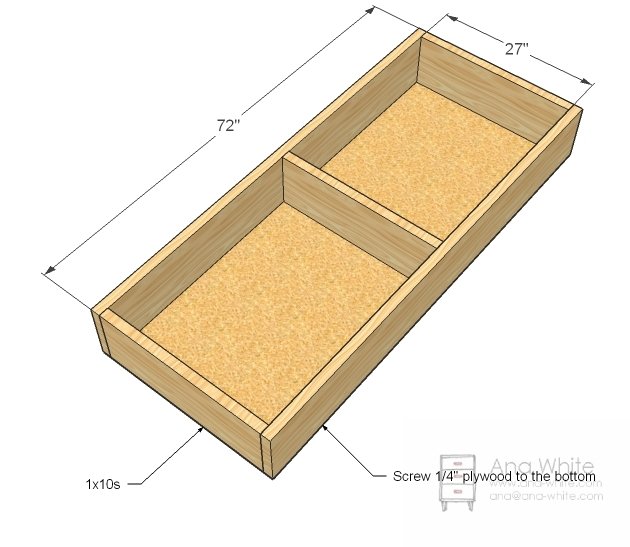
Slipcover
Use the spray adhesive to attach the foam pad to the remaining piece of plywood. Then use the spray adhesive to attach batting to the foam on the top, front and sides. Cut a piece of fabric 73″ long x 31″ wide. Cut two pieces 31″ long x 6″ wide, and two at 73″ long and 6″ wide. Sew together to create a box cushion (see this post for details on sewing). Place the cushion slipcover over top of the foam and staple the slip cover raw edges to the underside of the plywood, hiding edges. This is shown below.
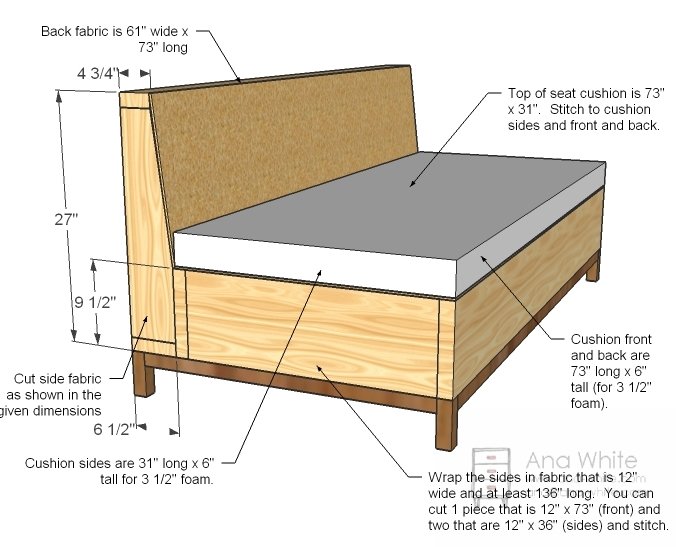
Step 7
That one should be easy. Now cut strips of fabric as shown in the diagram above (step 6) and sew together and staple in place around the sides and front of the sofa. Should be easy to do. Turn edges under to hide raw seams. Now the back was the most difficult part – certainly not impossible, but I thought was the most difficult part of sewing. To make this part easier, you could simply not put a taper in the back side of the sofa, and all your cuts are square. Anyway, cut out the side and back pieces and stitch together, and fit over the back. Turn under and staple to the underside of the legs. Reference the diagram in step 6 for exact measurements.
Base
Build the base as shown above. Don’t worry about the 2x2s not being strong enough – their is no support required here (it’s all in the 2x10s). The 2×2 aprons are to keep the fabric tucked under and to give you something to screw your feet too. Paint or stain your base. If you choose to use 2x4s for the legs, remember, this does change the dimensions of the legs, and adjust the 2×2 cuts accordingly.
Assembly
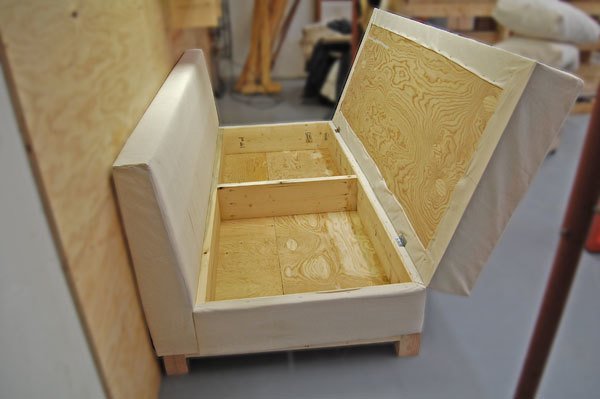
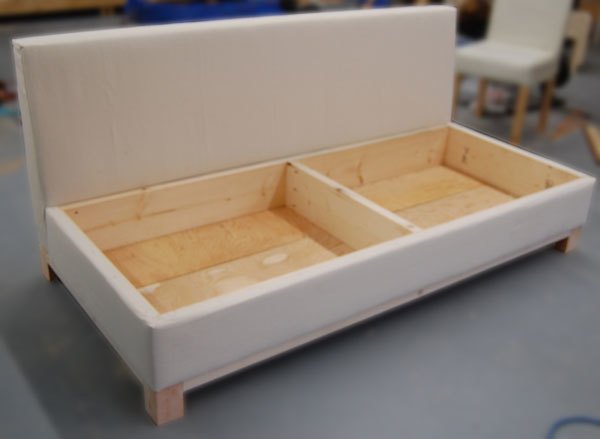
Assembly will be easy. Start by screwing the storage box to the back, through the 2×10 back boards into the supports in the back of the sofa. Use the 3″ screws. Then flip over and screw the base to the sofa underside with 3″ screws. Flip it back over and attach the cushion with hinges. Support the hinges with a strap to keep the cushion from collapsing all the way forward.
Pillows
The pillows I sewed for this sofa are square box cushions measuring 36″ wide x 4″ deep x 18″ tall. Cut four pieces of fabric 37″ wide x 19″, four pieces 19″ x 5″ and four pieces 37″ x 5″. Stitch with right sides together, creating a box, but leaving an opening to insert foam. Stuff with loose stuffing. Hand stitch open seam closed.
Finishing
Sand all surfaces, starting with a medium grit and finishing with fine. Wipe off the dust, fill any holes or gaps with wood filler, and sand smooth once dry. Apply primer if you're painting, then finish with your choice of paint or stain and seal with a durable clear topcoat. For outdoor projects, use exterior-rated primer, paint or stain, and sealer so the piece stands up to the weather.
Source (temporary): https://www.ana-white.com/woodworking-projects/storage-sofa