Sunday Trinket Box
A super easy and quick trinket box that you can build from ½” thick craft boards (or a cedar picket or even some scrap wood). It makes an ideal starter project, and is great for a gift.
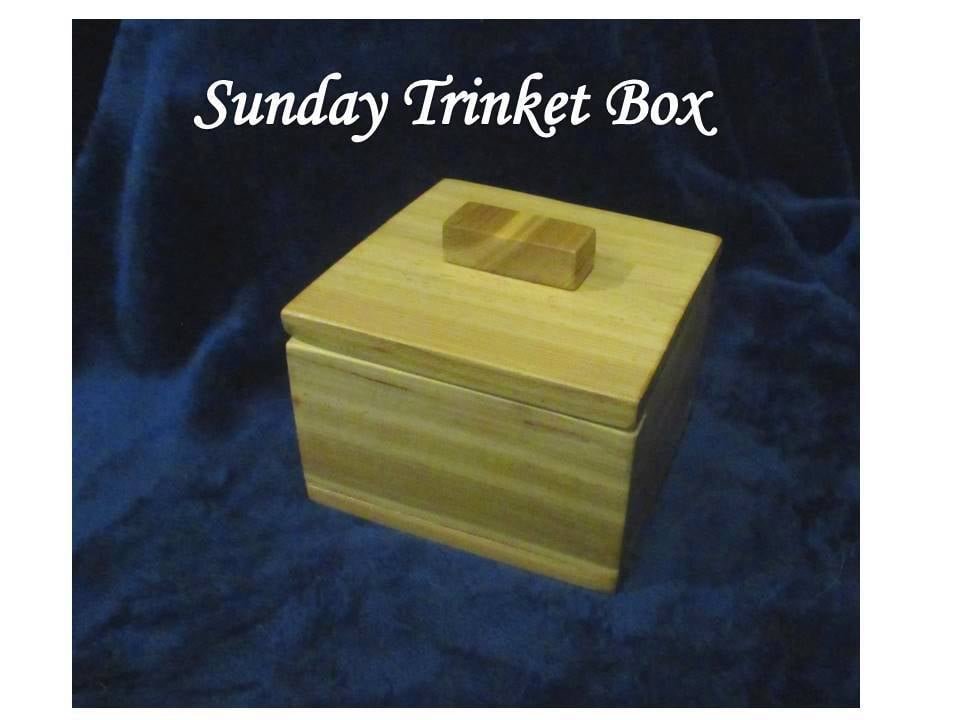
Specifications
| Project type | Other Projects |
|---|---|
| Room | Storage Solutions |
| Style | Tradditional Style Furniture Plans |
| Difficulty | Starter Projects |
Dimensions
Use the size-specific shopping and cut lists below.
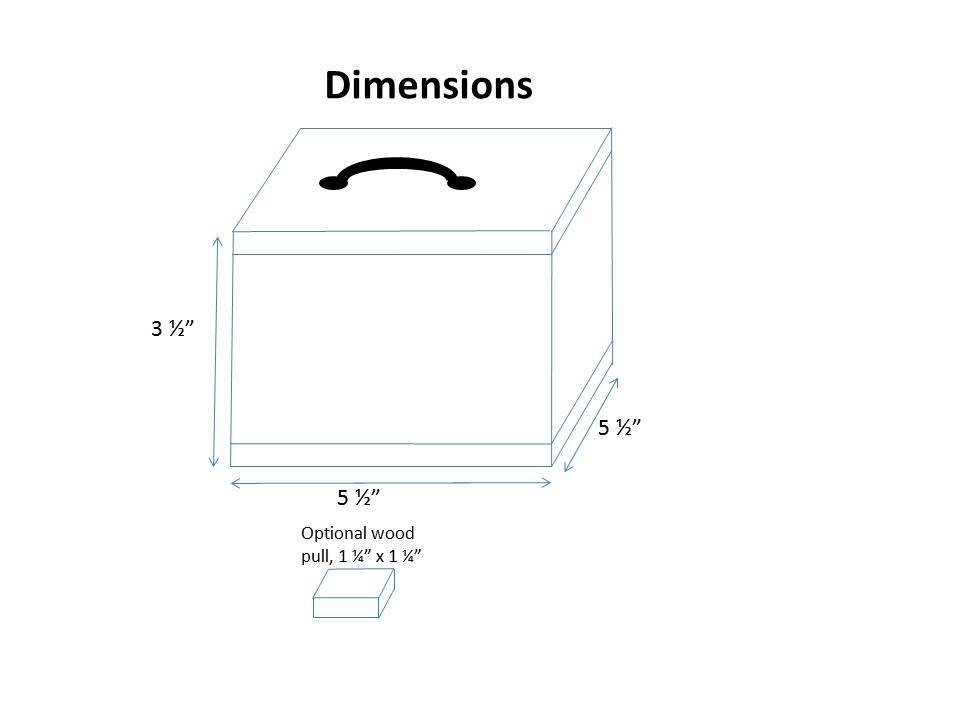
Shopping List
Shopping List
1 pc ½” x 5 ½” craft board at 2’
1 pc ½” x 2 ½” craft board at 3’
OR
1 pc ½” x 5 ½” x 6’ cedar picket
1” finish nails
Wood glue
Super glue (if using wood pull)
Sandpaper
Wood filler (if painting)
Wood putty (if staining)
Paint or Stain for desired finish
1 knob or pull (optional, if not using a wood pull)
Note: you could also substitute scrap 1x3 and 1x6 for the craft boards, or use bigger 1x scrap cut down to standard board sizes. Follow picket cutting/measuring directions for sides/inner lid if using scrap 1x boards.
Cut List
Cut list for ½” thick craft board:
2 pc ½” x 5 ½” @ 5 ½” (top & bottom, 5 ½” x 5 ½”)
2 pc ½” x 2 ½” @ 5 ½ (front & back, 2 ½” x 5 ½”)
2 pc ½” x 2 ½” @ 4 ½” (sides, 2 ½” x 4 ½”)
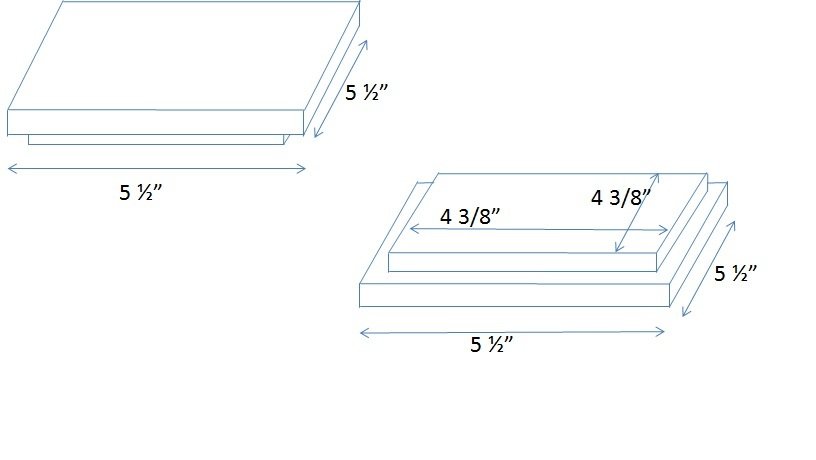
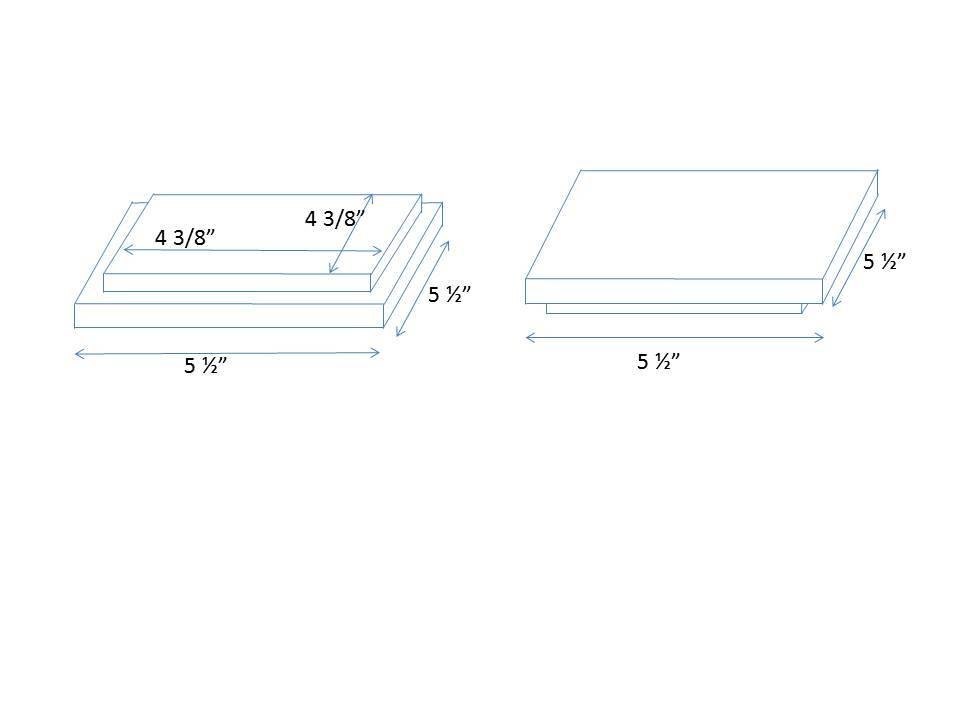
1 pc ½” x 5 ½” cut to 4 3/8” x 4 3/8”
(inner lid, trim to fit – about 1/8” smaller than the inner dimensions of the box)
Pull: use desired size piece of wood OR a store bought knob or pull)
Cut list for Cedar picket (1/2” x 5 ½”)
2 pc @ 5 ½” (top & bottom, 5 ½” x 5 ½”)
1 pc @ 5 ½”, then turn and cut off 2 strips @ 2 ½” wide (front & back)
1 pc @ 4 ½”, then turn and cut off 2 strips @ 2 ½” wide (sides)
(see note on measuring for length of sides)
1 pc @ 4 3/8”, then turn and cut to 4 3/8” (inner lid, trim to fit) (see note on measurements)
Pull: cut desired size piece of wood OR use a store bought knob or pull
If your picket or board doesn’t measure 5 ½” x ½” - measure for sides/inner lid:
Measure width of wood: ______
Measure thickness of wood: ________
Length of side: Width minus 2X thickness
Ex: 5 3/8” wide picket @ ½”, sides would be
5 3/8” minus 1” = 4 3/8” for side
Inner lid: 4 3/8” x 4 ¼” (1/8” shorter than side, trim to fit)
Tools
- measuring tape
- square
- pencil
- hammer
- safety glasses
- hearing protection
- drill
- circular saw
- compound miter saw
- nailer
- sander
- countersink drill bit
Step-by-step Instructions
Step 1
Attach sides between front & back with 1” finish nails & glue, keeping tops/bottoms and outside edges flush.
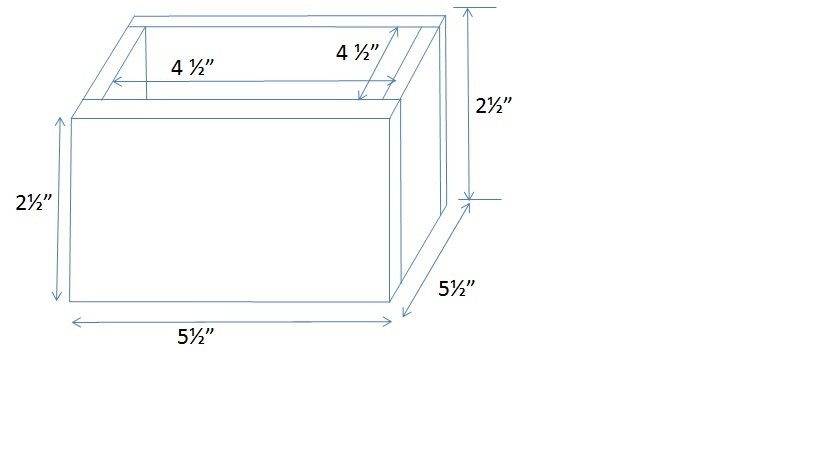
Step 2
Attach bottom to box, keeping outside edges flush, using finish nails and glue.
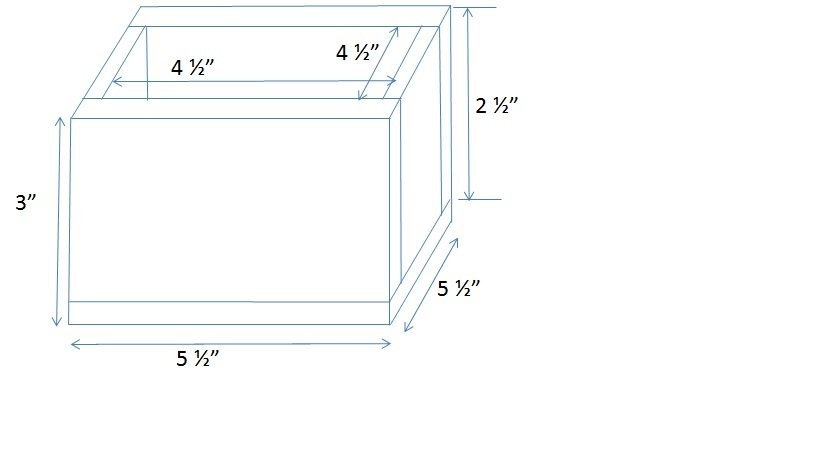
Step 3
Cut inner lid and trim to fit. The inner lid should fit easily inside the box without catching on the sides. Top & bottom views of how it would look (wait till after finishing to attach inner lid):
Step 4
Sand and finish as desired. Recommend wood filler if you are painting. If you are staining or just using poly, try finishing first and adding some matching color wood putty to fill any nail holes afterward.
Step 5
Finishing
Sand all surfaces, starting with a medium grit and finishing with fine. Wipe off the dust, fill any holes or gaps with wood filler, and sand smooth once dry. Apply primer if you're painting, then finish with your choice of paint or stain and seal with a durable clear topcoat. For outdoor projects, use exterior-rated primer, paint or stain, and sealer so the piece stands up to the weather.
Source (temporary): https://www.ana-white.com/woodworking-projects/sunday-trinket-box