Super Easy but a Little Tricky Ladder Table
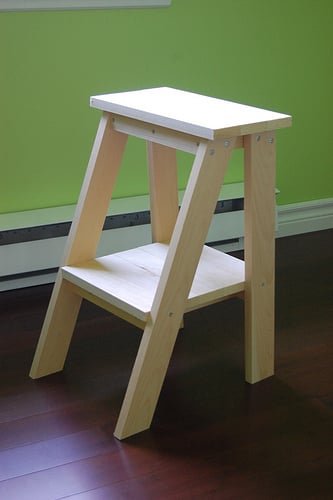
A simple table reminicent of a small painter's ladder can work as a bedside table or a side table. This is a great project to use up your scraps.
Specifications
| Project type | Side and End Table Plans |
|---|---|
| Room | Bathroom |
| Style | Cottage Style Furniture Plans |
| Difficulty | Beginner Projects |
| Estimated cost | Under $20 |
Dimensions
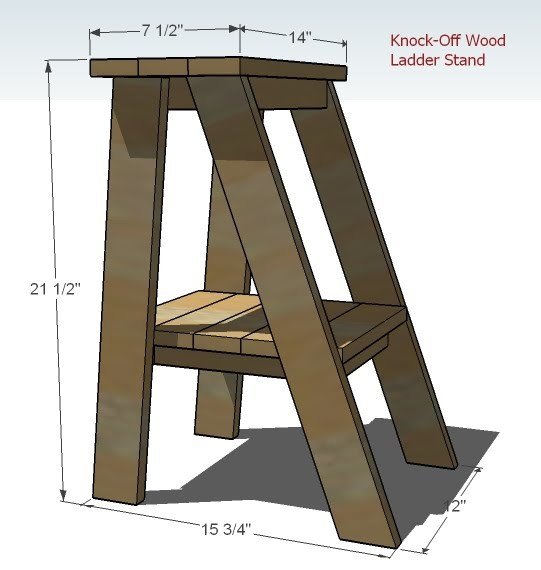
Use the size-specific shopping and cut lists below.
Shopping List
2 – 1×3 Boards
1 – 1×2 Boards
2″ Screws
1 1/4″ Screws
Wood Glue
Wood Filler
Cut List
4 – 1×2 @ 10 1/2″ (Top and Bottom Shelf Supports)
3 – 1×2 @ 5″ (Top Shelf Supports)
2 – 1×2 @ 9″ (Bottom Shelf Supports)
3 – 1×3 @ 14″ (Top Shelf Boards)
5 – 1×3 @ 10 1/2″ (Bottom Shelf Boards)
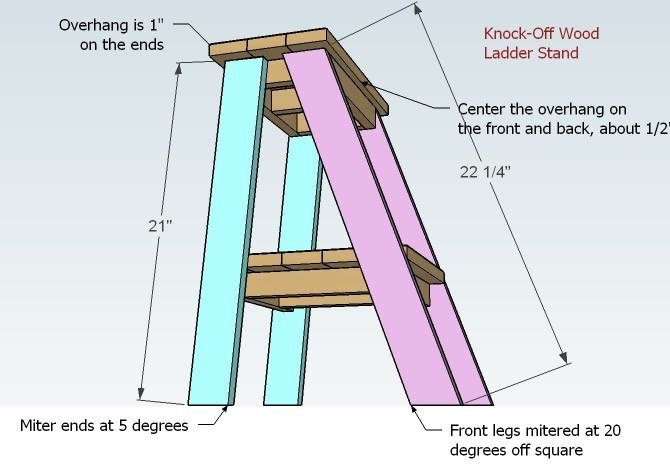
2 – 1×3 @ 21″ (Back Legs, ends cut at 5 degrees off square, end parallel)
2 – 1×3 @ 22 1/4″ (Front Legs, ends cut at 20 degrees off square, ends parrallel)
Tools
- measuring tape
- square
- pencil
- safety glasses
- hearing protection
- drill
- compound miter saw
- sander
- level
Step-by-step Instructions
Step 1
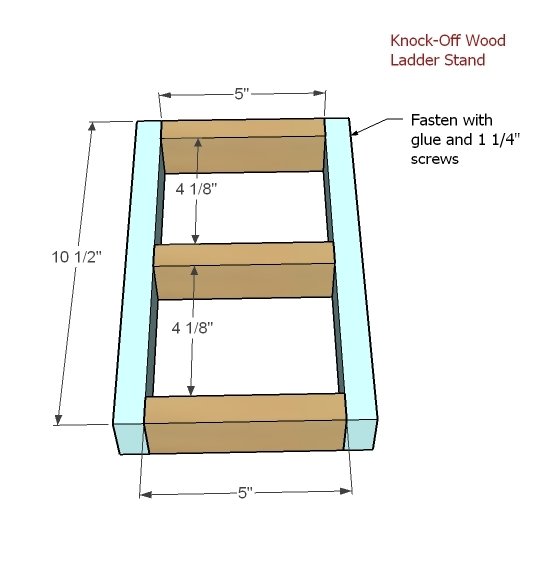
Build the top shelf supports as shown above using the 1×2 @ 10 1/2″ and the 1×2 @ 5″. Screw together using 2″ screws and glue.
Step 2
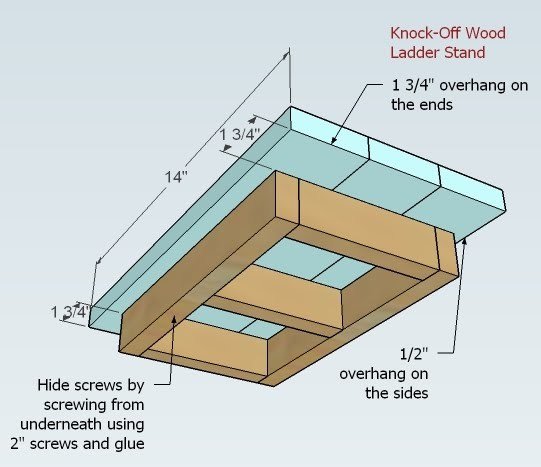
Using the 1×3 boards 14″ long, fasten through the supports into the underside of the shelf boards as shown above. Use 2″ screws and glue.
Step 3
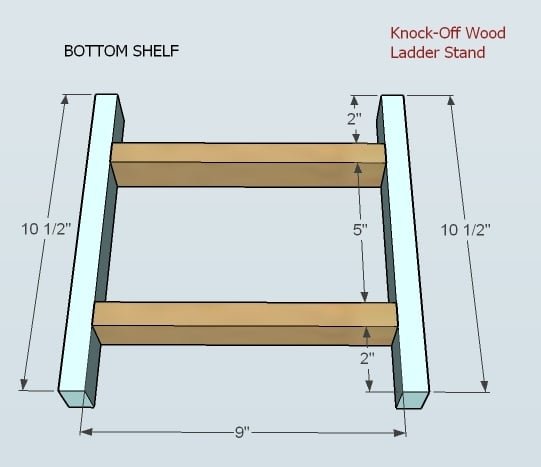
Just like the top shelf, put the bottom shelf support together as shown above. Use glue and 2″ screws.
Step 4
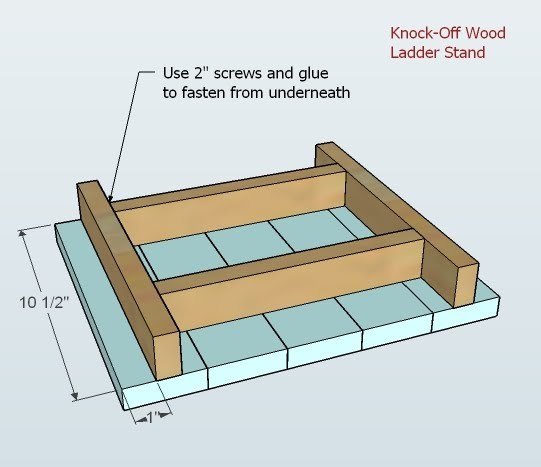
As you did the top shelf, screw thought the supports into the underside of the shelf boards using 2″ screws and glue. Use the diagram above to guide you.
Step 5
Finishing
Sand all surfaces, starting with a medium grit and finishing with fine. Wipe off the dust, fill any holes or gaps with wood filler, and sand smooth once dry. Apply primer if you're painting, then finish with your choice of paint or stain and seal with a durable clear topcoat. For outdoor projects, use exterior-rated primer, paint or stain, and sealer so the piece stands up to the weather.
Source (temporary): https://www.ana-white.com/woodworking-projects/super-easy-little-tricky-ladder-table-plans