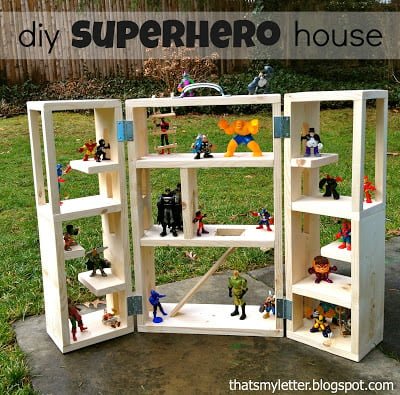
Superhero House
to build a folding superhero house from
Specifications
| Project type | Toys |
|---|---|
| Room | Kids and Toys |
| Style | Children's and Kid's Room Furniture and Toy Plans |
| Difficulty | Beginner Projects |
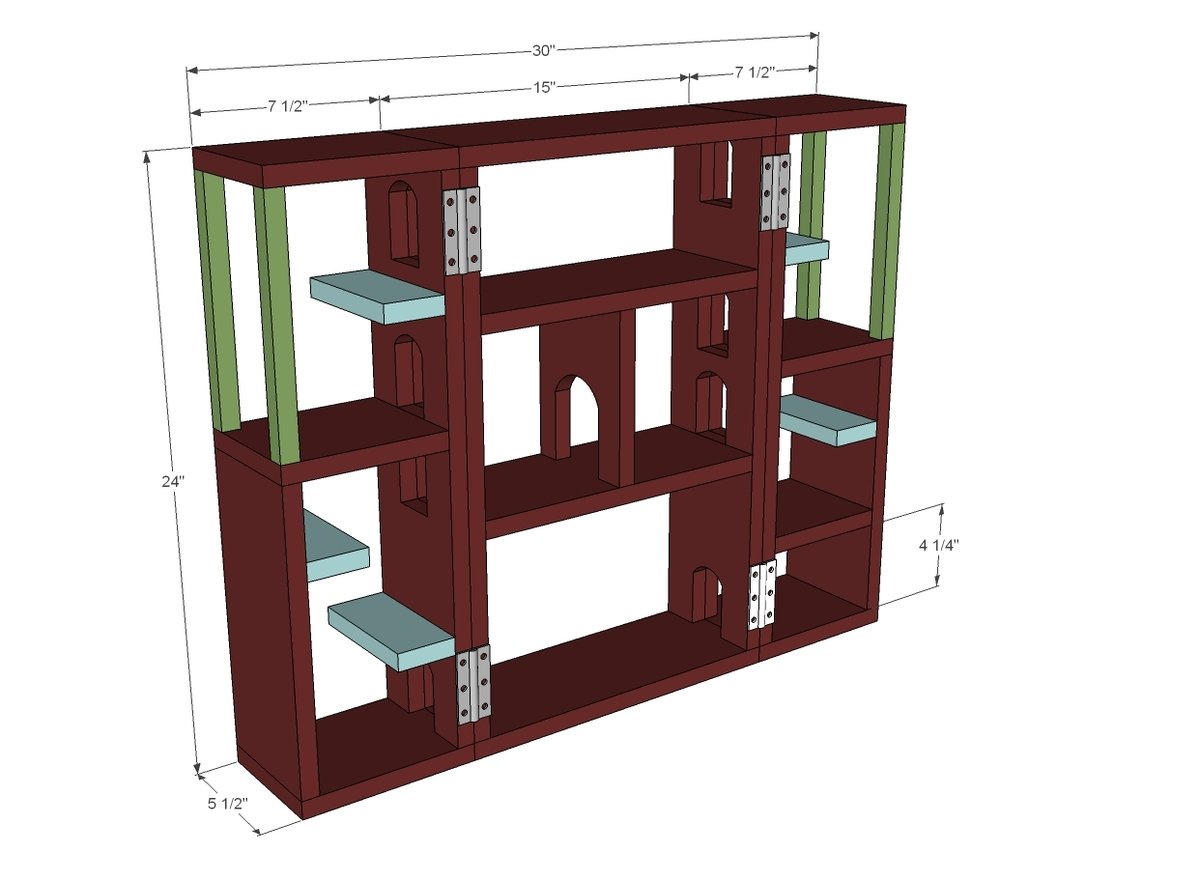
Dimensions
Use the size-specific shopping and cut lists below.
Shopping List
3 - 1x6x8' 2 - 1x1x3' 2 sets hinges (the cheapo basic ones work perfect) 2 - hook and eye closures Handle Screws or pocket hole screws (1 1/4")
Cut List
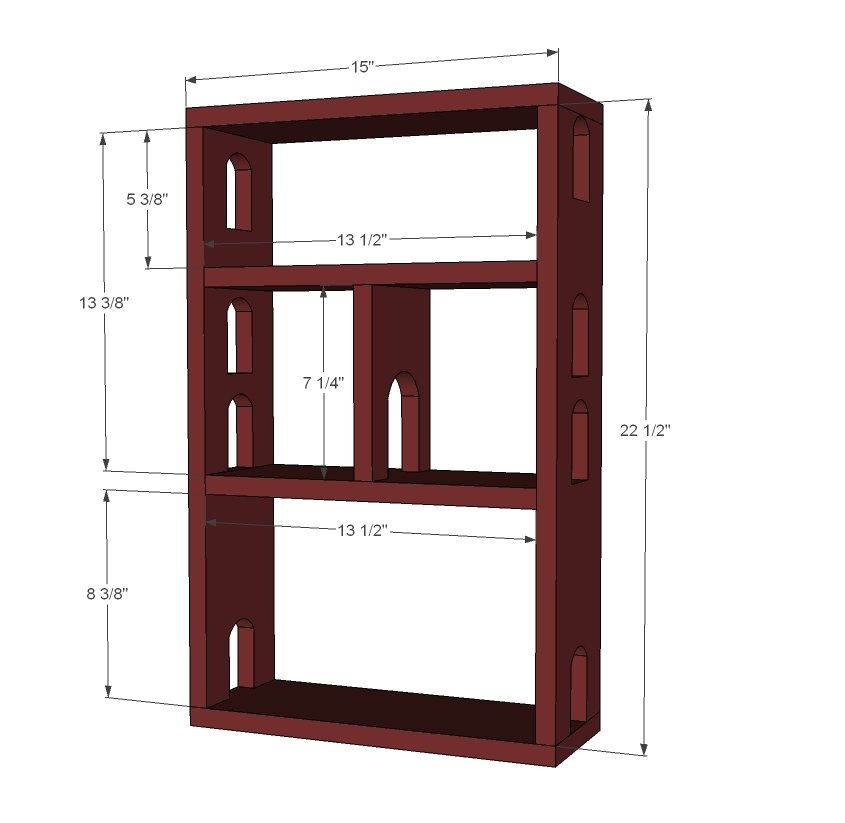
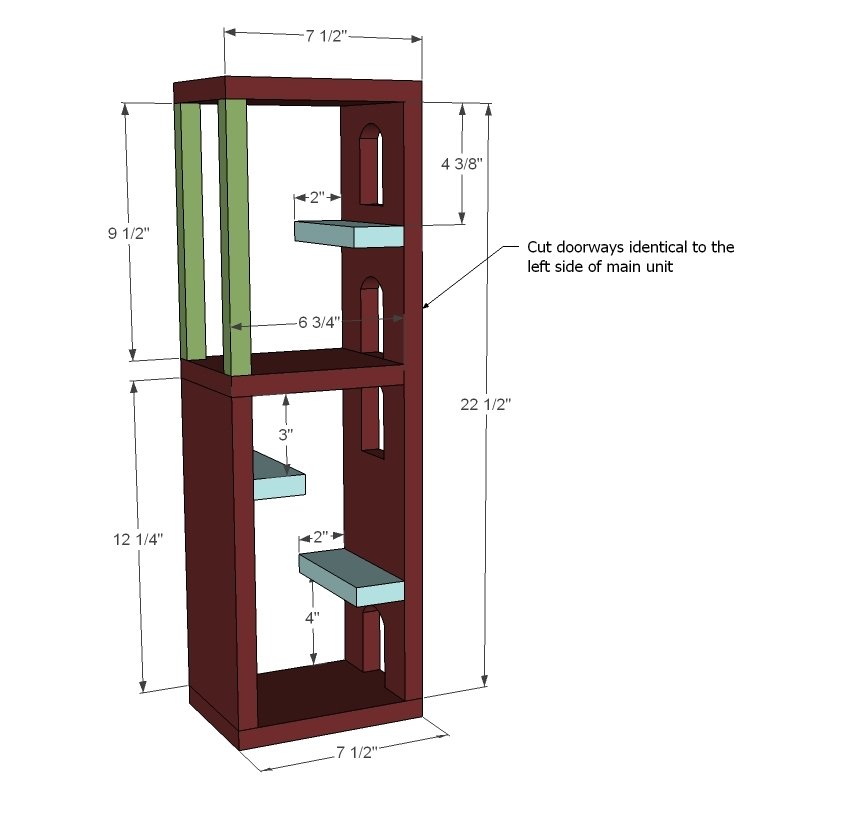
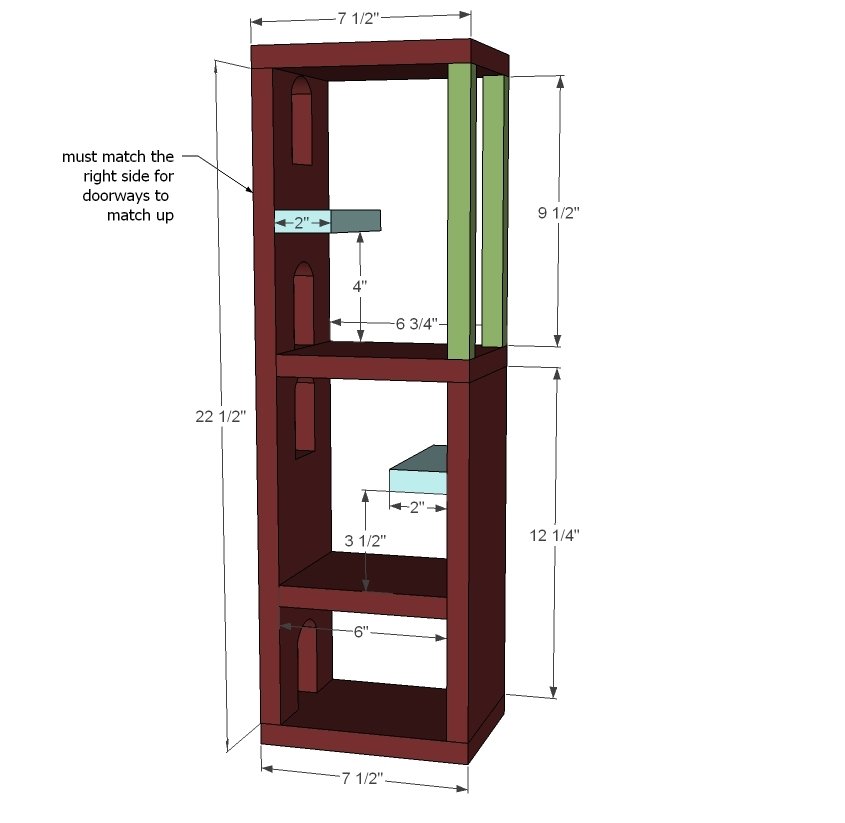
CENTER 2 - 1x6 @ 15" 2 - 1x6 @ 13 1/2" 1 - 1x6 @ 7 1/4" 2 - 1x6 @ 22 1/2" SIDE (RIGHT) 2 - 1x6 @ 7 1/2" 1 - 1x6 @ 6 3/4" 1 - 1x6 @ 22 1/2" 1 - 1x6 @ 6" (full floors) 1 - 1x6 @ 12 1/4" 2 - 1x1 @ 9 1/2" 2 - 1x6 @ 2" SIDE (LEFT) 2 - 1x6 @ 7 1/2" 1 - 1x6 @ 6 3/4" 1 - 1x6 @ 22 1/2" 1 - 1x6 @ 12 1/4" 2 - 1x1 @ 9 1/2" 3 - 1x6 @ 2"
Tools
- measuring tape
- square
- pencil
- safety glasses
- hearing protection
- drill
- circular saw
- jigsaw
- sander
Step-by-step Instructions
Step 1
Start by cutting out all the doorways first, and sanding well. Then build the center with either 2" trim screws and glue or 1 1/4" pocket hole screws (pocket holes drilled on 3/4" setting).
Step 2
Match the left side of the center to the doorways on the left tower. Cut out and sand. Then build the left tower. If you don't have 1x1s you can use 1x2s or even dowels or pipe pieces.
Step 3
Then build the last tower as you did the left tower.
Step 4
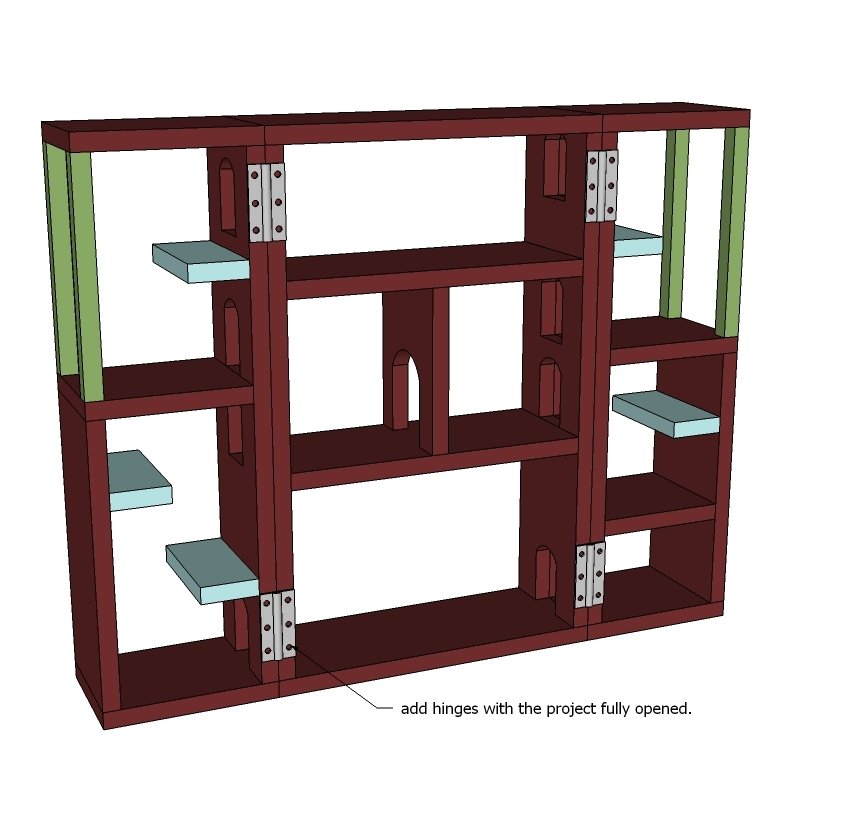
Hinge the three sections together. Add hook and eye closure to secure when closed. Add the handle to top. Bring on the superheros!
Finishing
Sand all surfaces, starting with a medium grit and finishing with fine. Wipe off the dust, fill any holes or gaps with wood filler, and sand smooth once dry. Apply primer if you're painting, then finish with your choice of paint or stain and seal with a durable clear topcoat. For outdoor projects, use exterior-rated primer, paint or stain, and sealer so the piece stands up to the weather.
Source (temporary): https://www.ana-white.com/woodworking-projects/superhero-house