Superhero Playhouse
plans. Build your own super hero city with working elevator and jail cell. Perfect for 8" action figures. Step by step plans include full diagrams, build photos and lots of details.
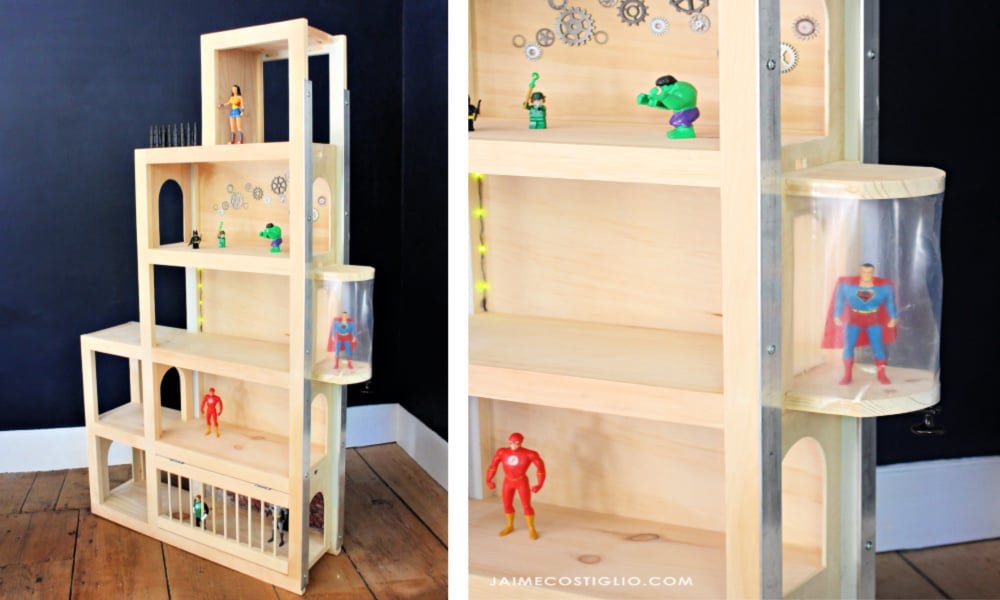
Specifications
| Project type | Toys |
|---|---|
| Room | Kids and Toys |
| Style | Children's and Kid's Room Furniture and Toy Plans |
| Difficulty | Intermediate |
Dimensions
Use the size-specific shopping and cut lists below.
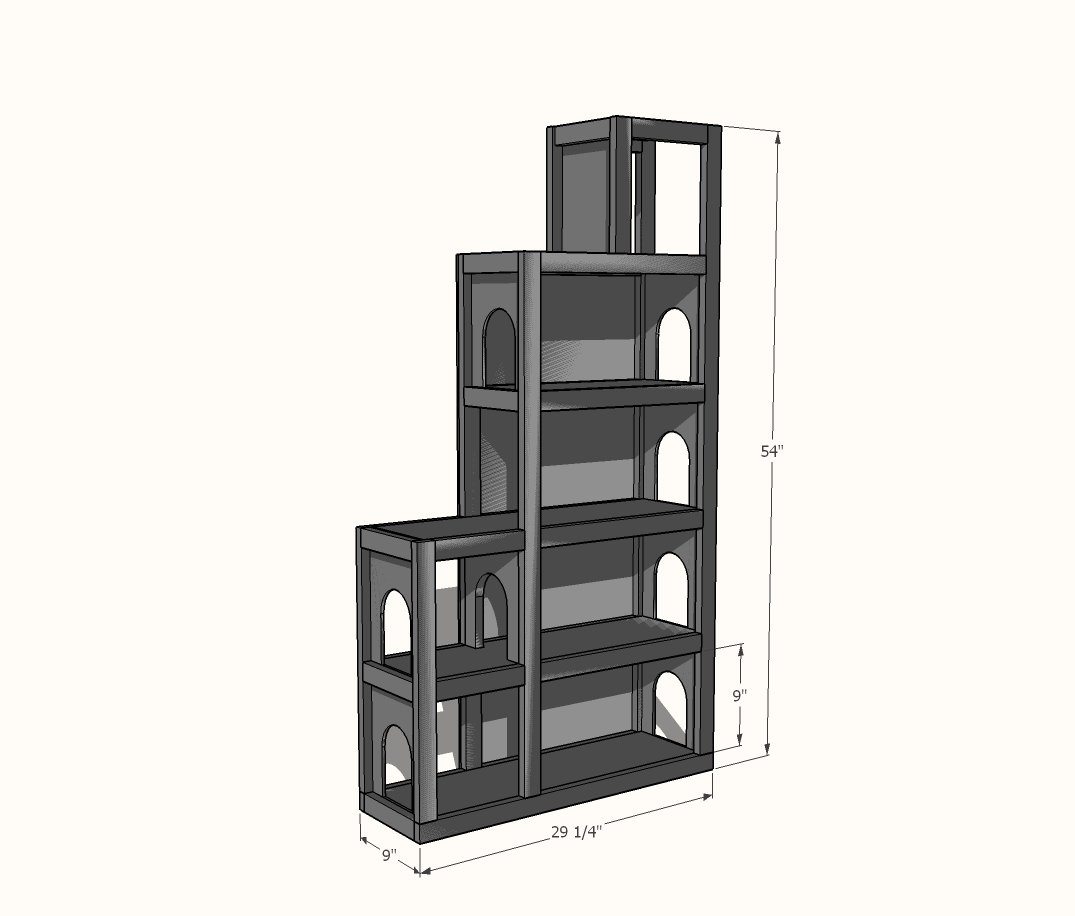
Shopping List
- 1 - 1 x 8 x 12 feet long (can substitute a 1x8x8' AND a 1x8x4')
- 1 - 48" x 48" - 1/4" plywood panel
- 8 - 1 x 2 x 8'
Cut List
Face Frames
- 2 - 1x2 @ 52-1/2"
- 2 - 1x2 @ 29-1/4"
- 2 - 1x2 @ 42"
- 8 - 1x2 @ 16-3/4"
- 6 - 1x2 @ 8"
- 2 - 1x2 @ 10-1/2"
- 2 - 1x2 @ 21"
Shelves
- 3 - 1x8 @ 27-1/4"
- 2 - 1x8 @ 17-3/4"
- 1 - 1x8 @ 8-3/4"
- 1 - 1x8 @ 9-3/4"
Back and Side Panels
- 1 - 1/4" plywood @ 43-1/2" x 19-3/4" - back
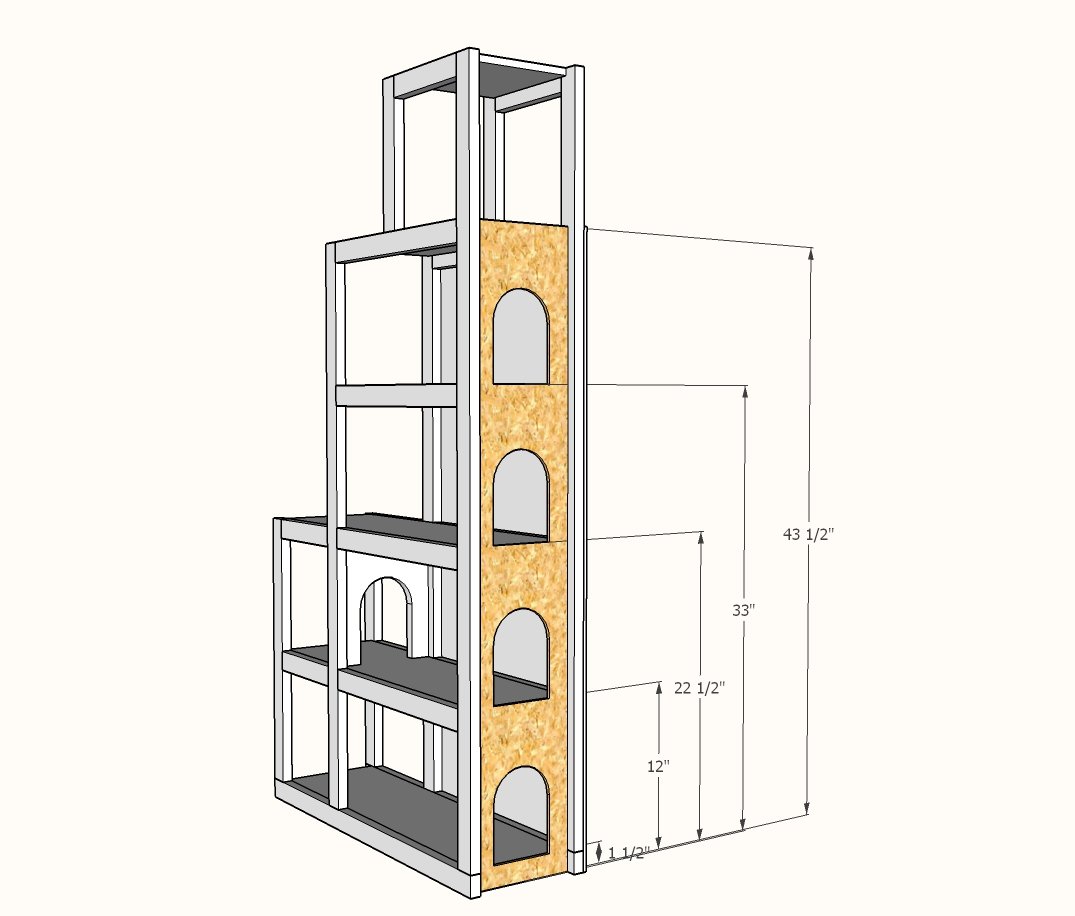
- 1 - 1/4" plywood @ 7-1/4" (matches width of 1x8) x 43-1/2"
- 1 - 1/4" plywood @ 7-1/4" (matches width of 1x8) x 22-1/2"
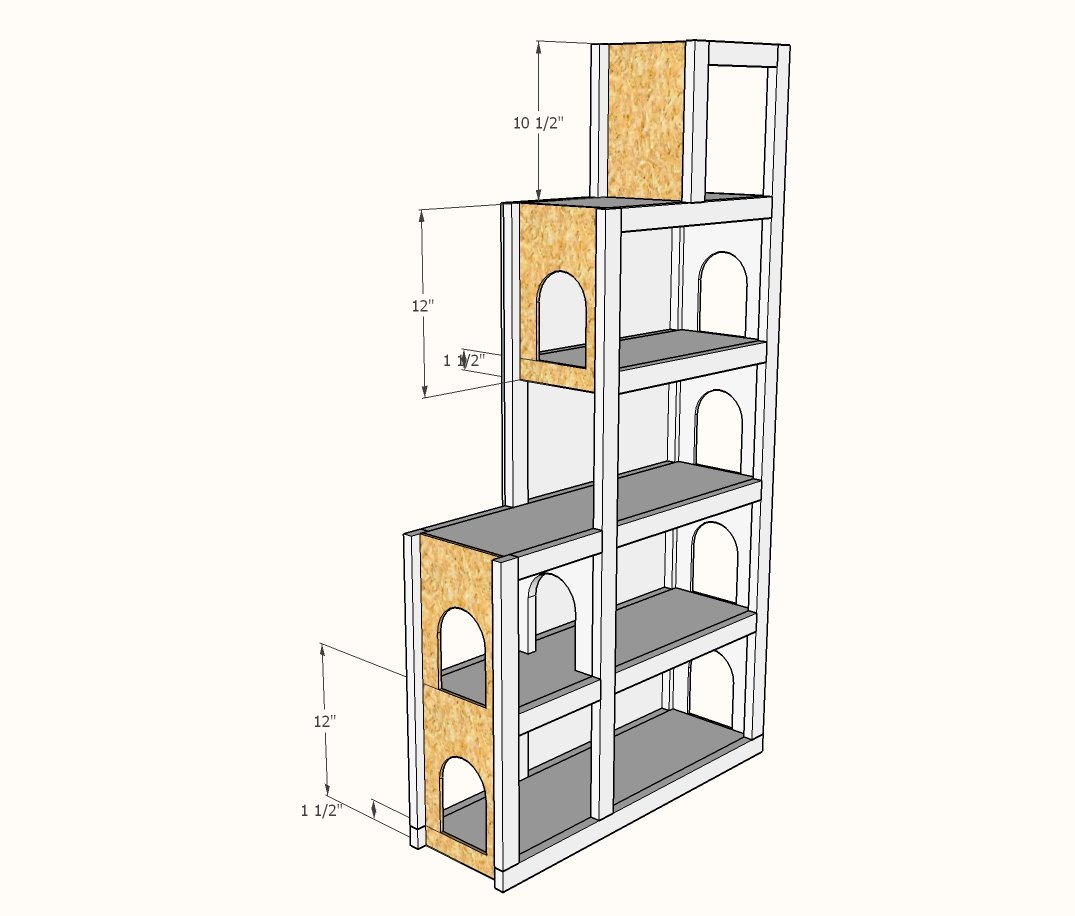
- 1 - 1/4" plywood @ 7-1/4" (matches width of 1x8) x 12"
- 1 - 1/4" plywood @ 7-1/4" (matches width of 1x8) x 10-1/2"
1x2 Trim
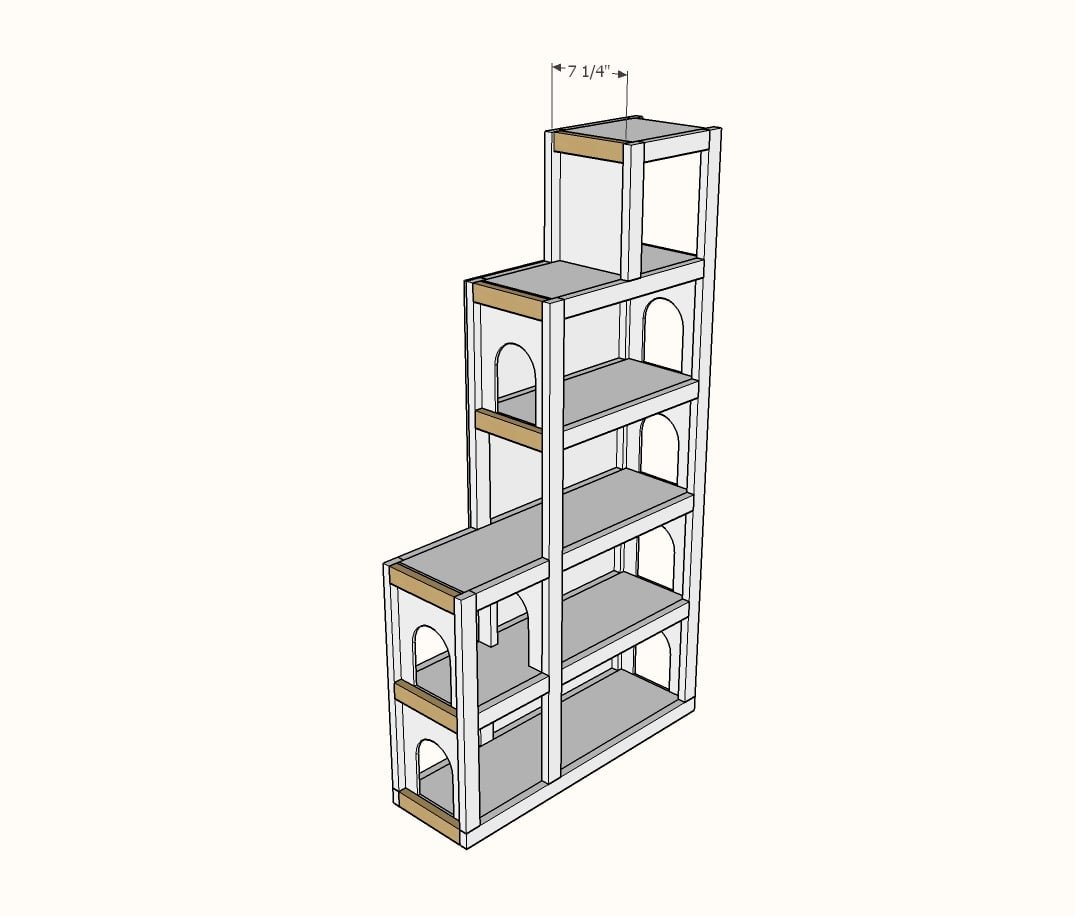
- 6 - 1x2 @ 7-1/4" (matches width of 1x8)
Tools
- measuring tape
- square
- pencil
- safety glasses
- hearing protection
- kreg-jig
- drill
- circular saw
- jigsaw
- compound miter saw
- nailer
- sander
Step-by-step Instructions
Cut pieces of face frames with miter saw.
Drill 3/4" pocket holes (two per joint) on ends of joining boards. Clamp to a flat, level surface and attach joints with 1-1/4" pocket hole screws.
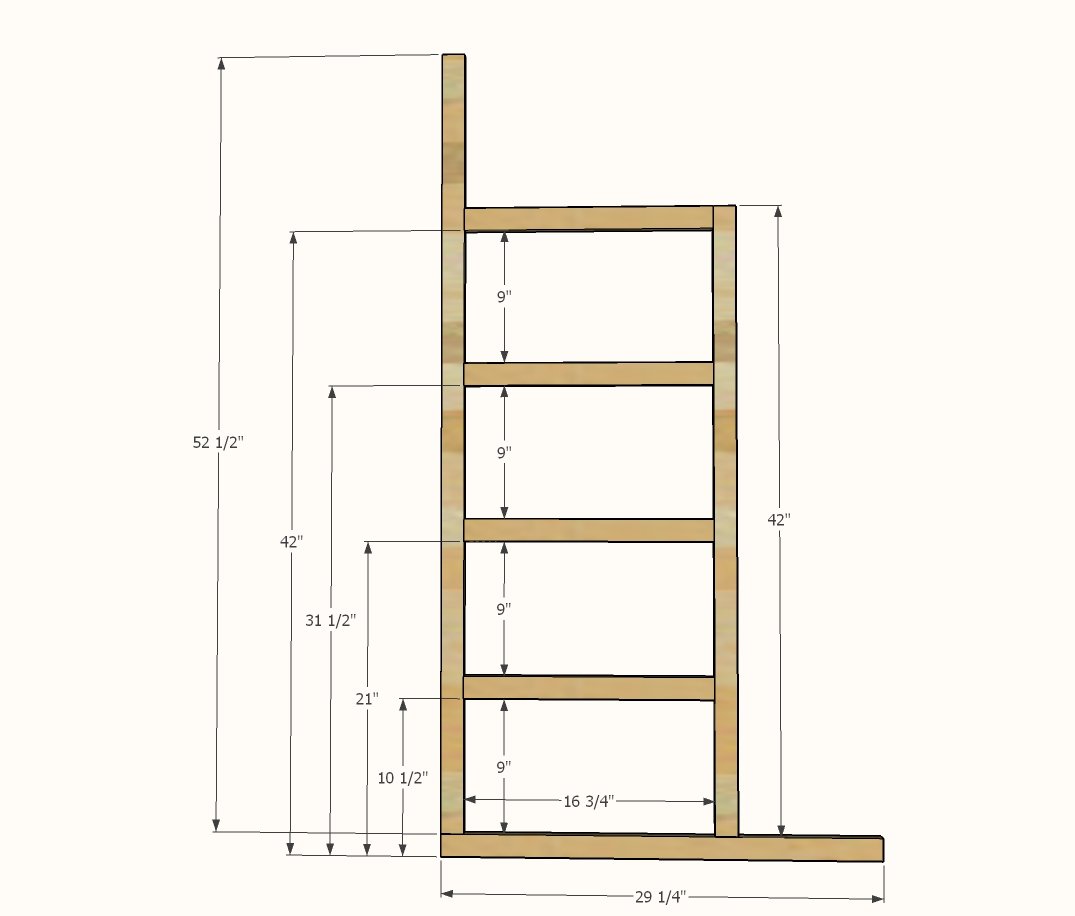
Repeat for final face frame pieces.
Build two identical face frames.
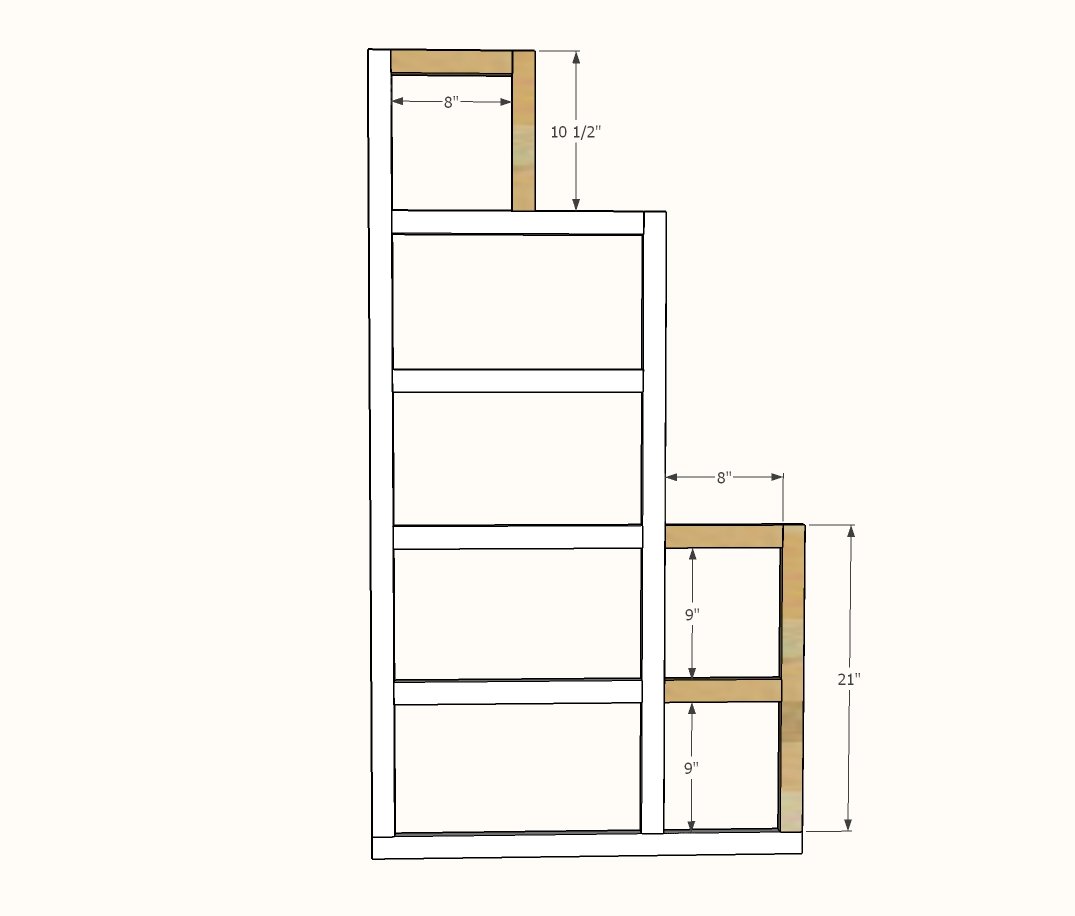
Cut shelf boards with a compound miter saw.
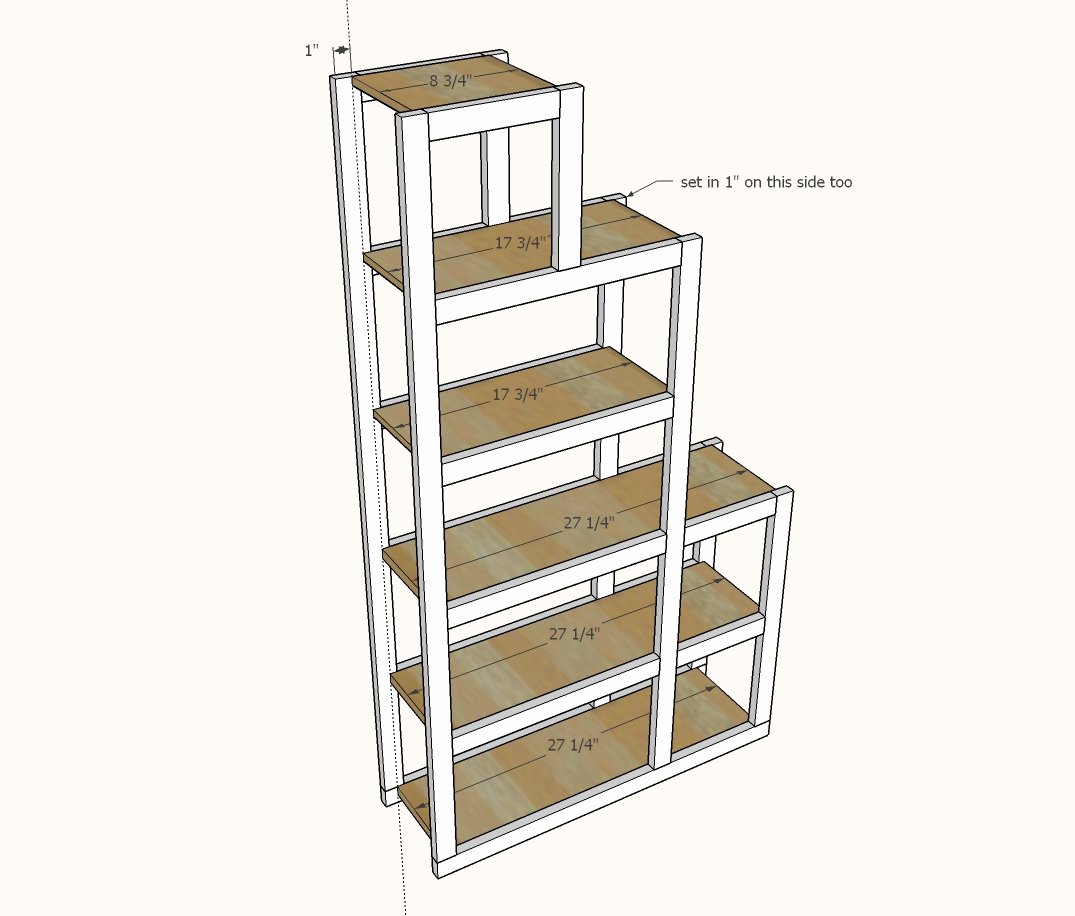
Drill 3/4" pocket holes along side edges (the longer edges), one on each end and depending on the length of the shelf, more about every 8", avoiding directly behind 1x2 leg areas, so you can fit your drill inside the face frames when attaching the pocket hole screws. Draw a line 1" in on the face frame, parallel to the vertical ends (dotted line shown in the diagram). Attach shelves so ends meet the dotted lines, using 1-1/4" pocket hole screws.
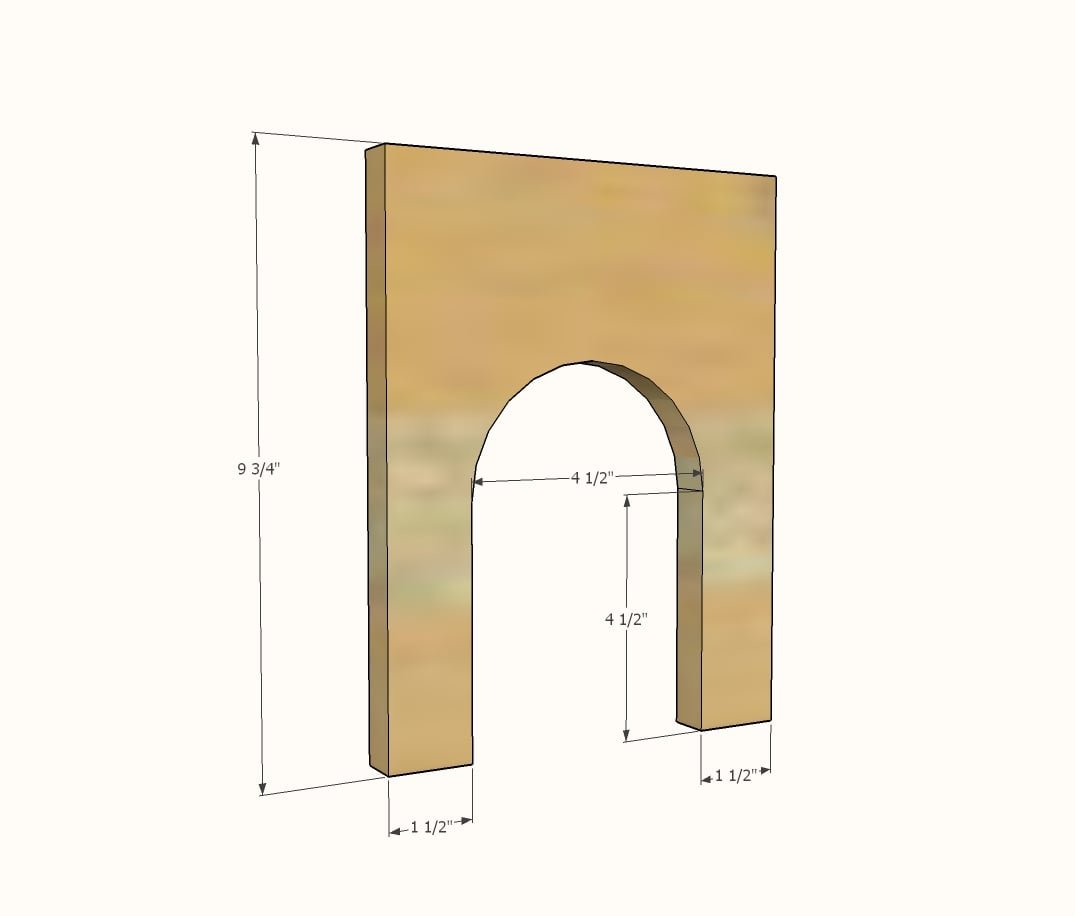
Cut out arches in the 1x8 room divider with a jigsaw.
You can also use a hole saw (4" size) to drill a 4" hole, and then finish the arch cut with a jigsaw.
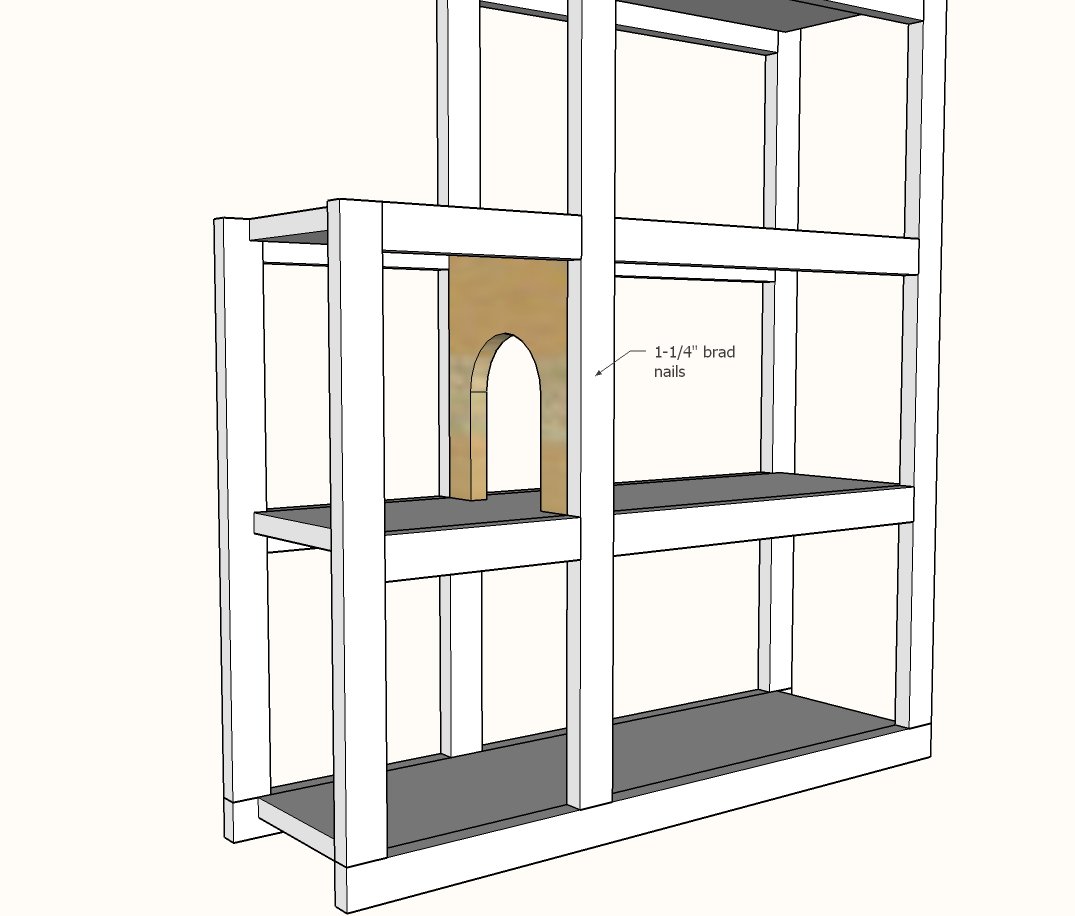
Step 5
Attach with 1-1/4" brad nails and glue inside the playhouse.
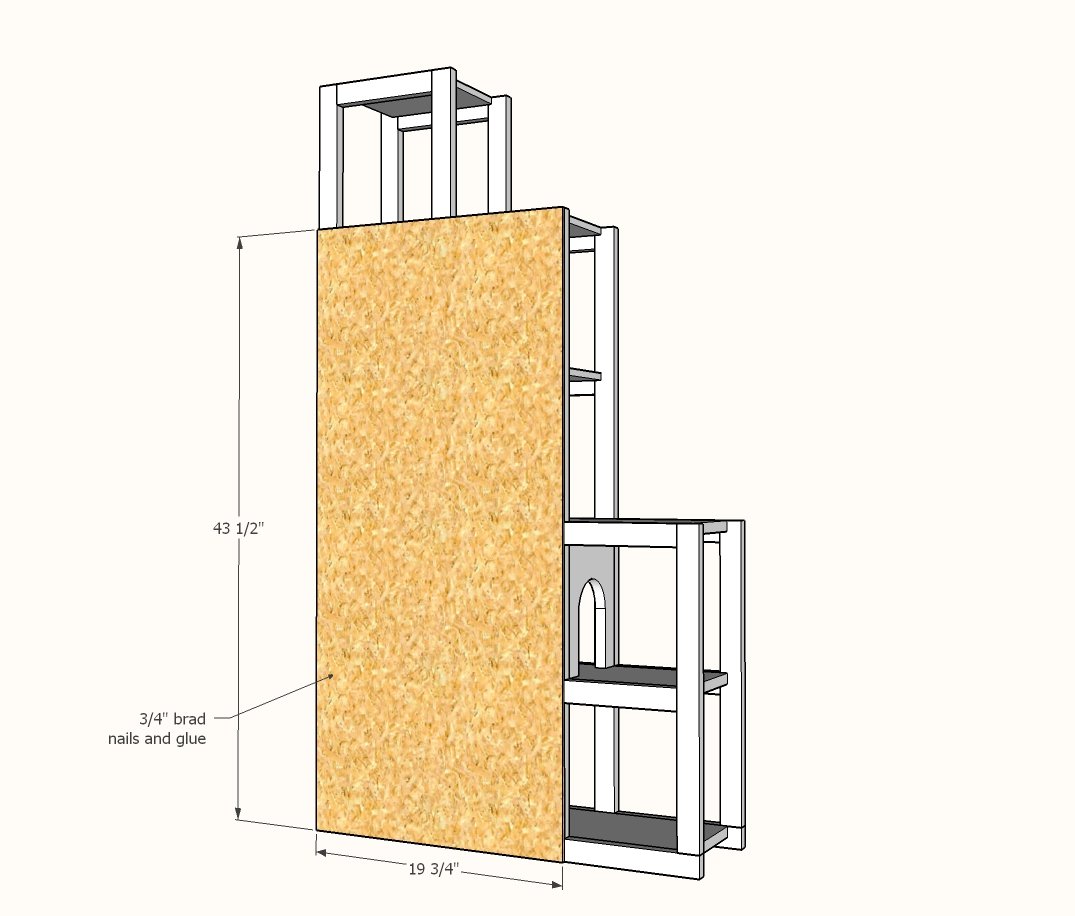
Cut 1/4" pywood for the back with a circular saw.
Attach with 3/4" brad nails and glue.
Cut the long side panel with circular saw, matching width to the width of the 1x8s.
Cut out the archways. Attach to the ends with 3/4" brad nails and wood glue.
Step 8
Repeat steps for the remaining side panels. Attach with 3/4" brad nails and wood glue.
Add trim, attaching from face frames with 1-1/4" brad nails and wood glue.
Also nail to the shelf 1x8 ends with 1-1/4" brad nails and wood glue. You can also add trim to the tall end, if you opt not to add the elevator.
Step 10
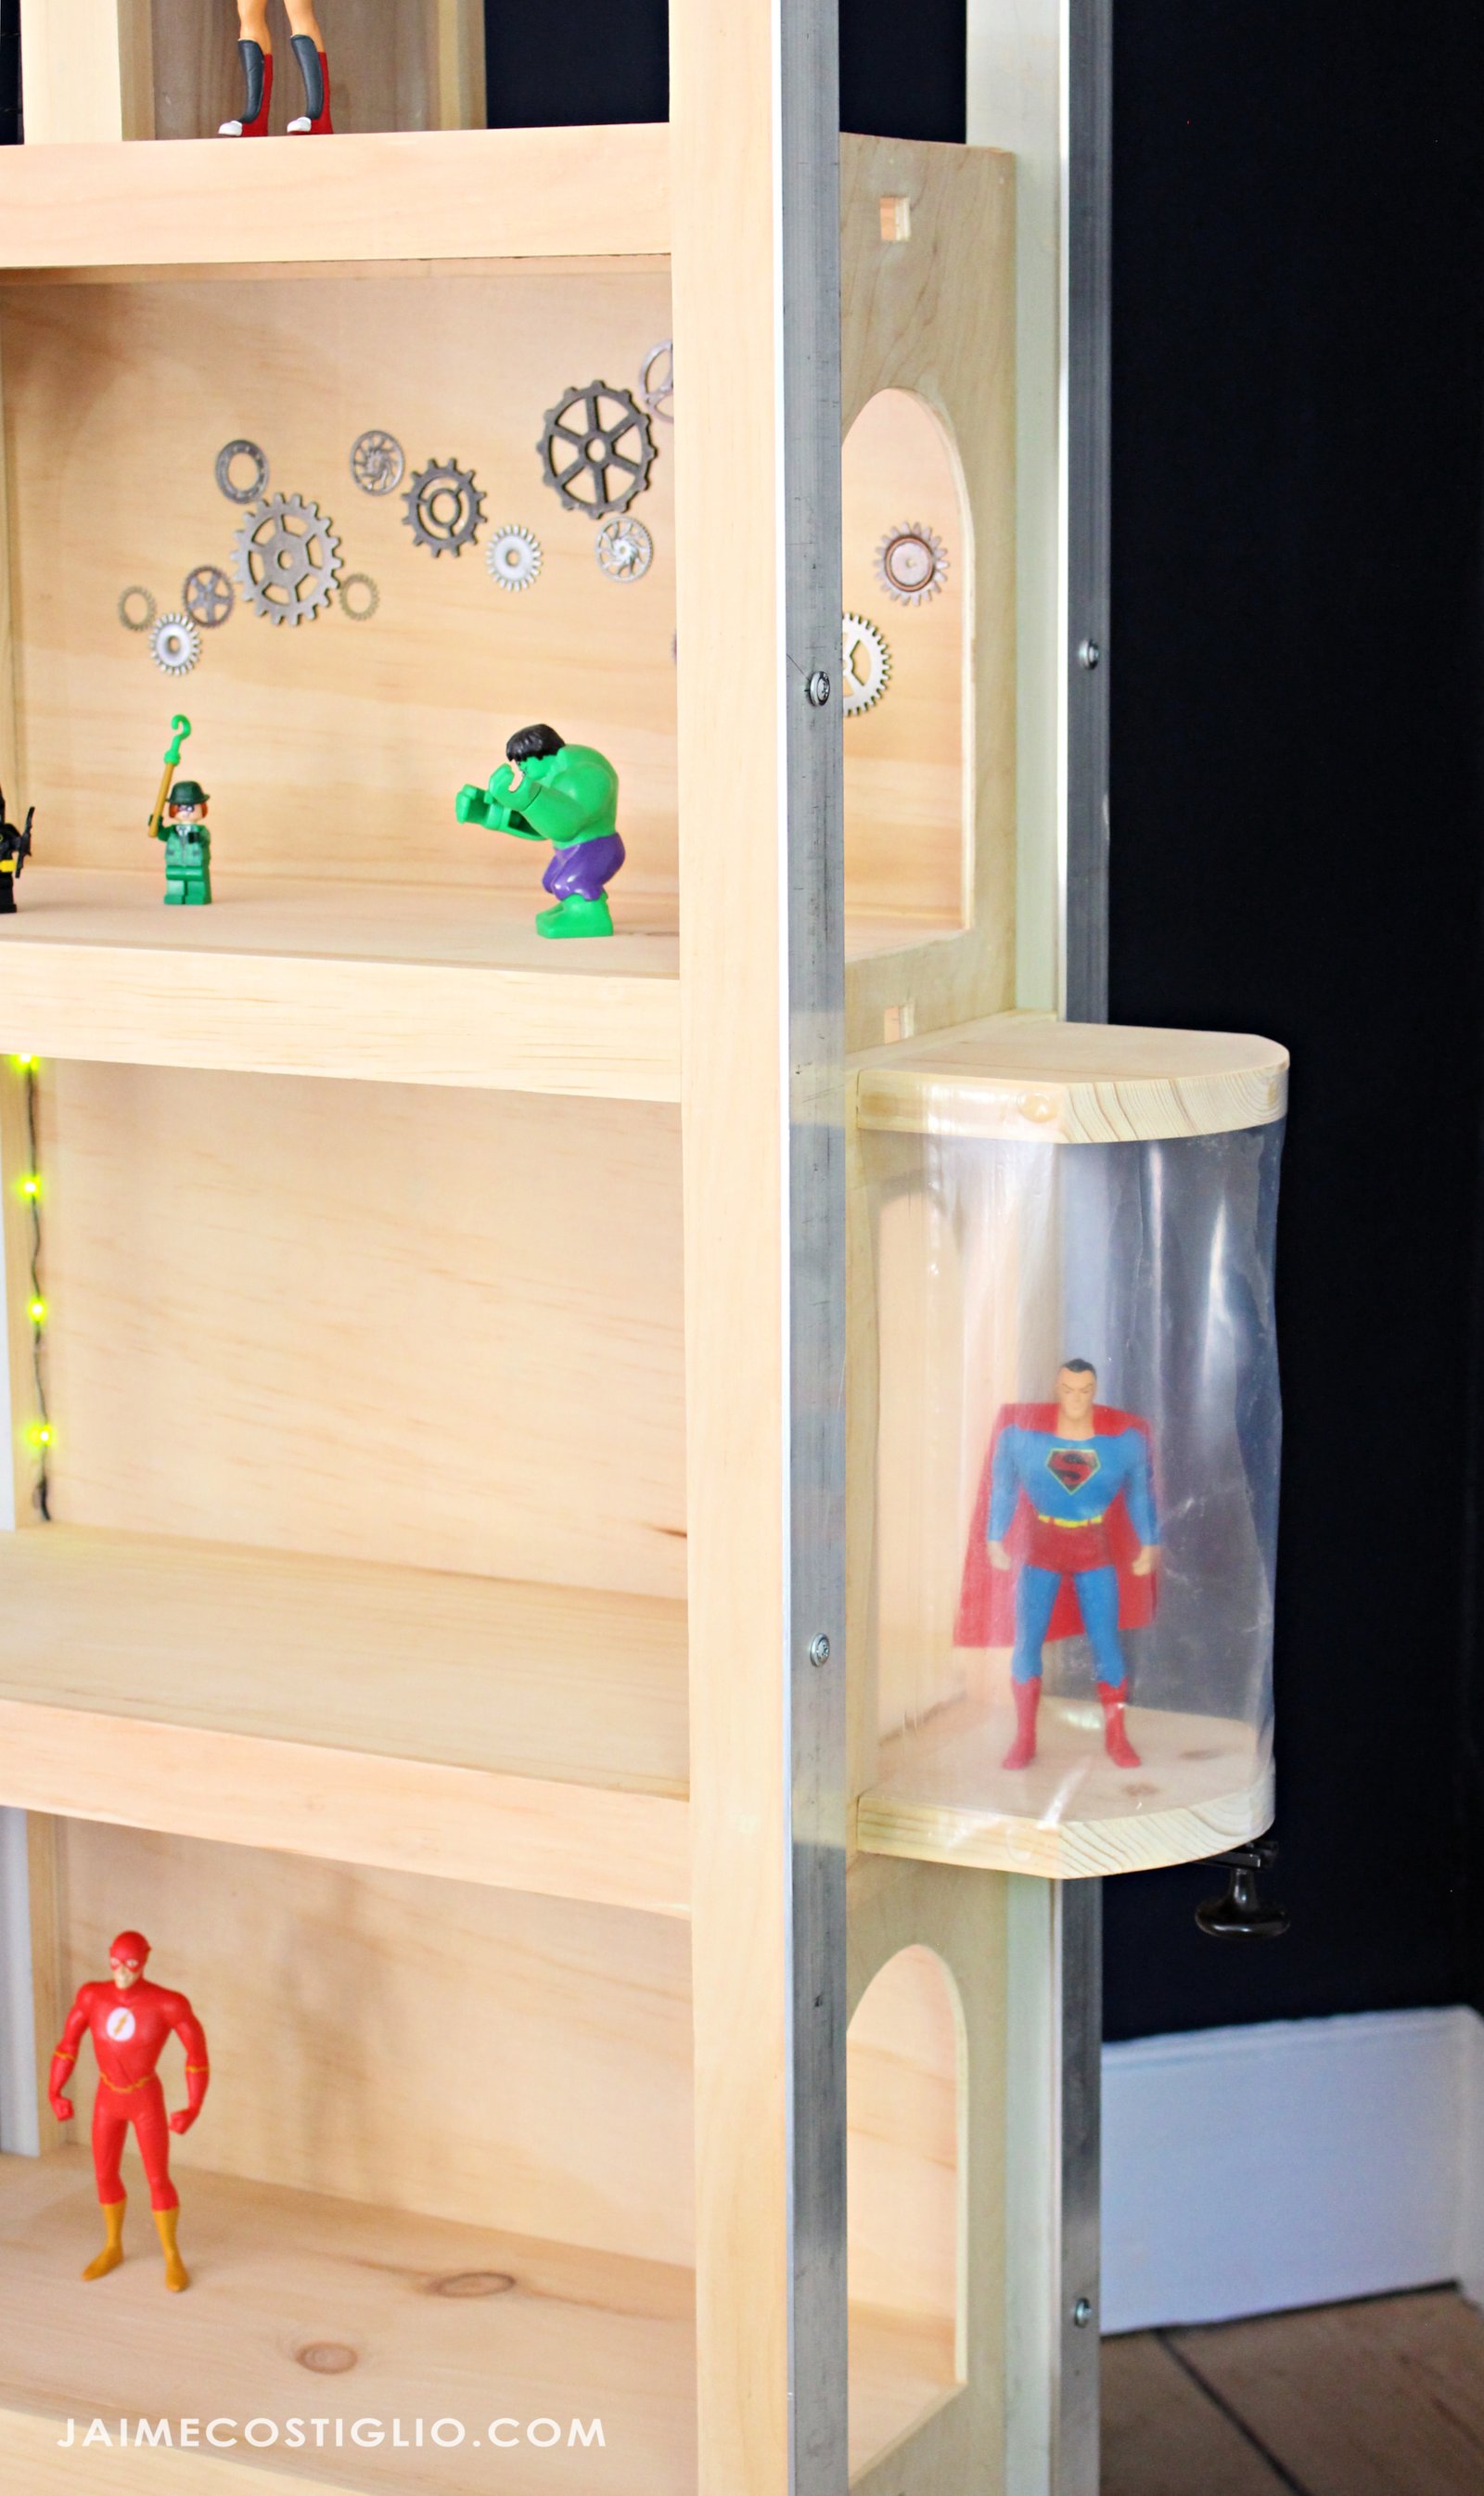
Elevator and jailhouse accessory how-to is here.
Finishing
Sand all surfaces, starting with a medium grit and finishing with fine. Wipe off the dust, fill any holes or gaps with wood filler, and sand smooth once dry. Apply primer if you're painting, then finish with your choice of paint or stain and seal with a durable clear topcoat. For outdoor projects, use exterior-rated primer, paint or stain, and sealer so the piece stands up to the weather.
Source (temporary): https://www.ana-white.com/woodworking-projects/superhero-playhouse