Surf Board Coffee Table, Bench or Child's Table
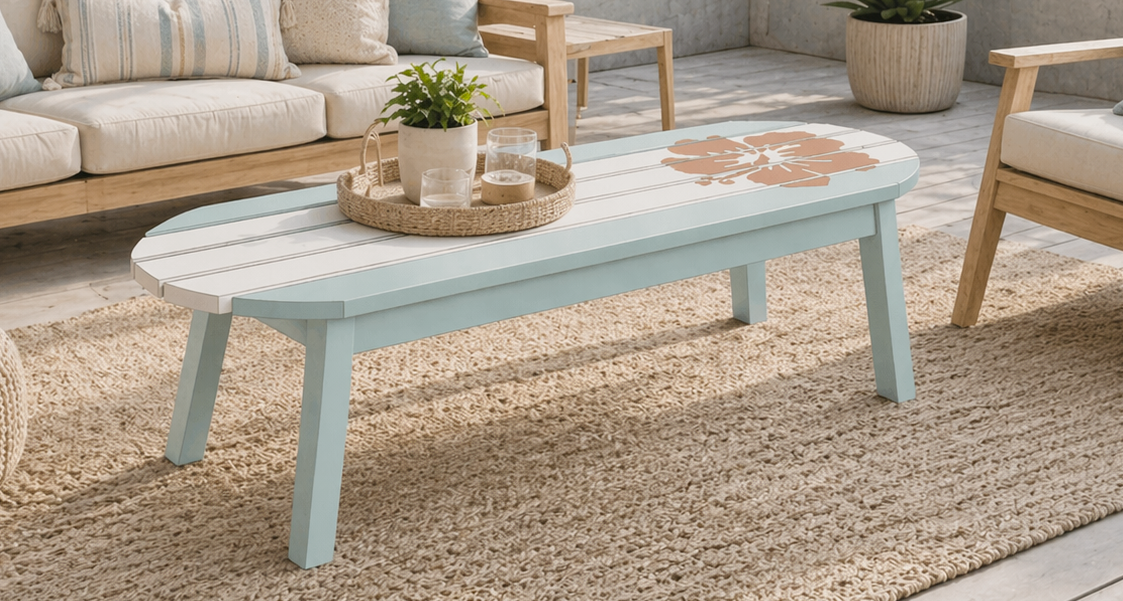
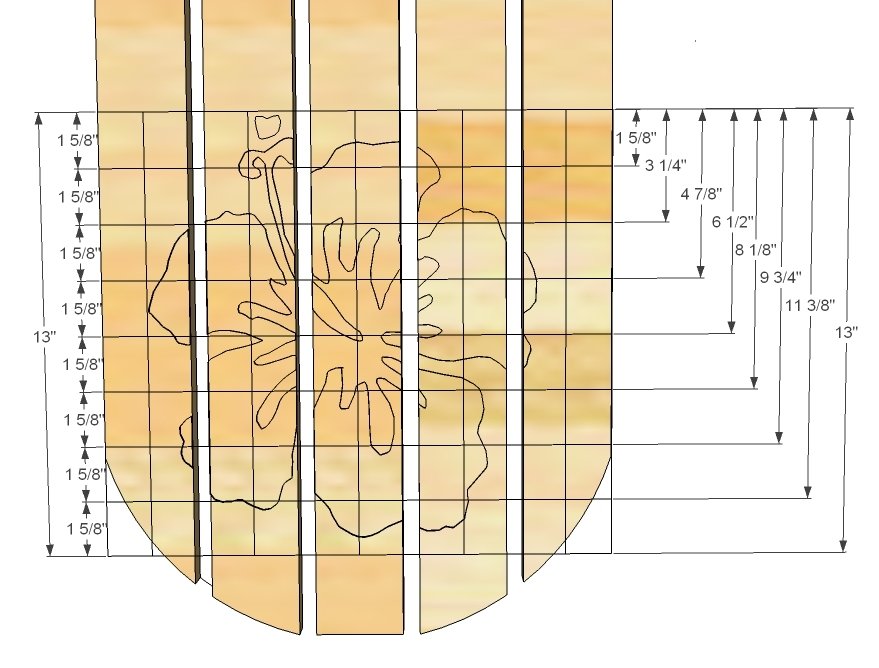
Add beach style to your space, or bring the vacation feel to your backyard with this surf board inspired bench, coffee table, or child's outdoor table. Featuring a sturdy design, this inexpensive cutie comes alive with fun painting. Pair the surf board table with stools for an outdoor table your child will love to eat and play at. Use this DIY project plan as a coffee table - think adirondack chairs, or even a bench. Also included in this plan is help with adding a Hawaiian Flower to your Surfboard Coffee Table or Kids Table as shown in the diagrams.
Specifications
| Project type | Bench |
|---|---|
| Room | Entryway and Mudroom |
| Style | Cottage Style Furniture Plans |
| Difficulty | Beginner Projects |
| Estimated cost | Under $20 |
Dimensions
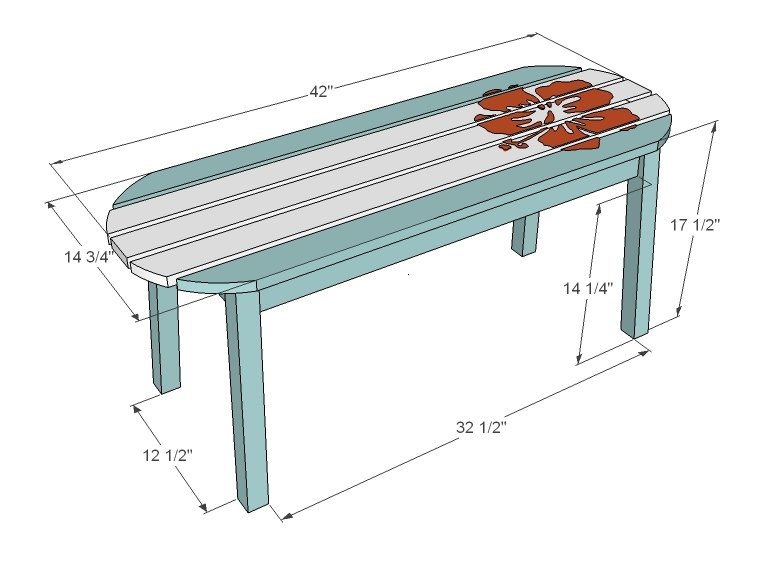
Use the size-specific shopping and cut lists below.
Shopping List
- 1 - 2x2 @ 8 feet long
- 4 - 1x3 @ 8 feet long
- 2-1/2" and 1-1/4" pocket hole screws
- exterior wood glue
Cut List
- 4 - 2x2 @ 16 3/4" (both ends cut 5 degrees off square with a 5 degree bevel, ends parallel to each other)
- 2 - 1x3 @ 10 1/2" (both ends cut at 5 degrees off square, NOT parallel to each other, short point to short point measurement)
- 2 - 1x3 @ 30 1/2" (both ends cut at 5 degrees off square, NOT parallel to each other, short point to short point measurement)
- 2 - 1x3 @ 11 1/4"
- 5 - 1x3 @ 42"
Tools
- measuring tape
- square
- pencil
- safety glasses
- hearing protection
- kreg-jig
- drill
- jigsaw
- compound miter saw
- nailer
- sander
- countersink drill bit
Step-by-step Instructions
Step 1
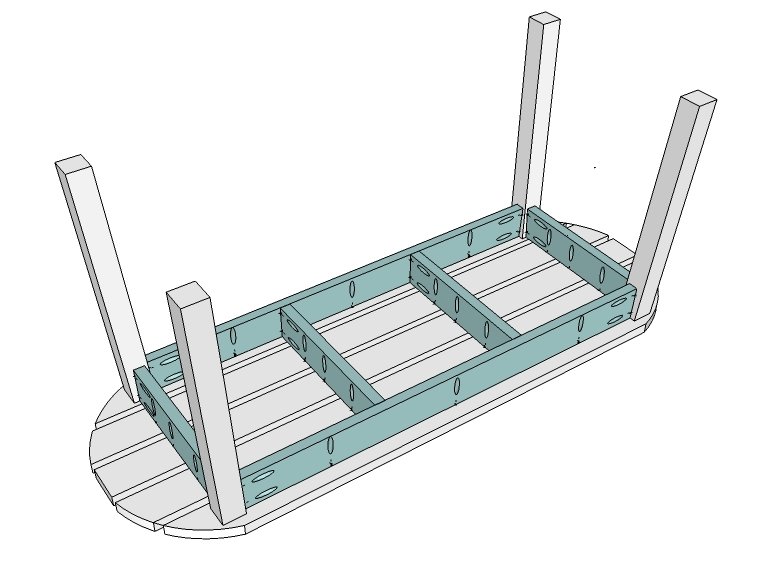
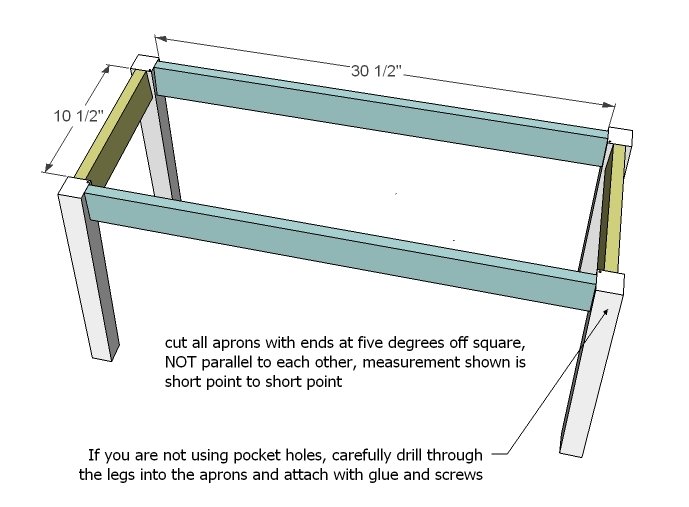
Since many of us have Kreg Jigs, and many of us don't, I try to make new plans adaptable for both. For Kreg Jig users, the diagram above shows all boards that you would need to drill pocket holes in.
Step 2
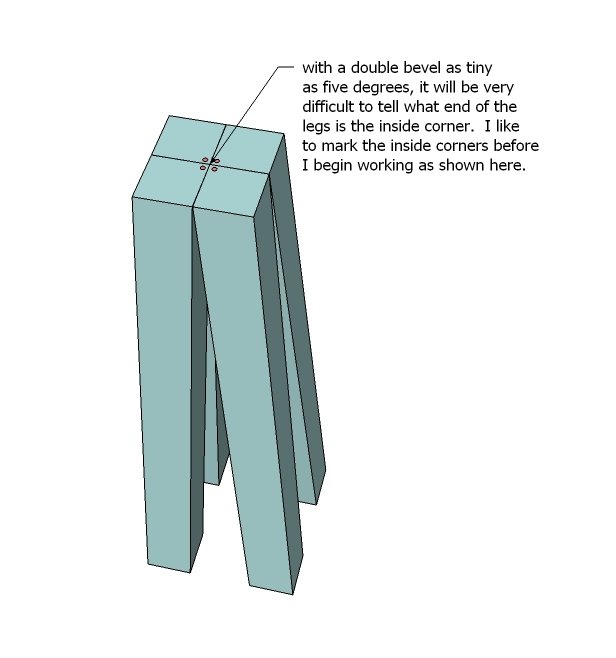
As you will find, it's going to be tough figuring out what end is what with a 5 degree double bevel, once you start working. I always take a second and mark the inside corners of the legs. You can make this table without a double bevel, but it's much sturdier with a slight bevel and will last longer. Especially if you've got little surfers pretending to be big surfers on it:)
Step 3
Once your legs are cut, attach the aprons as shown above. You will need to carefully predrill holes and attach with glue and 2 1/2" screws. If you find your table has any wobble, add corner bracing.
Step 4
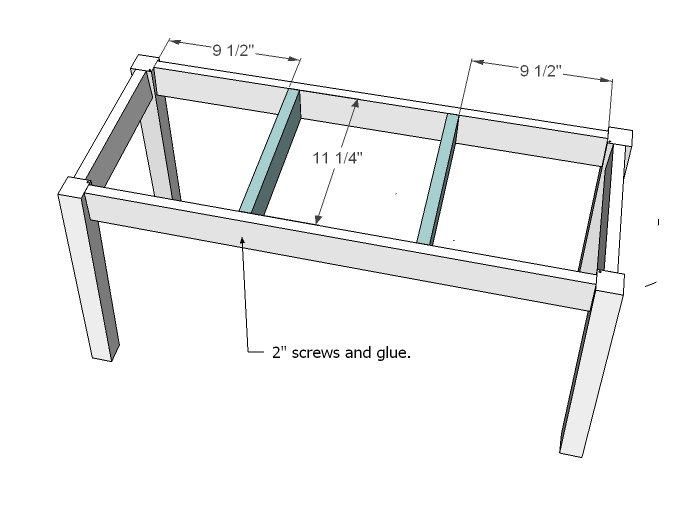
Center supports. Attach center supports as shown above.
Step 5
Step 6
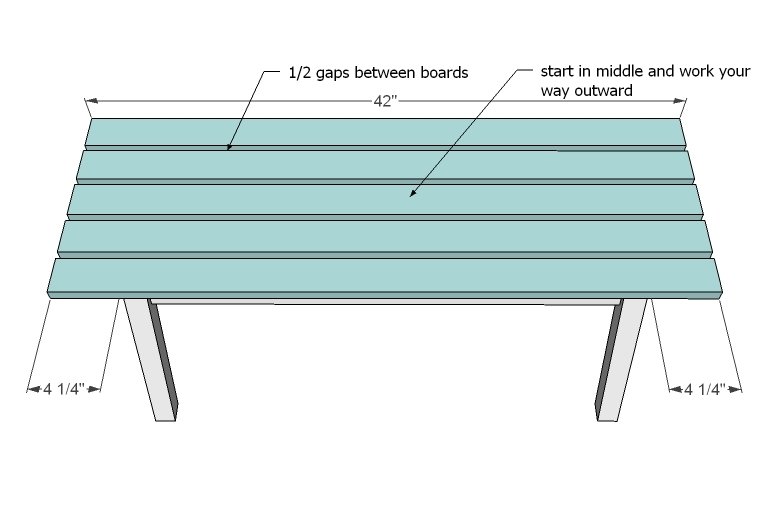
Once your tabletop boards are nailed down, round the corners as shown above and cut of with a jigsaw. Sand the edges.
Step 7
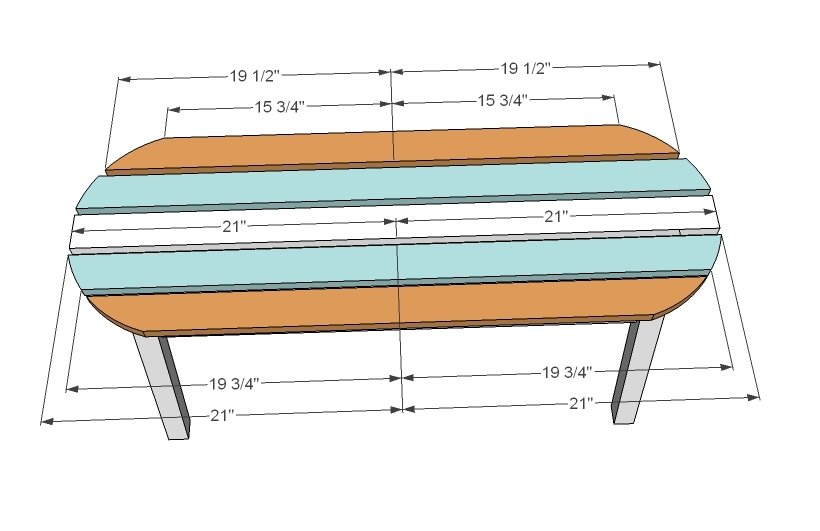
You can print this diagram out and transfer it on your surf board table or bench or coffee table! Just draw the graph on your surf board table, and then draw the image located in each square of the graph onto the tabletop. Then paint with a contrasting color.
Finishing
Sand all surfaces, starting with a medium grit and finishing with fine. Wipe off the dust, fill any holes or gaps with wood filler, and sand smooth once dry. Apply primer if you're painting, then finish with your choice of paint or stain and seal with a durable clear topcoat. For outdoor projects, use exterior-rated primer, paint or stain, and sealer so the piece stands up to the weather.
Source (temporary): https://www.ana-white.com/woodworking-projects/surf-board-coffee-table-bench-or-childs-table