Tabletop Play Kitchen
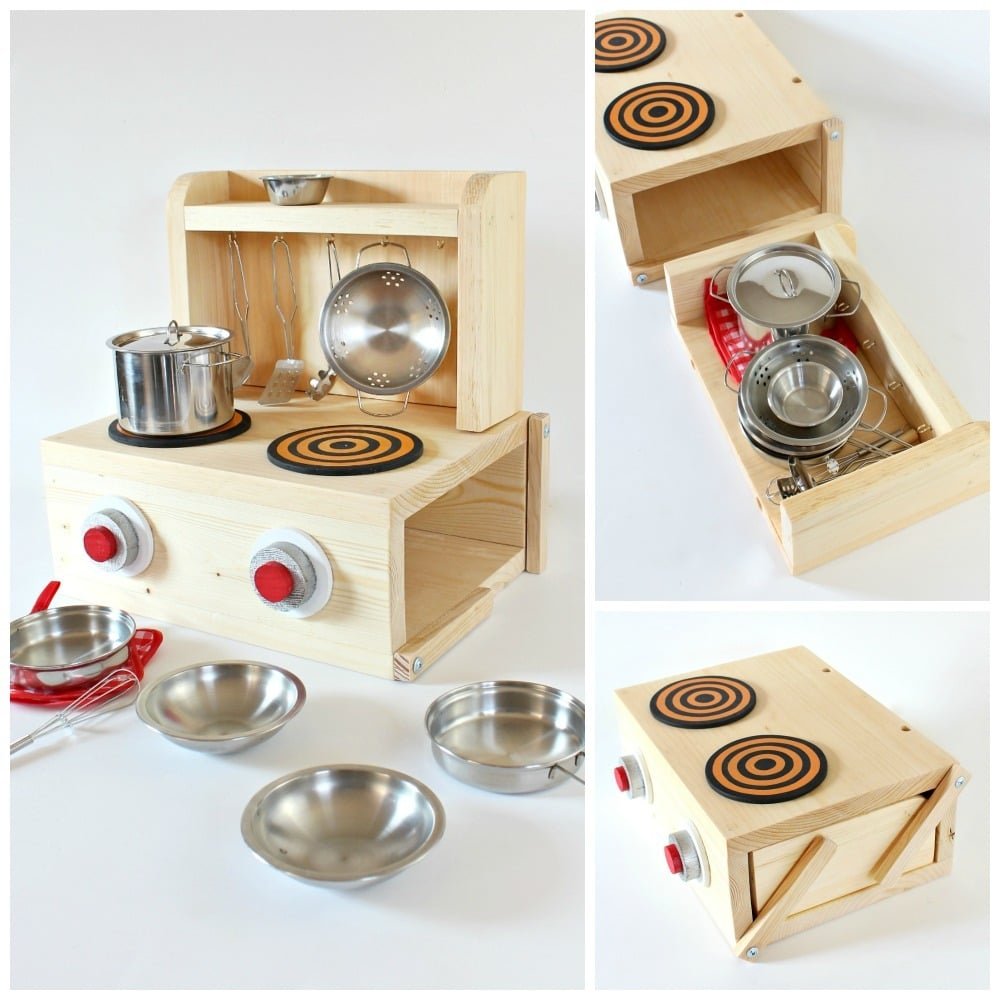
DIY tabletop play kitchen that folds up into a small storage box. Free
Specifications
| Project type | Play Kitchen Collection |
|---|---|
| Room | Kids and Toys |
| Style | Children's and Kid's Room Furniture and Toy Plans |
| Difficulty | Beginner Projects |
| Estimated cost | scraps |
Dimensions
Use the size-specific shopping and cut lists below.
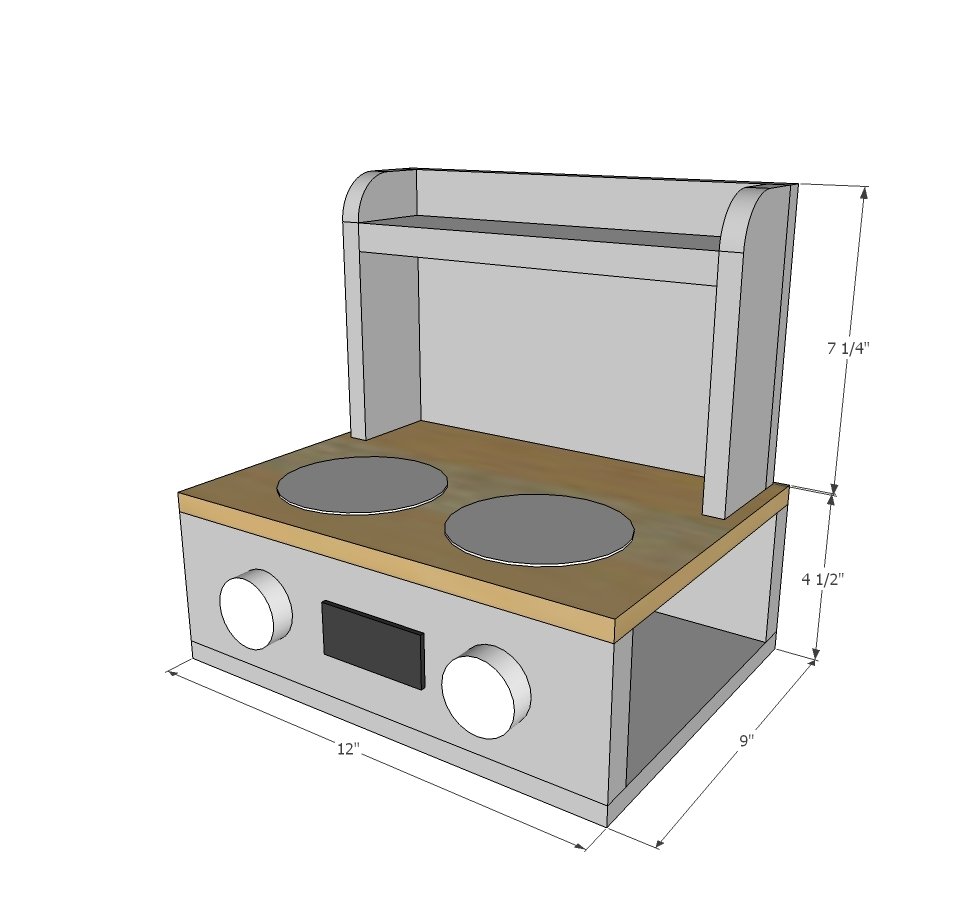
Shopping List
28" of 1x4s
25" of 1x3s
24" x 24" piece of 1/2" plywood (or scraps in smaller pieces)
Dowels for securing hutch to the base
1-1/4" brad nails or 2" wood screws (self tapping, smallest possible size)
Cut List
BASE
2 - 1x4 @ 12"
1 - 1x4 @ 7-1/2"
2 - 1/2" plywood @ 12" x 9"
HUTCH
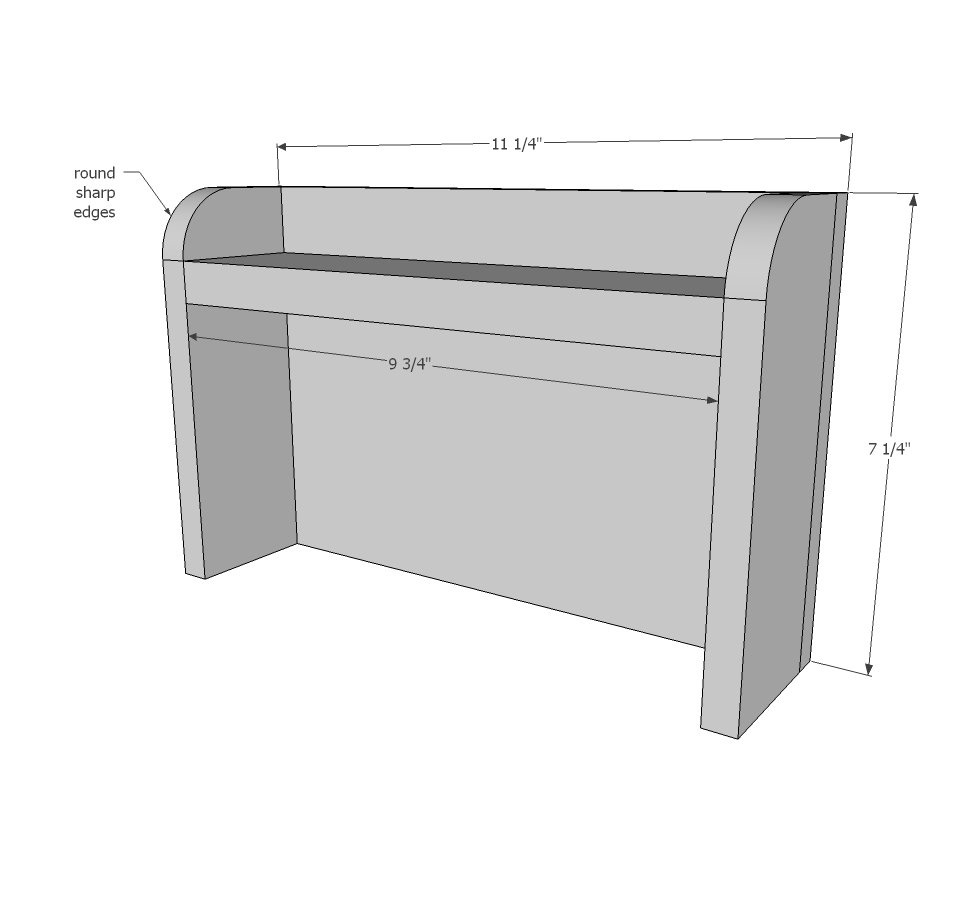
2 - 1x3 @ 7-1/4"
1 - 1x3 @ 9-3/4"
1 - 1/2" plywood @ 11-1/4" x 7-1/4"
Dowels for securing hutch to the base
28" of 1x4s
25" of 1x3s
24" x 24" piece of 1/2" plywood (or scraps in smaller pieces)
Tools
- measuring tape
- square
- pencil
- safety glasses
- hearing protection
- drill
- circular saw
- nailer
- sander
- countersink drill bit
Step-by-step Instructions
Step 1
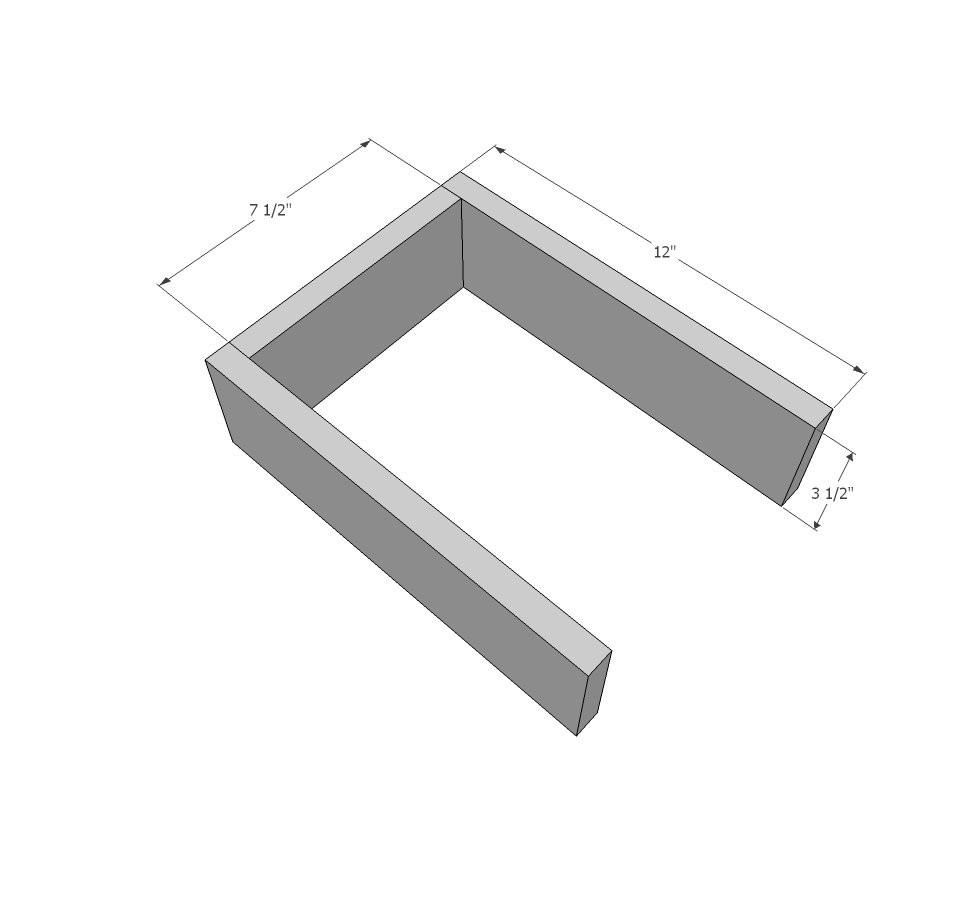
Attach the 1x4 boards together, with either wood screws (2" length self tapping or predrill to prevent wood splitting) or with brad nails (1-1/4" or longer) with wood glue.
Step 2
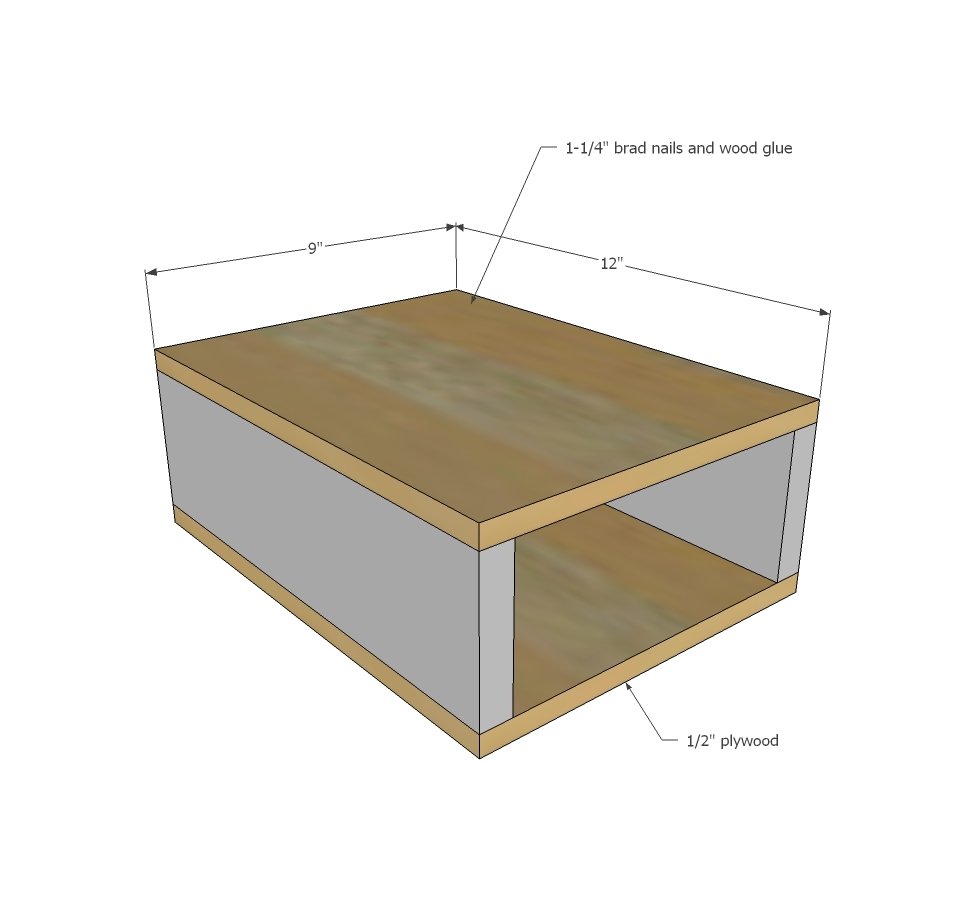
Attach top and bottom plywood to the 1x4s with brad nails.
Step 3
The hutch is built using same construction techniques as the base. Always use glue with nails.
Step 4
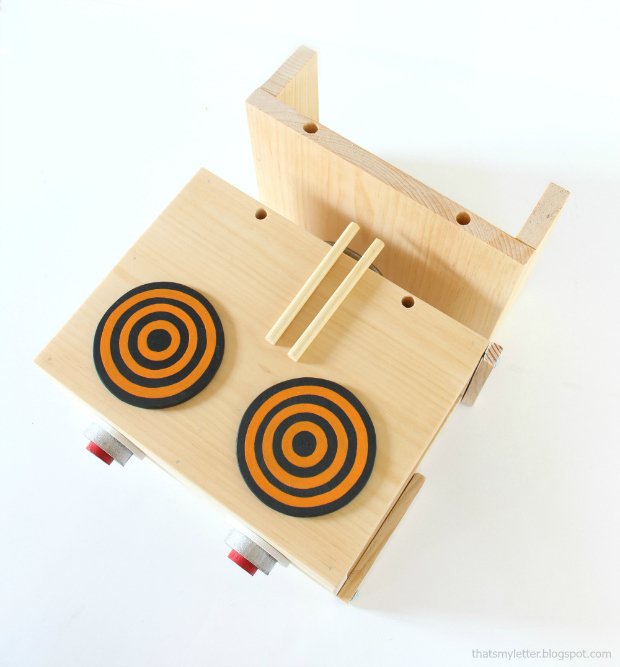
Jaime recommends dowels to be used to keep the hutch in place on the base. Drill the dowel holes a little larger than the dowels so it is easy for little hands to assemble all by themselves.
Finishing
Sand all surfaces, starting with a medium grit and finishing with fine. Wipe off the dust, fill any holes or gaps with wood filler, and sand smooth once dry. Apply primer if you're painting, then finish with your choice of paint or stain and seal with a durable clear topcoat. For outdoor projects, use exterior-rated primer, paint or stain, and sealer so the piece stands up to the weather.
Source (temporary): https://www.ana-white.com/woodworking-projects/tabletop-play-kitchen