Tall Back Wooden Planter Box
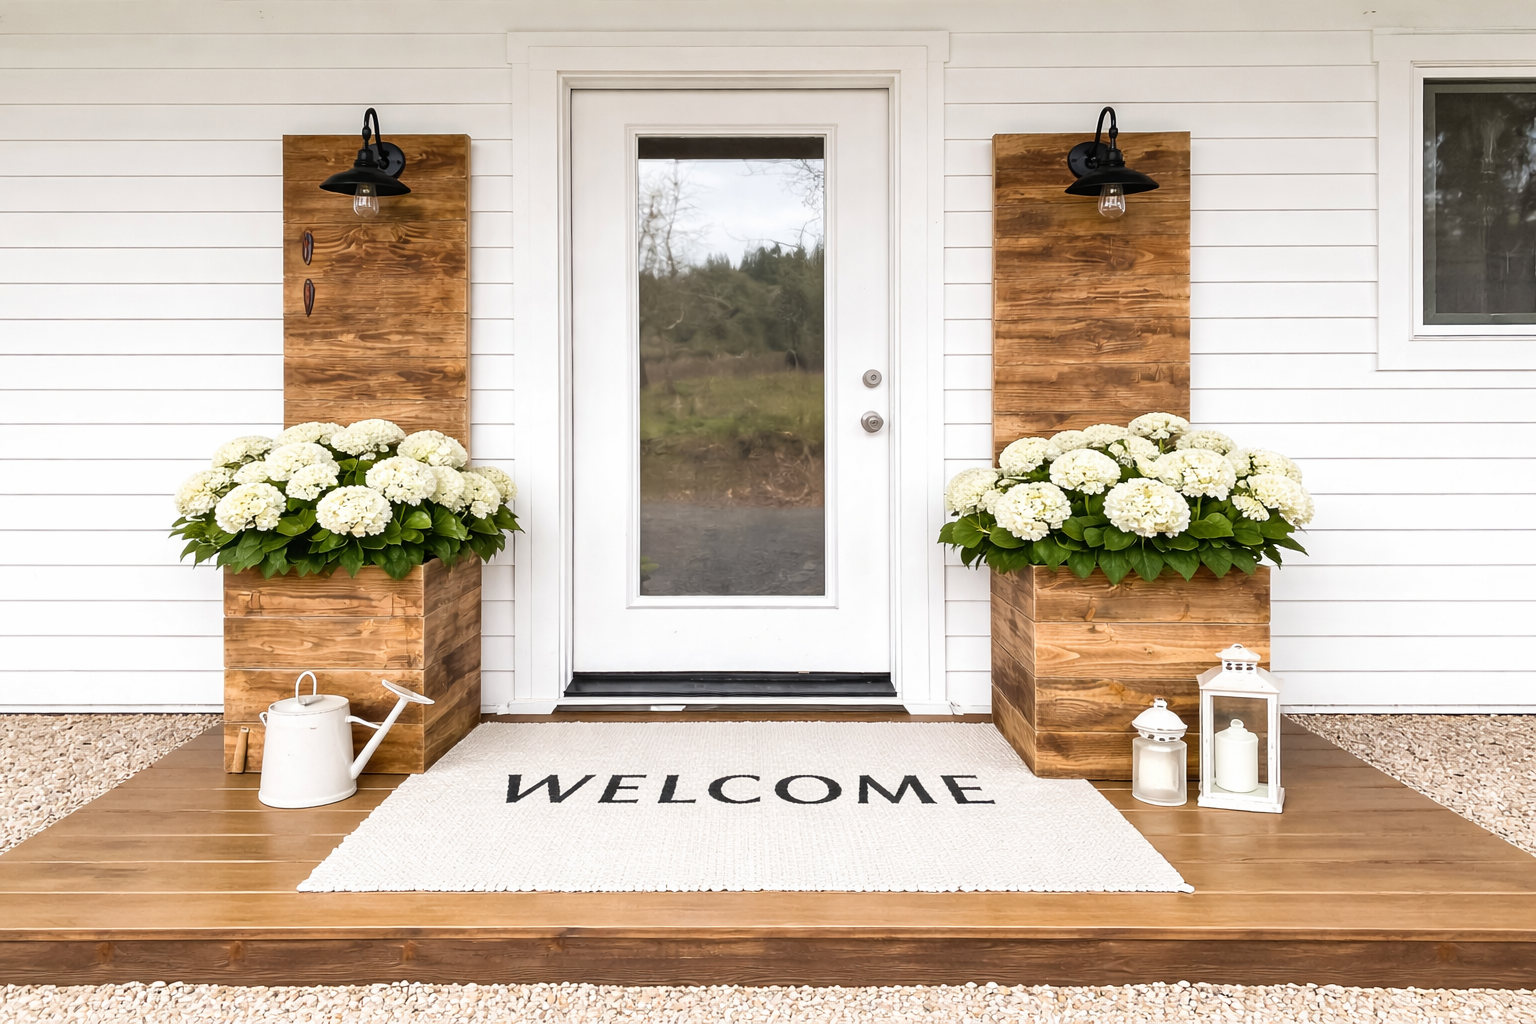
Add charm and vertical interest to your entryway, patio, or garden with this stylish Small Wood Planter with Tall Back. Designed to be both functional and decorative, this planter combines a classic box-style base with a tall back panel that creates a beautiful backdrop for your favorite plants, flowers, or vines. Whether you’re styling herbs on a kitchen porch, showcasing seasonal annuals, or adding greenery to a front entrance, this planter brings warm, handcrafted character to any space. The tall back is perfect for supporting climbing plants, hanging accents, or simply drawing the eye upward for a more dramatic display. Built with simple square boards and basic joinery, this versatile planter is a great weekend build for beginners and experienced woodworkers alike — and it looks amazing stained or painted to match your home’s aesthetic. Why You’ll Love It • Versatile Styling: Great for flowers, herbs, succulents, or trailing vines. • Functional Design: Tall back panel gives structure and visual height. • Beginner Friendly: Straightforward build with basic cuts and fasteners. • Customizable: Easy to finish with paint, stain, or a weathered look.
Specifications
| Project type | Planters, Garden Beds, and Greenhouses |
|---|---|
| Room | Outdoor |
| Difficulty | Beginner Projects |
| Estimated cost | $20 - $50 |
Dimensions
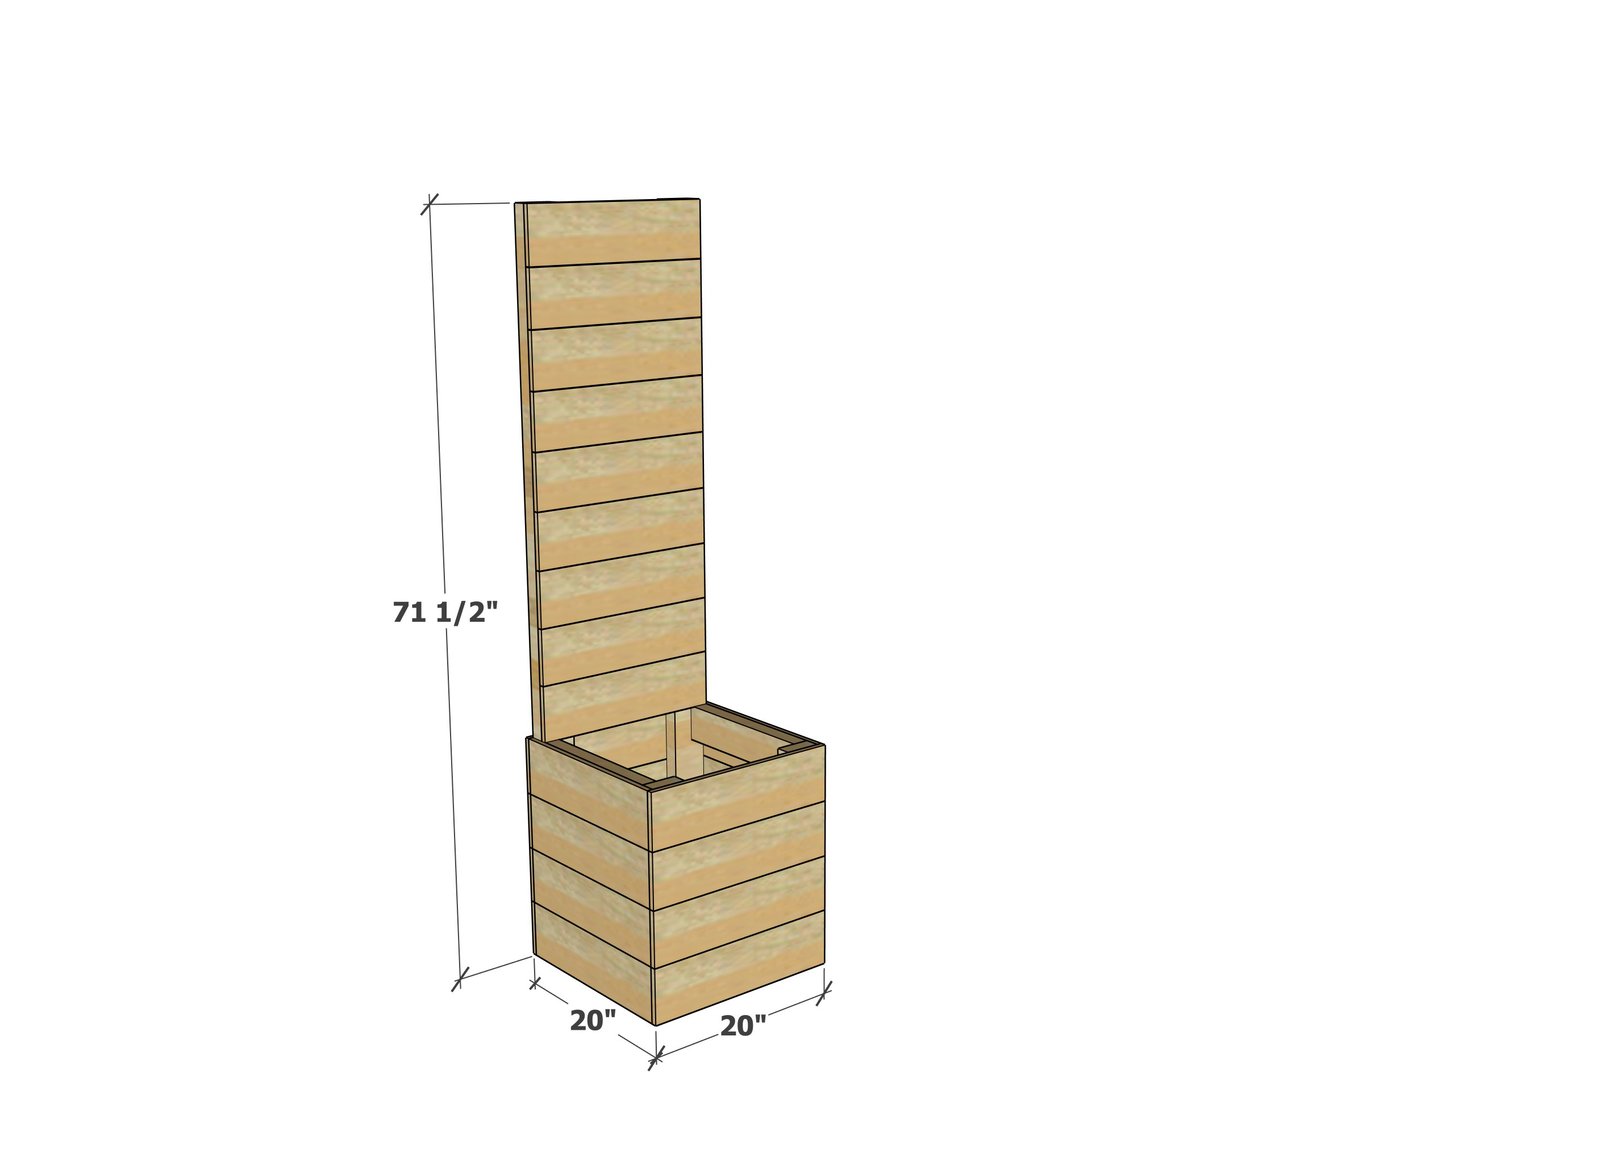
Use the size-specific shopping and cut lists below.
Shopping List
- 3 - 2x4x8' (make long cuts first)
- 9 - cedar fence pickets
*Material list is for 1 planter
Cut List
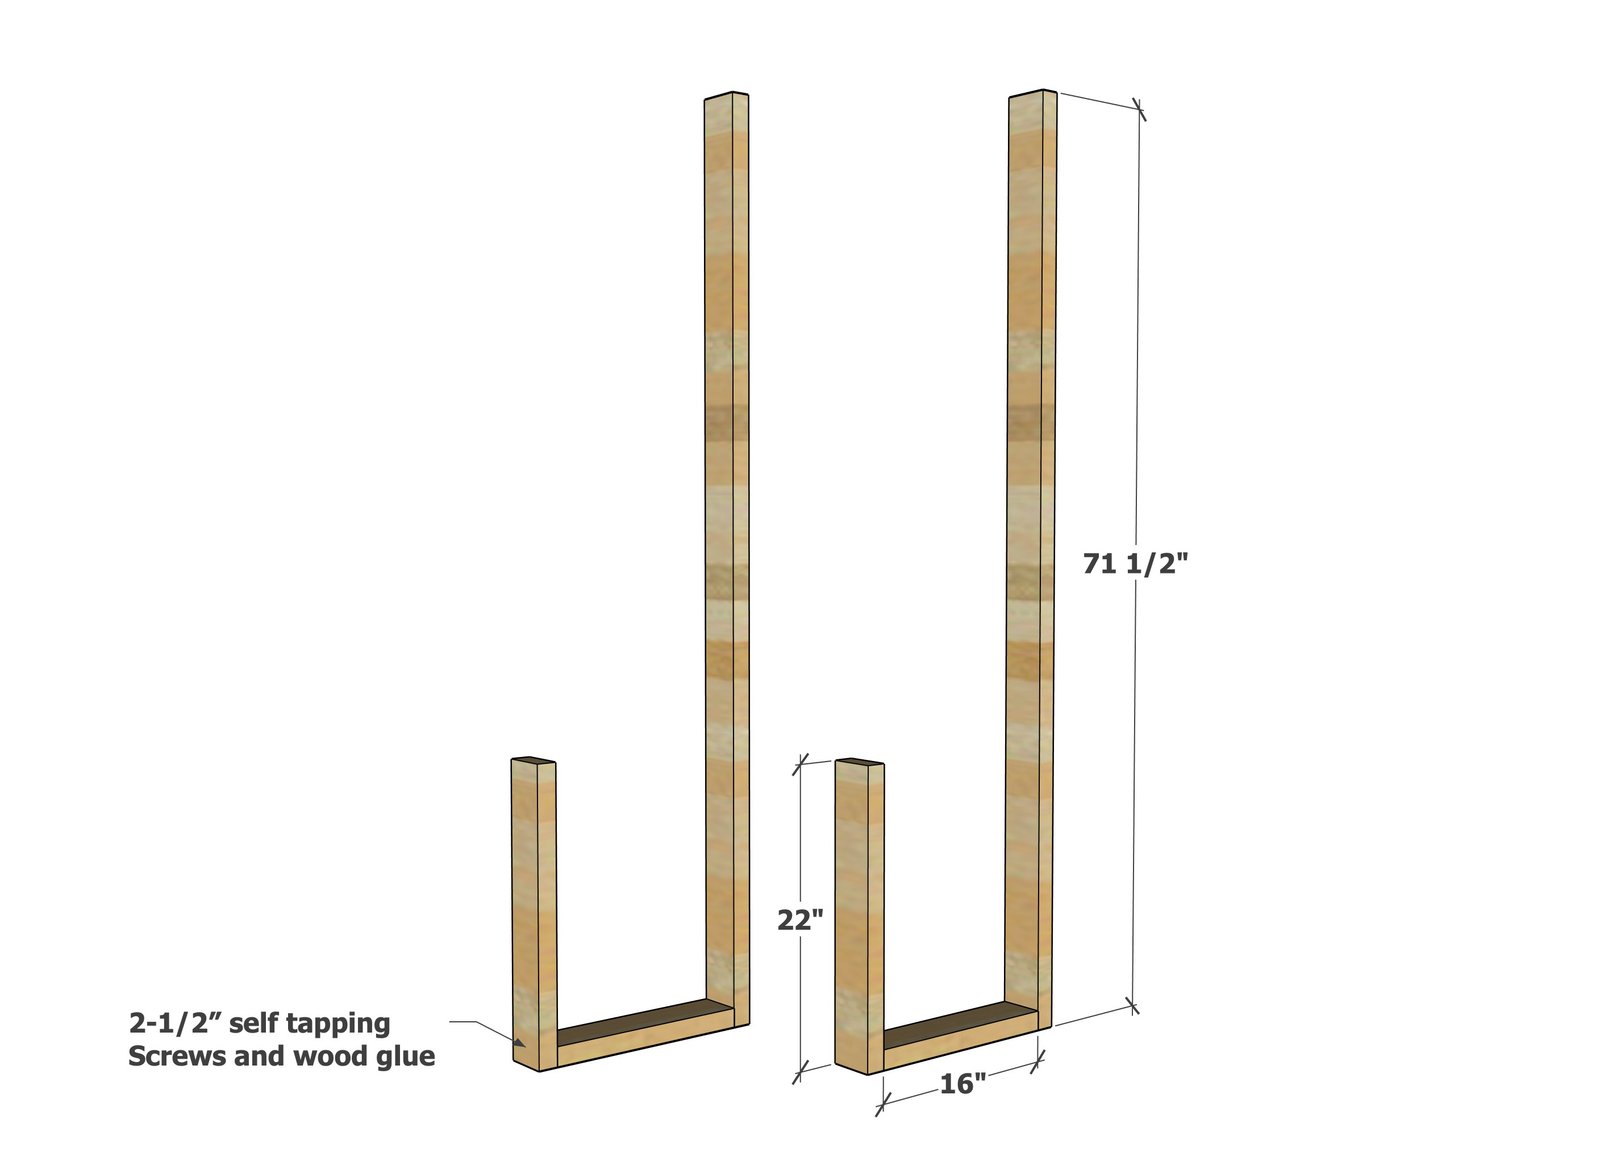
- 2 - 2x4 @ 22" (front of leg)
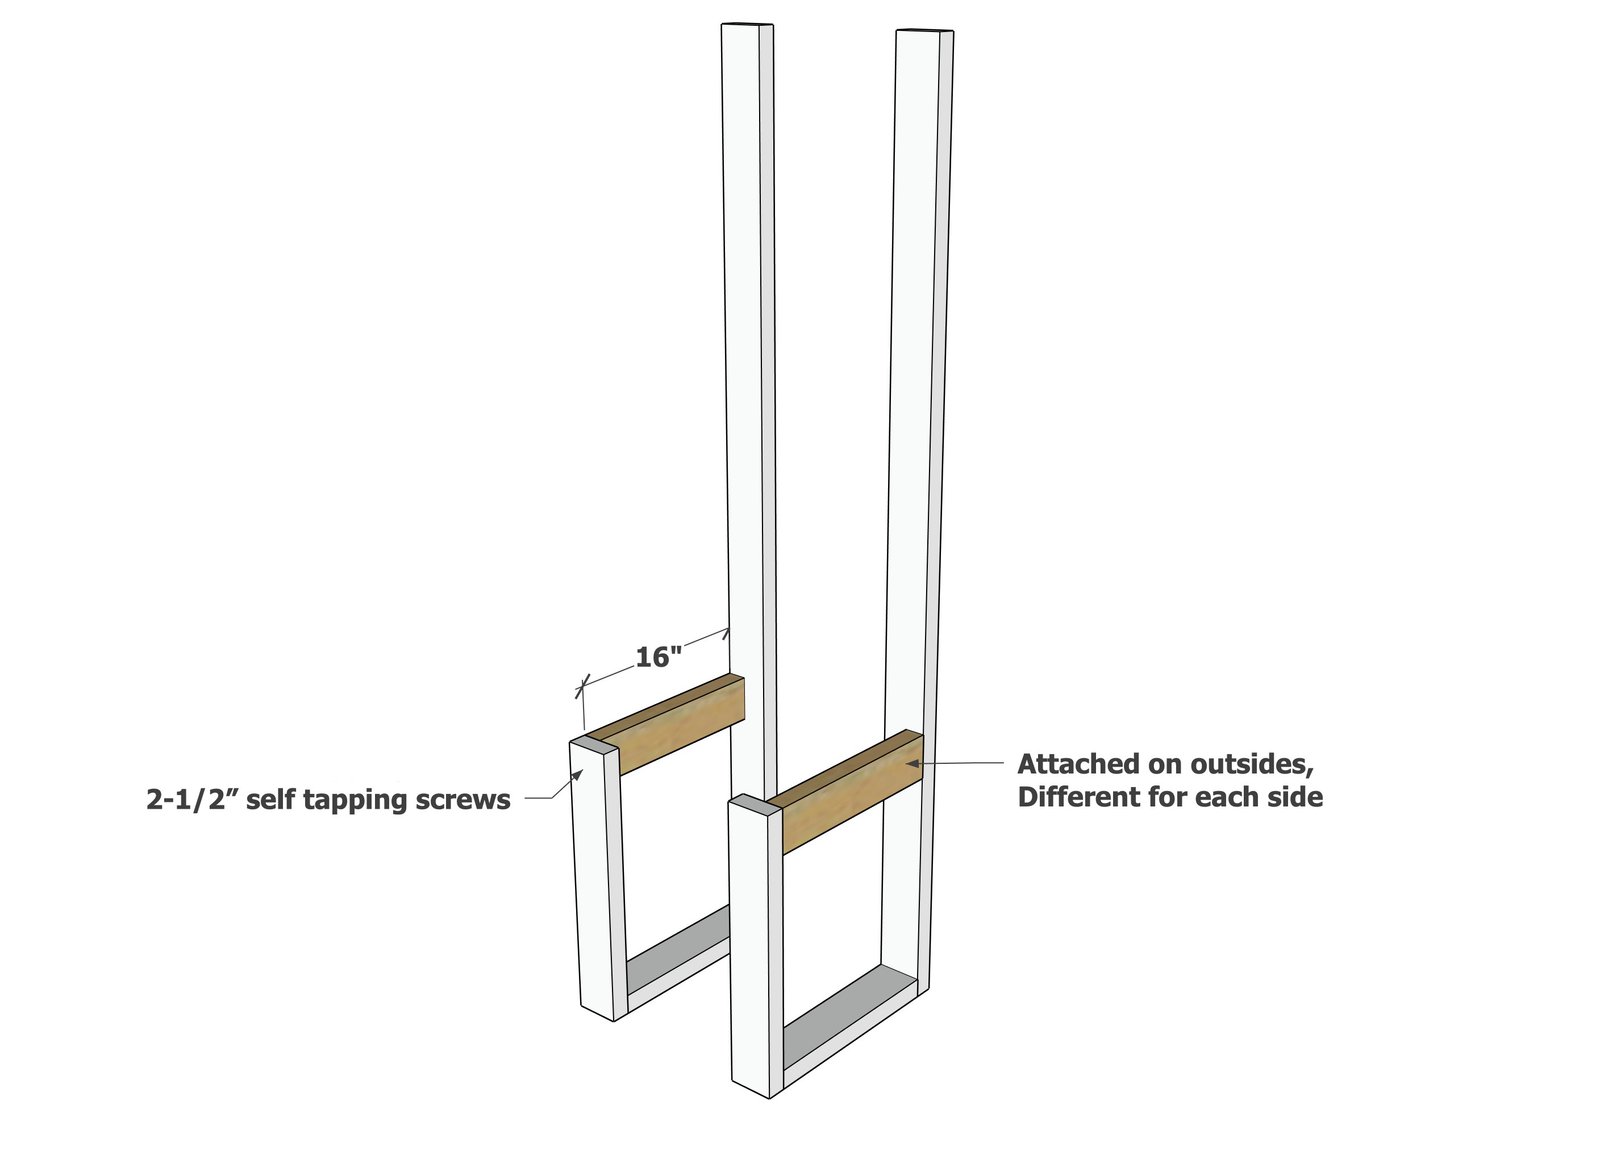
- 4 - 2x4 @ 16" (leg horizontal supports)
- 2 - 2x4 @71 1/2" (back of leg)
- 8 - Cedar Fence Pickets @19"
- 8 - Cedar Fence Pickets @ 20"
- 9 - Cedar Fence Pickets @ 18 3/4" cut to fit
Tools
- measuring tape
- square
- pencil
- safety glasses
- hearing protection
- drill
- compound miter saw
- nailer
- sander
Step-by-step Instructions
Step 1
Build two identical as shown in the diagram, using 2-1/2" self tapping screws, two screws per joint.
Step 2
Attach the upper support as shown, noting that they are placed on the outside, different on each side.
Step 3
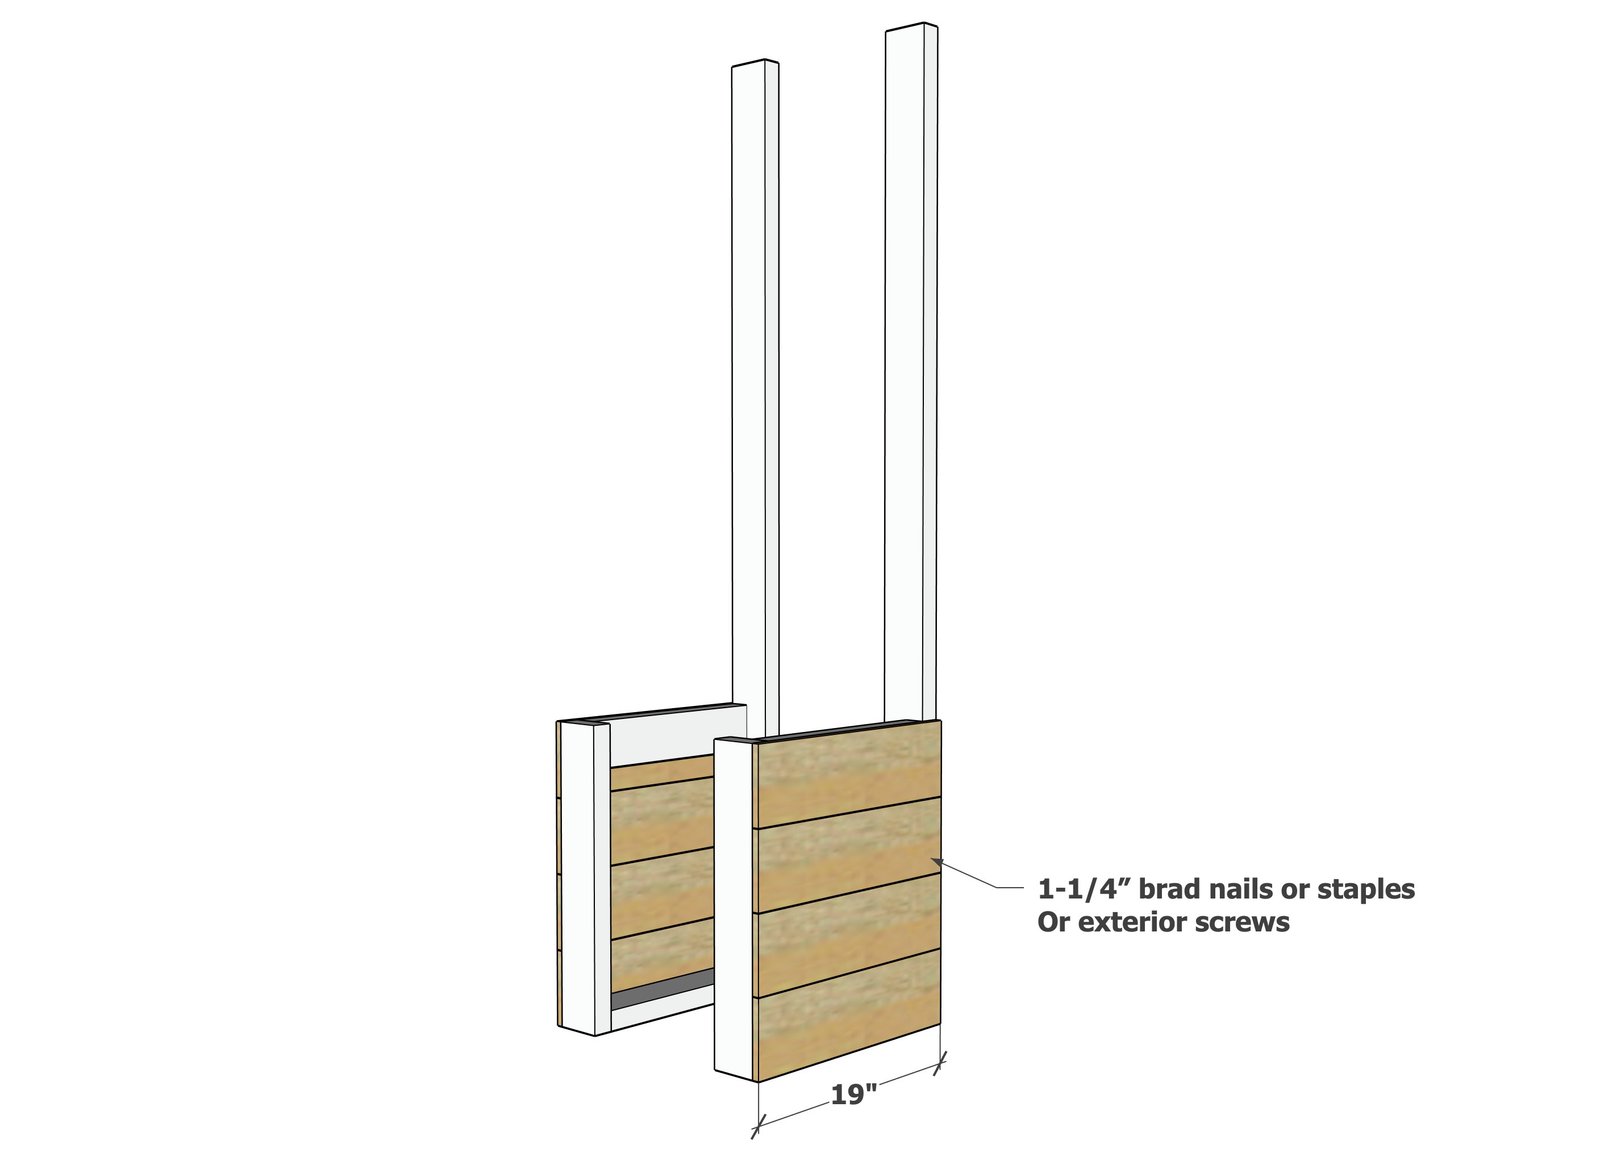
Attach cedar fence pickets to the outsides of the two frame pieces with 1-1/4" exterior fasteners and exterior wood glue. NOTE: This plan expects your cedar fence pickets to be 5-1/2" wide. If narrower, evenly space the gaps out.
Step 4
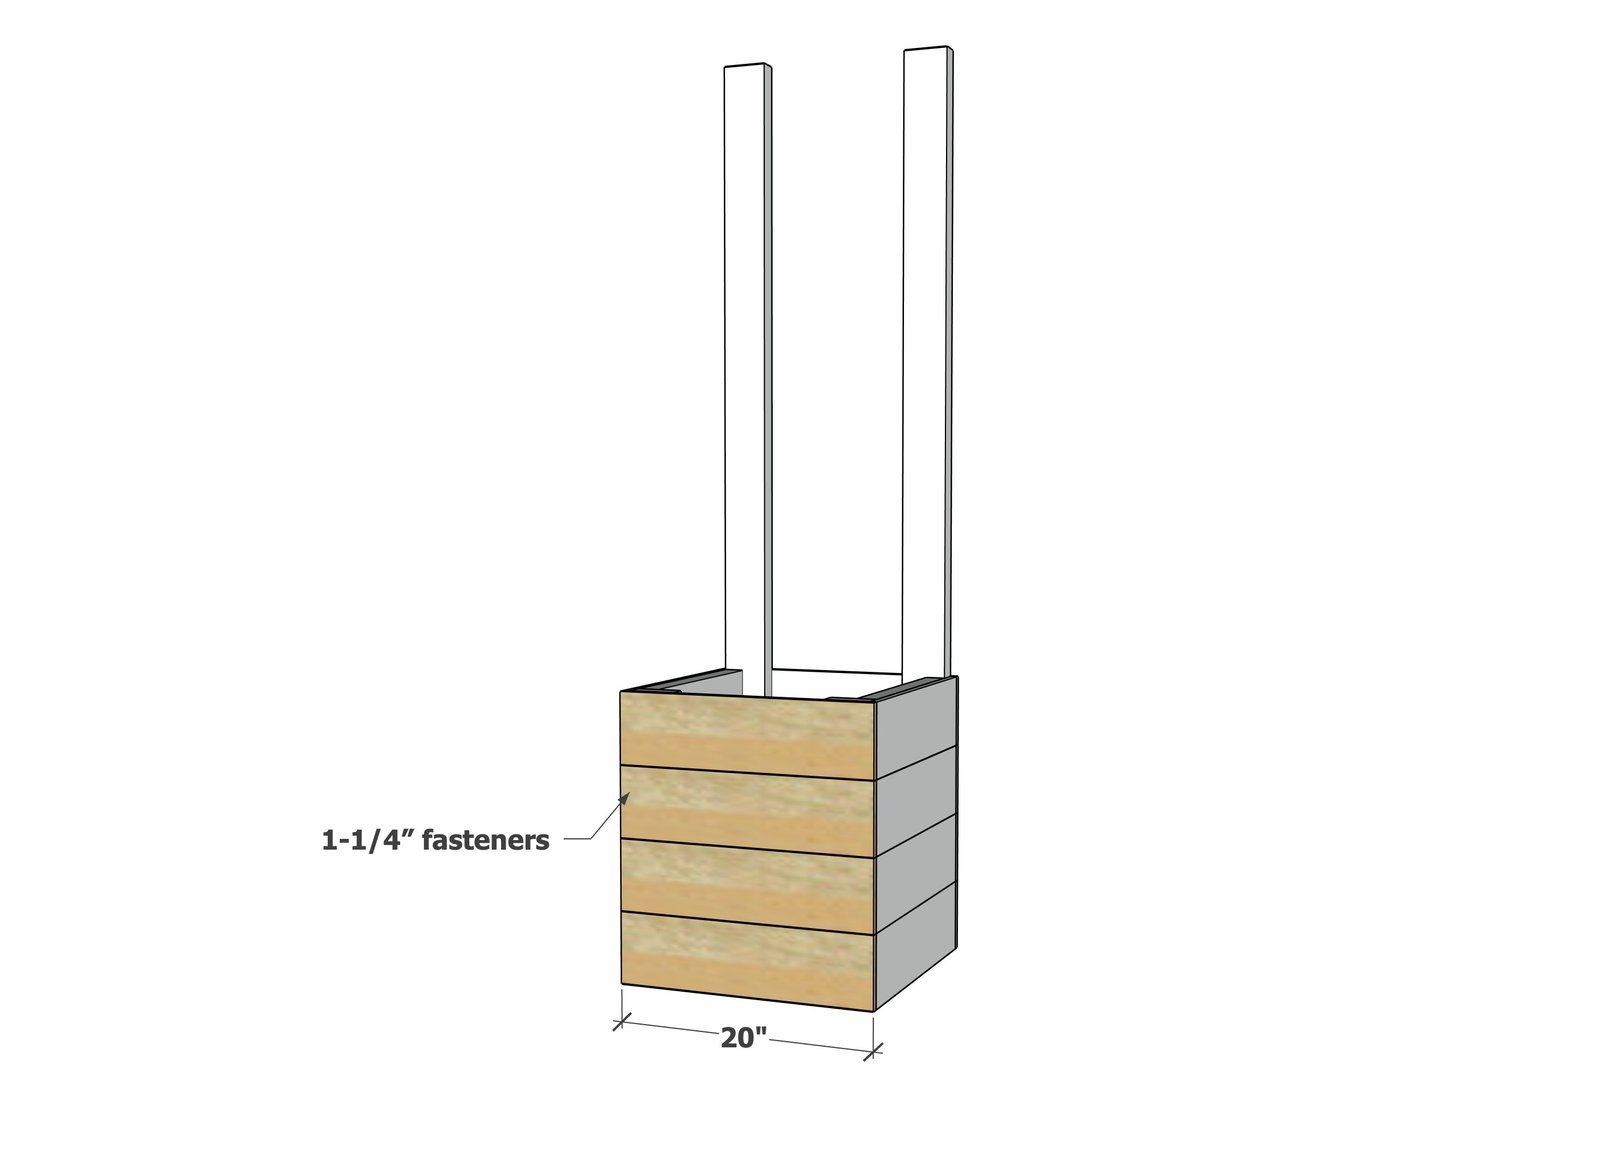
Attach the front cedar fence pickets to the fronts of the frames, keeping outside edges flush.
Step 5
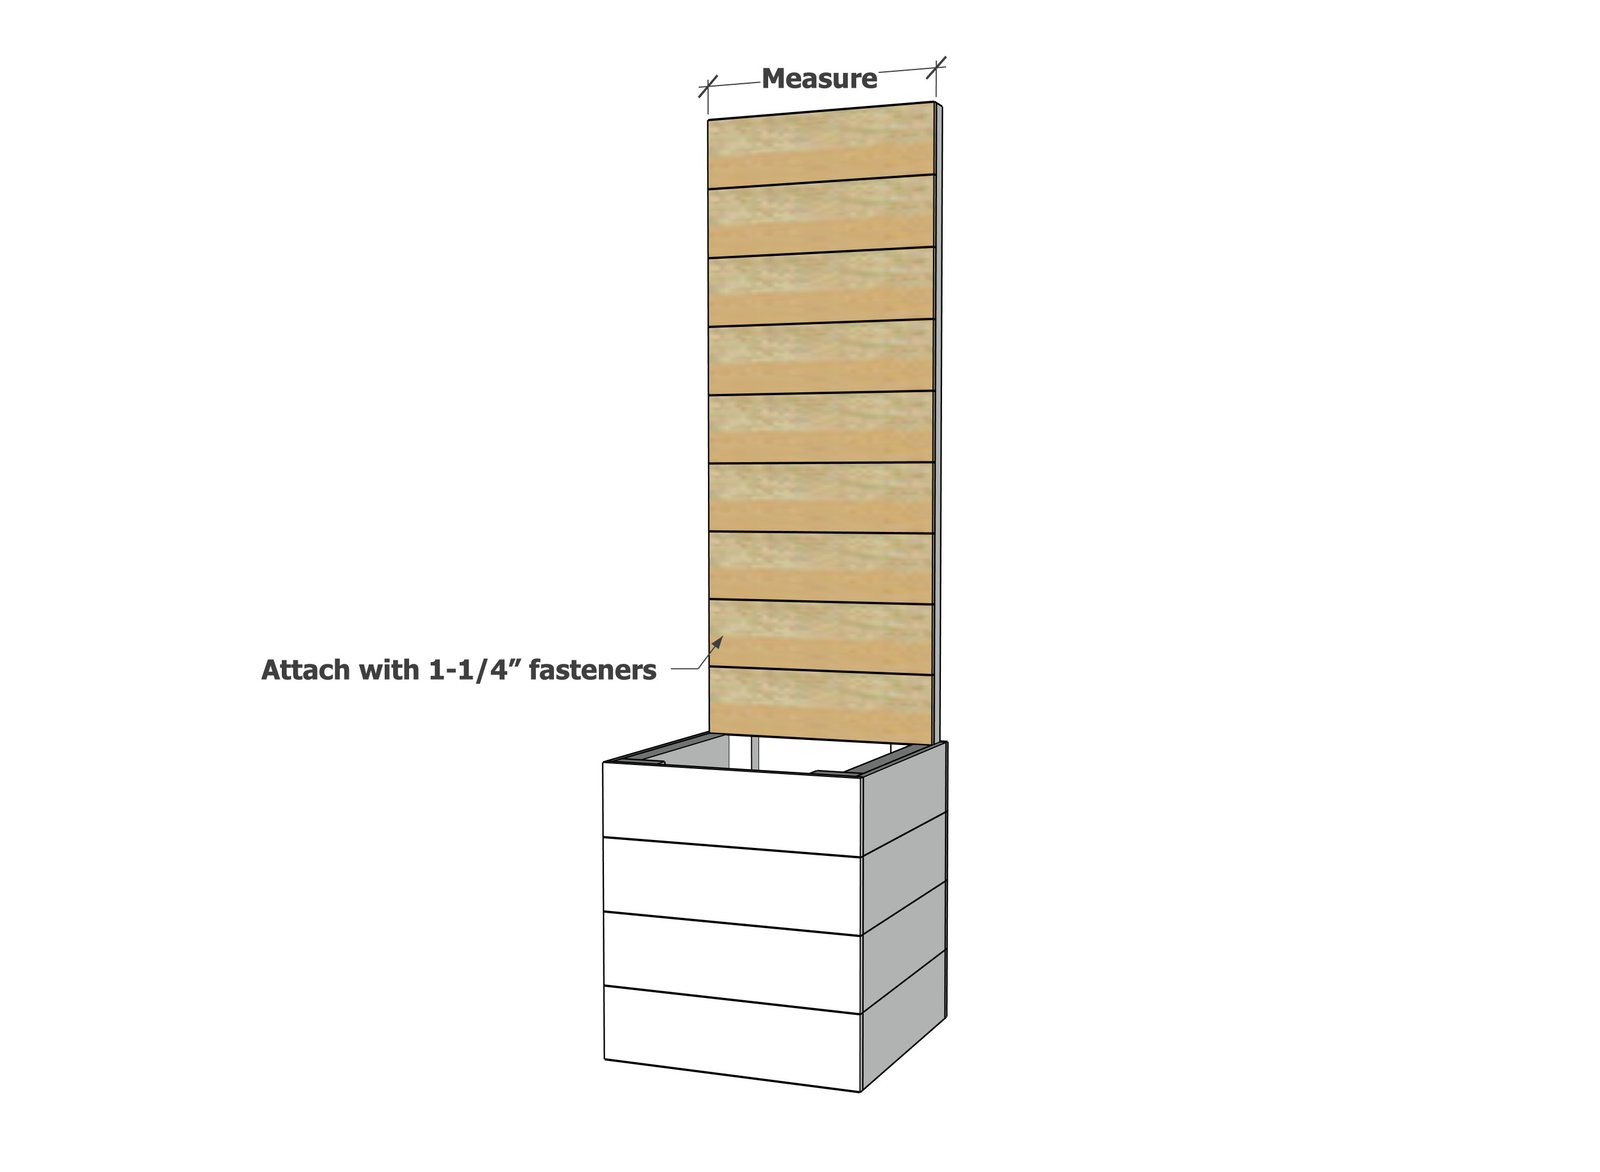
Measure and cut the back pieces. Attach with 1-1/4" brad nails and wood glue.
Finishing
Sand all surfaces, starting with a medium grit and finishing with fine. Wipe off the dust, fill any holes or gaps with wood filler, and sand smooth once dry. Apply primer if you're painting, then finish with your choice of paint or stain and seal with a durable clear topcoat. For outdoor projects, use exterior-rated primer, paint or stain, and sealer so the piece stands up to the weather.
Source (temporary): https://www.ana-white.com/woodworking-projects/tall-back-wooden-planter-box