Tall Corner Media Console
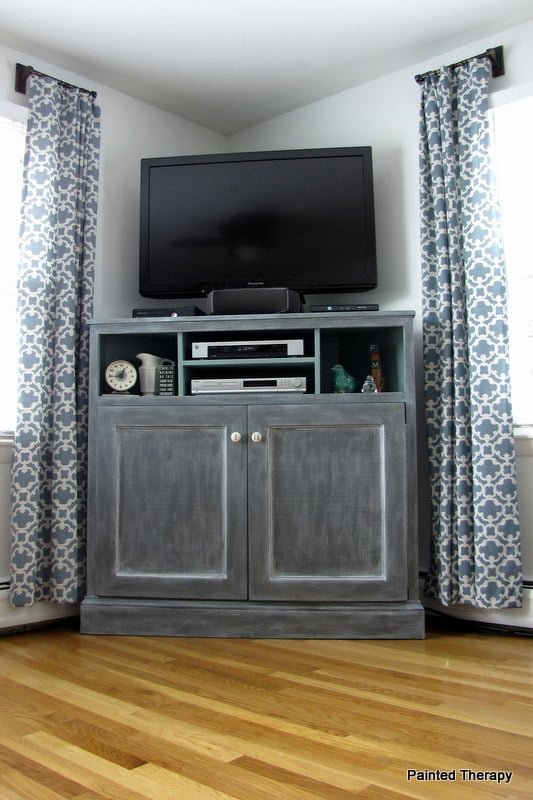
Build a corner media stand! from
Specifications
| Project type | Media and Entertainment Centers |
|---|---|
| Room | living room |
| Style | Cottage Style Furniture Plans |
| Difficulty | Advanced |
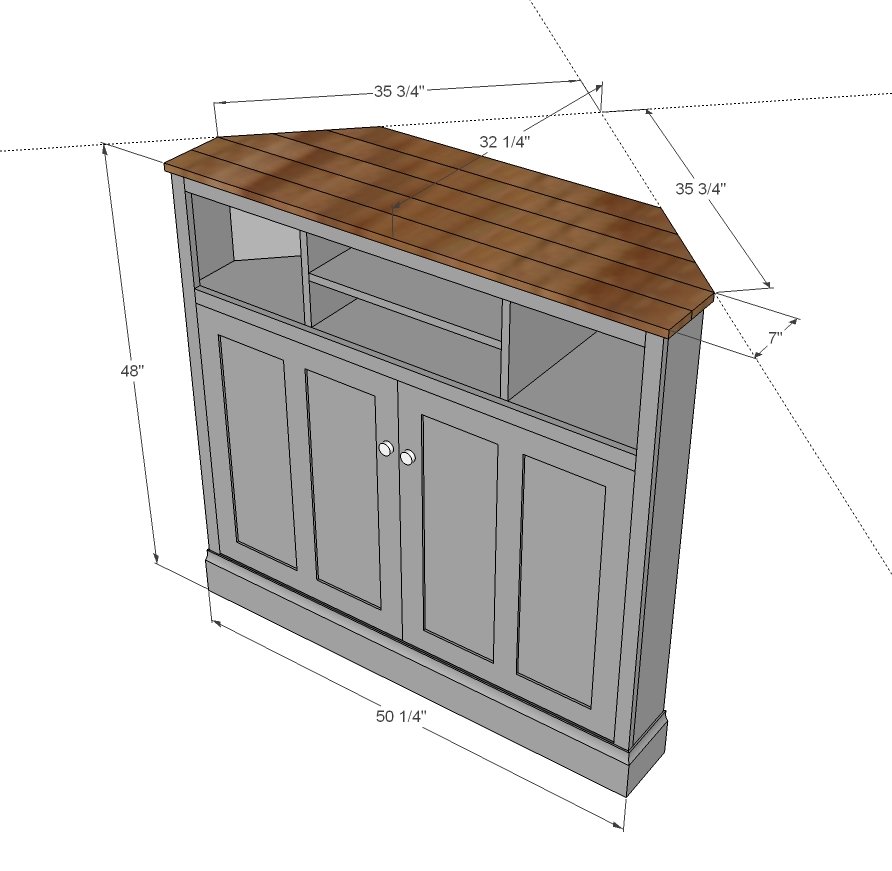
Dimensions
Use the size-specific shopping and cut lists below.
Shopping List
1 – sheet ¾” plywood cut into strips 15 ¾” wide by 8 feet long (referred to as 1x16 boards in this plan)
1 – 1x6 @ 8 feet long (you can use scrap 1x16s ripped down if you have a tablesaw)
5 – 1x2 @ 8 feet long
1 – sheet ¼” plywood (for back and door backs)
2 – 1x4 @ 8 feet long
1 – 1x4 @ 6 feet long
5 ¼” base moulding (6 foot stick)
1x3s for door frame or other materials for doors
2” screws or 1 ¼” pocket hole screws
2” and 1 ¼” finish nails
Wood glue
Finishing supplies
Cut List
2 – 1x16 @ 10 1/2" (dividers)
1 – 1x16 @ 20” (center shelf)
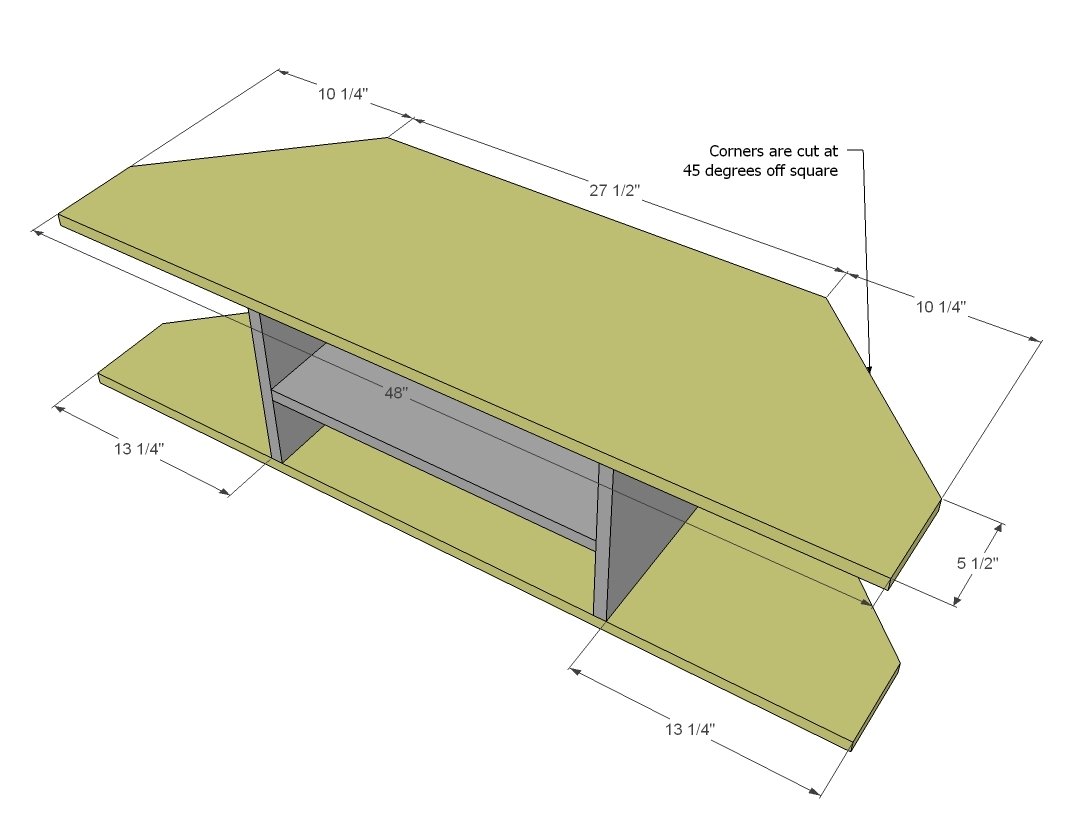
4 – 1x16 @ 48” – ends cut as shown in step 2 (shelves)
2 – 1x6 @ 47 1/4" (sides)
4 – 1x2 @ 47 1/4” (back supports)
1 – 1/4” plywood @ 24 1/2” x 47 1/4" (back middle)
2 – 1/4” plywood @ 13” x 47 1/4" (back middle)
2 – 1x2 @ 47 1/4” (side face frame)
3 – 1x2 @ 46 1/2" (shelf face frame trim)
TOP
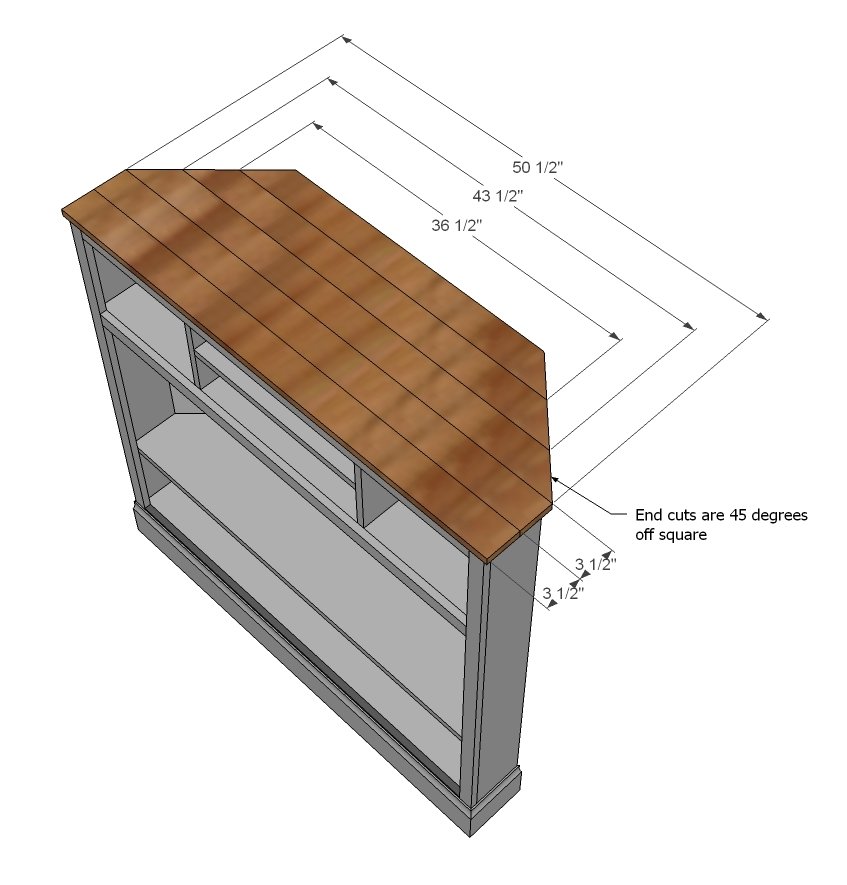
2 – 1x4 @ 50 1/2"
1 – 1x4 @ 50 1/2" (both ends cut at 45 degrees off square, ends NOT parallel, long point measurement)
1 – 1x4 @ 43 1/2" (both ends cut at 45 degrees off square, ends NOT parallel, long point measurement)
1 – 1x4 @ 36 1/2" (both ends cut at 45 degrees off square, ends NOT parallel, long point measurement)
Step-by-step Instructions
Step 1
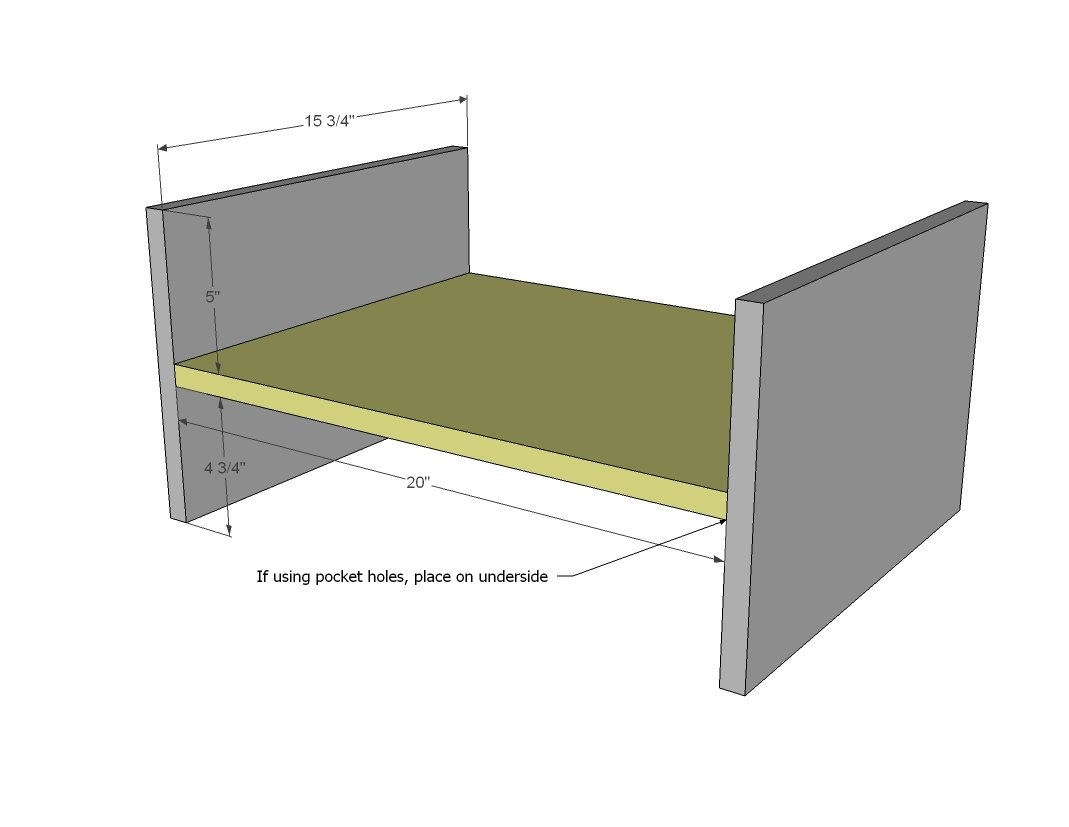
Let's start by building those top shelves for the media controllers. I recommend using a Kreg Jig as Debbie did, but if you don't have one, you can also countersink screws or use a finish nailer and glue. If you are using the Kreg Jig, go through the entire plan and mark out and drill all pocket holes now - it's easier to drill a pocket hole on a board rather than on a project!
Step 2
Now we are going to add the top and bottom to the shelves. What I would do is attach the top from underside with 3/4" PHs and 1 1/4" PH screws, and then attach the bottom shelf from underside with 2" countersunk screws, as it will be very difficult to get your drill in there to drive a PH screw.
Step 3
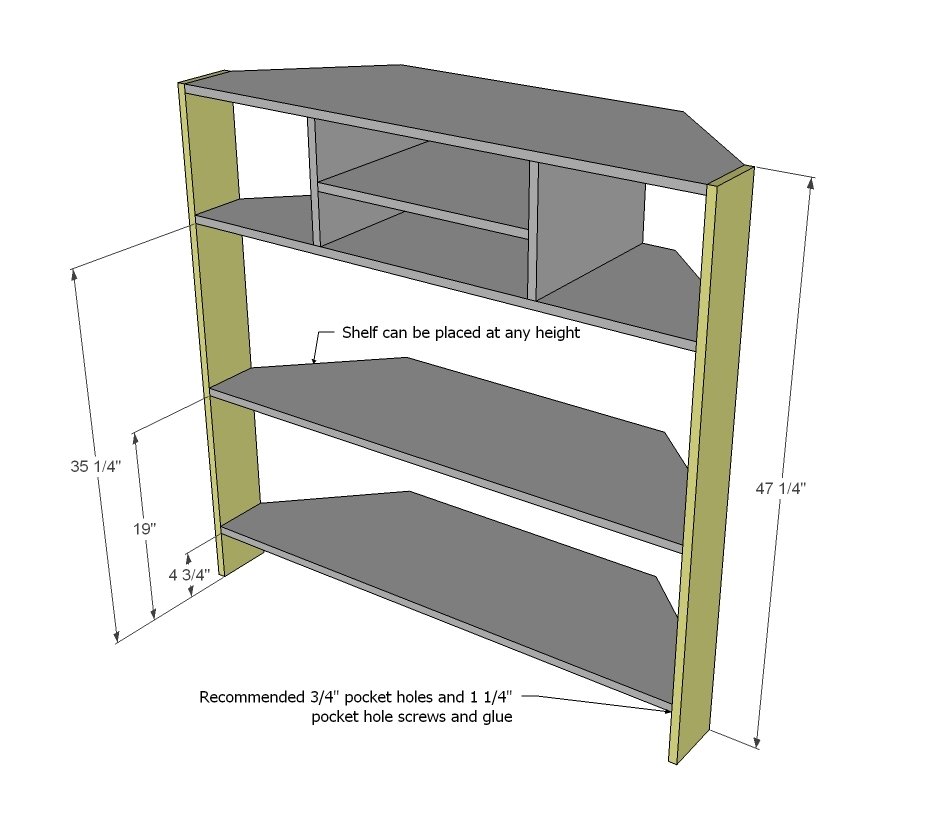
Now on the sides, mark out all shelf locations. PH users should drill 3/4" PHs along sides of all shelves. Attach with screws and glue.
Step 4
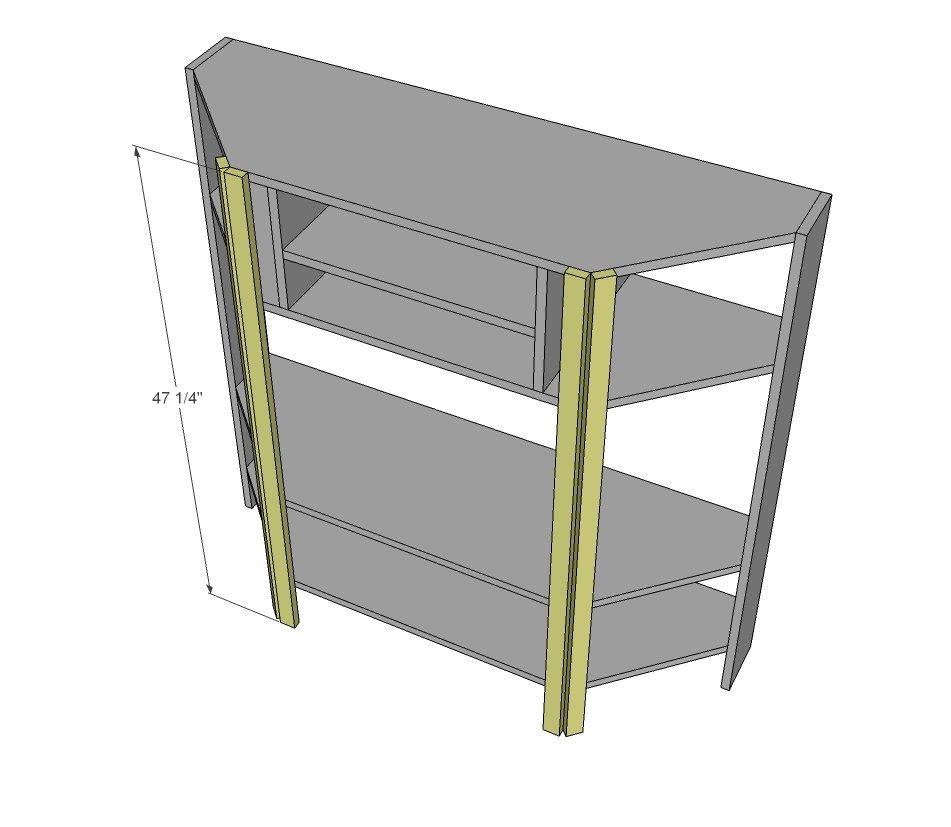
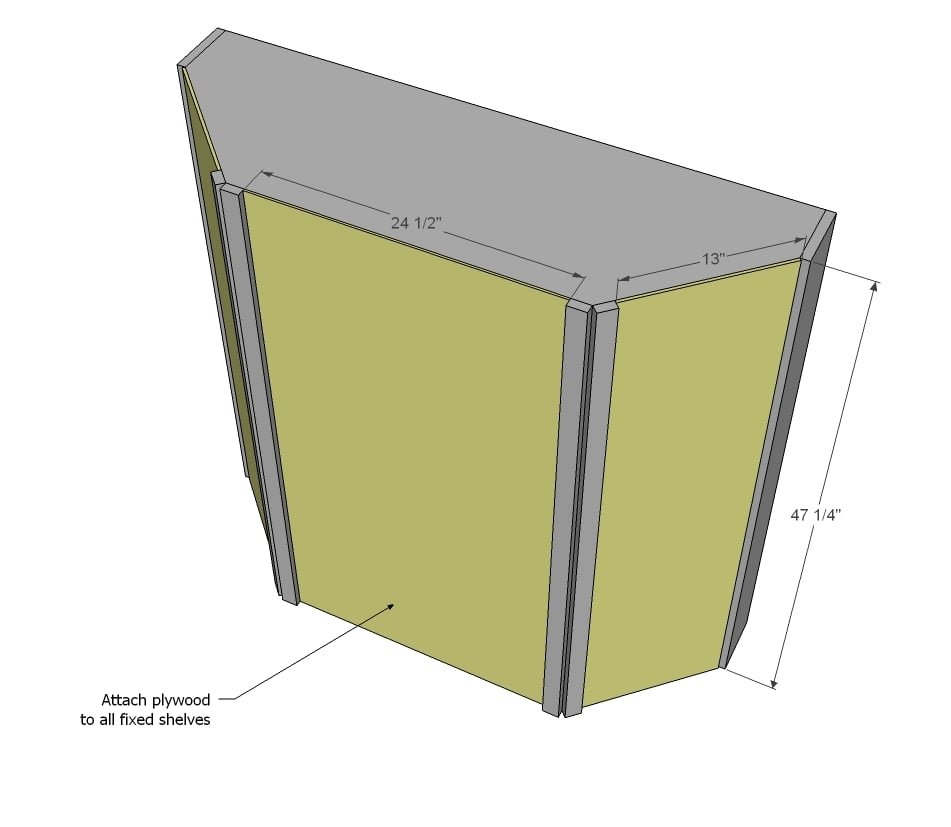
And then add back pieces.
Step 5
Step 6
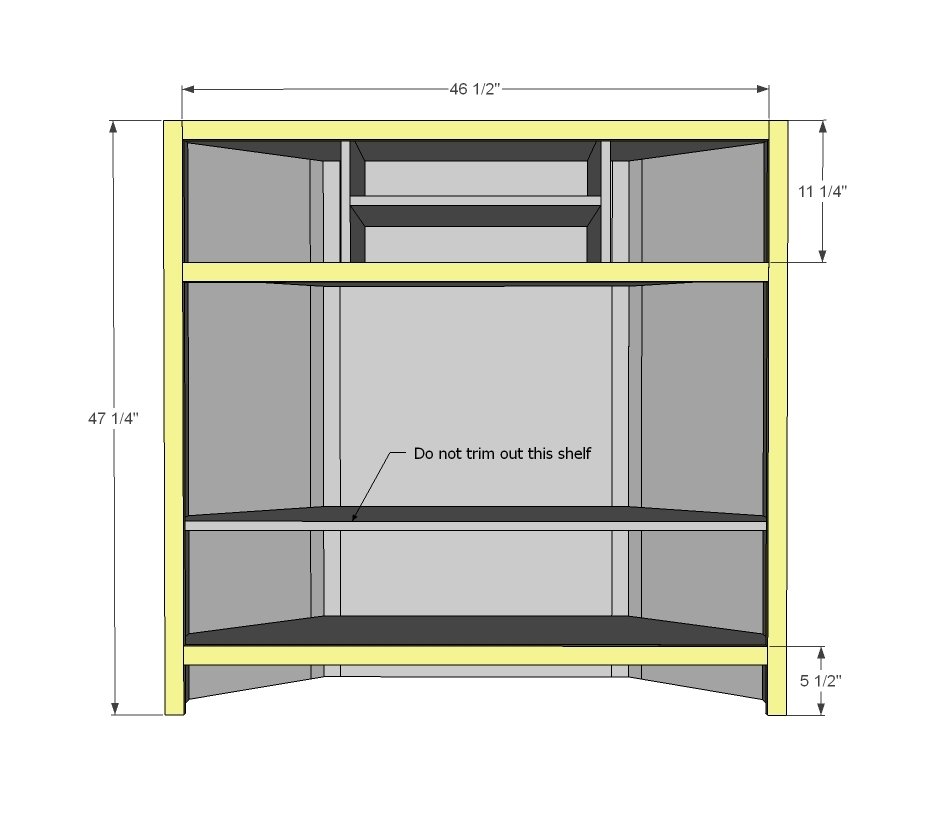
Now we do the face frame! You can build your face frame first with 3/4" PHs and 1 1/4" PH screws or attach each board with nails and glue.
Step 7
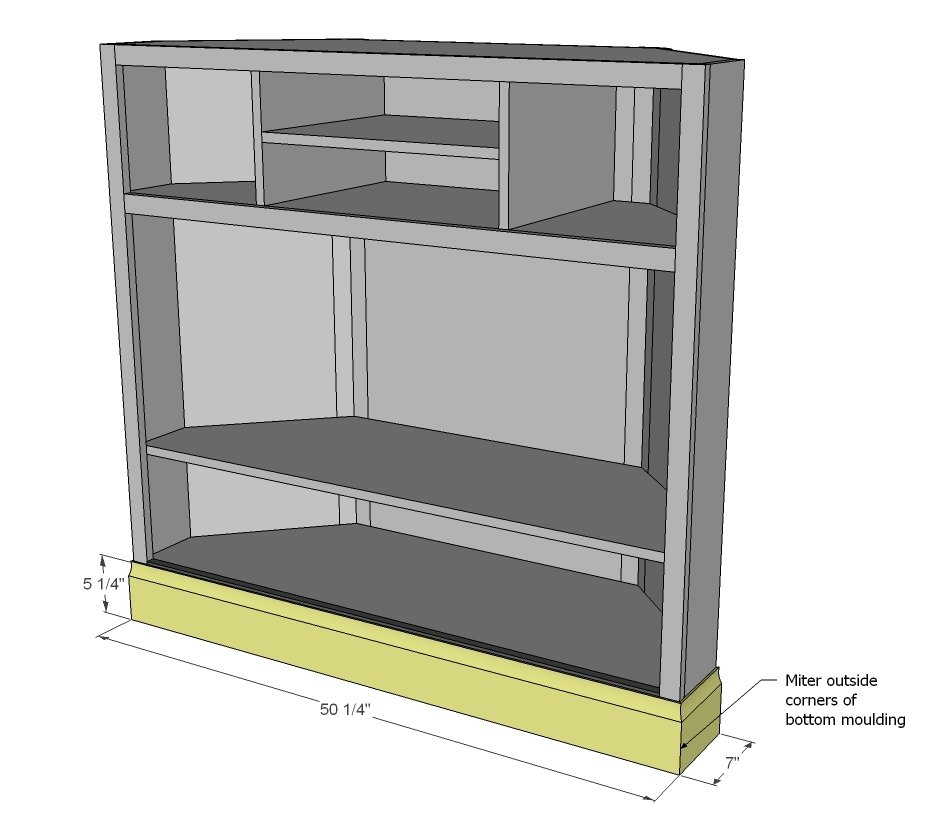
Nail moulding on bottom mitering the corners.
Step 8
And the decorative top isn't entirely necessary, but we wanted to add something pretty to the top. Nail down with 1 1/4" finish nails and glue.
Step 9
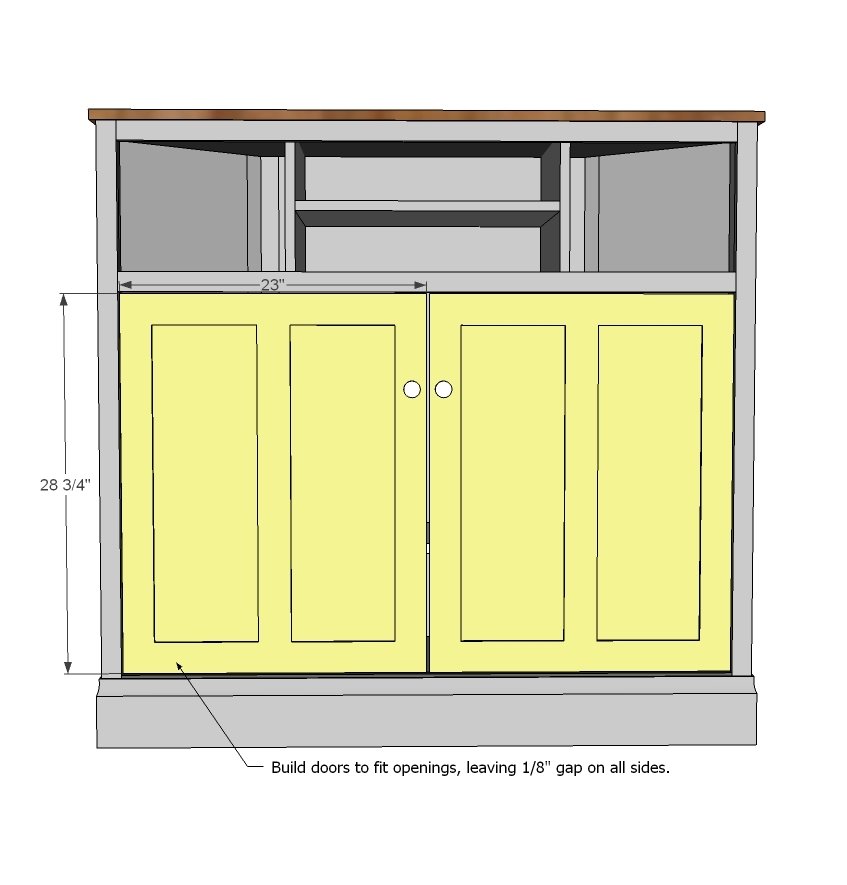
Debbie ended up doing overlay doors, which is a great idea. For inset doors, you will want to measure your openings - just to be SURE of the opening - and then build to suit. I like to leave 1/8" gaps all the way around. For overlay doors, build your doors slightly larger than the opening and use overlay hinges. Overlay doors will be easier to install and open and close easier.
Step 10
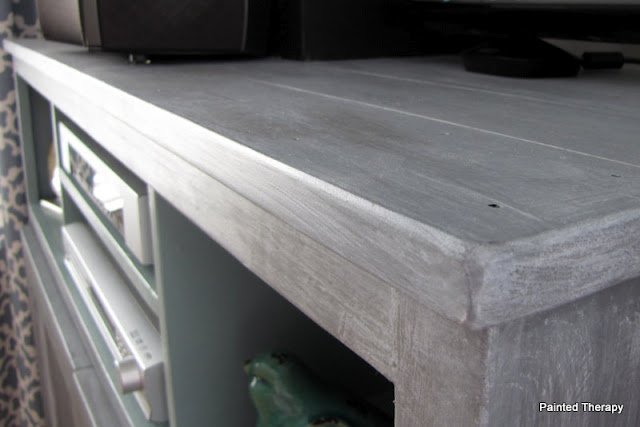
For more details on this beautiful finish, please visit Debbie at Painted Therapy. Thanks Debbie!
Finishing
Sand all surfaces, starting with a medium grit and finishing with fine. Wipe off the dust, fill any holes or gaps with wood filler, and sand smooth once dry. Apply primer if you're painting, then finish with your choice of paint or stain and seal with a durable clear topcoat. For outdoor projects, use exterior-rated primer, paint or stain, and sealer so the piece stands up to the weather.
Source (temporary): https://www.ana-white.com/woodworking-projects/tall-corner-media-console