Tall Panel Headboard
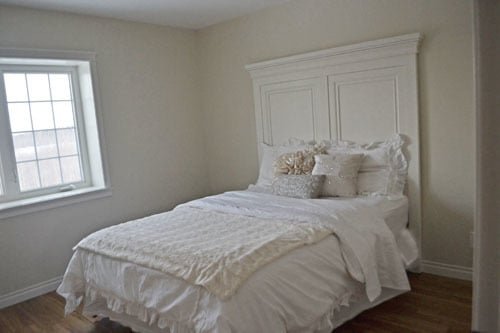
Tall panel headboard using baseboard trim and moulding - no routing required! from
Specifications
| Project type | Headboard |
|---|---|
| Room | Bedroom |
| Style | Farmhouse Furniture |
| Difficulty | Intermediate |
| Estimated cost | $50 - $100 |
Dimensions
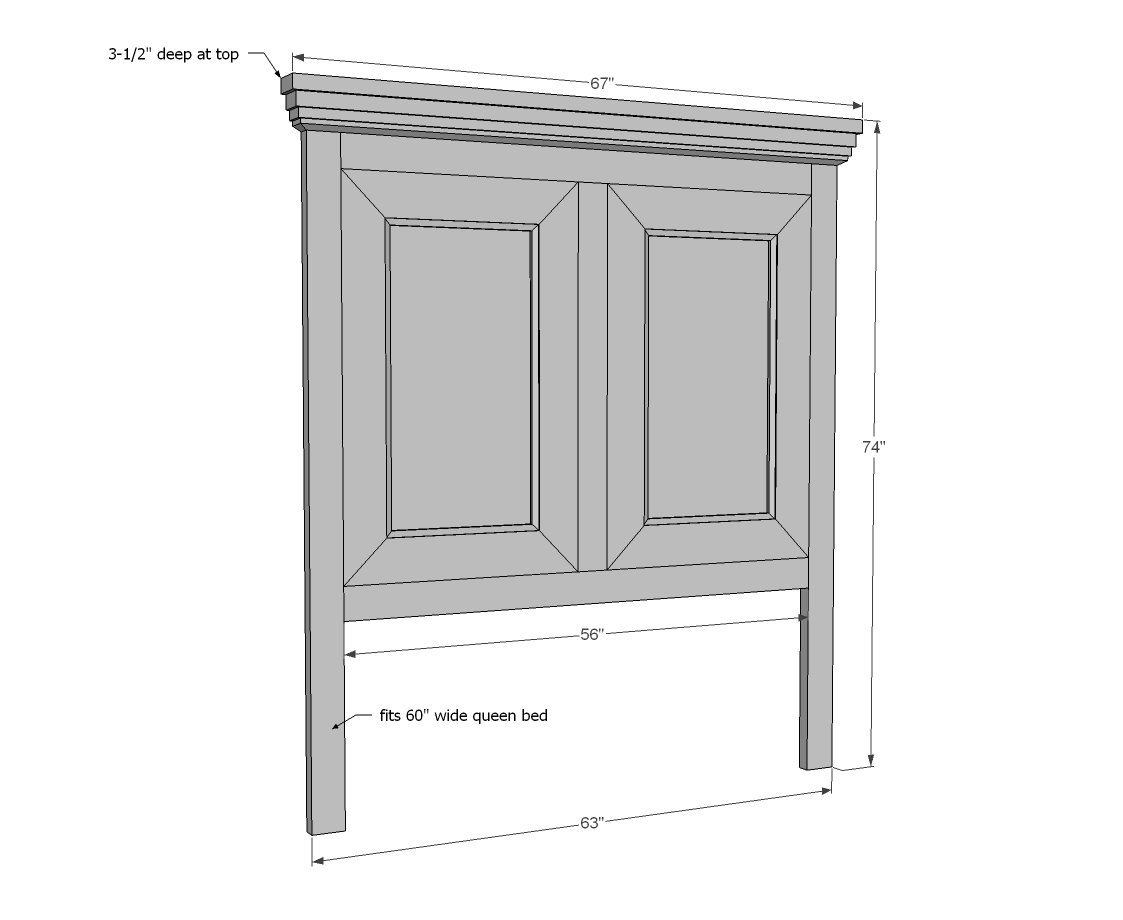
Use the size-specific shopping and cut lists below.
Shopping List
5 - 2x4 @ 8 feet or stud length
1 - 1x4 @ 10 feet long
1 - 1x4 @ 4 feet long (cut the 41" long board out of this one)
1 - full sheet of 3/4" finished plywood
24 feet of 5-1/4" baseboard moulding (you'll need quite a bit extra to get those miter cuts to work)
6 feet of header moulding or crown moudling
1 - 1x2 @ 8 feet long (optional for stacked header moulding)
1-1/4" and 2-1/2" pocket hole screws
2" and 1" finish nails
wood glue
Cut List
2 - 2x4 @ 72-1/2" (legs)
1 - 2x4 @ 56" (top header)
2 - 2x4 @ 56" (panel trim on front)
1 - 1x4 @ 41" (center panel trim on front)
1 - 3/4" plywood @ 48" x 56" (center panel)
1 - 2x4 @ 67" (top)
5-1/4" baseboard moulding cut to fit
header moulding cut to fit
optional 1x2 cut to fit
Tools
- measuring tape
- square
- pencil
- safety glasses
- hearing protection
- kreg-jig
- drill
- circular saw
- compound miter saw
- nailer
Step-by-step Instructions
Step 1
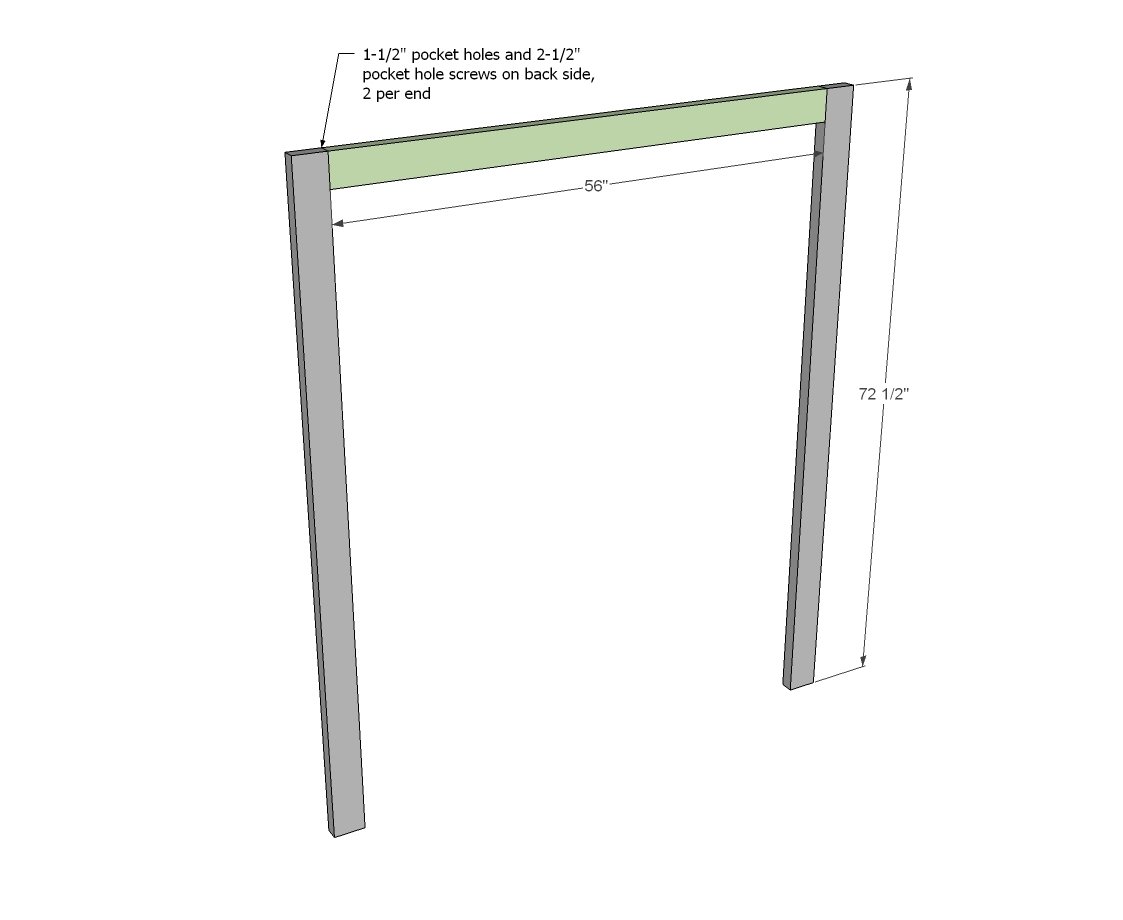
IMPORTANT: Due to the height of this headboard, you must secure the top to studs in the wall to prevent forward tipping. Start by attaching the legs to the top 2x4. NOTE: Also drill 1-1/2" pocket holes facing upward for attaching the top 2x4 in later steps.
Step 2
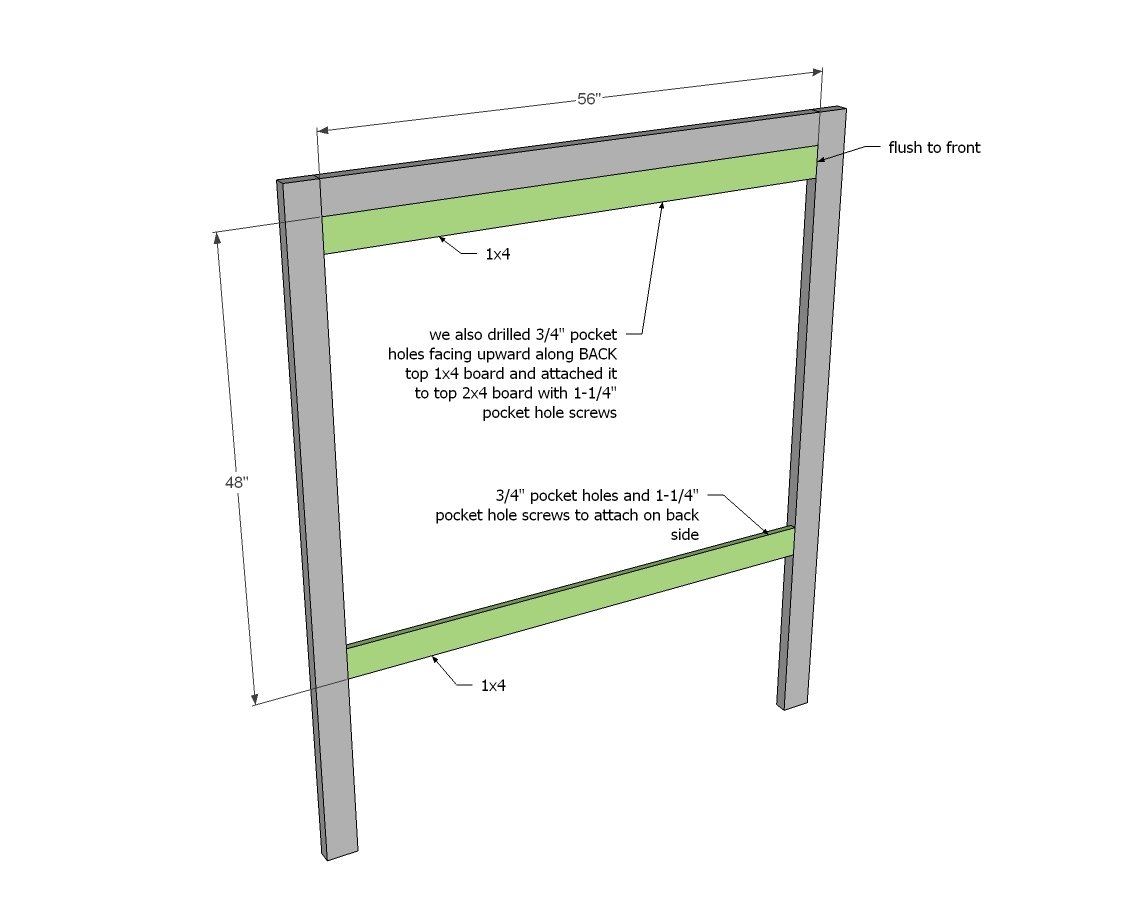
Next, attach the 1x4 pieces, all flush to the front.
Step 3
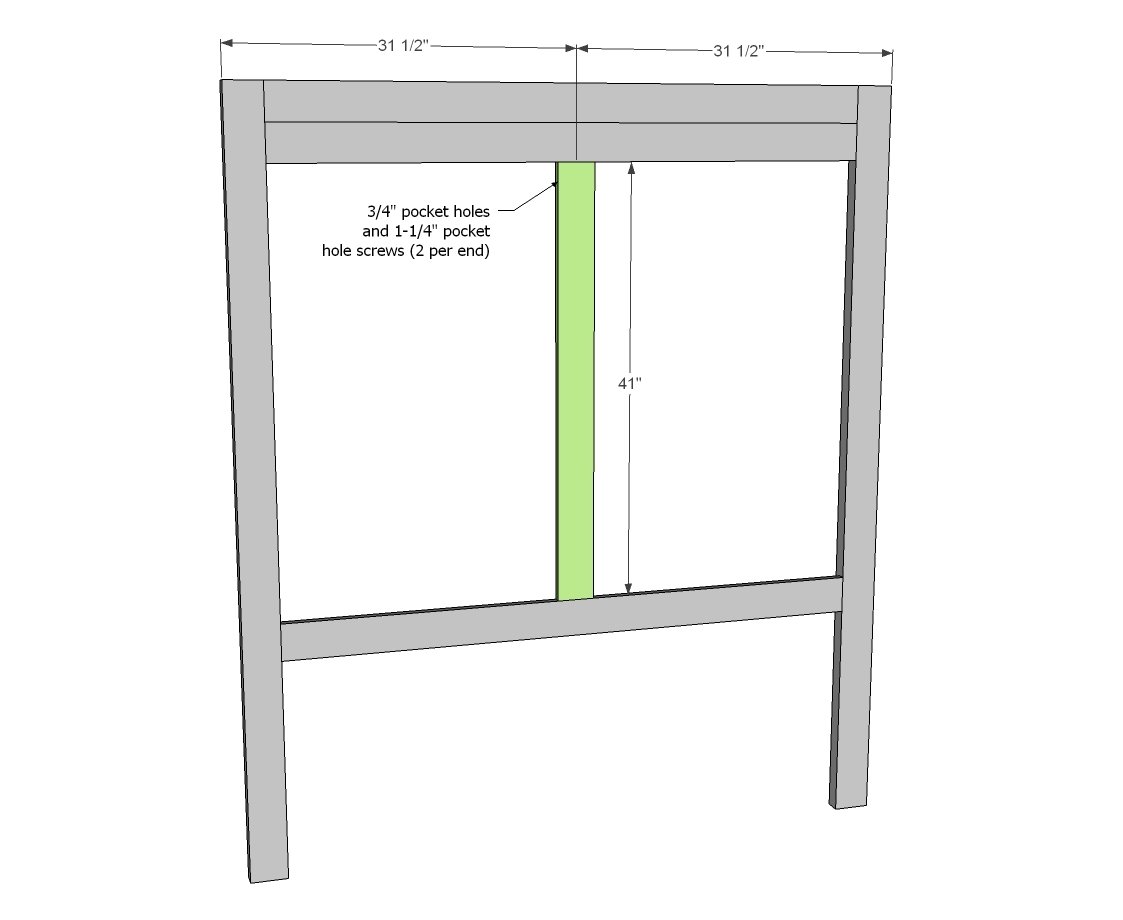
Then attach the center 1x4 - you may wish to measure and cut this piece to fit as 1x4s can vary in width.
Step 4
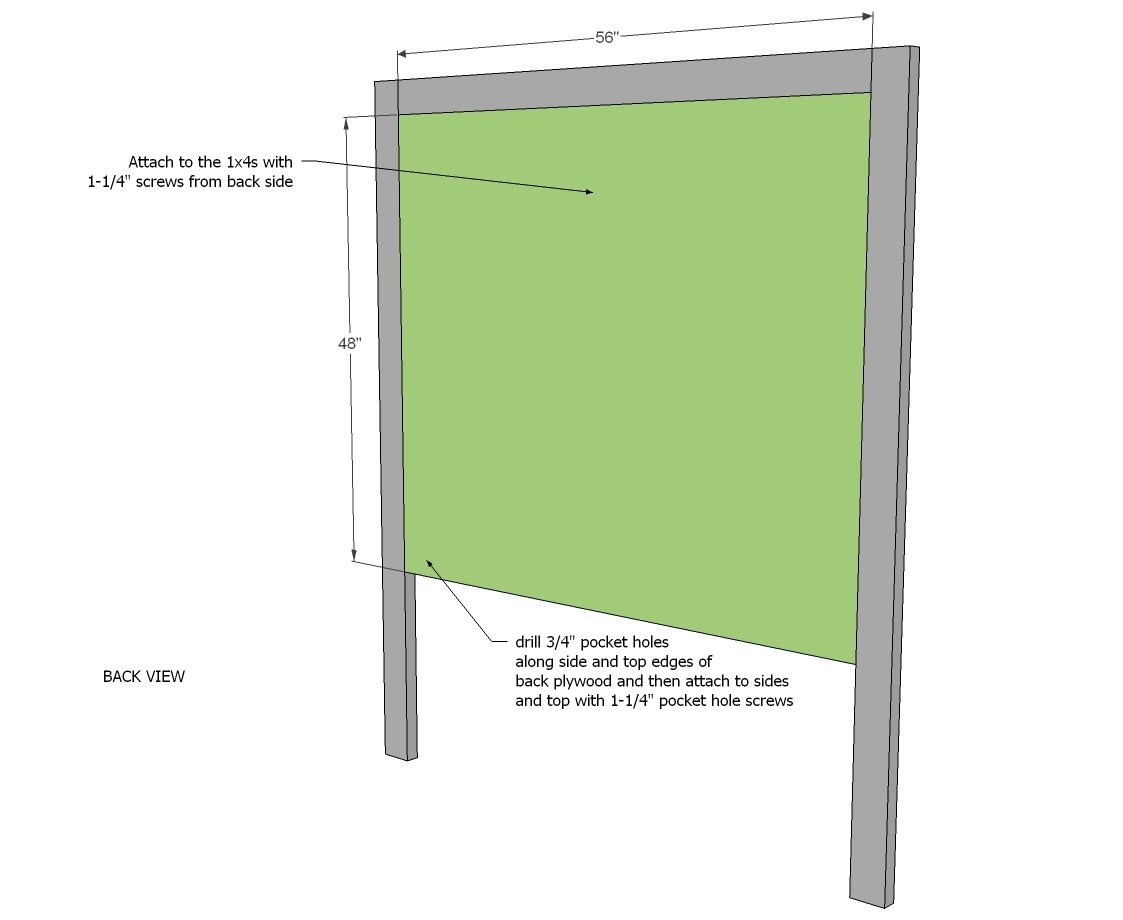
Cut the back plywood to fit, and attach to legs and header. Also attach to the front 1x4 boards with 1-1/4" screws (we just used pocket hole screws so we didn't have to buy special screws).
Step 5
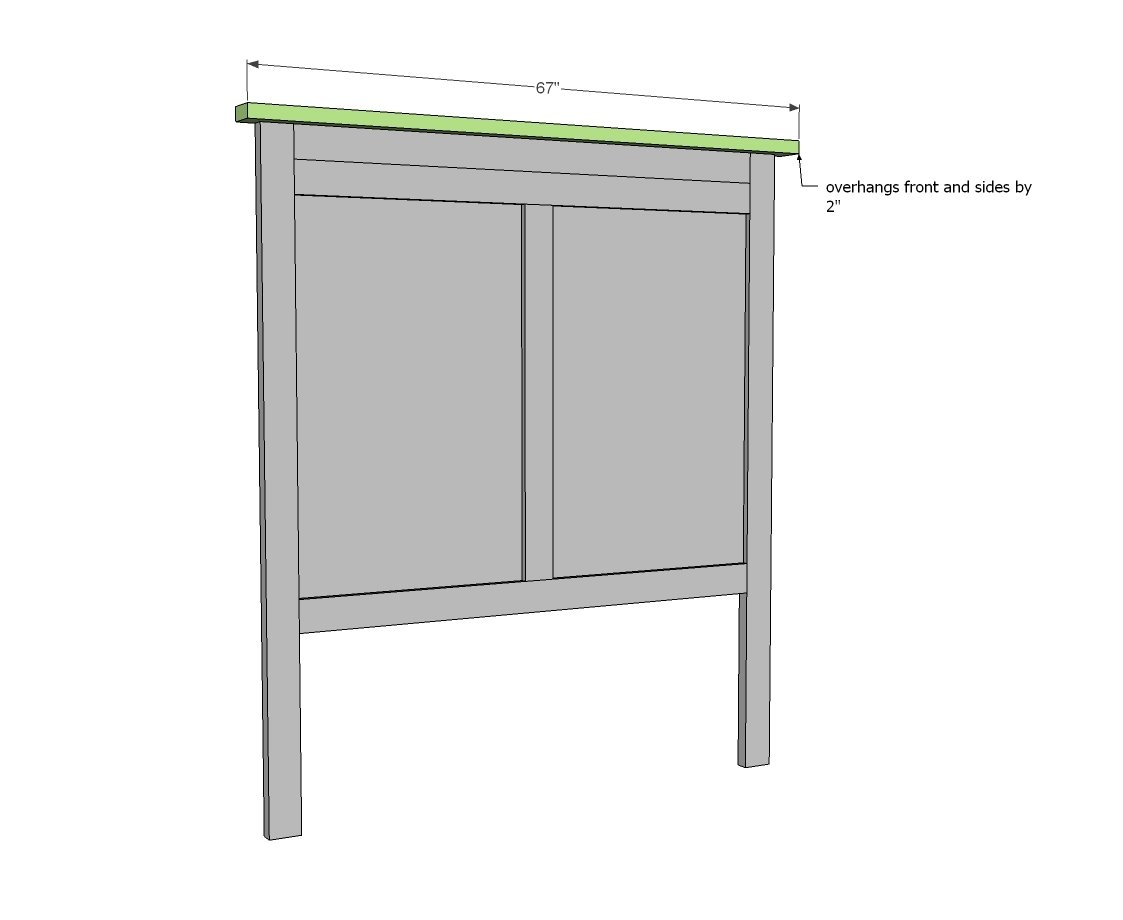
Step 6
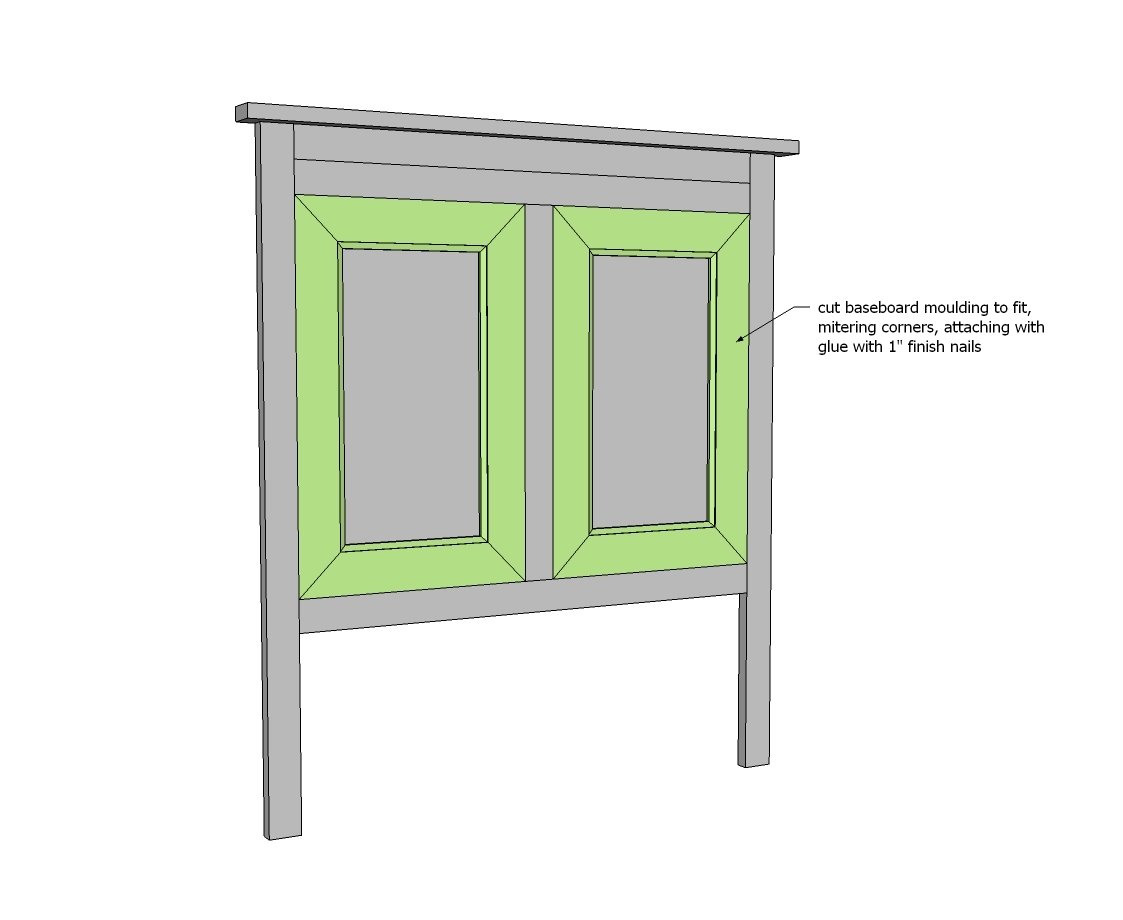
Next, attach moudling inside the 1x4 frames, mitering corners.
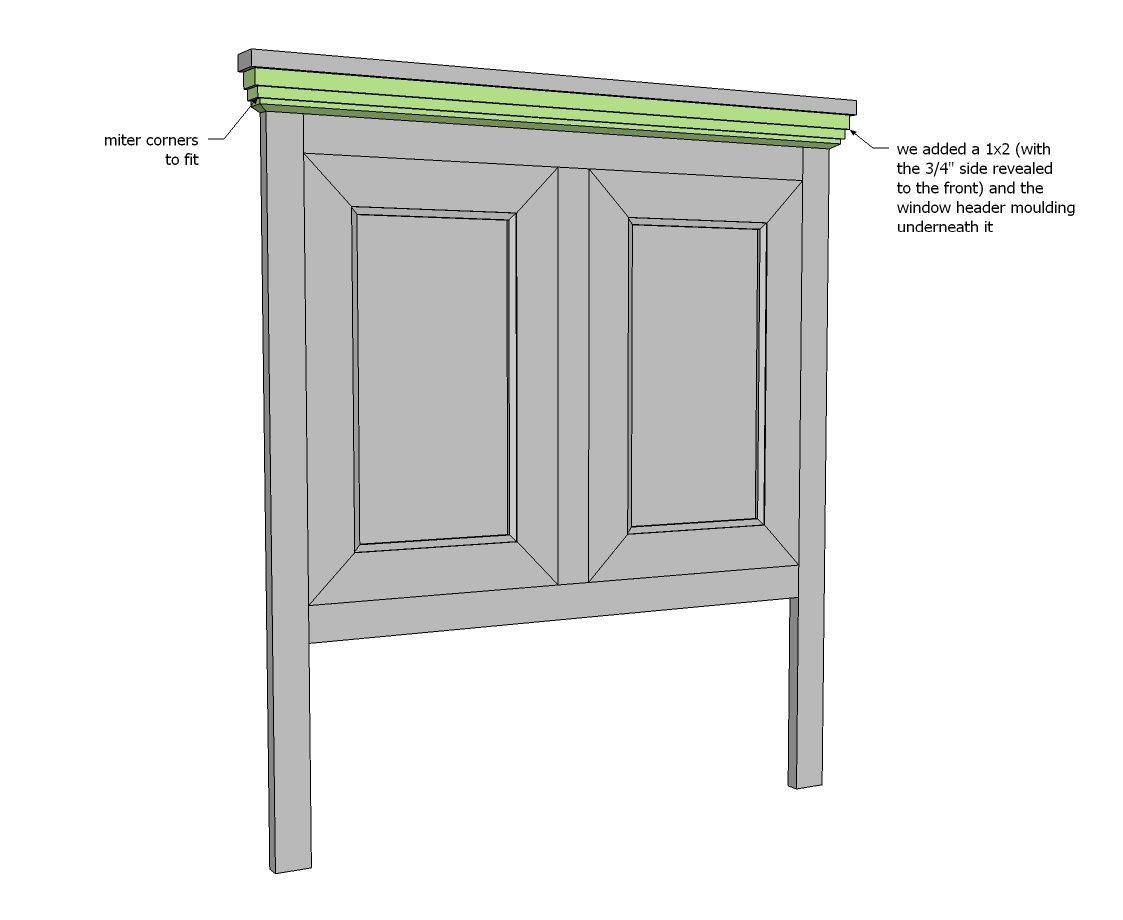
Finally, attach crown moulding or header moulding to the top.
IMPORTANT: Due to the height of this headboard, you must secure the top to studs in the wall to prevent forward tipping.
Finishing
Sand all surfaces, starting with a medium grit and finishing with fine. Wipe off the dust, fill any holes or gaps with wood filler, and sand smooth once dry. Apply primer if you're painting, then finish with your choice of paint or stain and seal with a durable clear topcoat. For outdoor projects, use exterior-rated primer, paint or stain, and sealer so the piece stands up to the weather.
Source (temporary): https://www.ana-white.com/woodworking-projects/tall-panel-headboard-queen