Taylor Console Table
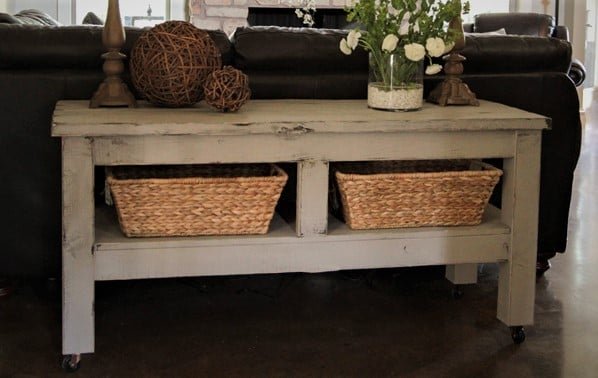
Free woodworking pattern to build a substantial, rustic console. This console table can be used under a tv, behind a sofa, as an accent table, or even as a bathroom vanity. The 4x4 legs give it a high end look, but you can DIY it with for much less. Built by Whitney from Shanty2Chi c
Specifications
| Project type | Media and Entertainment Centers |
|---|---|
| Room | Storage Solutions |
| Style | Farmhouse Furniture |
| Difficulty | Intermediate |
| Estimated cost | $50 - $100 |
Dimensions
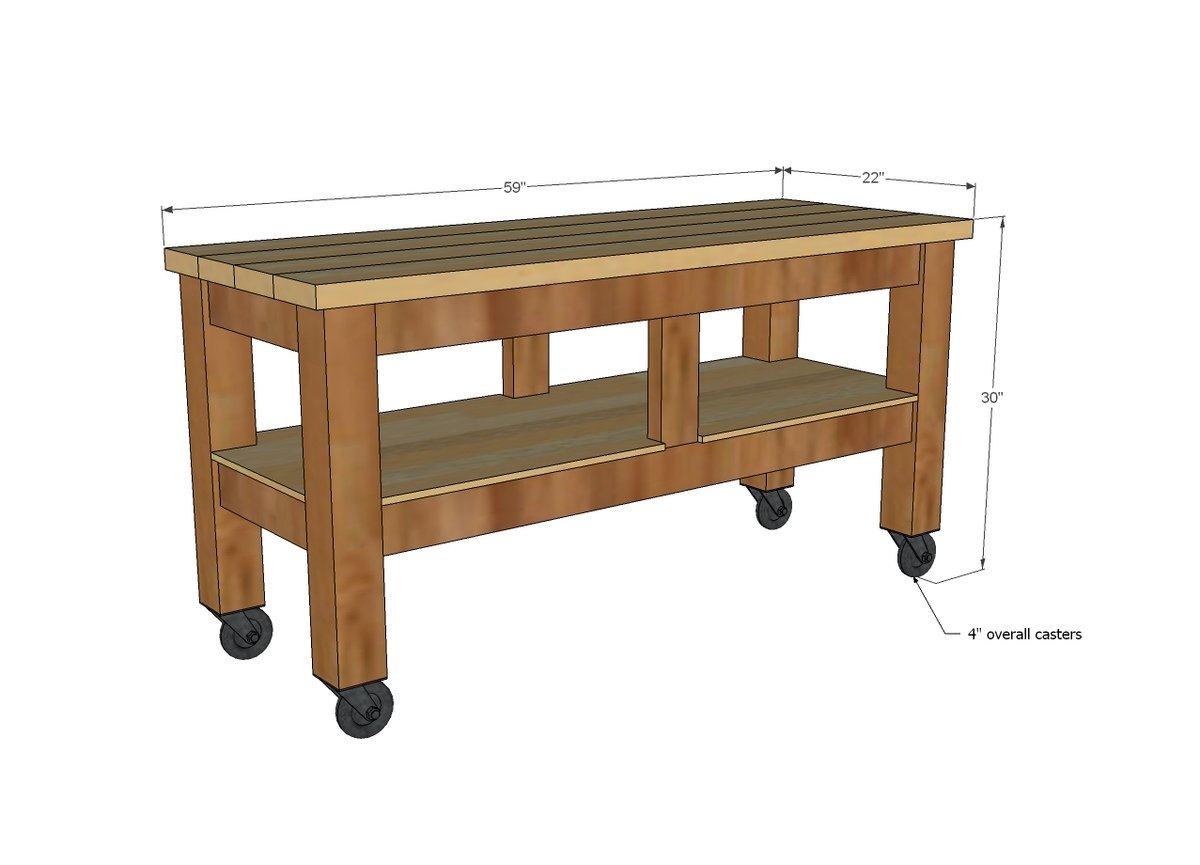
Use the size-specific shopping and cut lists below.
Shopping List
- 2 - 2x6 @ 10 feet long
- 1 - 4x4 @ 10 feet long
- 1 - sheet 1/2” plywood for bottom shelf, or substitute 3 - 1x4 x 10' boards
- 4 - 2x4 @ 8 feet long (cut 50” cuts first)
- 2 1/2” pocket hole screws
- 4” overall clearance caster wheels
- 1-1/4" brad nails
Cut List
- 4 - 4x4 @ 24 1/2” (extend length to 28-1/2" if not using caster wheels)
- 4 - 2x4 @ 50”
- 4 - 2x4 @ 14”
- 3 - 2x4 @ 17”
- 1 - 1/2” plywood @ 21” x 57” (or 1x4 boards, see step 4)
- 2 - 2x4 @ 9 1/2”
- 4 - 2x6 @ 59”
Tools
- measuring tape
- square
- pencil
- safety glasses
- hearing protection
- kreg-jig
- drill
- circular saw
- jigsaw
- nailer
- sander
Step-by-step Instructions
Step 1
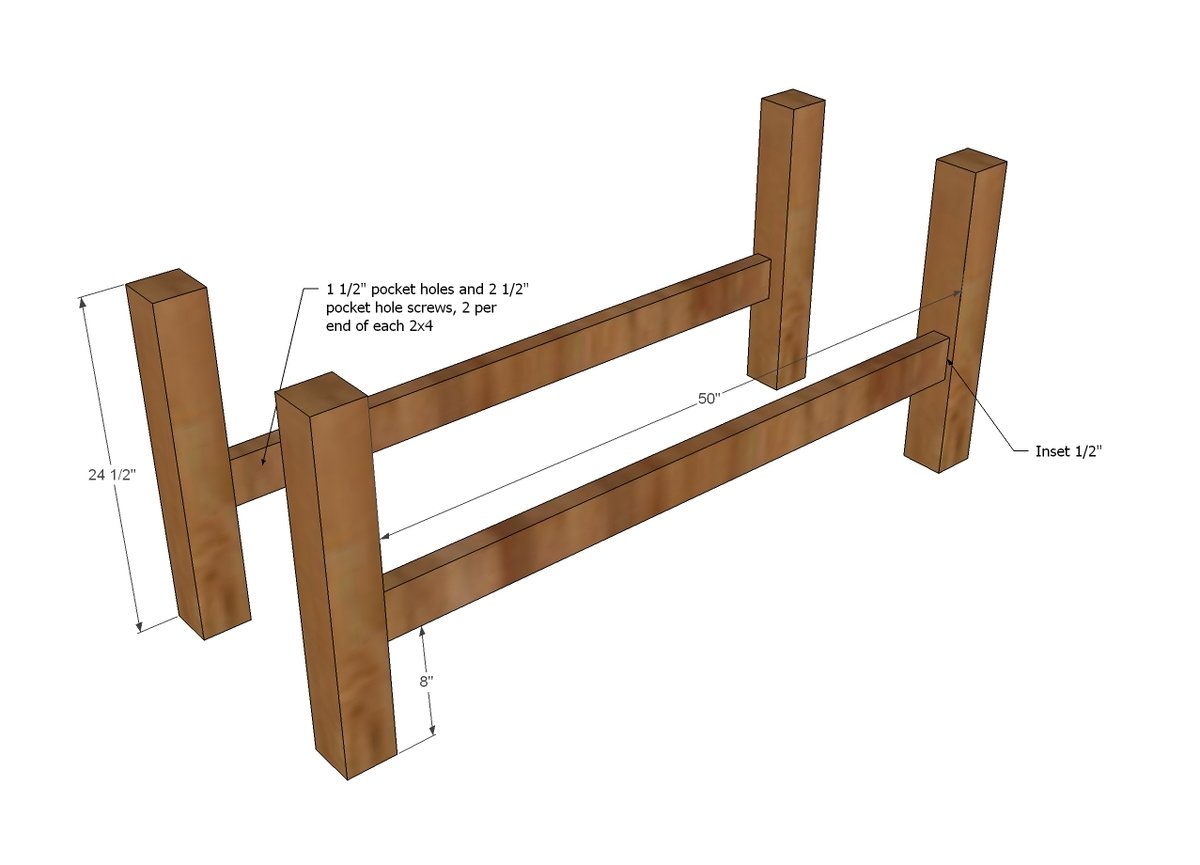
Attach aprons to legs using pocket holes.
Step 2
And then attach side aprons to legs - it will start looking like a console here!
Step 3
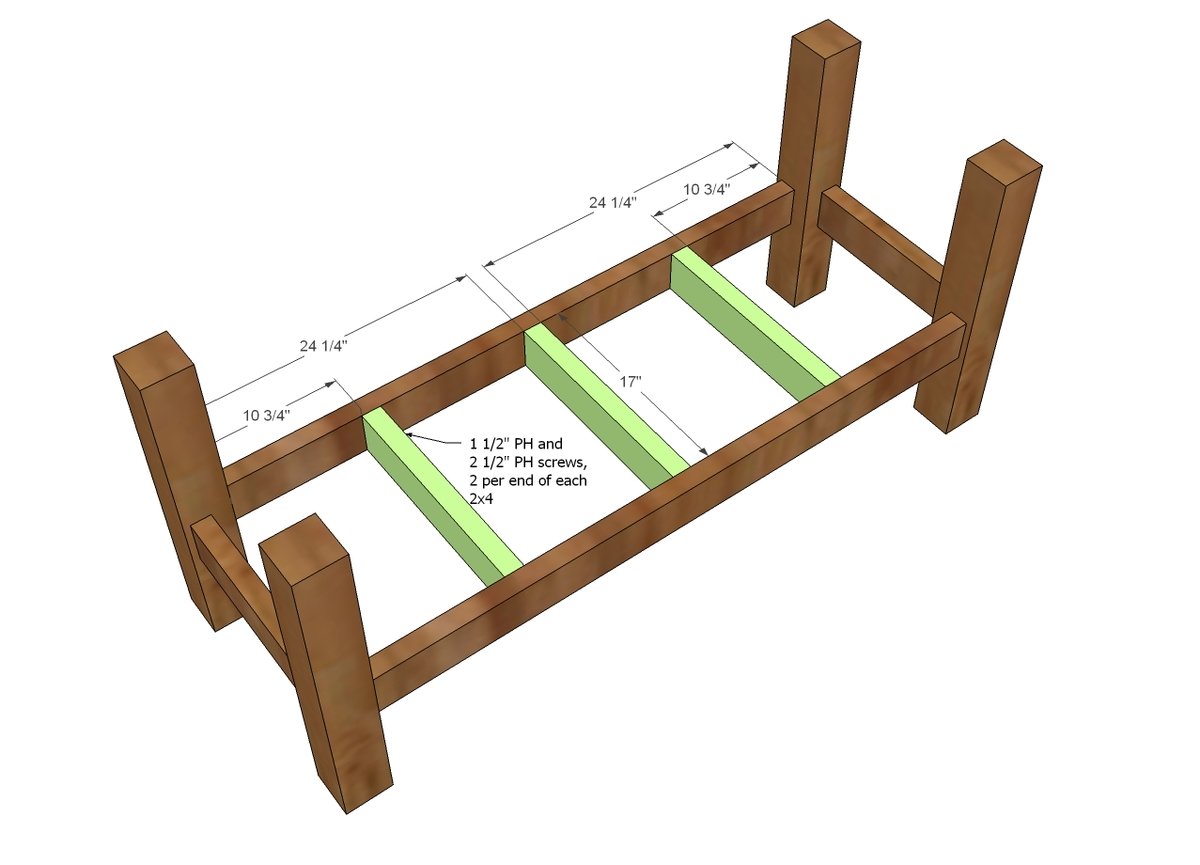
These supports will keep that bottom shelf from sagging - not essential if you are storing blankets though.
Step 4
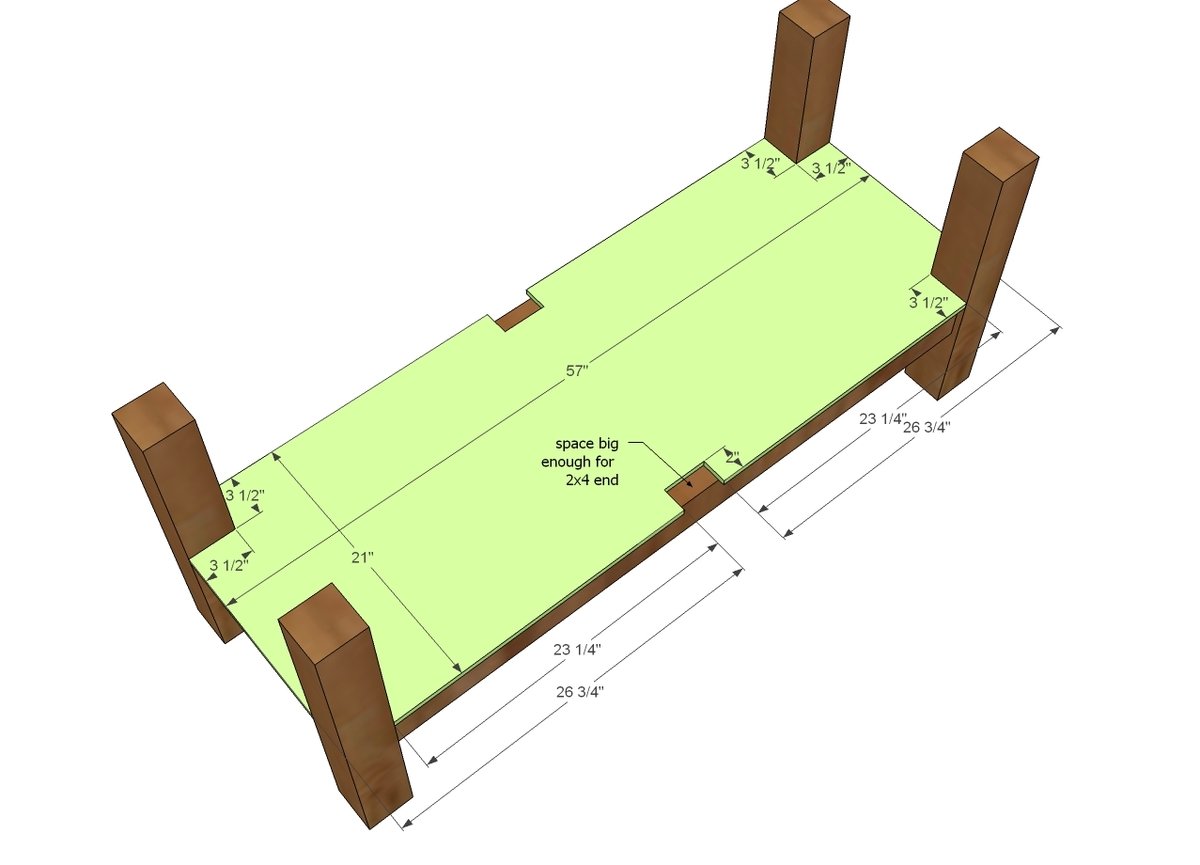
Once the top goes on, you won't be able to get the plywood in, so best to do that now. You could also use 1x boards on top for a planked look, or cut the plywood in 2 pieces down the center - it will get hidden by the center supports. 1x modification: 2 - 1x4 @ 50" and 4 - 1x4 @ 57" Notch out the 2 1x4 @ 50"
Step 5
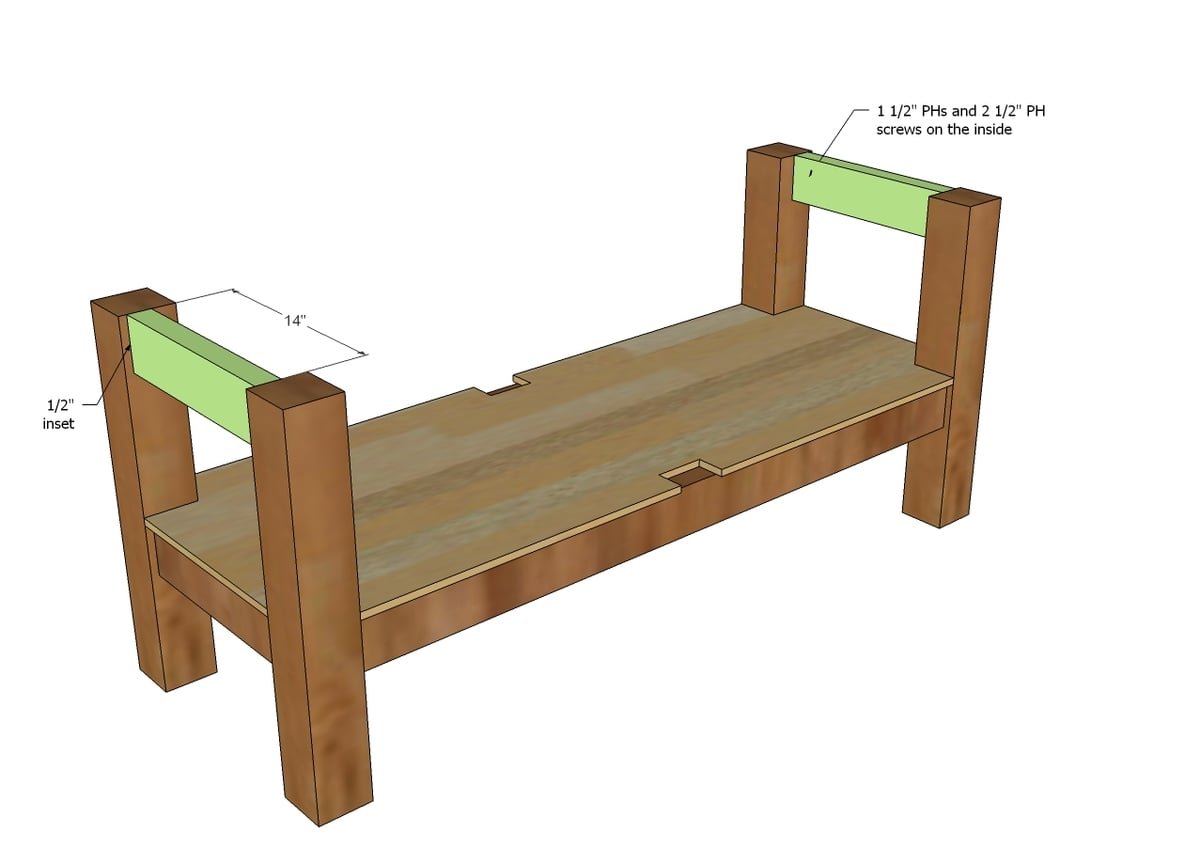
Attach the top sides to the legs with pocket hole screws on the inside.
Step 6
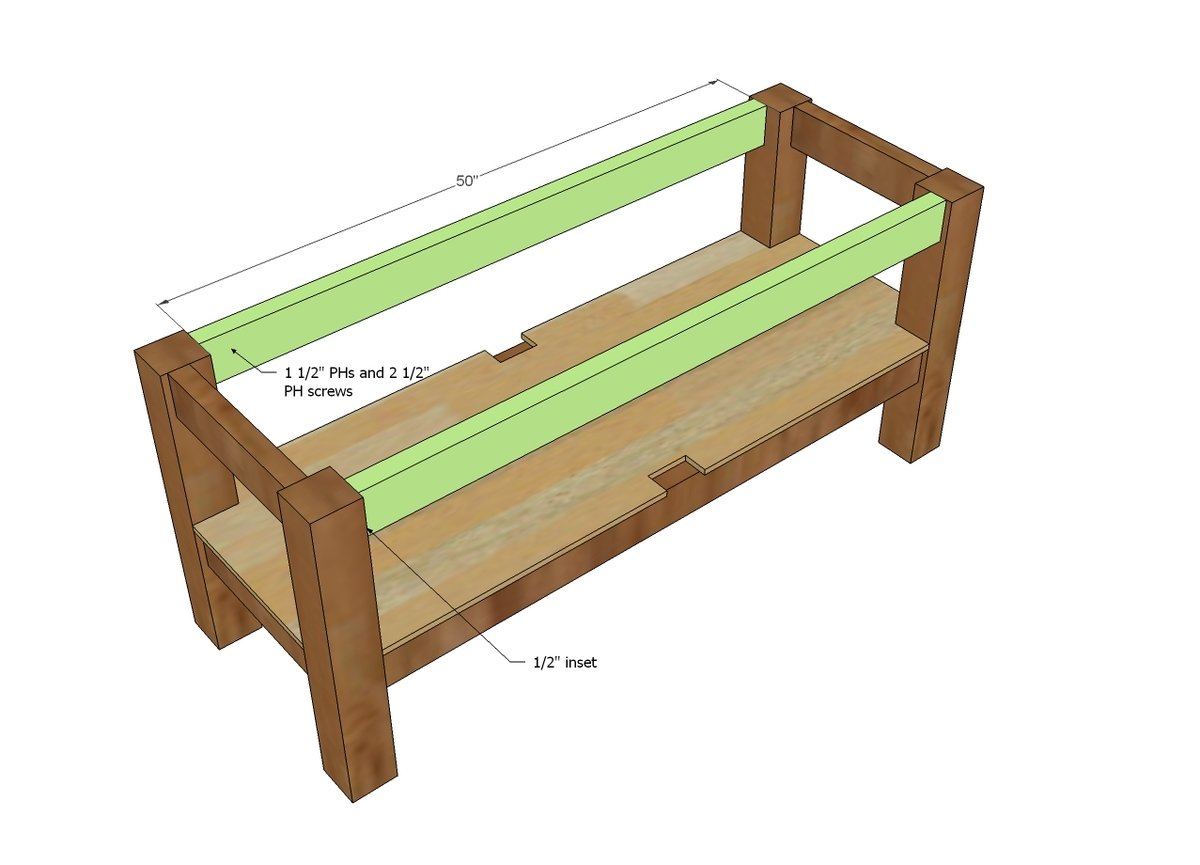
TIP: Drill 1 1/2” Pocket holes on insides of front/back aprons, facing upward, for attaching the top in later steps, prior to attaching aprons to legs. TIP: If you don't have a right angle drill, you may wish to do the next step (step 7) first as you may run out of room for your drill to fit. Followed by the front and back aprons.
Step 7
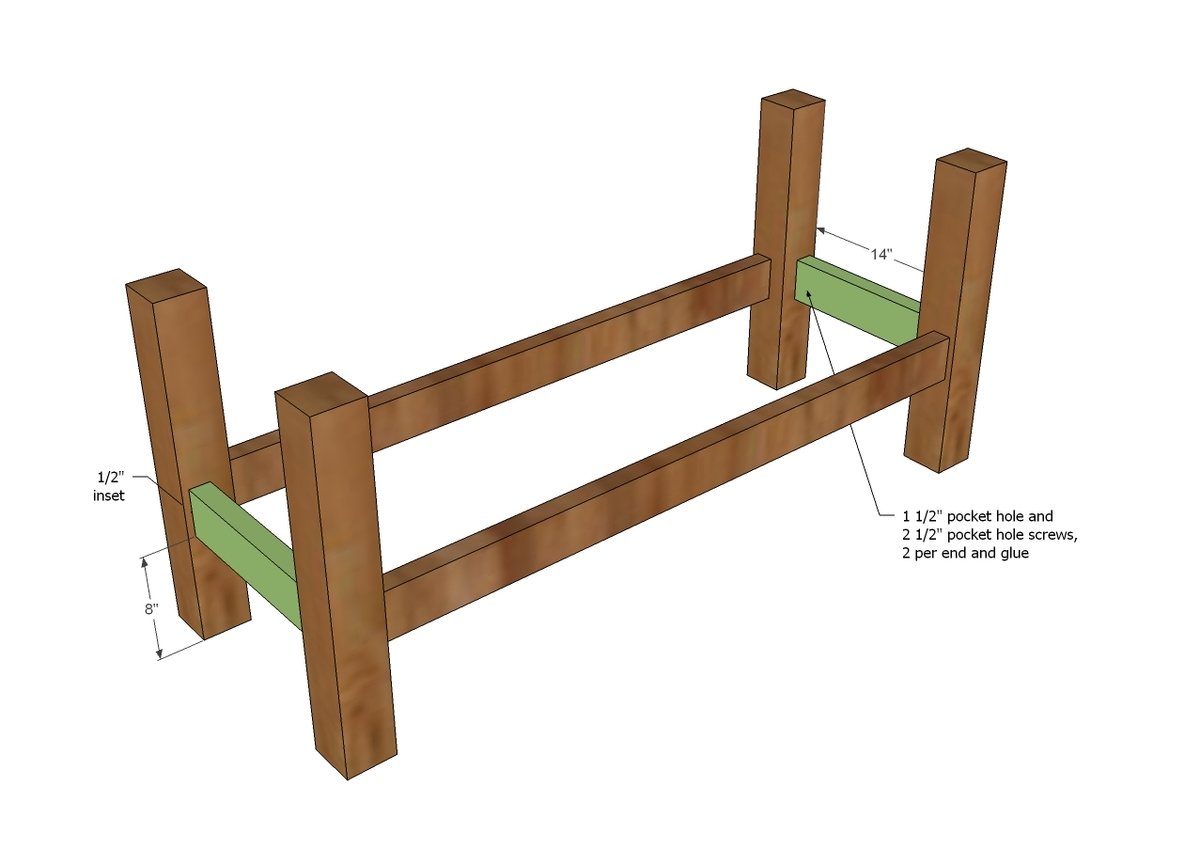
And then add these guys in the middle with 1 1/2" pocket holes and 2 1/2" pocket hole screws and glue.
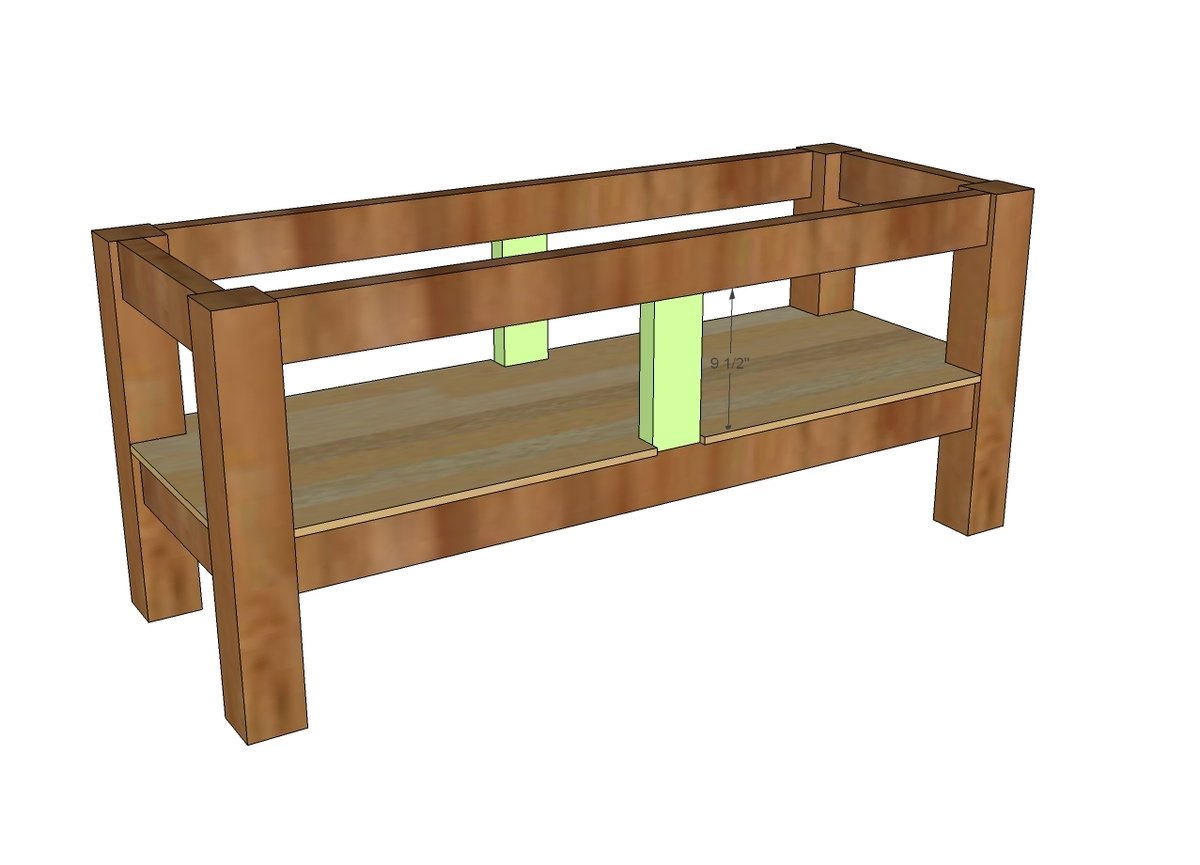
Step 8
Build the top first, and then attach through the aprons with 2 1/2" pocket hole screws and glue.
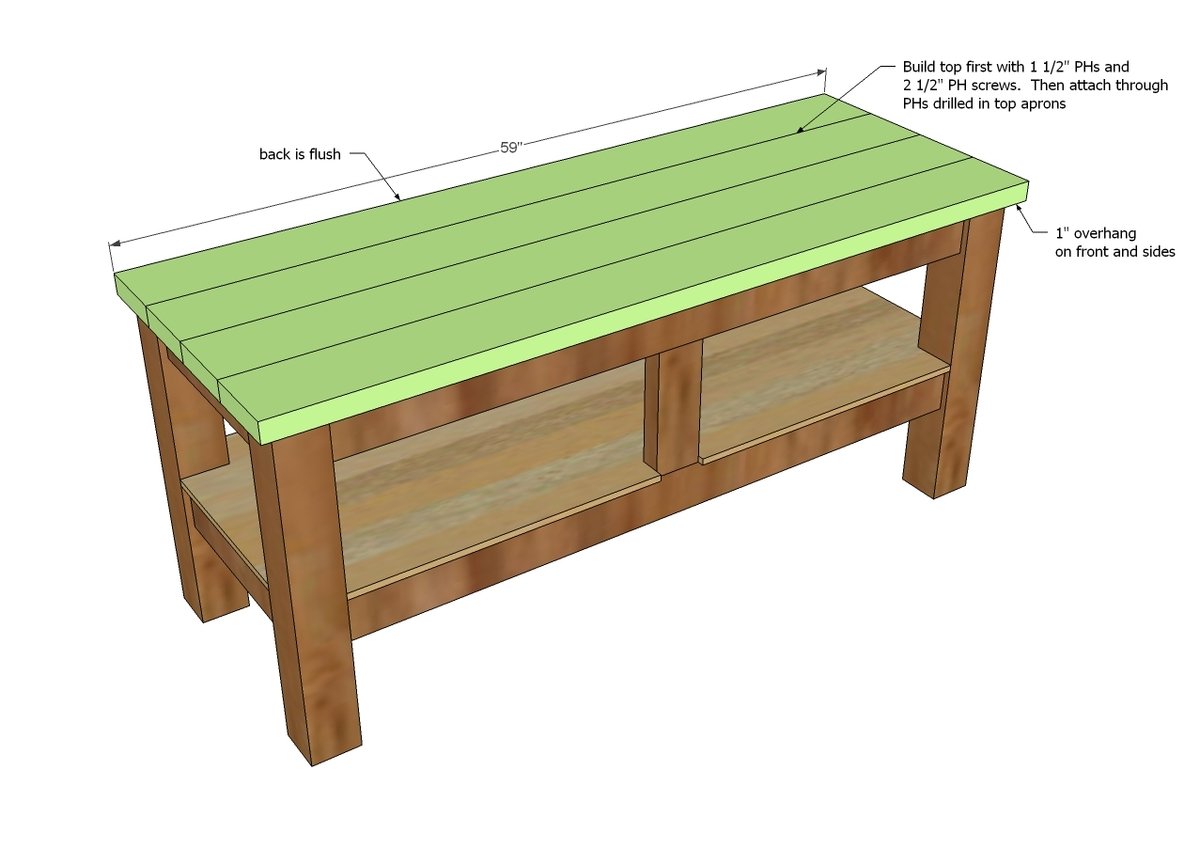
Step 9
Add caster wheels to the base - all done!
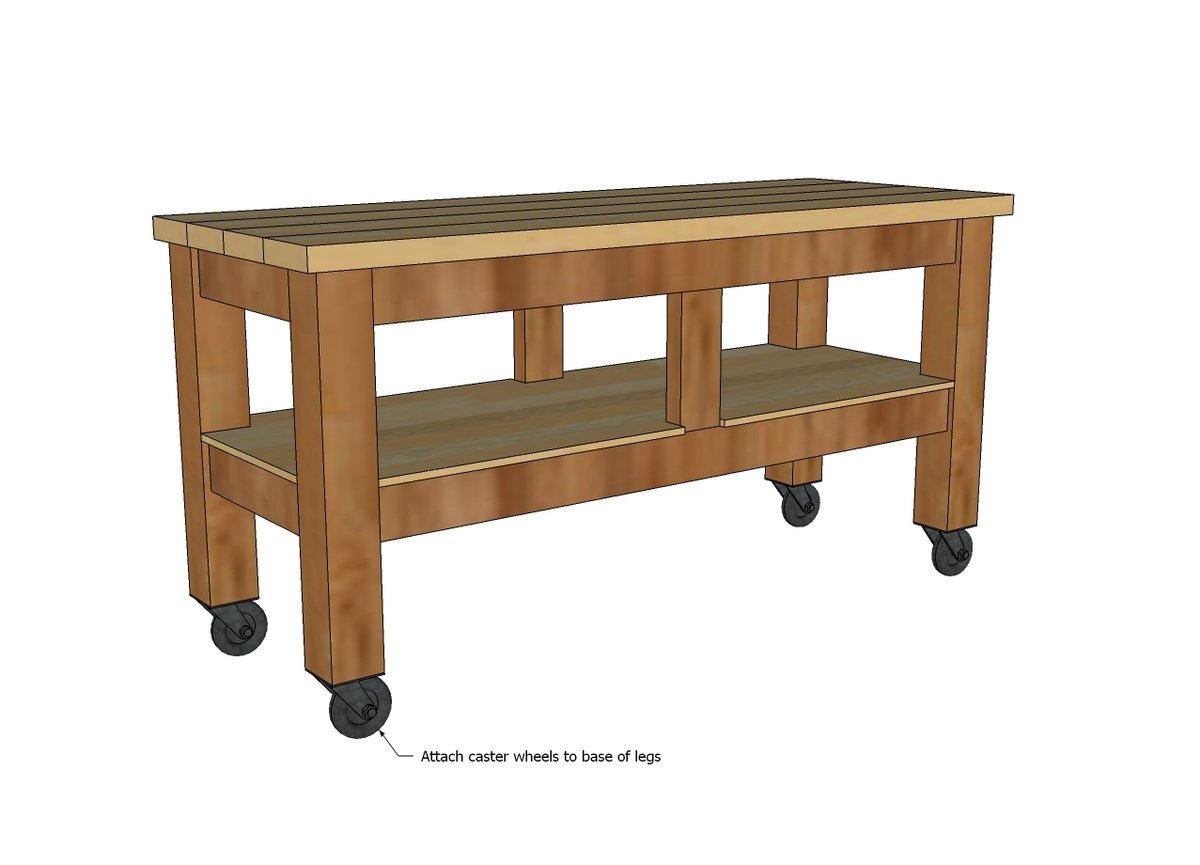
Finishing
Sand all surfaces, starting with a medium grit and finishing with fine. Wipe off the dust, fill any holes or gaps with wood filler, and sand smooth once dry. Apply primer if you're painting, then finish with your choice of paint or stain and seal with a durable clear topcoat. For outdoor projects, use exterior-rated primer, paint or stain, and sealer so the piece stands up to the weather.
Source (temporary): https://www.ana-white.com/woodworking-projects/taylor-console-table