Taylors Coffee Table
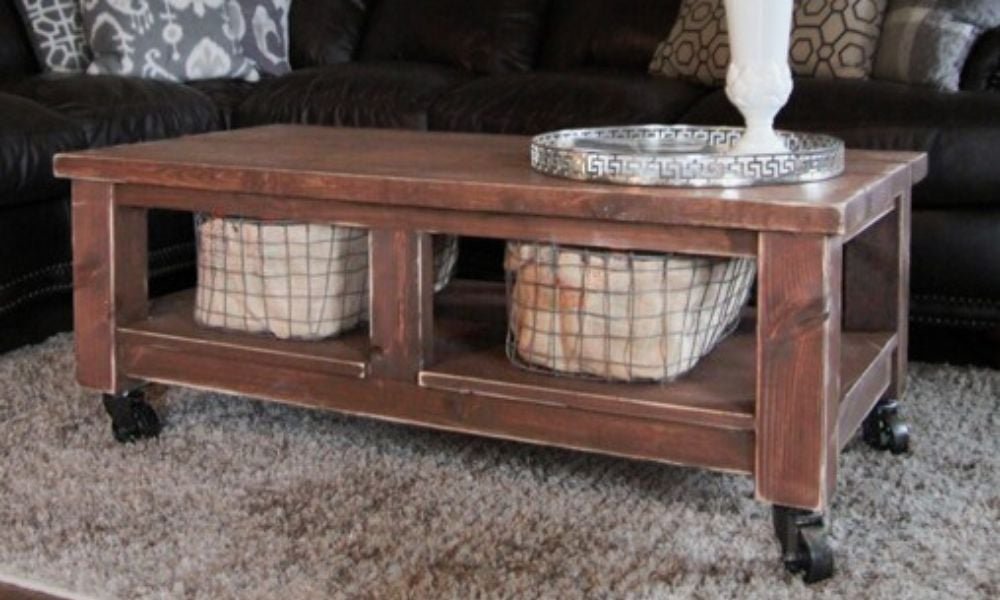
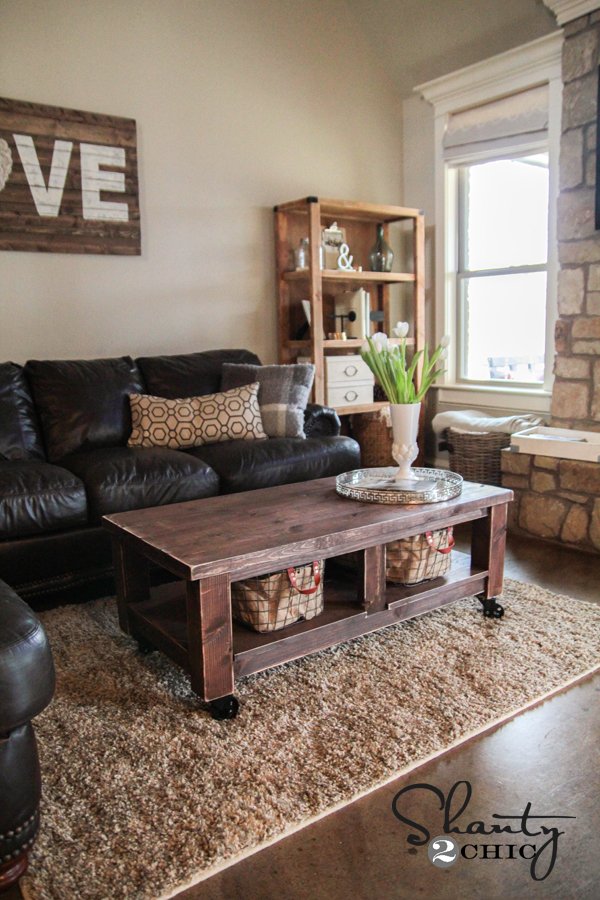
Build your own coffee table from This beautiful coffee table features a solid wood design - so you can paint or stain it any color! With room for baskets and optional casters, this coffee table is functional too! Related: Build the Matching Console Table
Specifications
| Project type | Coffee Tables |
|---|---|
| Room | living room |
| Difficulty | Intermediate |
| Estimated cost | $50 - $100 |
Dimensions
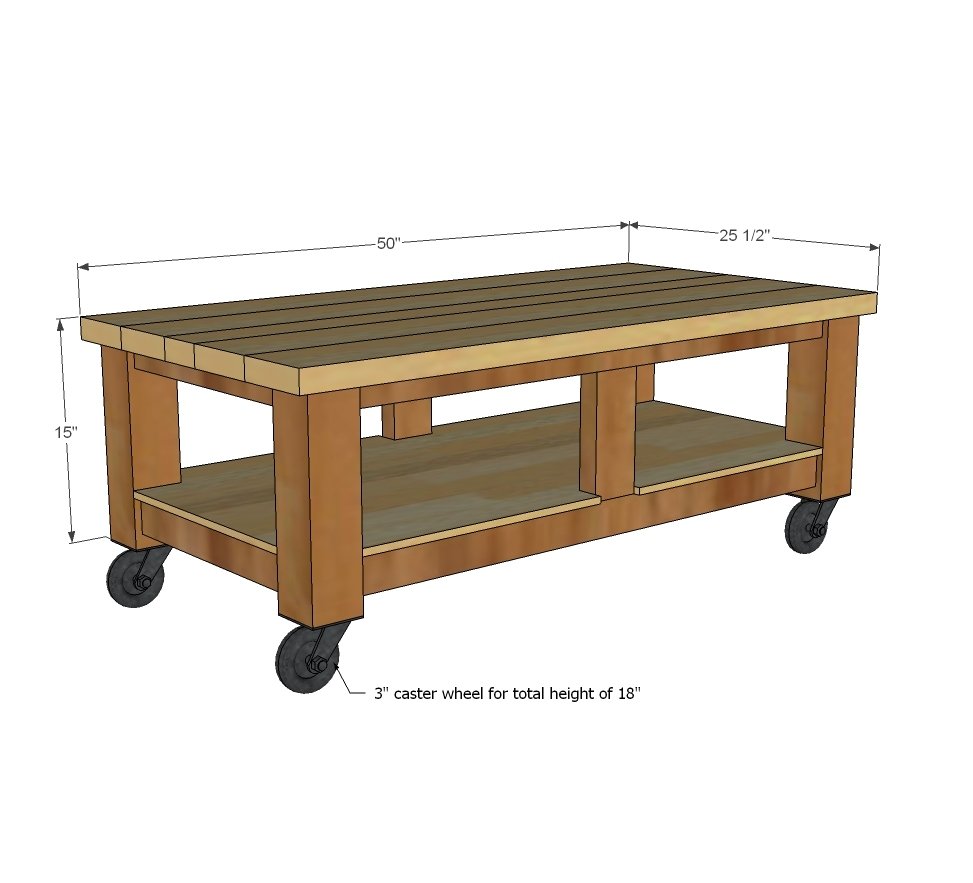
Use the size-specific shopping and cut lists below.
Shopping List
- 1 - 4x4 @ 6 feet long
- 1 - 1x3 @ 12 feet long
- 3 - 2x2 @ 8 feet long
- 1 - 2x4 @ 8 feet long
- 2 - 2x6 @ 9' stud length or 10 feet
- 1 - 1/2" thick plywood panel @ 24" x 48" (quarter sheet)
- 2 -1/2" pocket hole screws and 1-1/4" pocket hole screws (if you kept the 1x3s)
- 1" or longer brad nails (for nailing bottom shelf plywood down)
- 4 - caster wheels and screws to attach (if not included)
Cut List
NOTE: Instead of 1x3s, Whitney used 2x3s which does not affect the plan (actually makes it stronger) but many of you cannot source 2x3s locally. If you do make this change, you will need to measure and cut a few boards that tie in to the 1x3s (step 2).
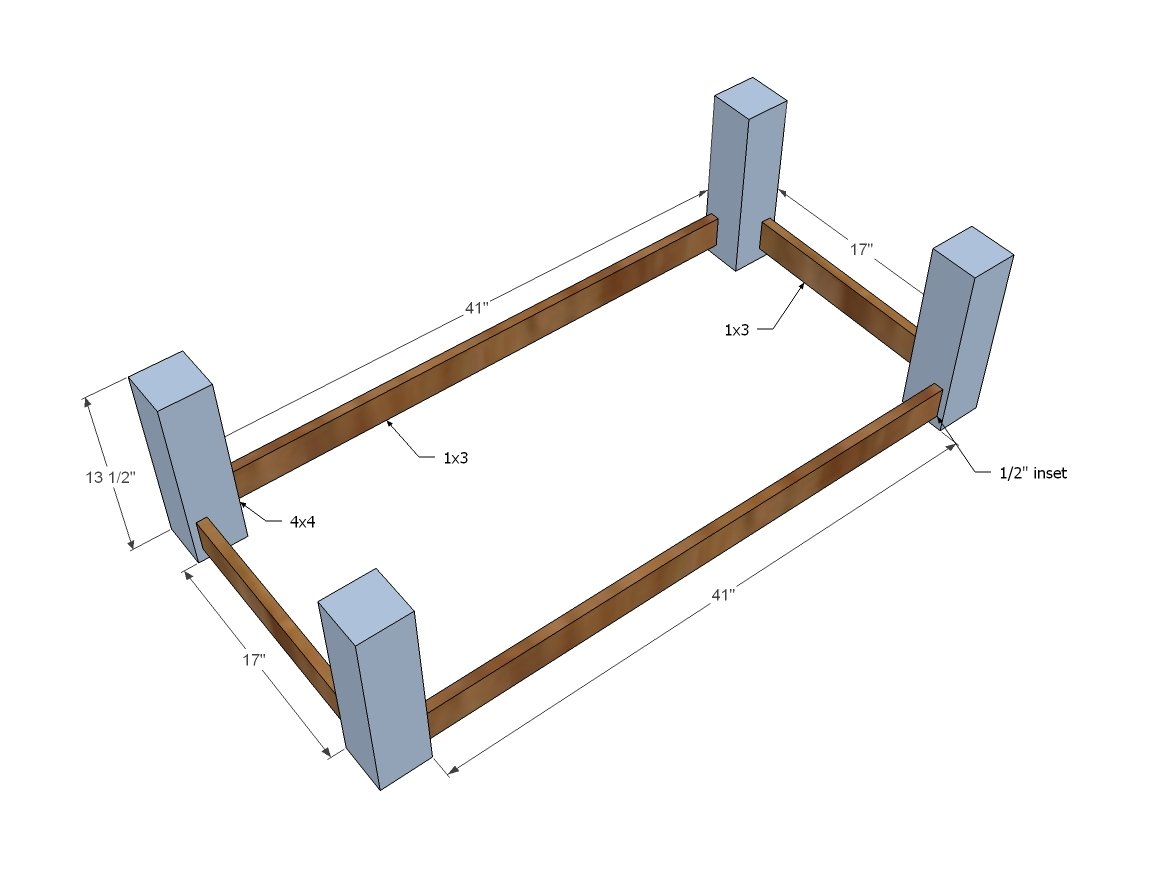
- 4 - 4x4 @ 13-1/2" (legs)
- 2 - 1x3 @ 17" (short aprons)
- 2 - 1x3 @ 41" (long aprons)
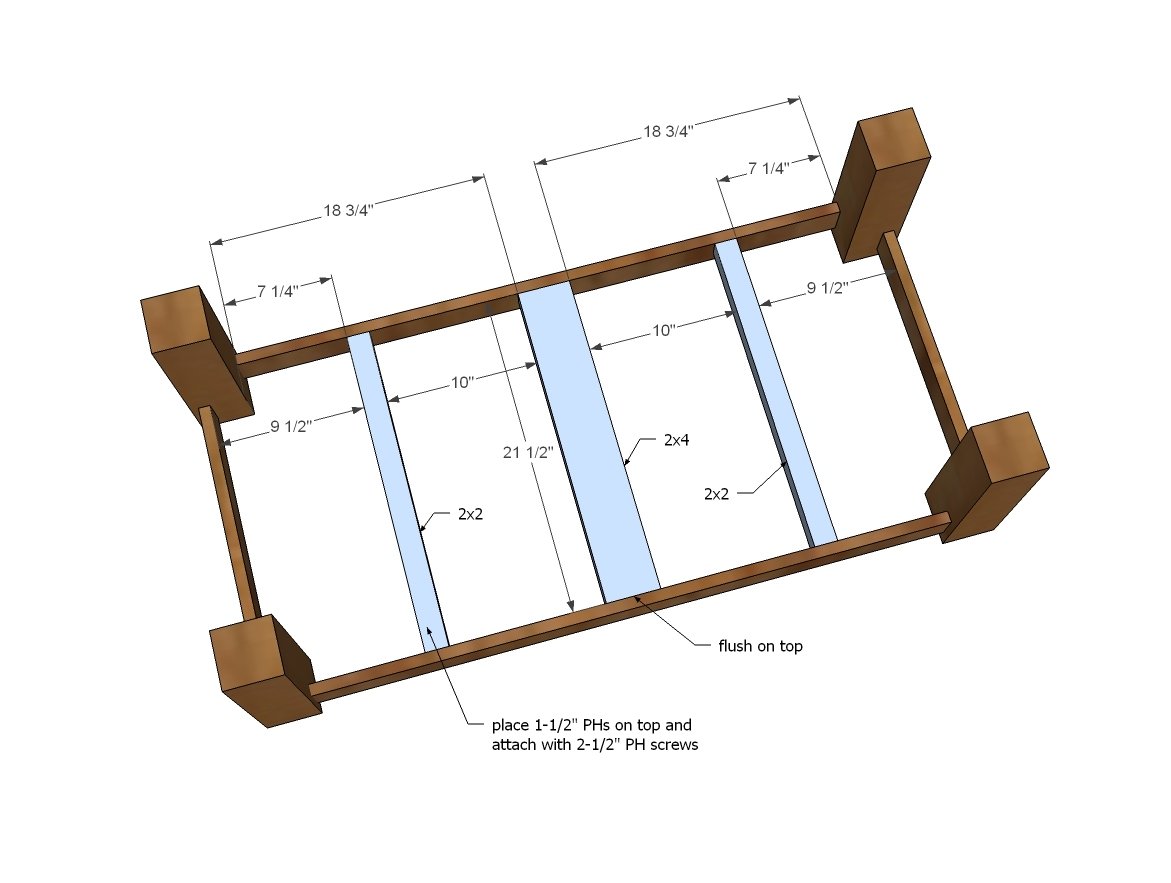
- 2 - 2x2 @ 21-1/2"
- 1 - 2x4 @ 21-1/2"
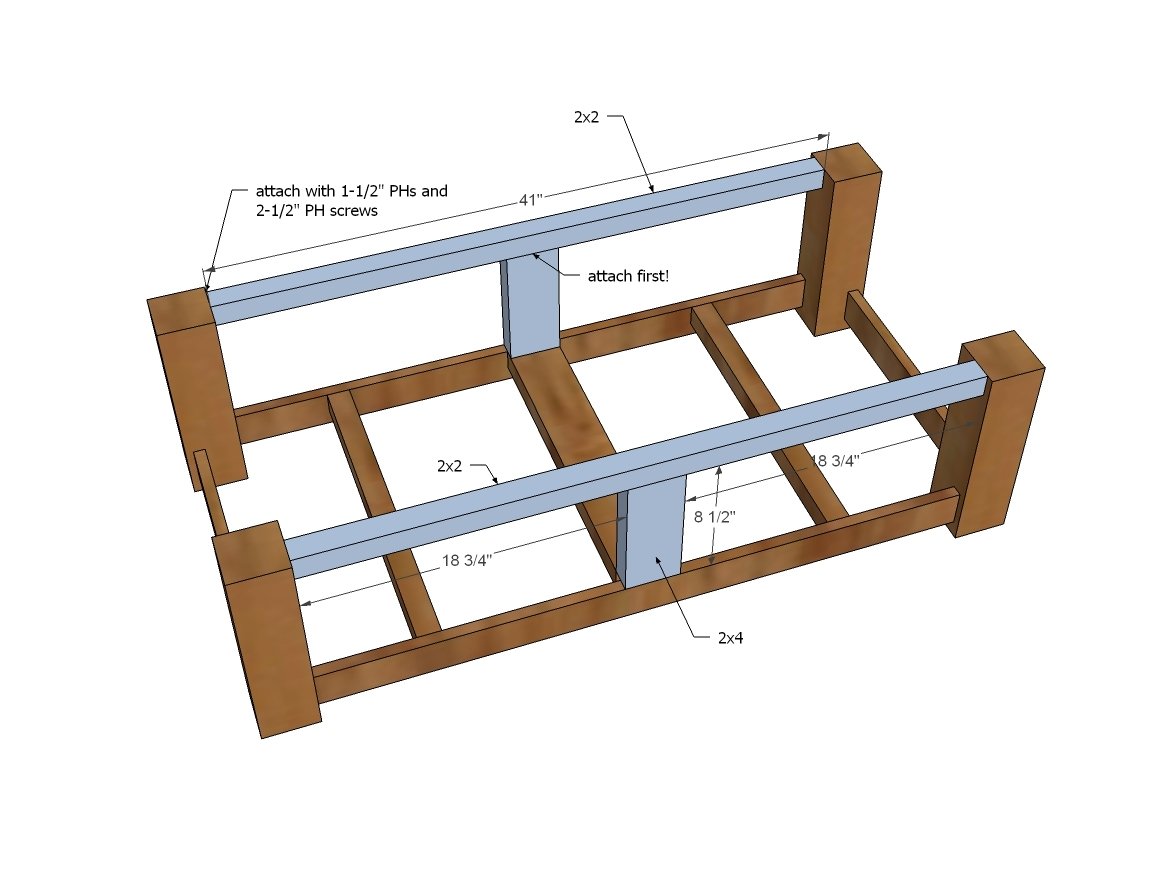
- 2 - 2x2 @ 41"
- 2 - 2x4 @ 8-1/2"
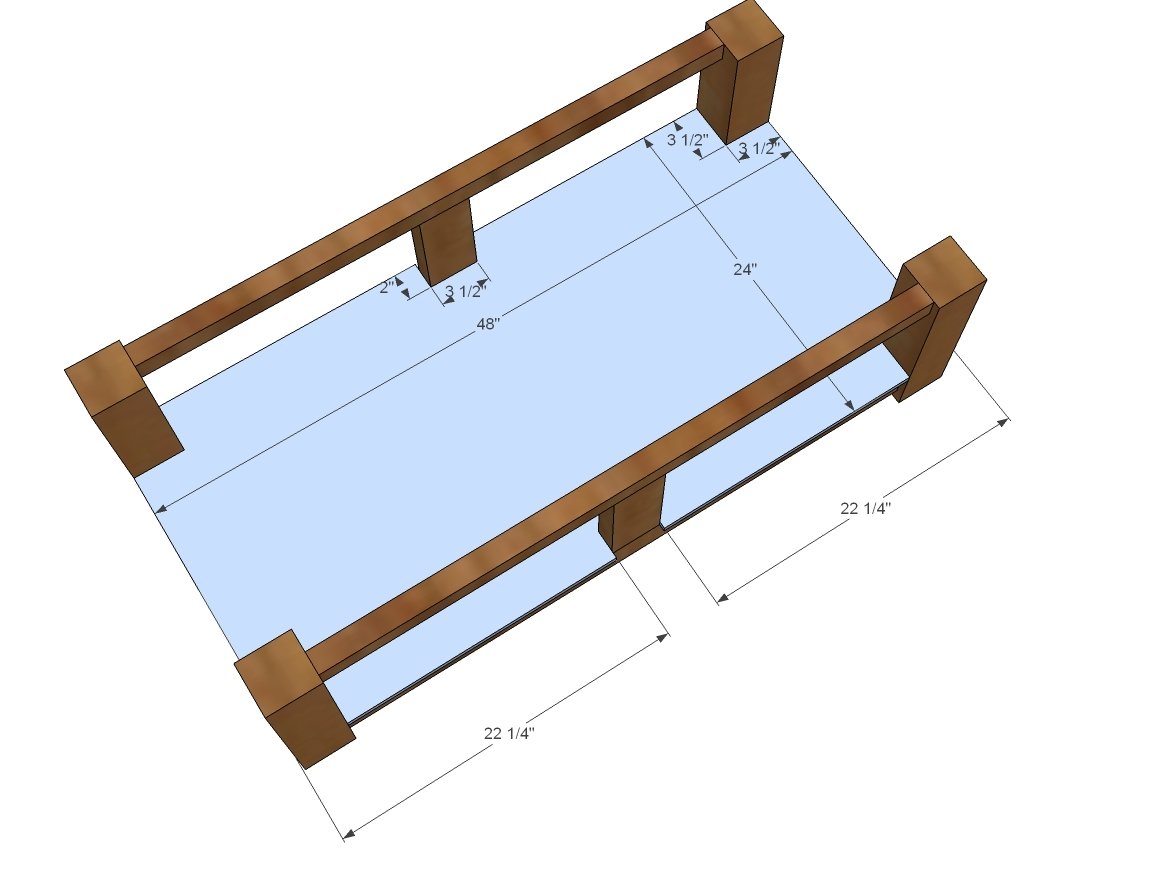
- 1 - 1/2" plywood @ 48" x 24"
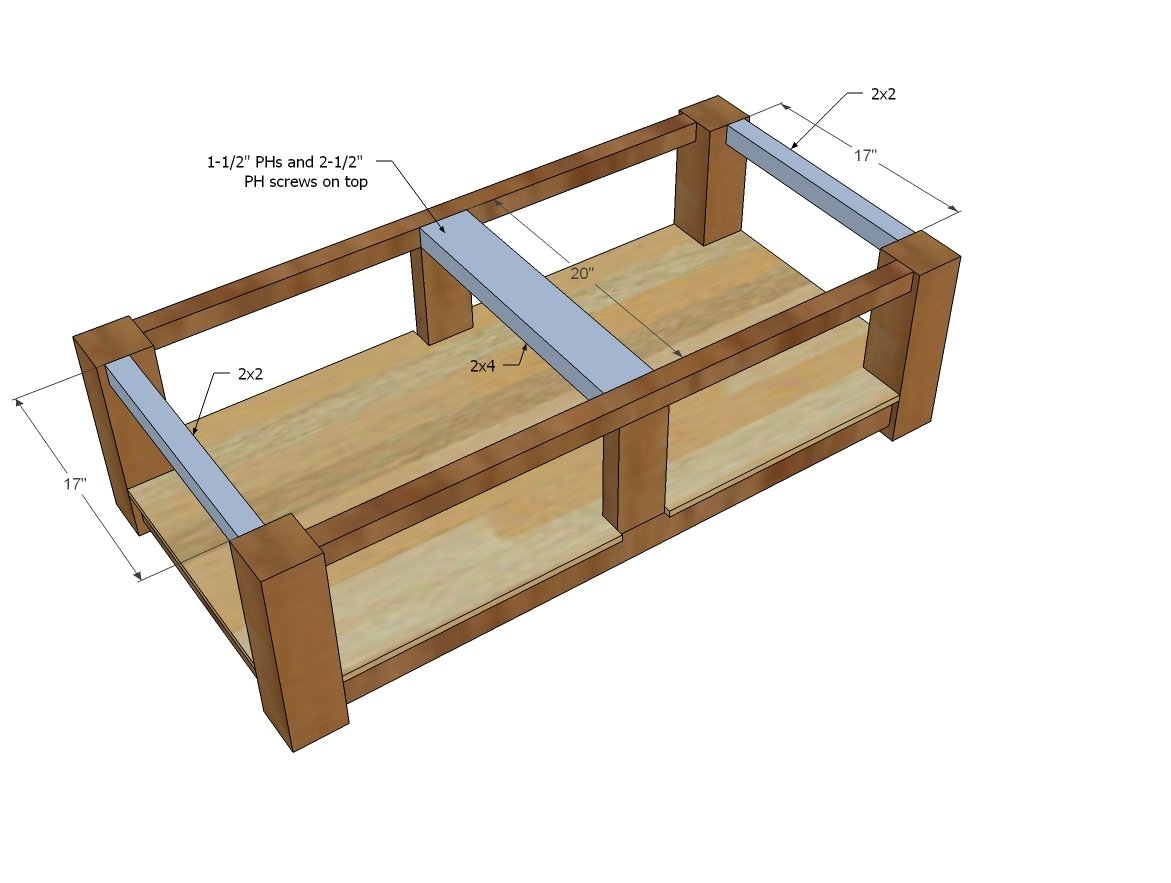
- 2 - 2x2 @ 17"
- 1 - 2x4 @ 20" Tabletop
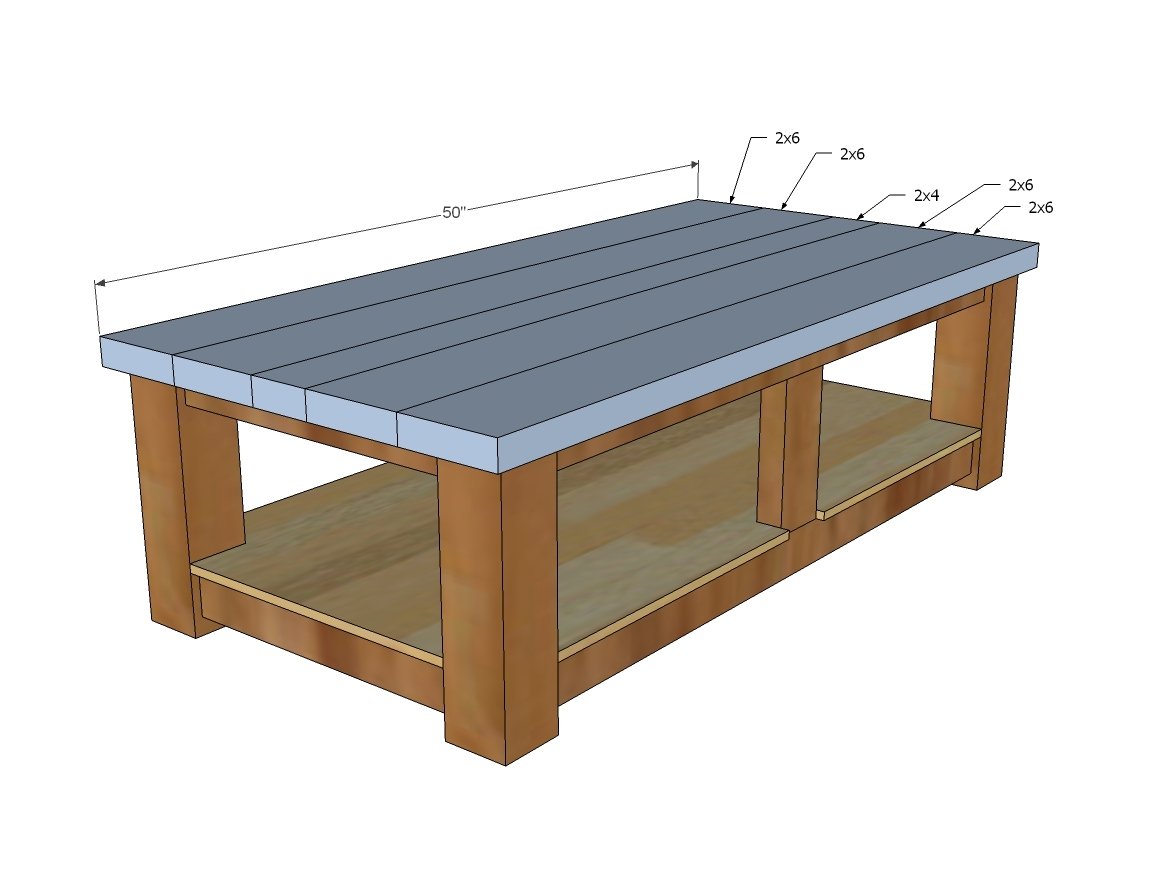
- 4 - 2x6 @ 50"
- 2 - 2x2 @ 50"
Tools
- measuring tape
- square
- pencil
- safety glasses
- kreg-jig
- drill
- circular saw
- compound miter saw
- nailer
- sander
Step-by-step Instructions
Step 1
Attach 1x3s (or 2x3s if you are using) to the four legs. For 1x boards, use 3/4" pocket holes and 1-1/4" pocket hole screws. For 2x boards, use 1-1/2" pocket holes and 2-1/2" pocket hole screws to attach.
Step 2
Attach bottom supports - this will support the bottom shelf plywood. Best way is pocket hole screws - if you are screwing into 1x boards (used 1x3s for sides) use 3/4" setting on pocket hole jig and 1-1/4" pocket holes. If you use 3/4" plywood for the bottom you don't need the 2x2 supports.
Step 3
Build these "T" pieces first, then attach to the legs and bottom.
Step 4
Notch out with a jigsaw the bottom shelf and attach to the bottom with finish nails and glue.
Step 5
Step 6
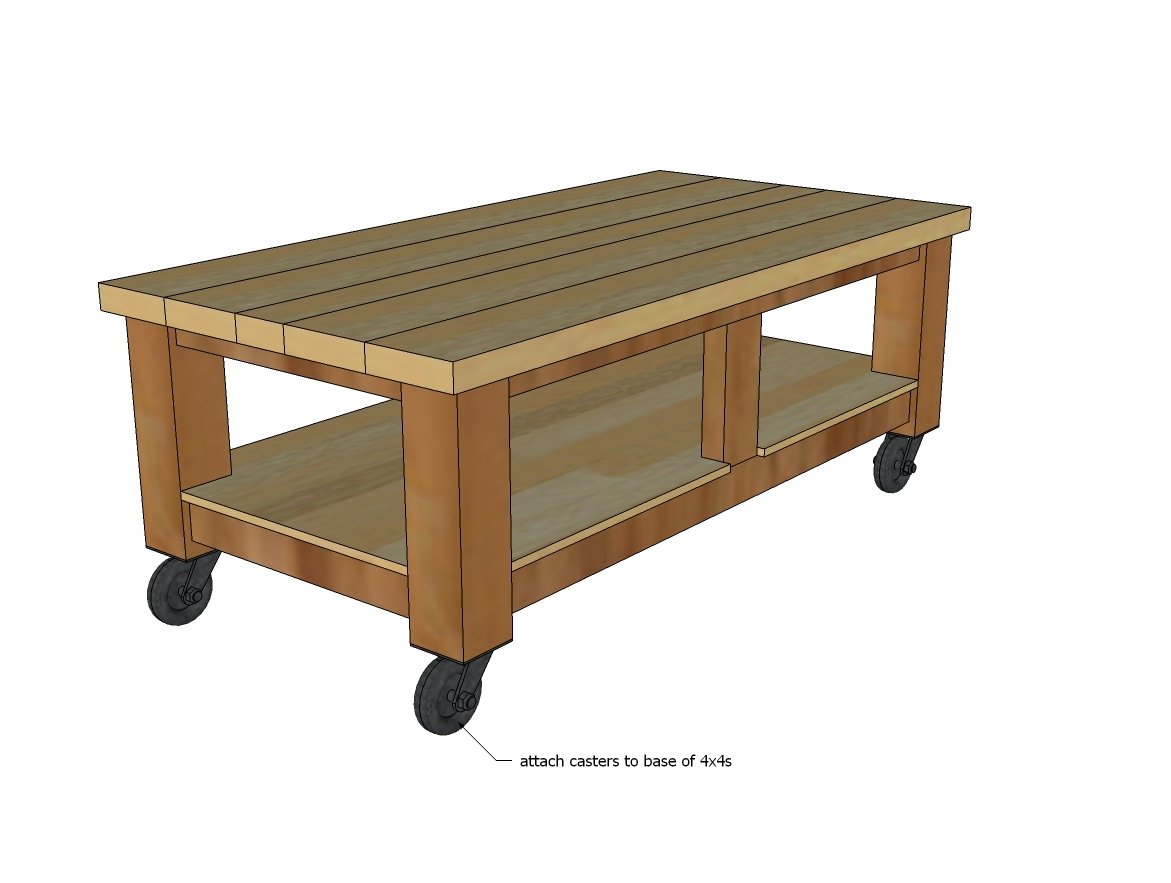
Instead of the 2x4 down the center as pictured, Whitney liked using 2 - 2x2s spaced between the 2x6s to make it look more balanced - and I'd have to agree. Build the tabletop first with 1-1/2" pocket holes and 2-1/2" pocket hole screws and wood glue. Then attach to base with through aprons and center undermount support with 2-1/2" screws (you can use pocket hole screws so you don't have to go out and buy special screws just for this step).
Step 7
Attach caster wheels to bottom of the legs.
Step 8
For finishing details - please visit Shanty2Chic
Finishing
Sand all surfaces, starting with a medium grit and finishing with fine. Wipe off the dust, fill any holes or gaps with wood filler, and sand smooth once dry. Apply primer if you're painting, then finish with your choice of paint or stain and seal with a durable clear topcoat. For outdoor projects, use exterior-rated primer, paint or stain, and sealer so the piece stands up to the weather.
Source (temporary): https://www.ana-white.com/woodworking-projects/taylors-coffee-table