Teen Platform Bed with Side Storage
Don't want to rip plywood? We have an option for this bed made using 1x12 boards. Here's the.
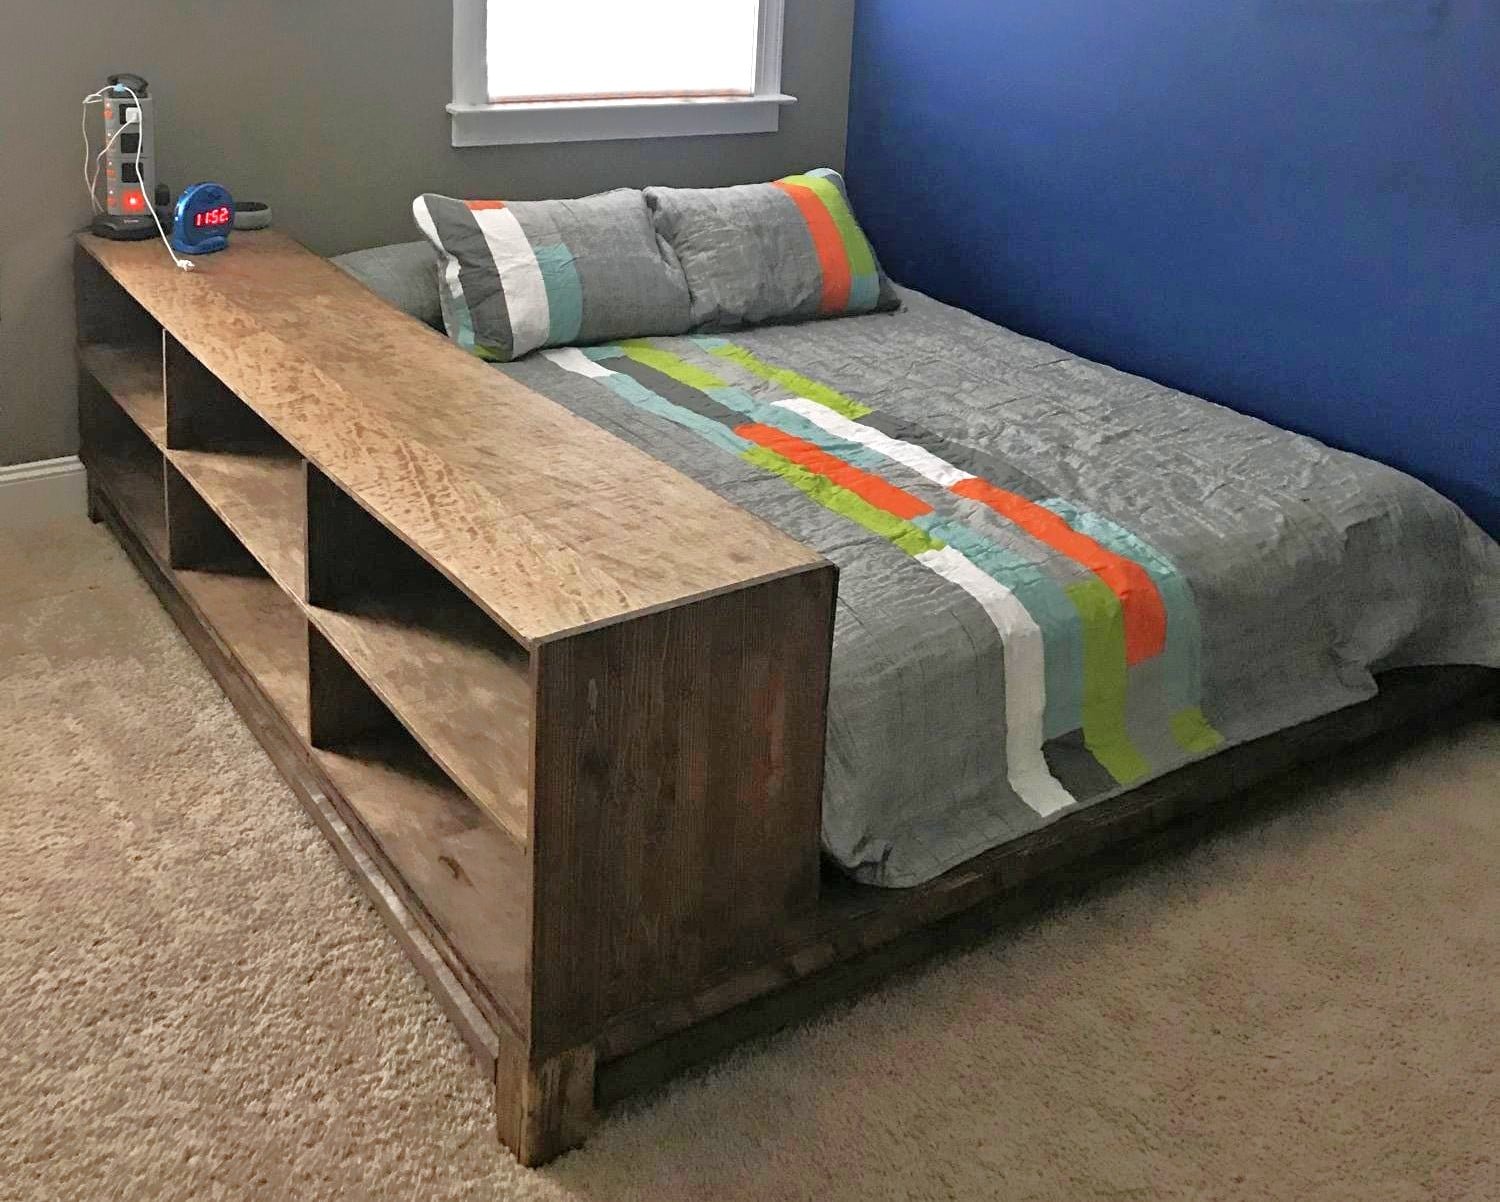
Specifications
| Project type | Bookshelf and Bookcase Plans |
|---|---|
| Room | Bedroom |
| Style | Modern Style Furniture Plans |
| Difficulty | Intermediate |
| Estimated cost | $150 - $200 |
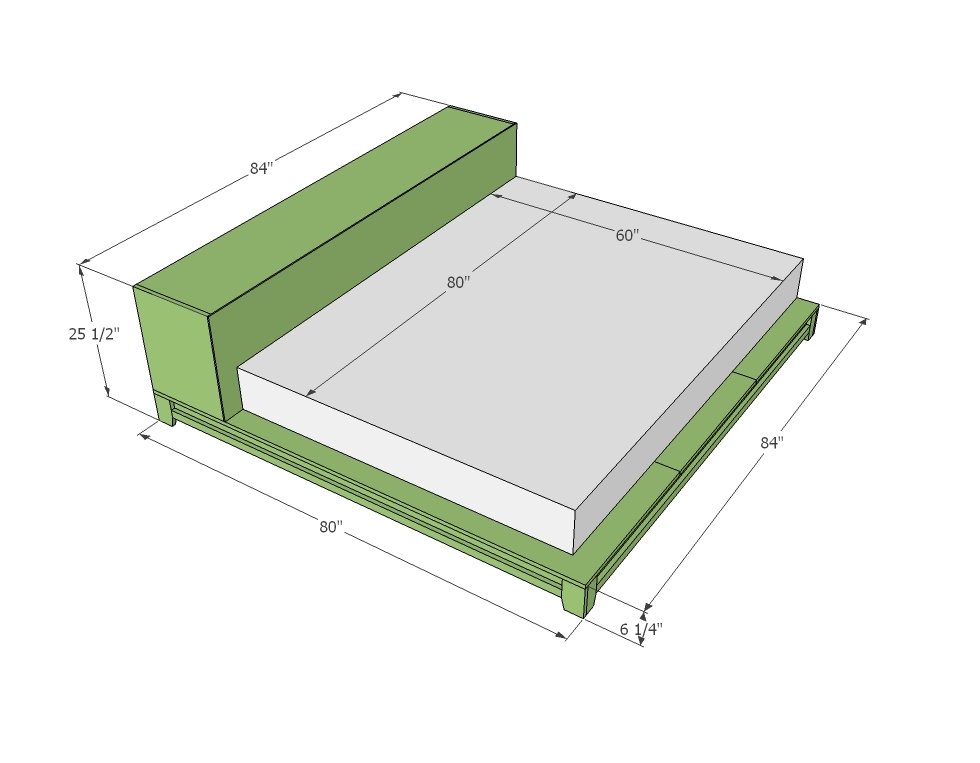
Dimensions
Use the size-specific shopping and cut lists below.
Shopping List
- 3 - Sheets 3/4" Plywood, MDF or other sanded sheet goods*
- 1 - sheet 1/4" plywood, MDF or other sanded sheet goods*
- 6 - 2x4 @ 8 feet long
- 4 - 1x2 @ 8 feet long or other decorative casing or moulding
- 1 - 1x4 @ 2 feet long
- 1 - 1x4 @ 2 feet long
- 1 - 2x2 @ 8 feet long *Choose PureBond formaldehyde free plywood to increase the air quality of your teens room
Cut List
- 2 - 2x4 @ 78 1/2"
- 4 - 2x4 @ 79 1/2"
- 4 - 1x3 @ 5 1/2" (Taper ends)
- 4 - 1x4 @ 5 1/2" (Taper ends)
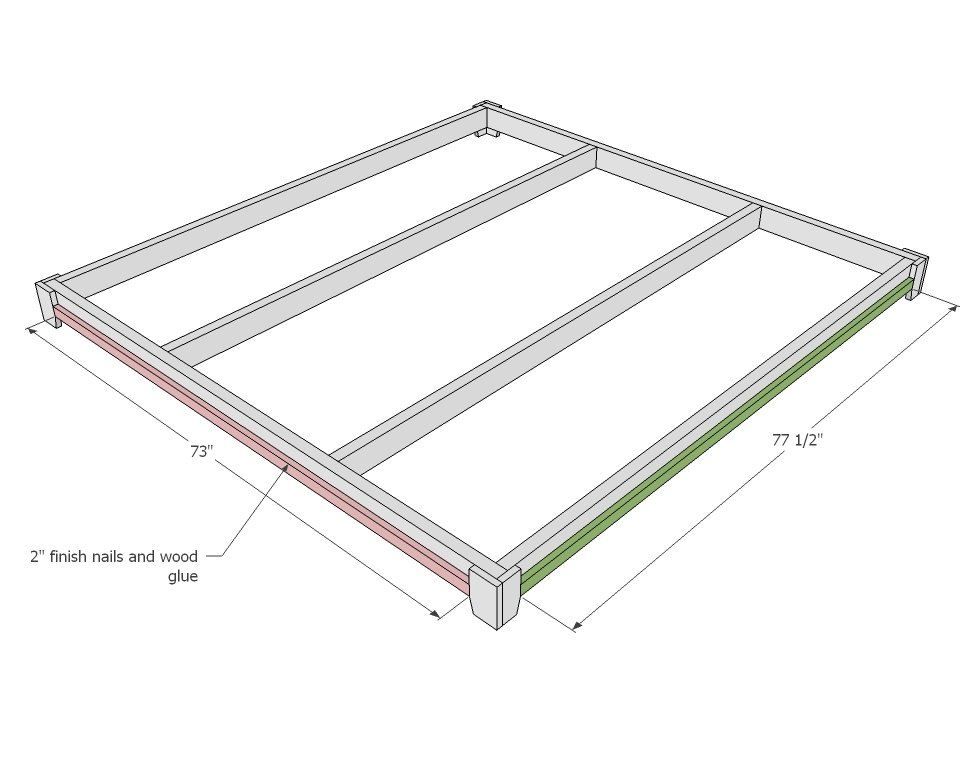
- 2 - 1x2 or other moulding @ 73"
- 2 - 1x2 or other moulding @ 77 1/2"
- 4 - 2x2 or 2x4 @ 5 1/2"
- 3 - 3/4" Plywood @ 28" x 80"
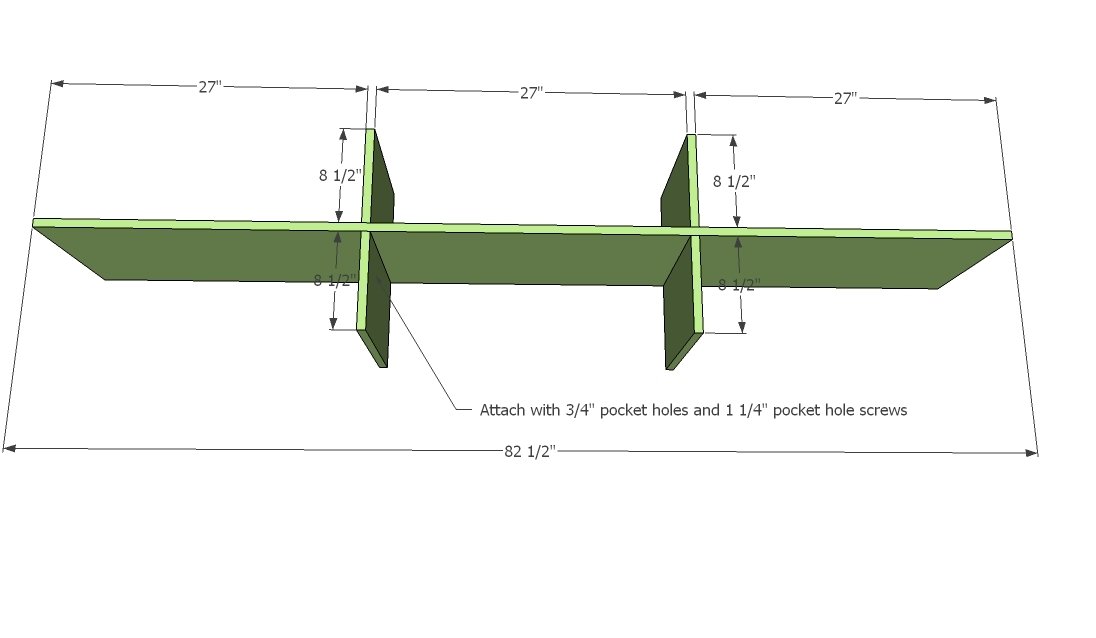
- SHELF 4 - 3/4" Plywood @ 15 1/2" x 8 1/2"
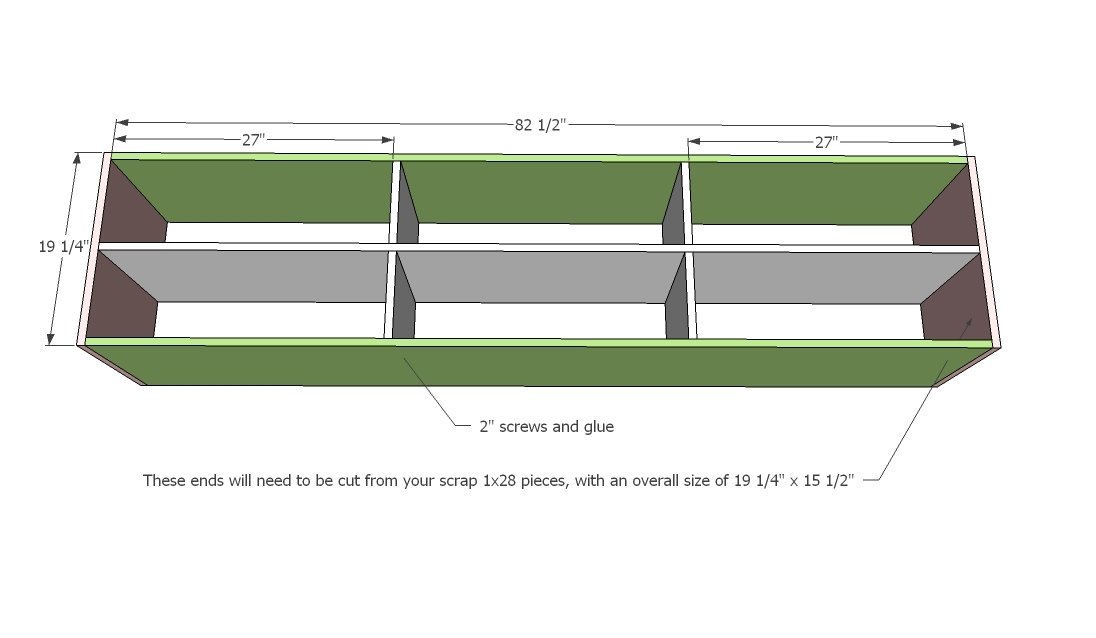
- 3 - 3/4" Plywood @ 15 1/2" x 82 1/2"
- 2 - 3/4" Plywood @ 15 1/2" x 19 1/4"
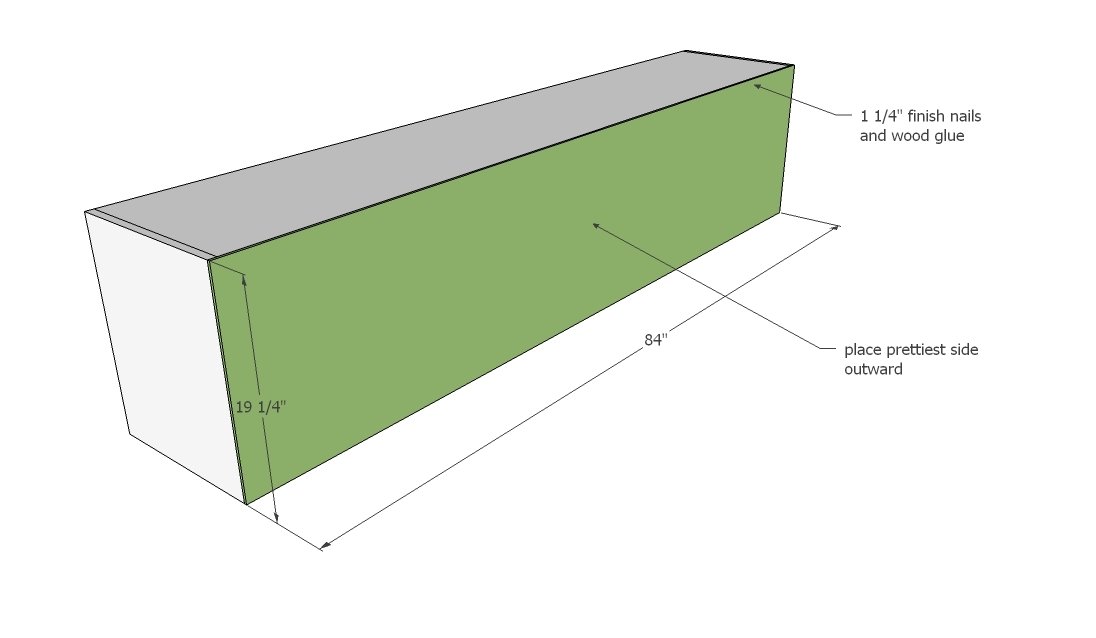
- 1 - 1/4" Plywood @ 84" x 19 1/4"
Tools
- measuring tape
- square
- pencil
- safety glasses
- hearing protection
- kreg-jig
- drill
- circular saw
- nailer
- sander
- level
- countersink drill bit
Step-by-step Instructions
Step 1
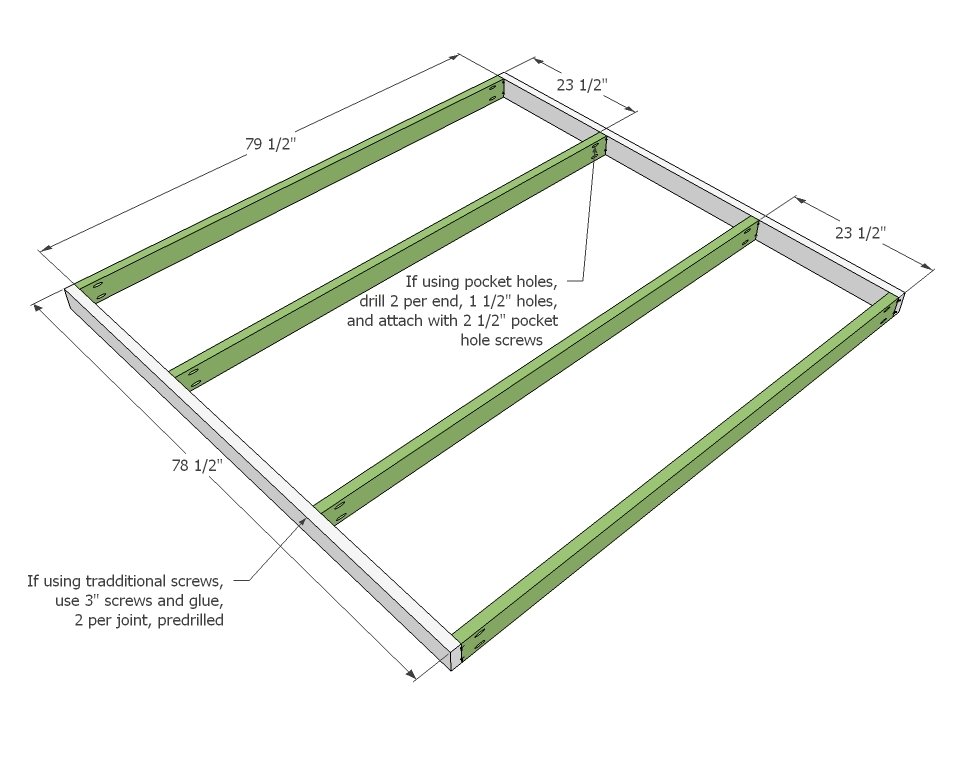
Measure your doorway to make sure you have 80" of clearance. I've got 80 1/2" and we have standard doors, so it will be tight - it may be in your best interest to build in your room for the queen size. Full and twin sizes should be more manageable. Most importantly here is having a flat level surface to work from with plenty of space, and measuring and marking out your joints and predrilling holes. If using your Kreg Jig, drill pocket holes on each end of the "studs" as shown in diagram. Build the frame as shown above.
Step 2
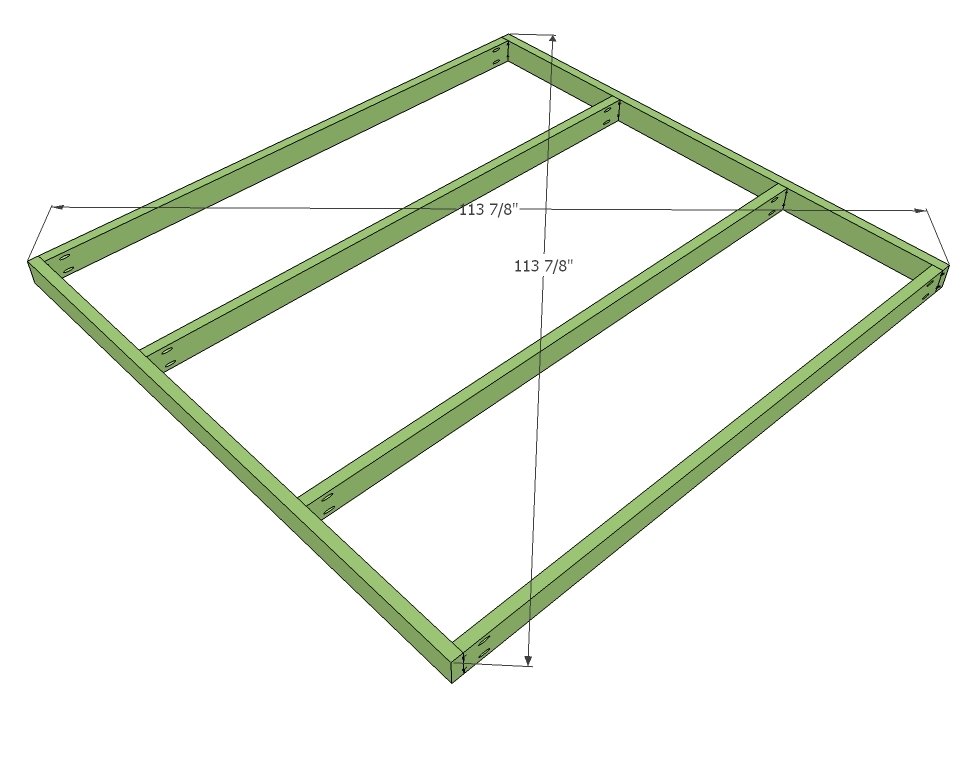
Check the frame for square by measuring outside opposite corner to outside opposite corner. If the two do not match up, push the longer measurement opposite corners together until they do. You need to do this before the glue sets up.
Step 3
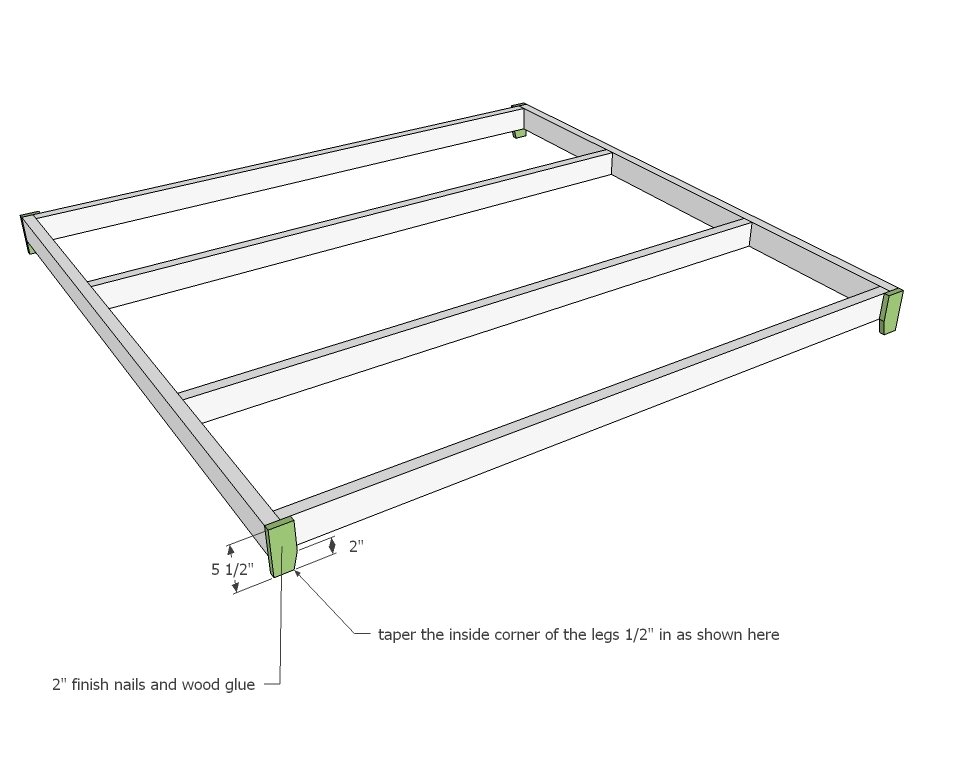
I would just work upside down here. And the reality is you could use sofa feet or any other type of decorative feet in place - to get a bed like this one. Taper the 1x3s 1/2" in and 2" up for a softened look.
Step 4
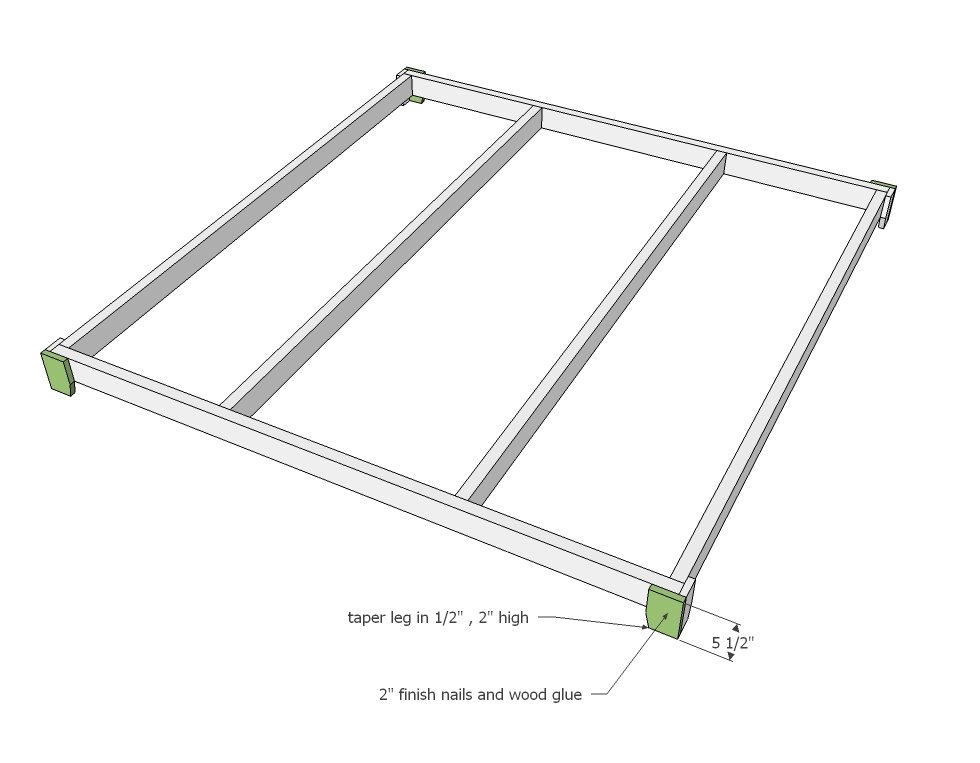
Next comes the 1x4 part of the legs to finish off the leg. Carefully keep edges flush on the outside corner with the 1x3 to make the leg look like a solid block. Attach in place. You can also taper as you did the 1x3 leg.
Step 5
Step 6
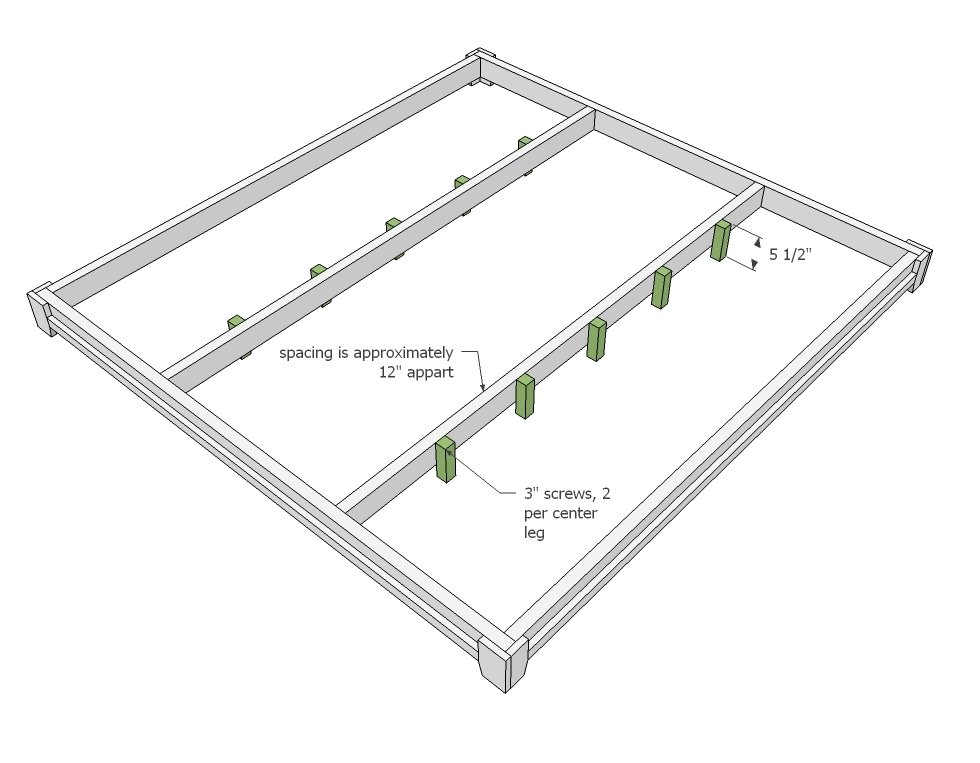
These extra legs are very important because they hold the majority of the weight from this bed. Screw legs on approximately ever 12"/
Step 7
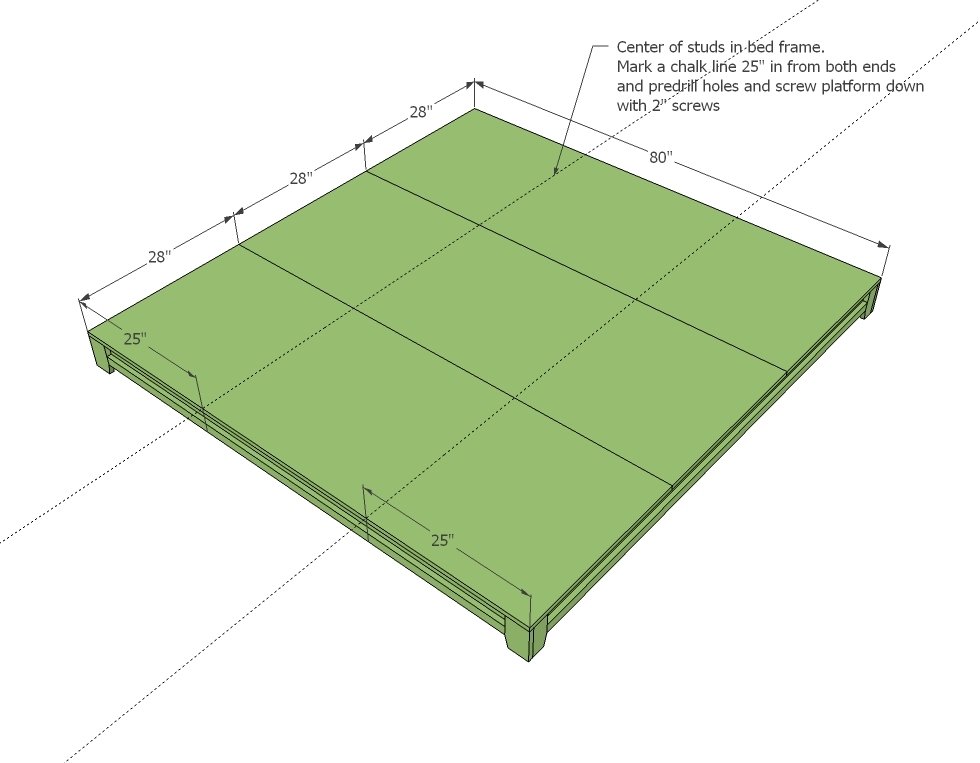
With the 1x28 strips of plywood, cover the top of the bed. Use a chalk line to draw a line as shown in the diagram (click diagrams for larger views) to mark the center of the studs underneath. Predrill holes and screw plywood down. I recommend finishing the platform bed as one, and the bookshelf separately.
Step 8
Build the interior of the shelf system first as shown above. You will need to drill three pocket holes on the inside ends of each divider to attach set for 3/4" stock and using 1 1/4" pocket hole screws. Carefully measure and mark the joint first.
Step 9
Now finish the shelf as shown above. If you prefer the Kreg Jig here, drill 3/4" pocket holes along the end edges of the top and bottom and attach with 1 1/4" screws.
Attach the back as shown here with nails and glue. Attach to all fixed shelves.
Save the scrap back piece of plywood - you could use it to make a headboard!
Step 11
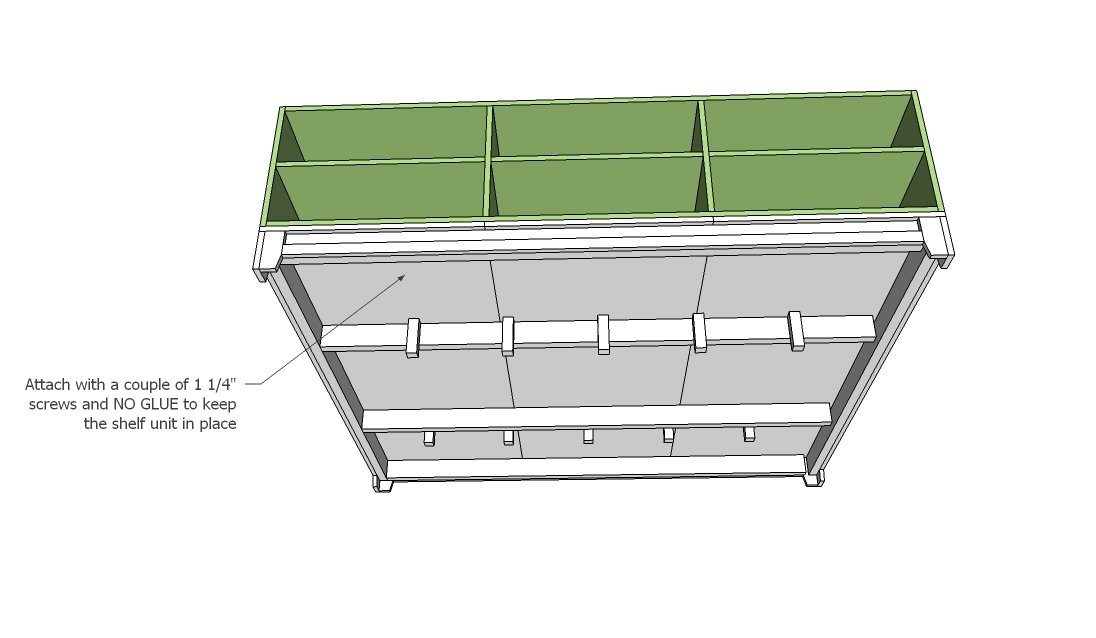
When you assemble the shelf on to the bed, you will need to add a few screws through the bottom to keep it in place.
Finishing
Sand all surfaces, starting with a medium grit and finishing with fine. Wipe off the dust, fill any holes or gaps with wood filler, and sand smooth once dry. Apply primer if you're painting, then finish with your choice of paint or stain and seal with a durable clear topcoat. For outdoor projects, use exterior-rated primer, paint or stain, and sealer so the piece stands up to the weather.
Source (temporary): https://www.ana-white.com/woodworking-projects/teen-platform-bed-side-storage