Three Drawer Rolling Dresser
to build dresser on wheels. This is a small dresser with big drawers, perfect to add extra storage. We love it wheeled in a closet, in entryways, or anywhere you need a little extra storage. Step by step plans with diagrams, shopping list and cut list and more from
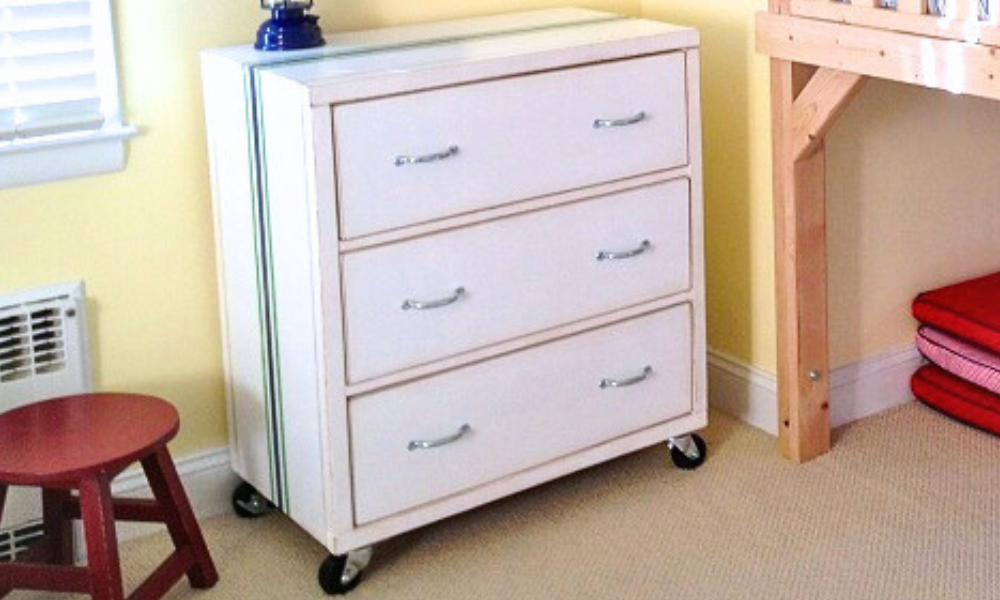
Specifications
| Project type | Dresser Plans |
|---|---|
| Room | Storage Solutions |
| Style | Cottage Style Furniture Plans |
| Difficulty | Intermediate |
| Estimated cost | $50 - $100 |
Dimensions
Use the size-specific shopping and cut lists below.
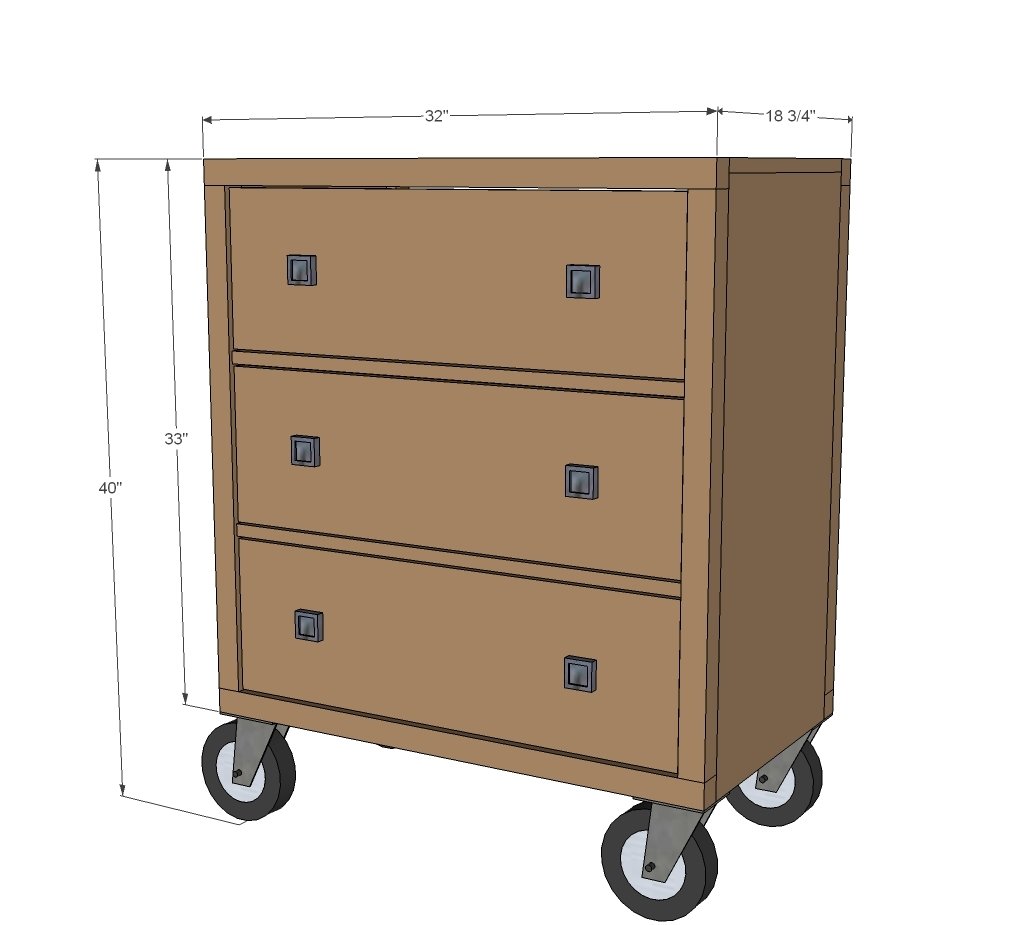
Shopping List
- Half sheet of 3/4" plywood ripped into 15 3/4" widths referred to as 1x16s in this plan
- 2 - 1x2 @ 8 feet long
- 3 - 2x2 @ 8 feet long
- 3 - 1x8 @ 8 feet long
- 1 - 1x10 @ 8 feet long (drawer faces)
- 1/2 sheet - 1/4" plywood
- 3 - 15" euro style bottom corner mount drawer slide sets (the white euor ones are easiest and will support the bottom plywood being attached to the bottom of the drawer)
- 1 1/4" and 2 1/2" pocket hole screws or 2" and 3" self tapping counter sink screws 4- caster wheels
Cut List
Cut List:
- 2 - 1x16 @ 32 1/4”
- 6 - 1x2 @ 15 3/4”
- 1 - 1x16 @ 32”
- 4 - 2x2 @ 32”
- 4 - 2x2 @ 30”
- 2 - 1x2 @ 29”
DRAWERS (cut to fit drawer slides!!!)
- 6 - 1x8 @ 26 1/2”
- 6 - 1x8 @ 16”
- 3 - 1/4” plywood 28” x 16” (tip: have 1/4” plywood ripped into 16” widths at hardware store)
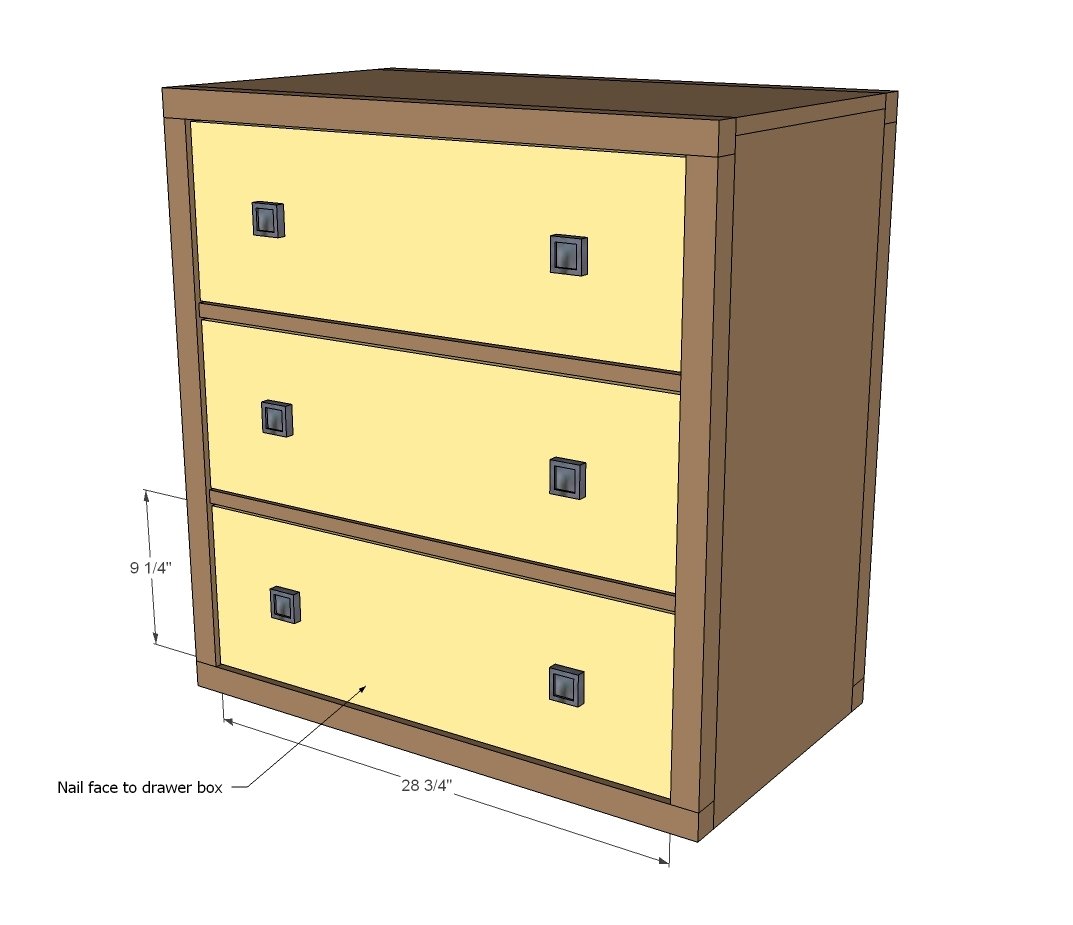
- 3 - 1x10 @ 28 3/4” (Expected width is 9 1/4" - if your 1x10s differ in width, you may need to alter the plan to ensure even gaps around your drawer faces)
- Back is optional
Tools
- measuring tape
- pencil
- safety glasses
- kreg-jig
- drill
- circular saw
- compound miter saw
- nailer
- sander
Step-by-step Instructions
Step 1
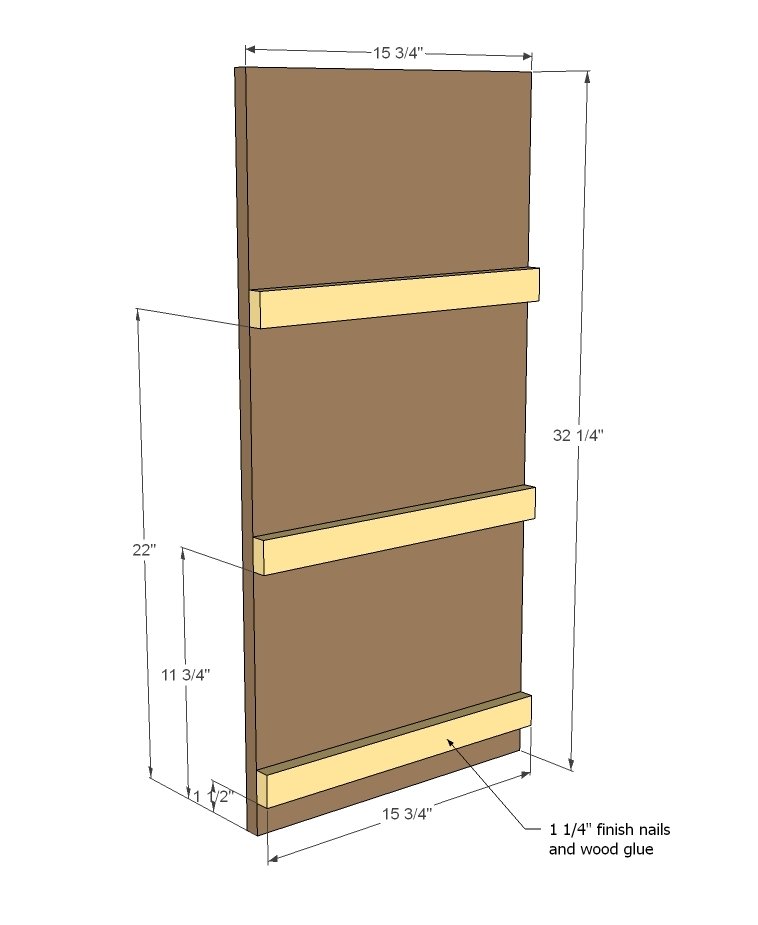
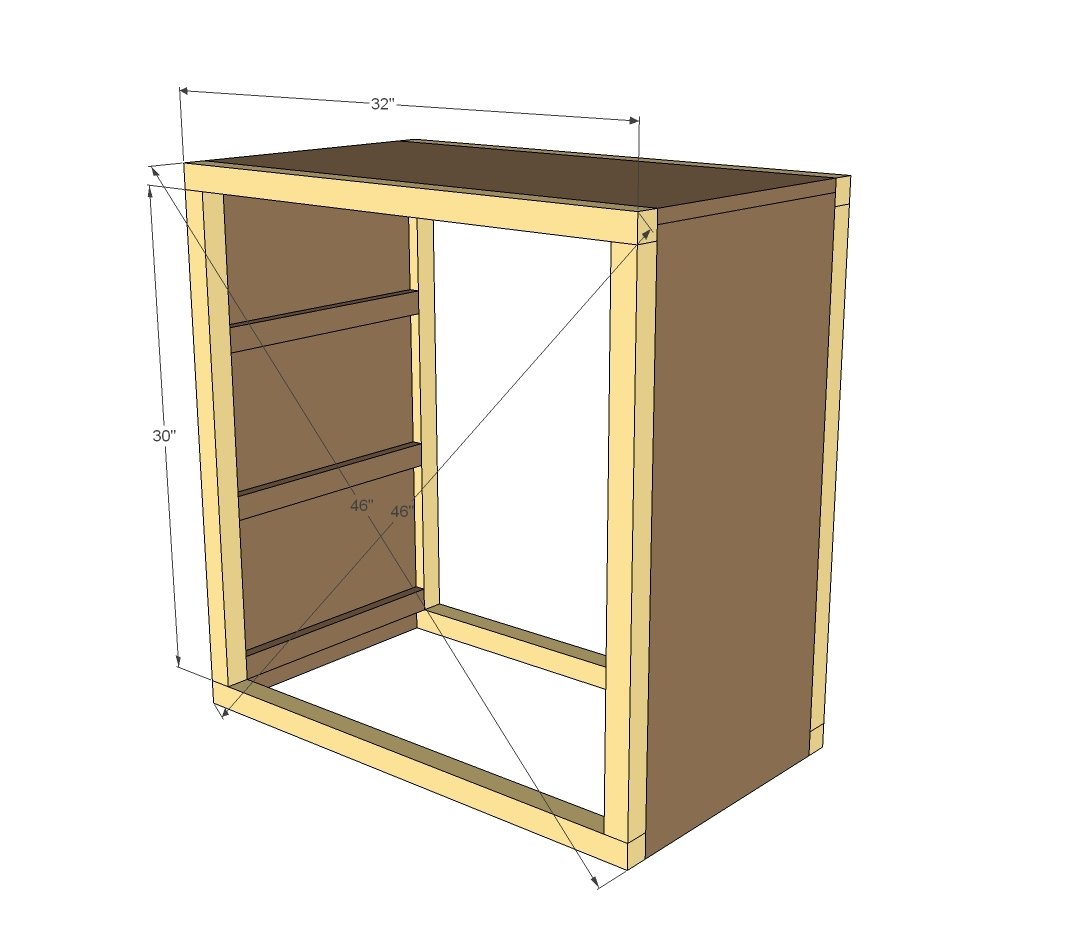
Please take a second to review the double wide plans as there is a ton of information in that plan as well. These cleats are for supporting the drawer slides later on. Attach with 1 1/4" finish nails and glue to insides of both sides. TIP: Pocket hole users may wish to drill 3/4" pocket holes facing upward on insides and facing outward on front/back sides for attaching top and face frames in later steps.
Step 2
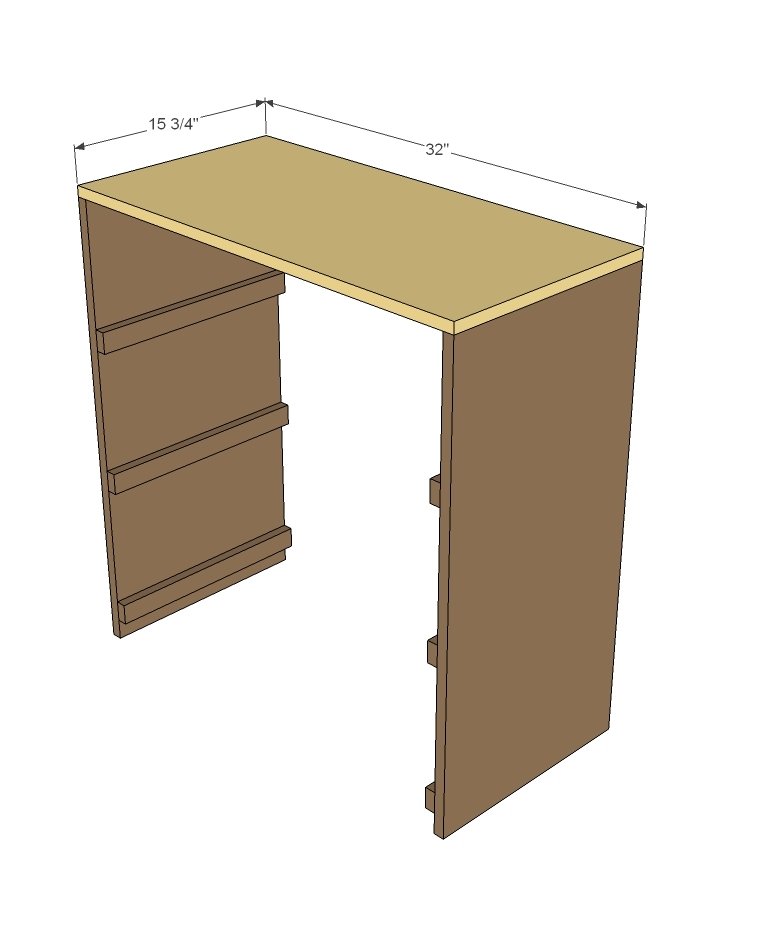
Attach top to sides with cleats on insides.
Step 3
Build face frames first with either 1 1/2" pocket holes and 2 1/2" pocket hole screws or countersunk 2 1/2" or 3" screws. Then attach to face of dresser either through pocket holes drilled in step 1 and 1 1/4" pocket hole screws or with 2"+ finish nails and glue.
Step 4
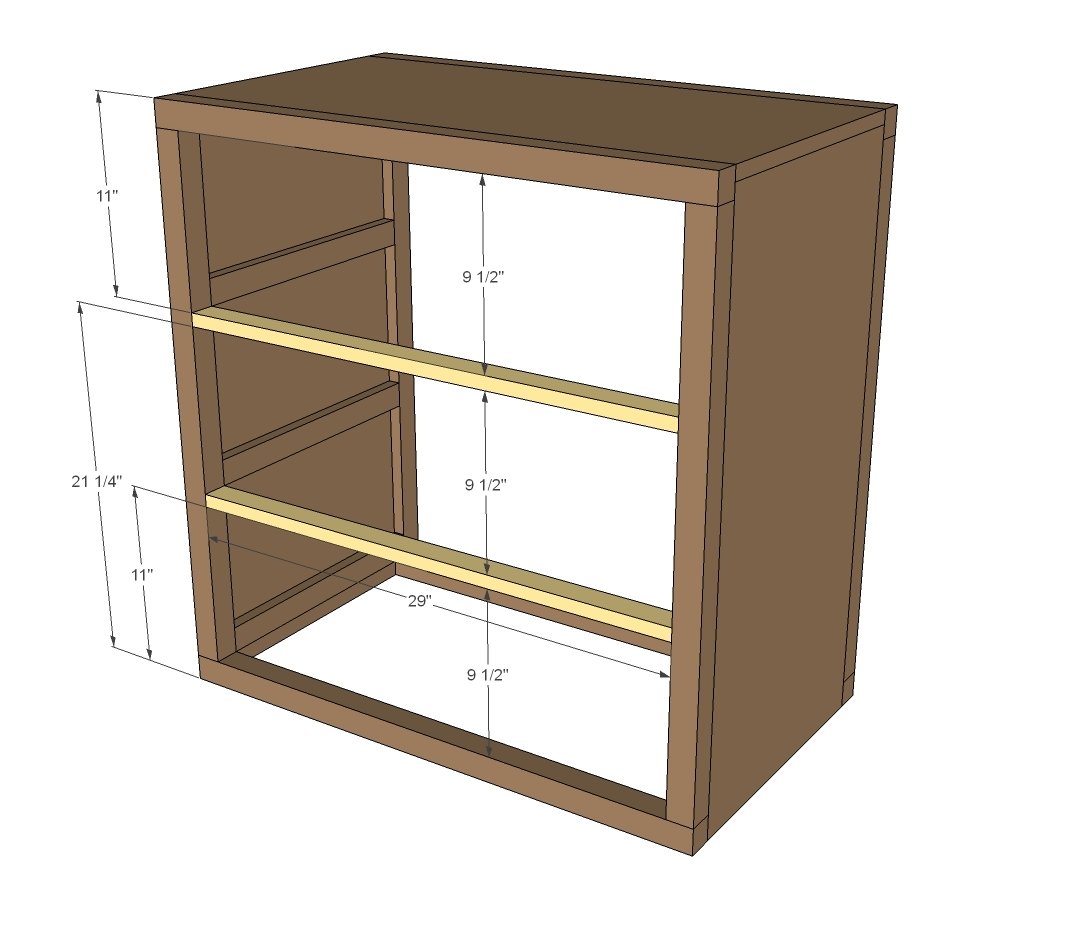
Now add these guys to the face. Recommended is 3/4" pocket holes and 1 1/4" pocket hole screws on underside.
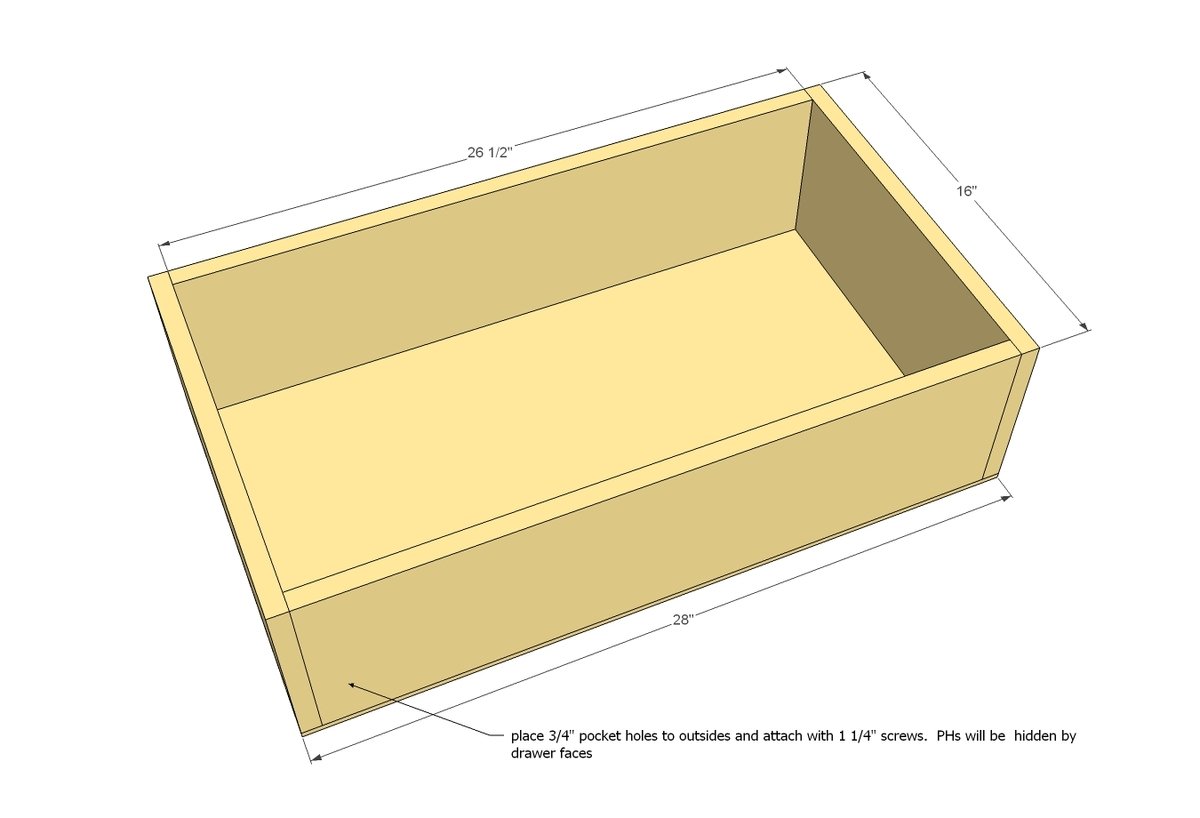
Drawers - The drawers should be built to match the opening widths of the dresser.
Here is a great video on building and installing drawers:
Step 6
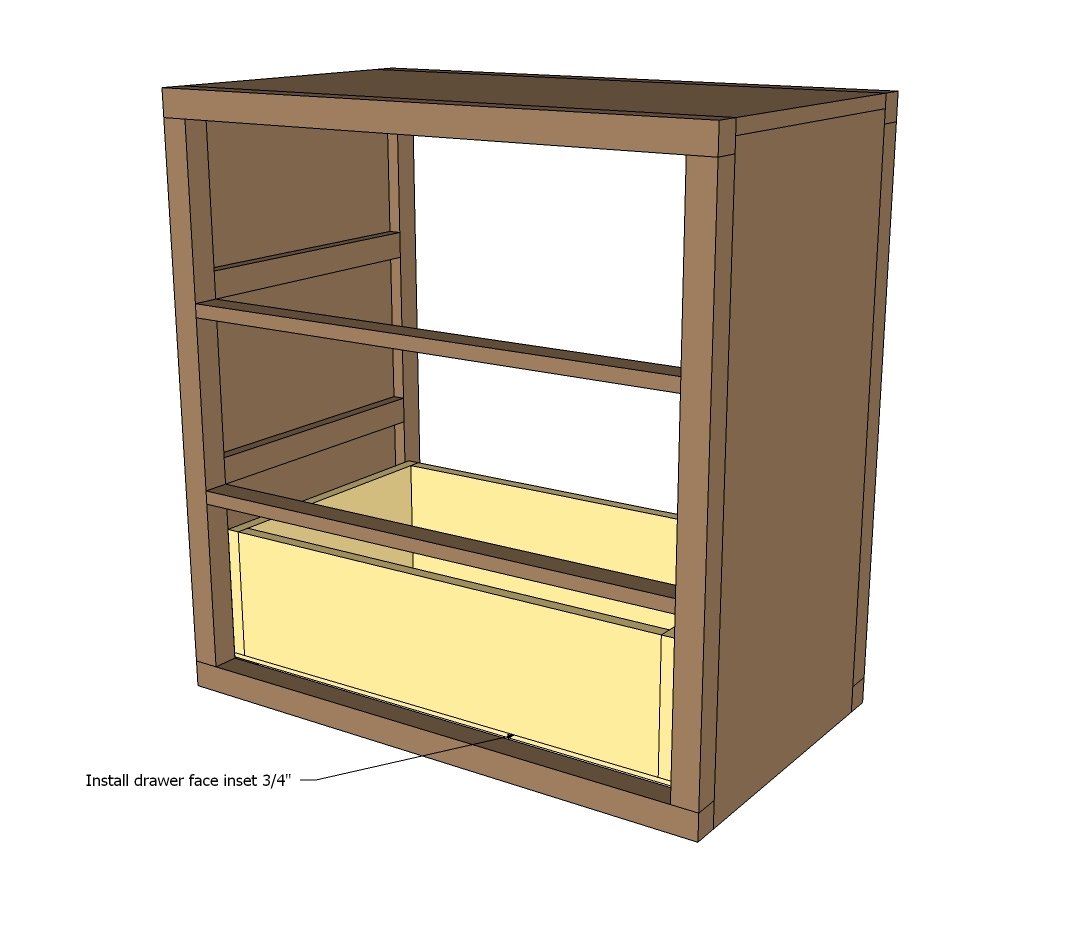
Install drawers in openings, attach cabinet members to 1x2 cleats and drawer members to bottom corner of drawers.
Step 7
Now add the drawer faces to the drawer boxes, keeping an even gap around all sides. Glue and nail from outside with 1 1/4" finish nails, and then you can add a few screws from the inside to keep the face in place. TIP: Depending on your hardware, it may be easier to add hardware before attaching drawer face to drawer.
Step 8
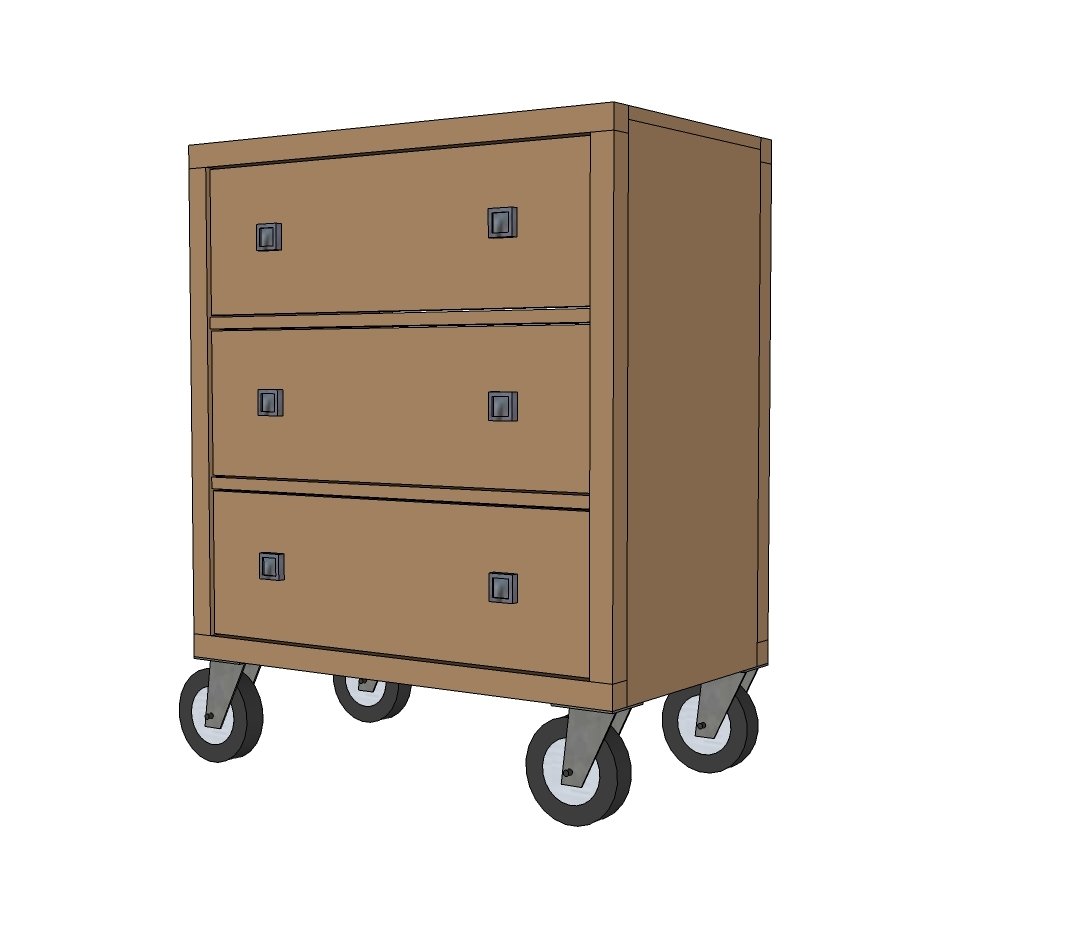
Just add wheels!
Finishing
Sand all surfaces, starting with a medium grit and finishing with fine. Wipe off the dust, fill any holes or gaps with wood filler, and sand smooth once dry. Apply primer if you're painting, then finish with your choice of paint or stain and seal with a durable clear topcoat. For outdoor projects, use exterior-rated primer, paint or stain, and sealer so the piece stands up to the weather.
Source (temporary): https://www.ana-white.com/woodworking-projects/three-drawer-rolling-dresser