Three Month Easy to Rotate Wall Calendar Shelf
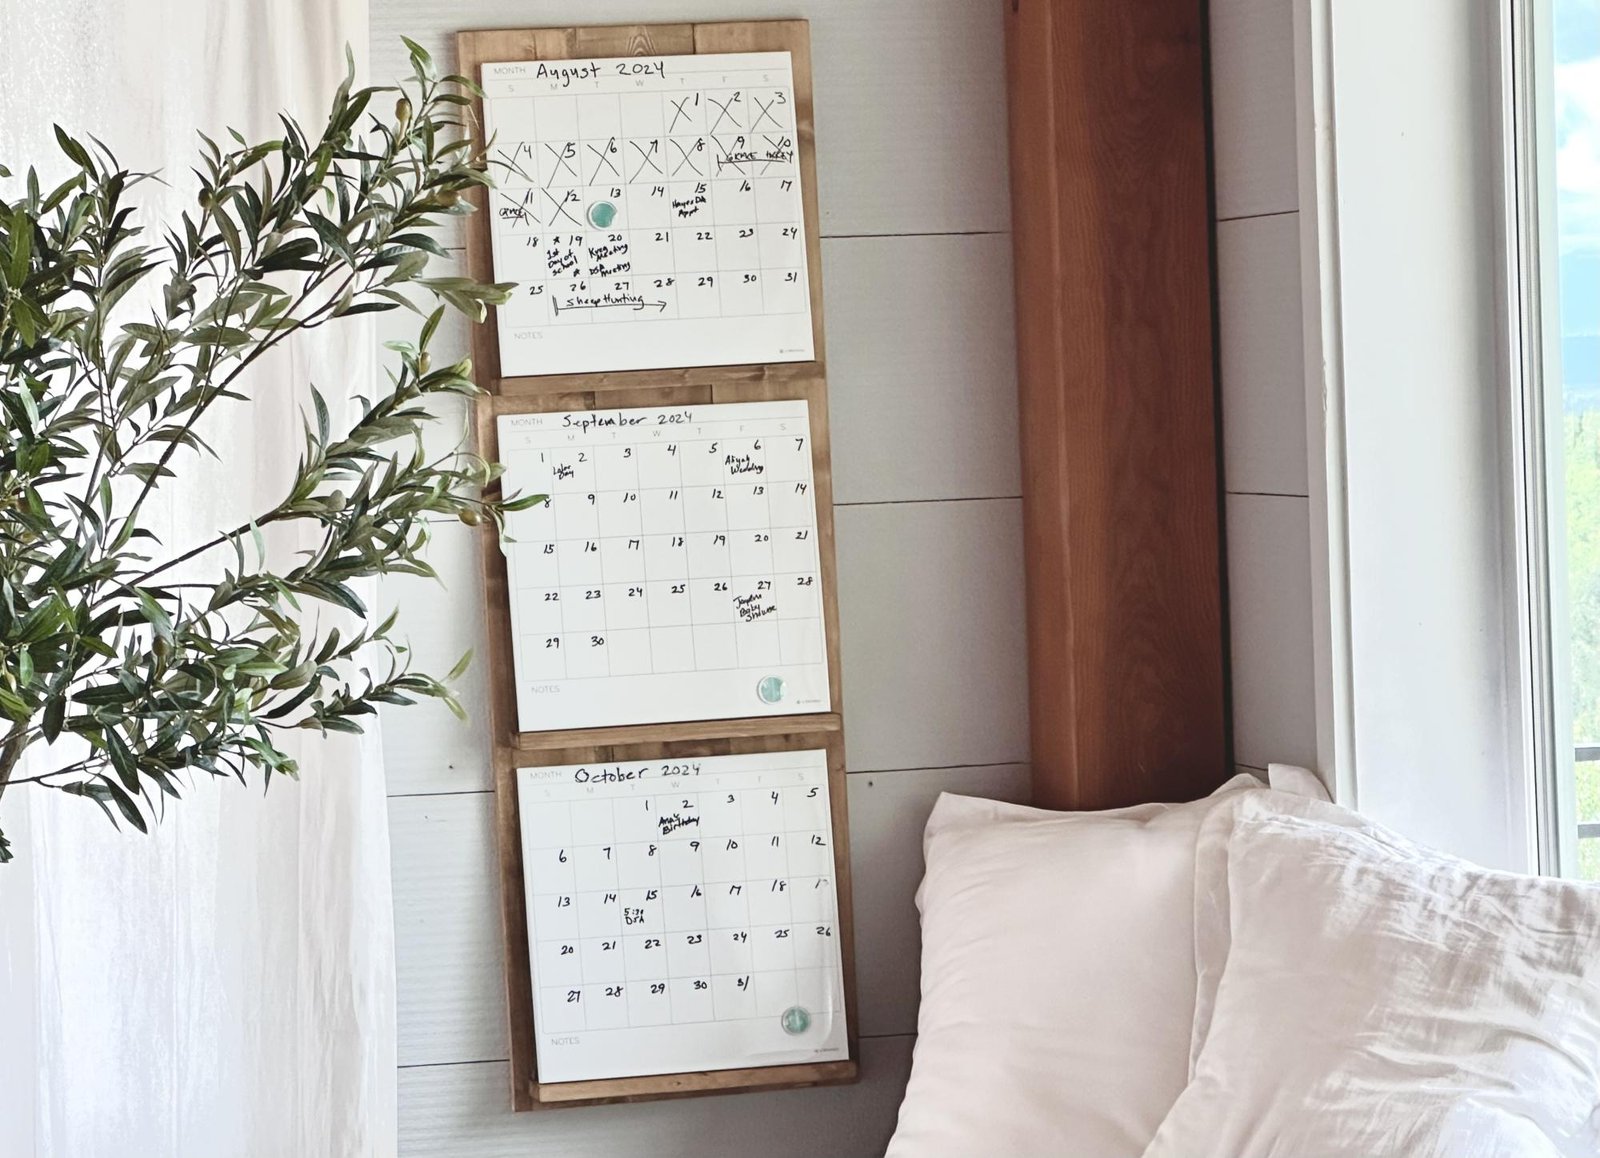
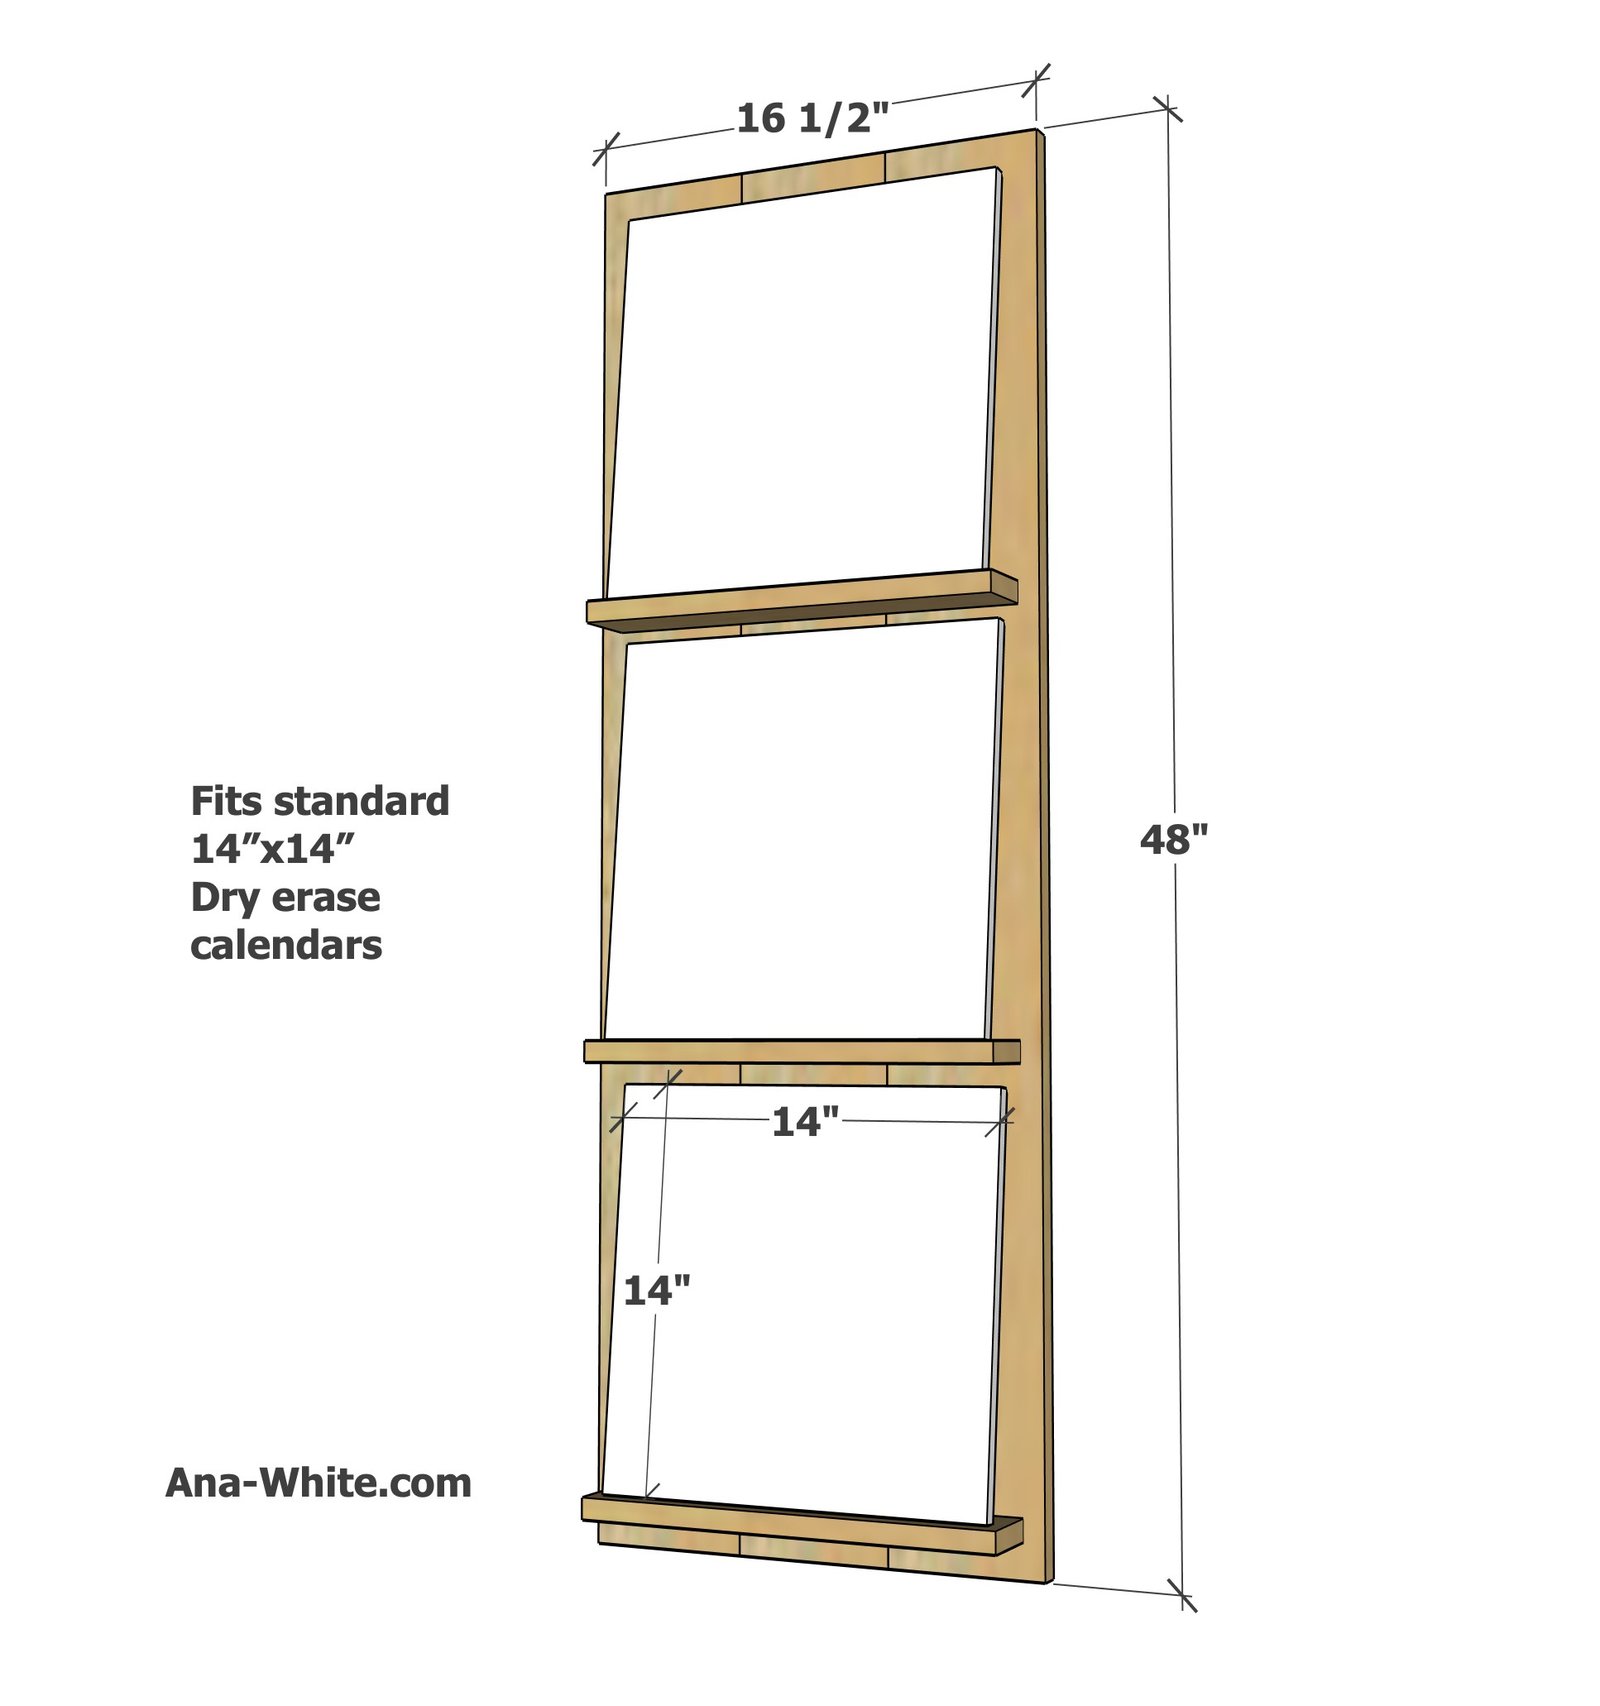
The must make calendar project for organized households, this shelf is designed to three fit standard 14" x 14" dry erase calendars, so you can stay organized three months out! Rotate calendars upward as months pass, for easy transitioning between months. No more throw away calendars. Only one project to hang on the wall. Make and keep your plans up to three months out. This amazing project is super easy to make with just a few boards and screws. Paint or stain any color. with video from
Specifications
| Project type | Home Decor |
|---|---|
| Room | Entryway and Mudroom |
| Difficulty | Starter Projects |
Dimensions
Use the size-specific shopping and cut lists below.
Shopping List
- 3 - 14" x 14" dry erase calendars ( these are the ones I used)
- 12 board feet of 1x6 (can be three 4' long boards, or an 8' and a 4')
- 4 board feet of 1x3 boards
- 18 - 1-1/2" self tapping star bit screws (spax or similar)
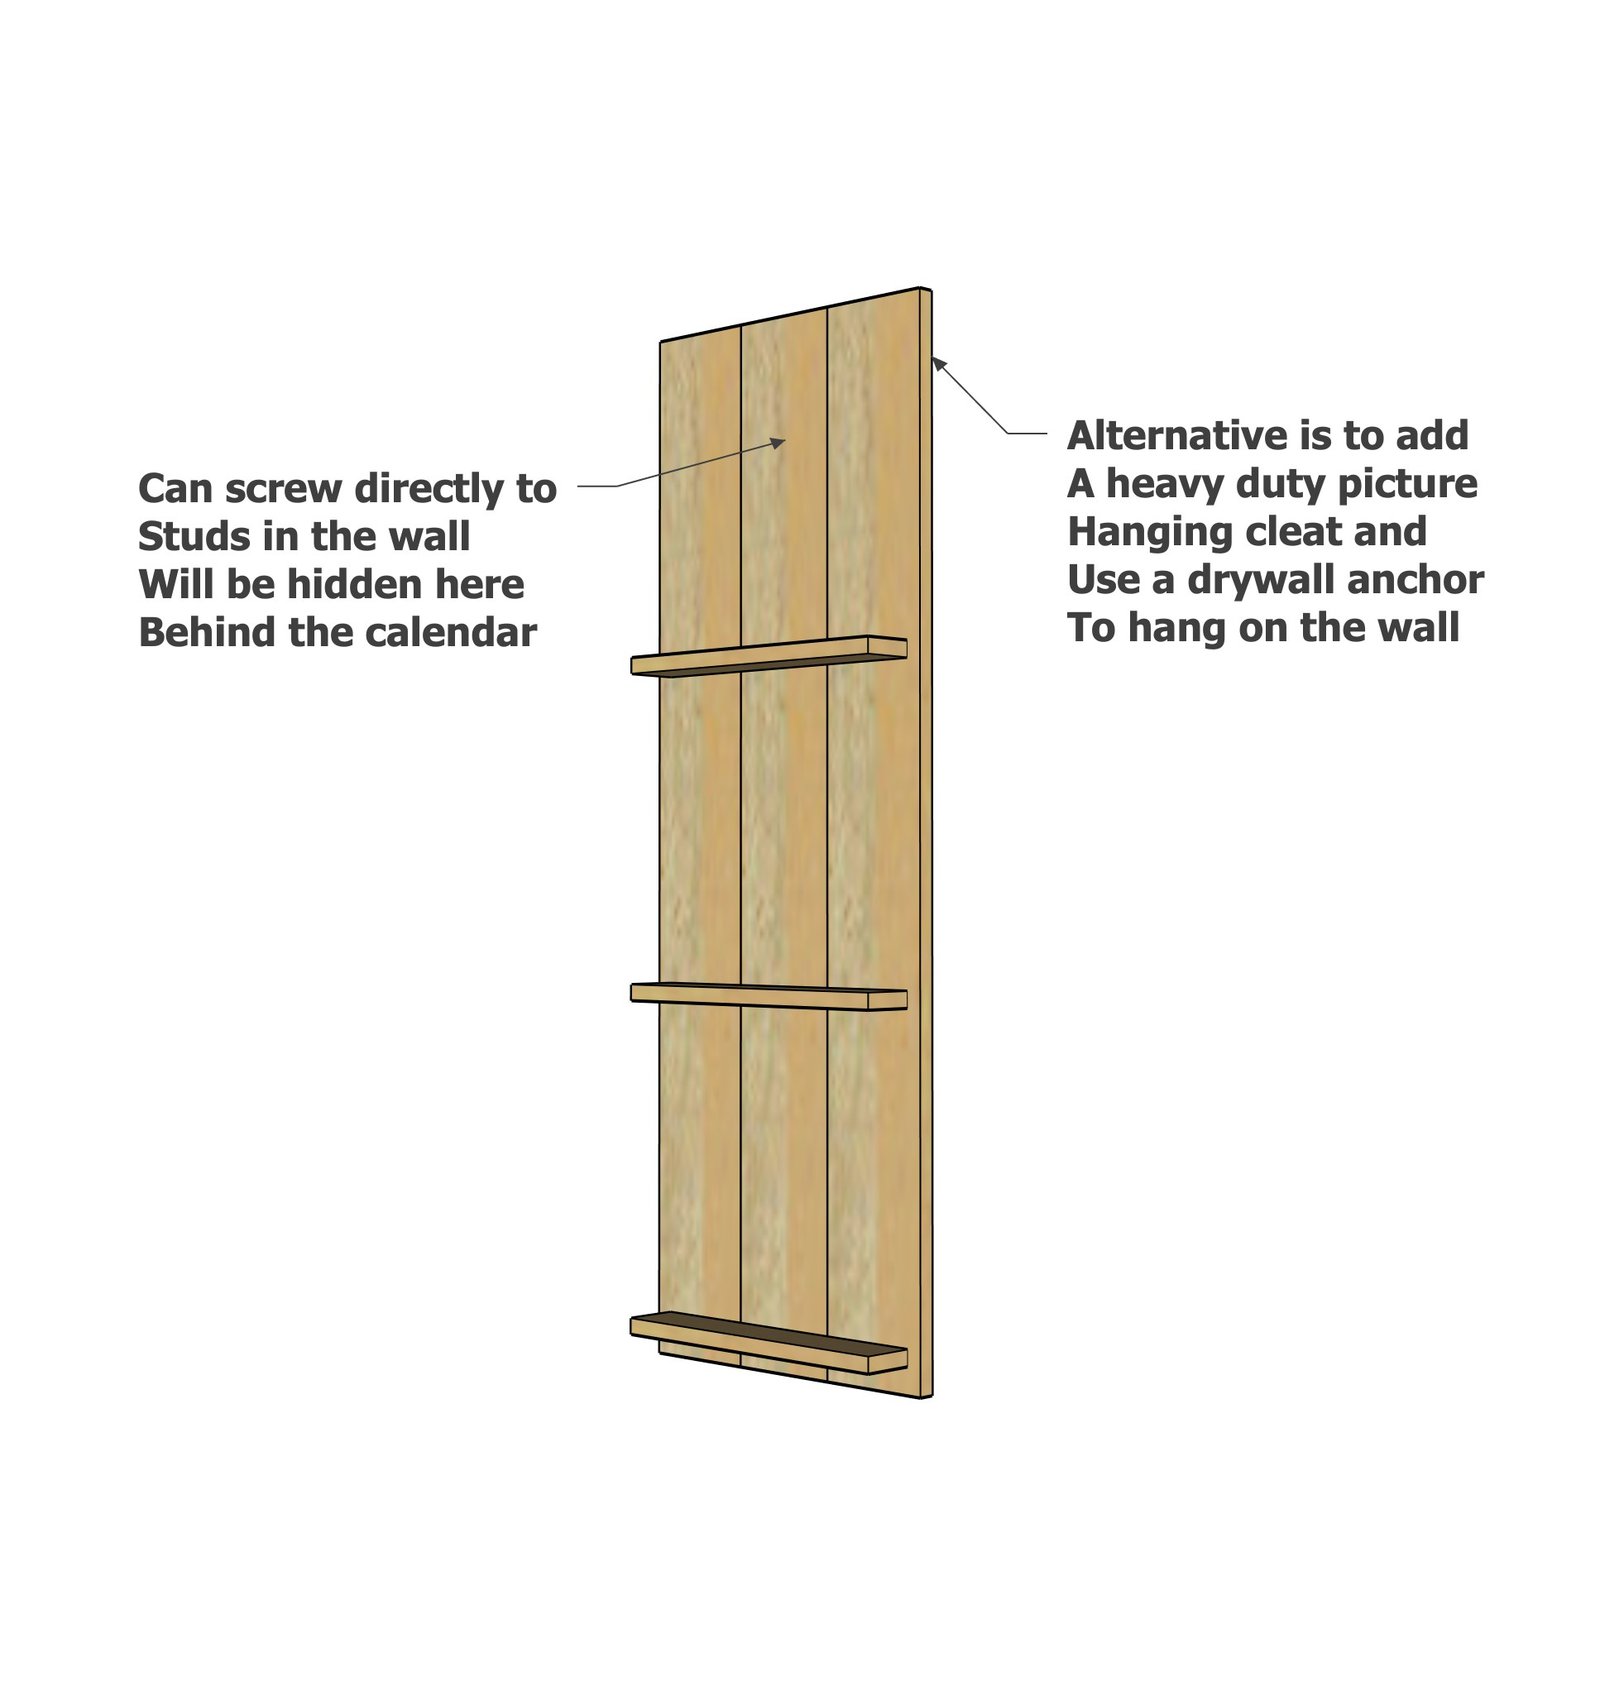
- heavy duty picture hanging bracket and wall anchor (or can screw directly to studs in the wall)
- Paint or stain as desired
- 120 grit sandpaper
Cut List
- 3 - 1x6 @ 48"
- 2 - 1x3 @ 15-1/2"
Tools
- measuring tape
- square
- pencil
- safety glasses
- drill
- circular saw
- level
Step-by-step Instructions
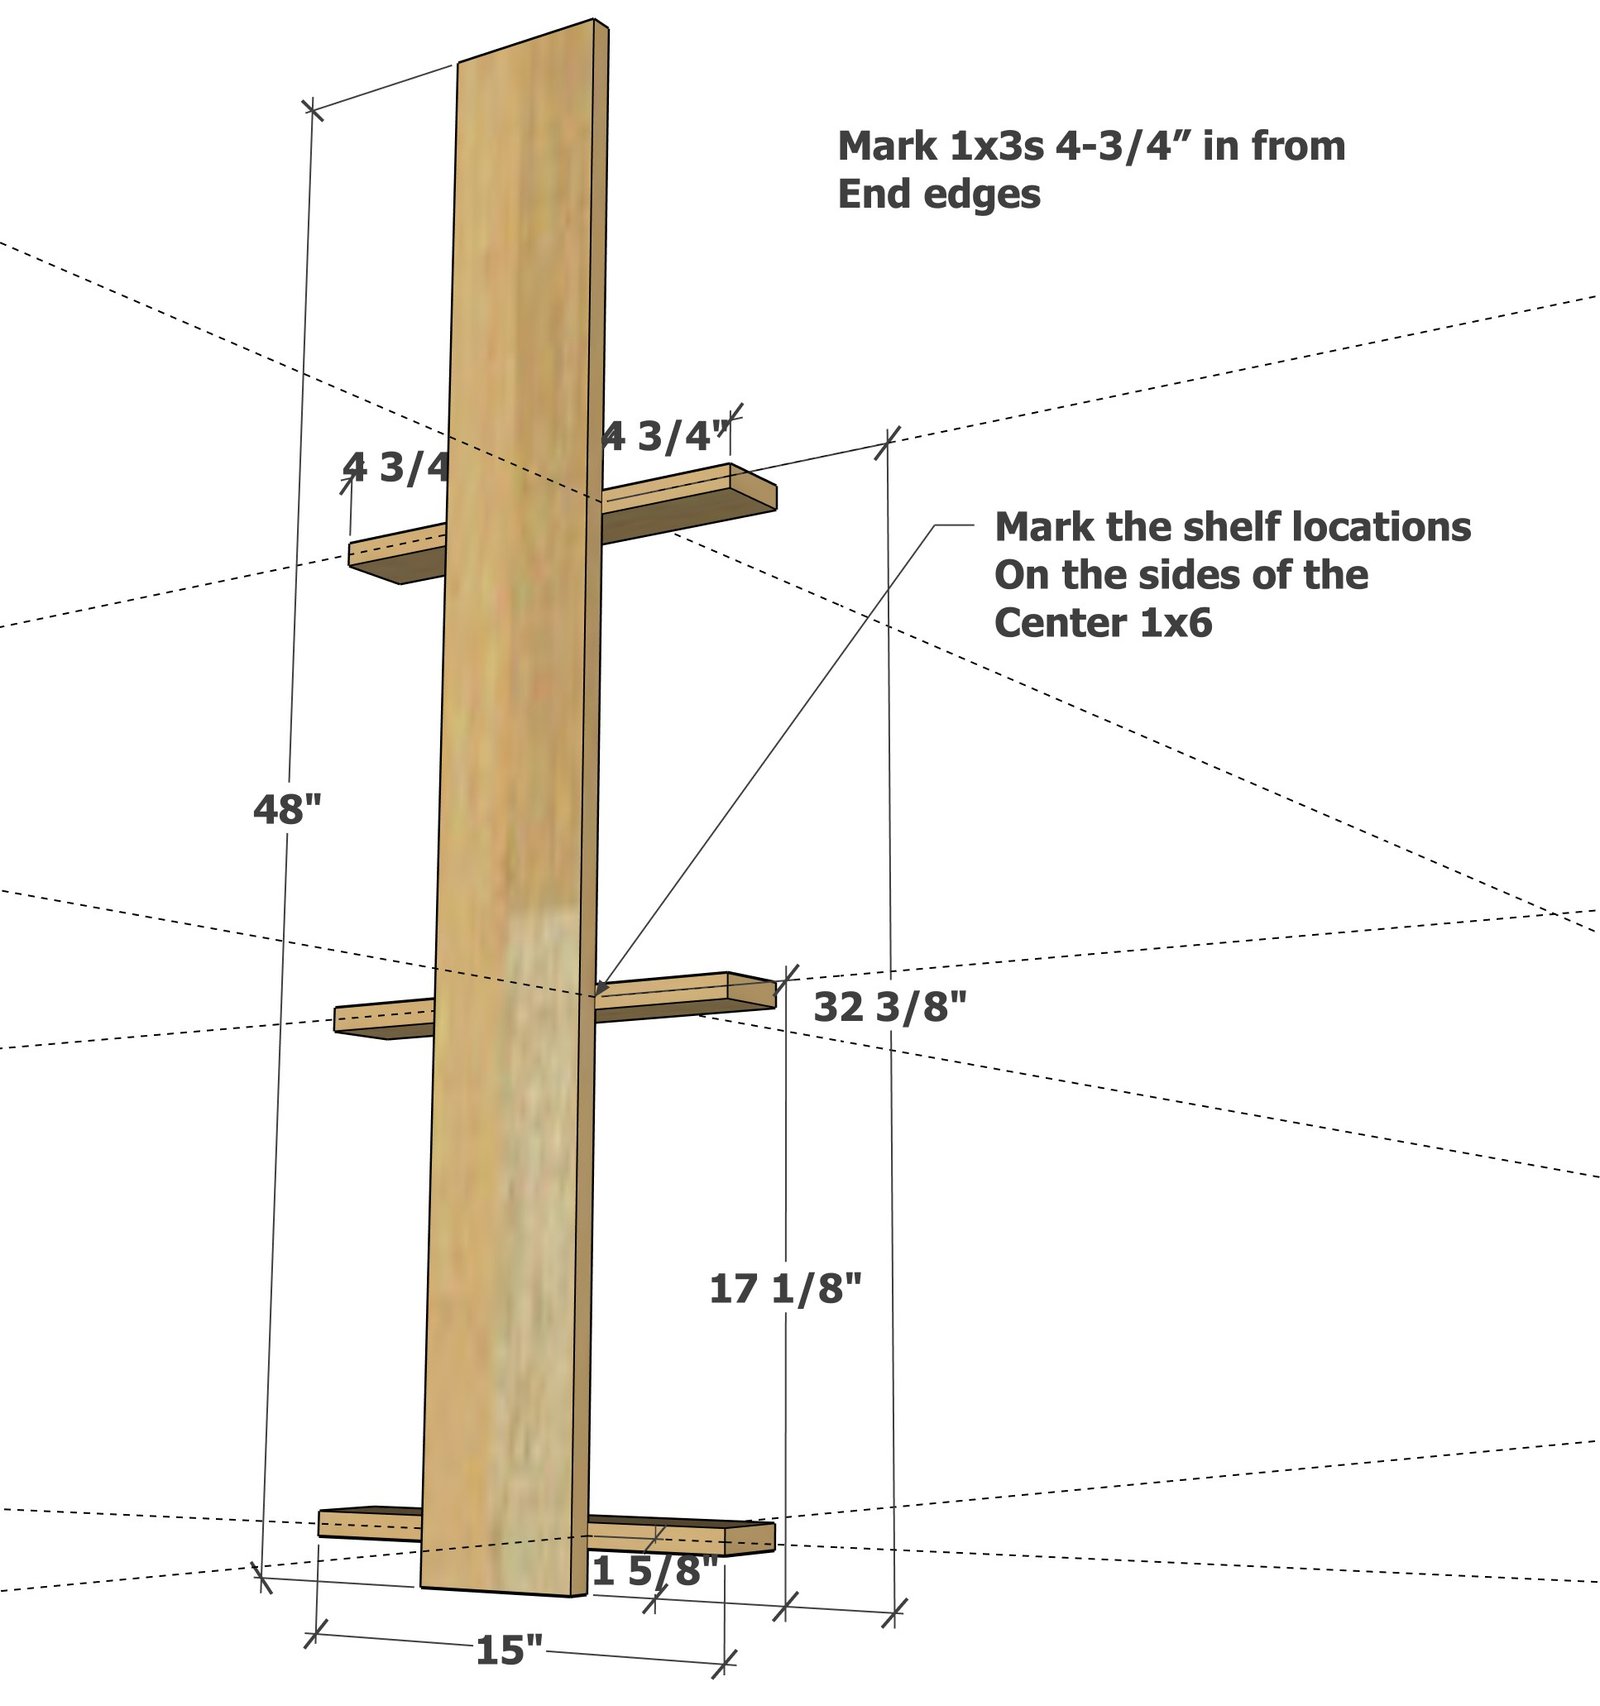
On one of the 1x6 boards, mark on the sides at 1-5/8", 17-1/8" and 32-3/8" as shown in the diagram.
On all three of the 1x3 boards, mark inward from both cut ends on the edge side, 4-3/4" This is shown in the full YouTube tutorial video. Place the three 1x3s on edge on a flat, level surface. Line the 1x6 on top, and screw to the shelves. Use a speed square to make sure the shelves are attached to the 1x6 perpendicular. Two screws per shelf are required.
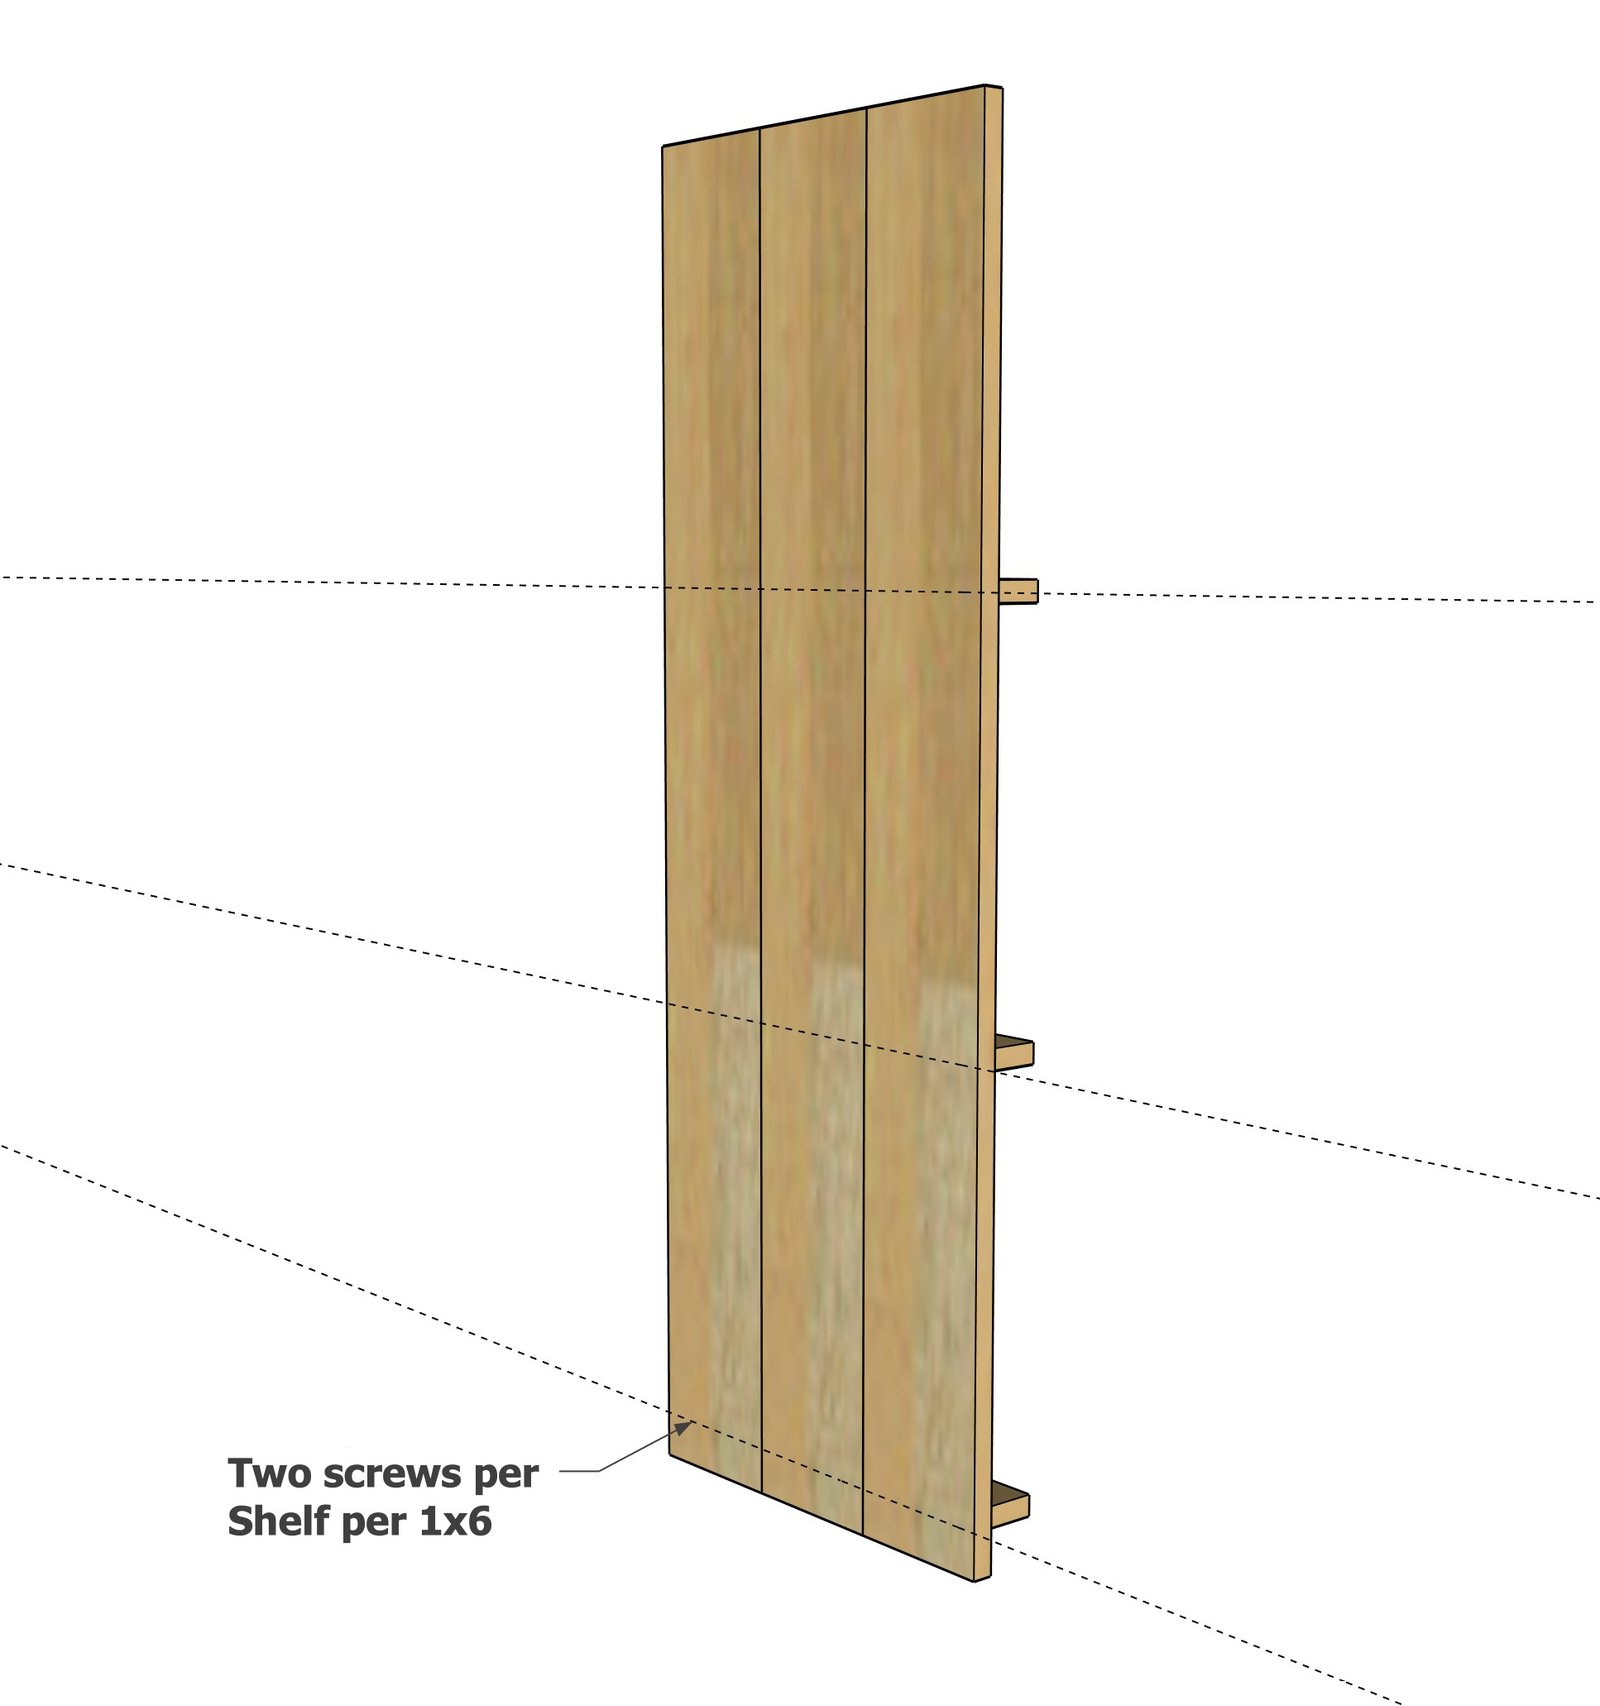
Place the remaining 1x6 boards on the back and mark the location of screws.
Then screw with two screws per joint the back to the back sides of the shelves.
Step 3
After sanding and finishing, hang the calendar shelf on the wall.
Finishing
Sand all surfaces, starting with a medium grit and finishing with fine. Wipe off the dust, fill any holes or gaps with wood filler, and sand smooth once dry. Apply primer if you're painting, then finish with your choice of paint or stain and seal with a durable clear topcoat. For outdoor projects, use exterior-rated primer, paint or stain, and sealer so the piece stands up to the weather.
Source (temporary): https://www.ana-white.com/woodworking-projects/three-month-easy-rotate-wall-calendar-shelf