Tiny Kitchen Island Prep Cart with Trash
Need extra prep space? Or a tiny kitchen island? The tiny square shaped kitchen island might be the perfect solution! Use the top for chopping produce up, the lower bin can hold a trash can for easy clean up (or cutting boards or whatever you can think of!). Put it on casters so it's easy to roll away! This is a using off the shelf materials and simple building techniques. Build it today!
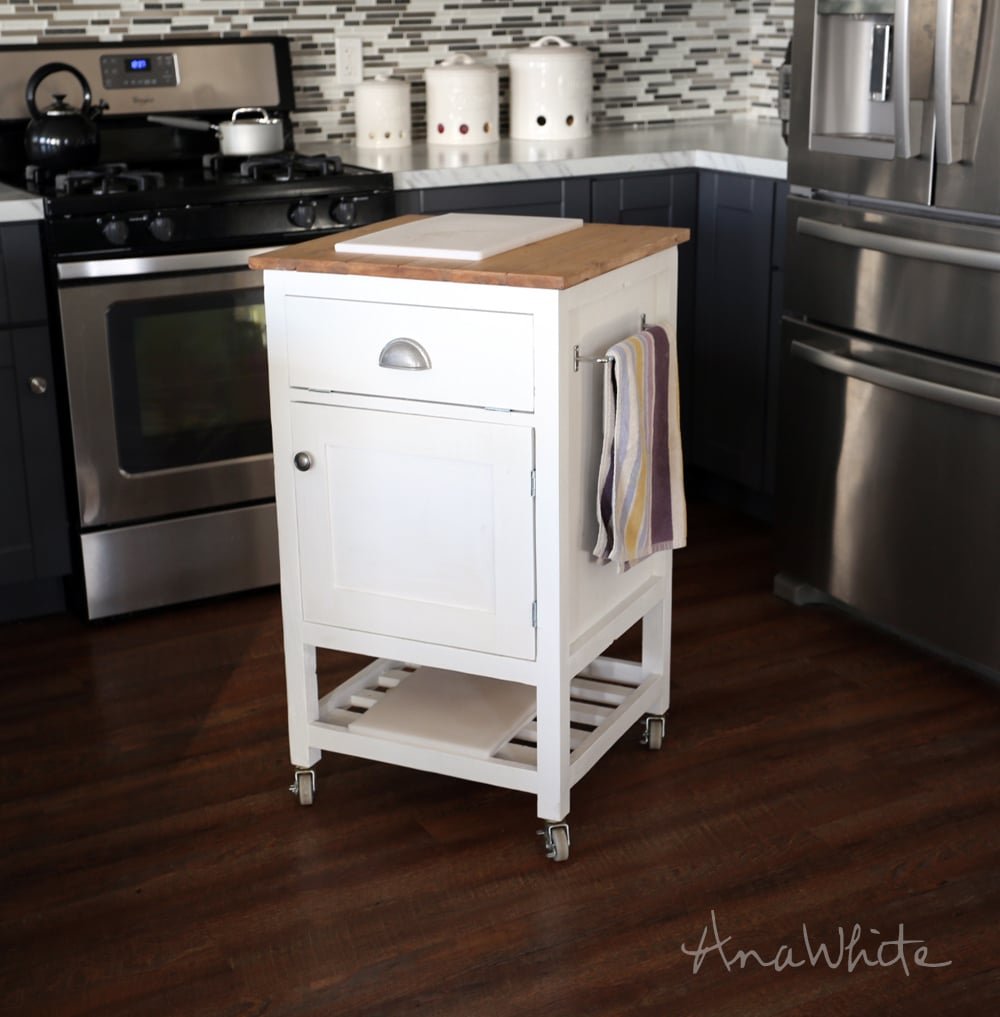
Specifications
| Project type | Kitchen Island Plans |
|---|---|
| Room | kitchen |
| Style | Cottage Style Furniture Plans |
| Difficulty | Intermediate |
| Estimated cost | $50 - $100 |
Dimensions
Use the size-specific shopping and cut lists below.
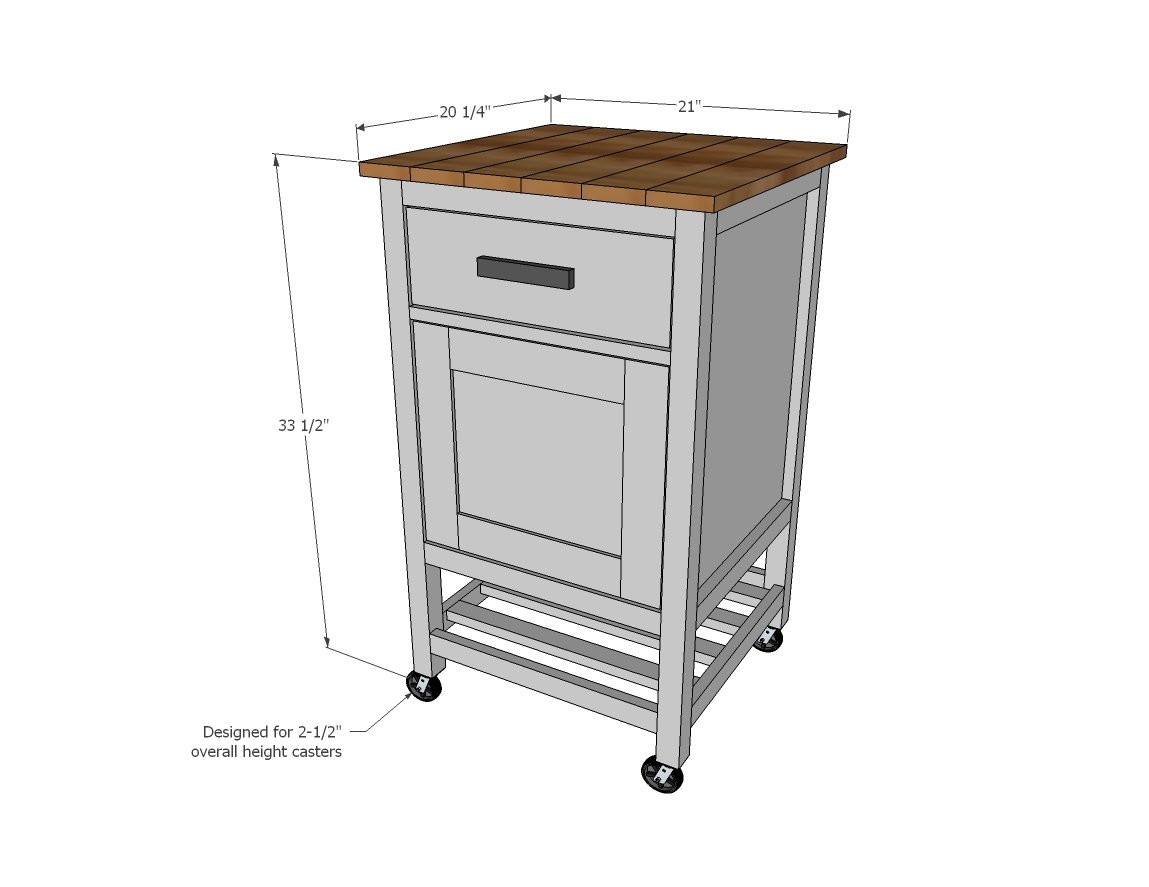
Shopping List
- 24" x 48" x 3/4" thick plywood or MDF project panel
- 3 - 2x2 @ 8 feet long (if buying select or hardwood, you can get away with less)
- 3 - 1x2 @ 8 feet long
- 1 - 1x6 @ 16-1/4" long
- 1 - 1x4 @ 12 feet long
- material for doors, depending on type of drawer construction
- 3 sets of hinges
- 3 magnetic clasps (if not using self closing hinges)
- 2 knobs and 1 pull
- 4 - 2" casters on bolts (overall clearance approximately 2-1/2")
Cut List
- 4 - 2x2 @ 32-3/4" - legs
- 4 - 1x2 @ 15-3/4" - side trim
- 2 - 3/4" plywood @ 15-3/4" x 24" - side panels * see plywood diagram below
- 4 - 2x2 @ 16-1/2" - tie in trim
- 1 - 1x2 @ 16-1/2" - door/drawer trim
- 1 - 3/4" plywood @ 15-3/4" x 16-1/2" - bottom * see plywood diagram below
- 2 - 1x2 @ 15-3/4" - bottom shelf outside trim (panels sides)
- 2 - 1x2 @ 16-1/2" - bottom shelf outside trim (drawer sides)
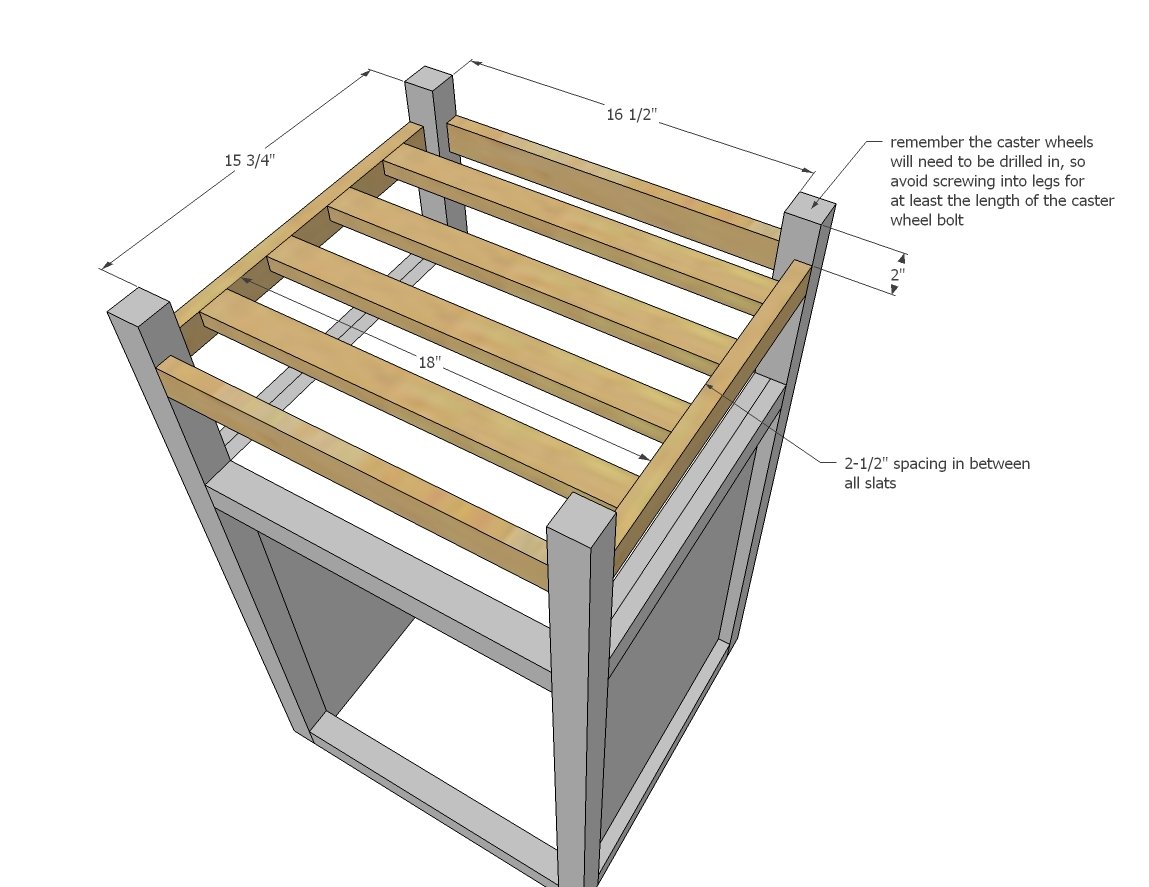
- 4 - 1x2 @ 18" - bottom shelf slats
- 1 - 1x6 @ 16-1/4" - top drawer
- 6 - 1x4 @ 20-1/4" - tabletop
Tools
- measuring tape
- square
- pencil
- safety glasses
- hearing protection
- kreg-jig
- drill
- compound miter saw
- table saw
- nailer
- sander
Step-by-step Instructions
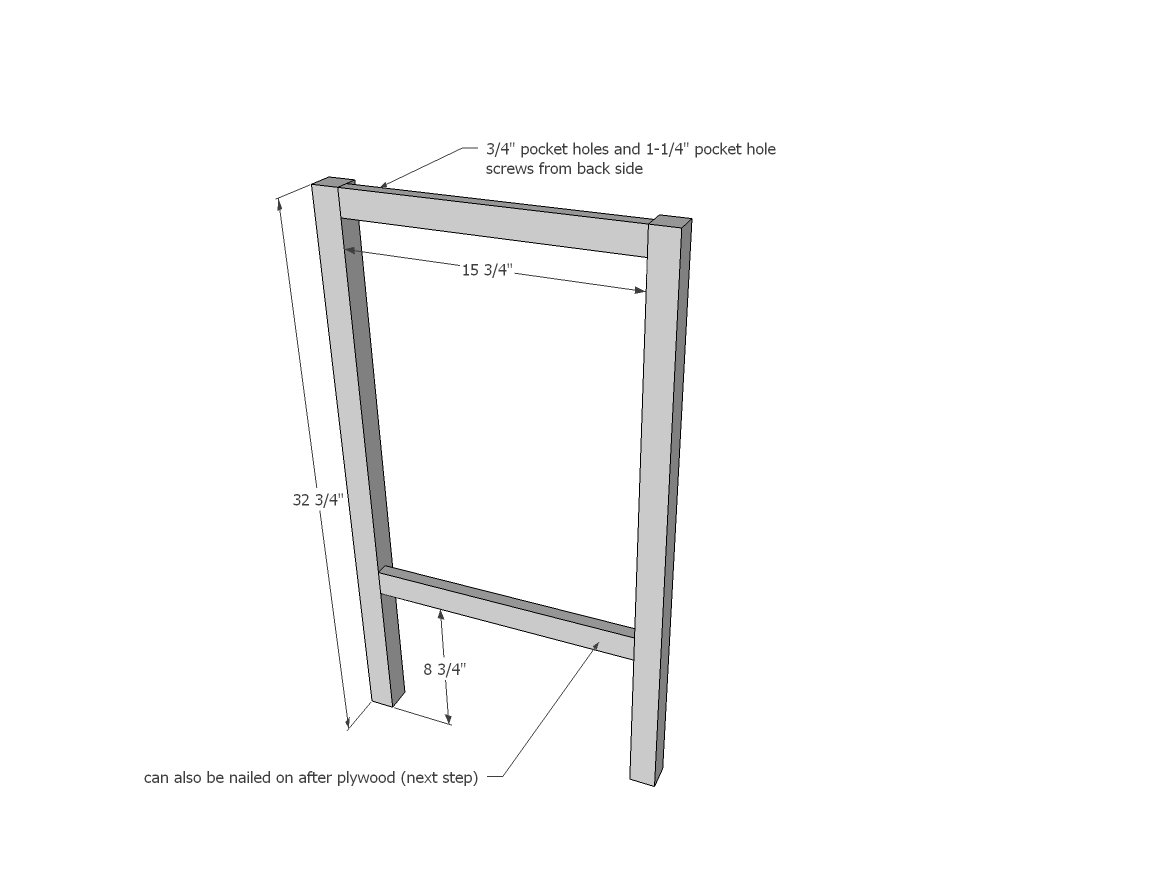
Step 1
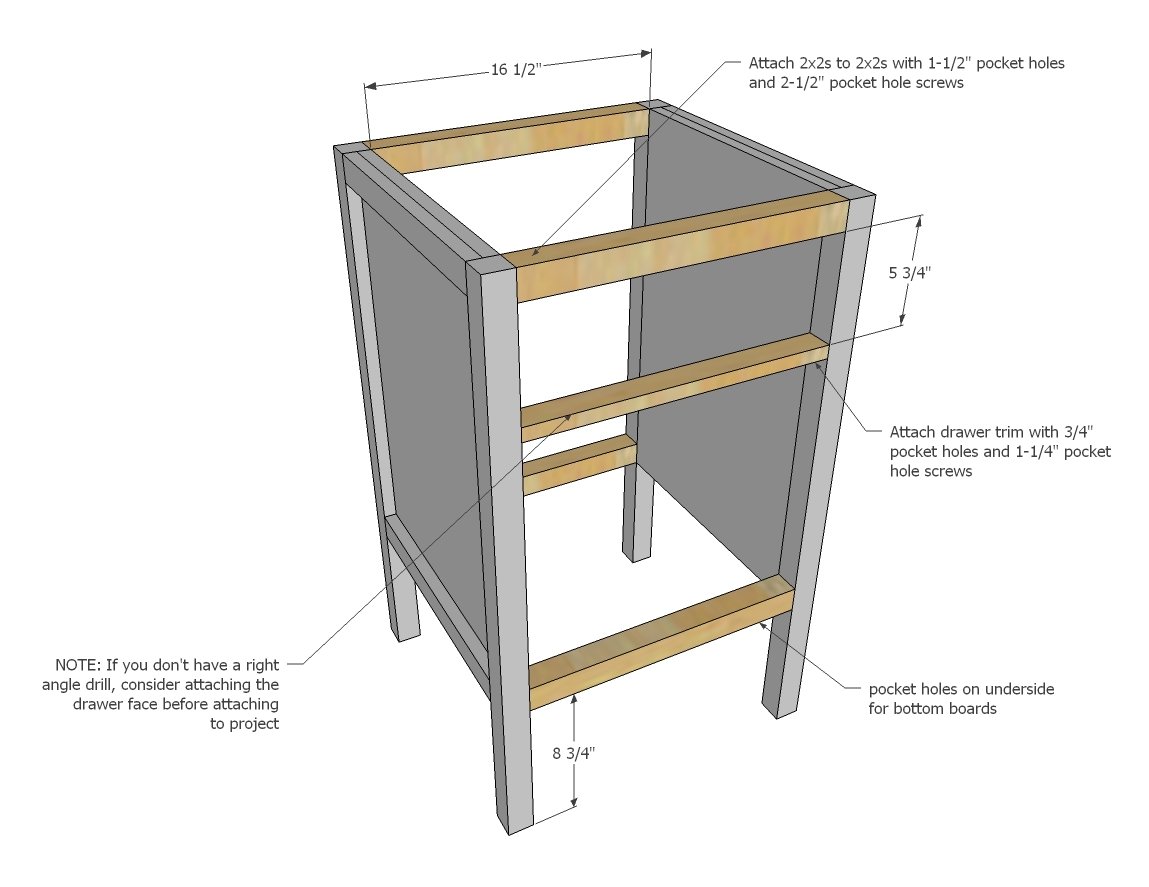
Build two of the end frames. As I mentioned in the video, joining the 1x2s to the 2x2s is not necessary for structure, it just keeps that joint snug. You could attach the plywood first, and then just nail the 1x2 trim on second.
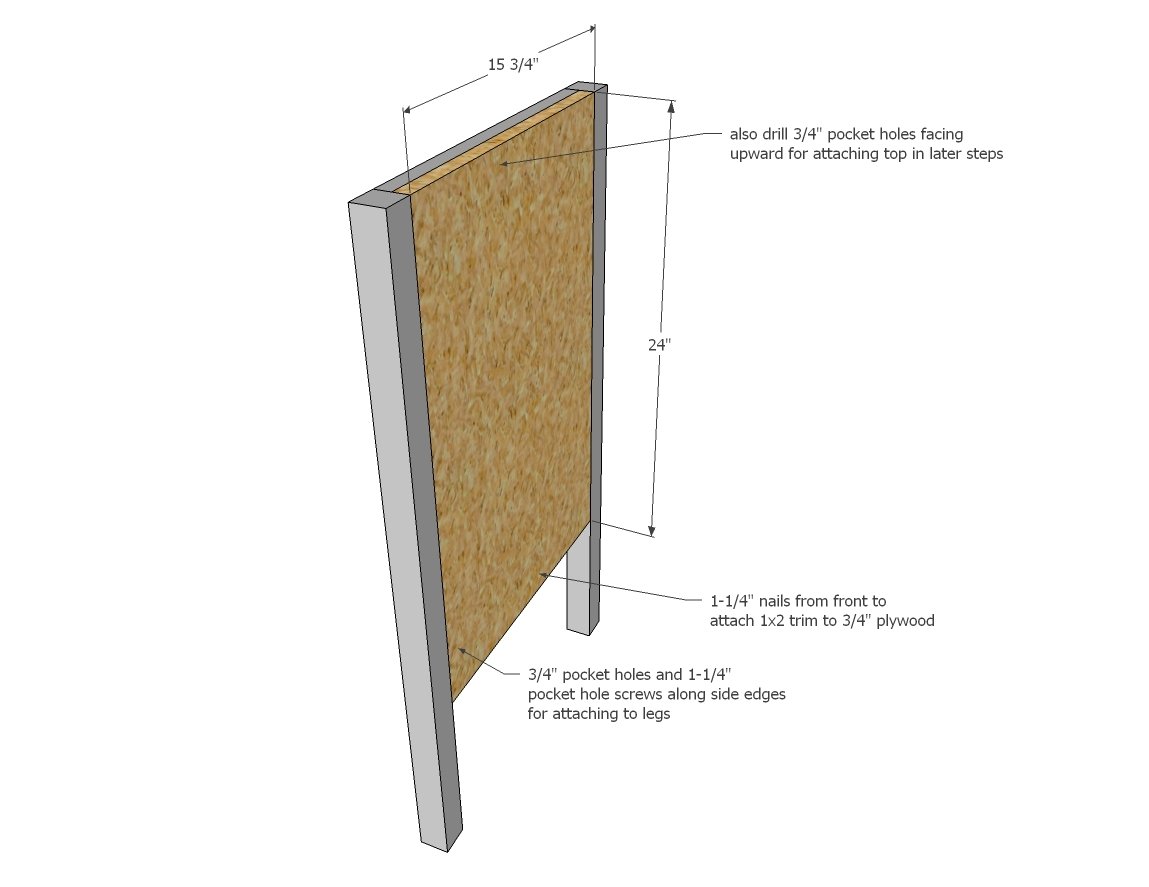
Step 2
Drill 3/4" pocket holes on the sides and tops of the plywood side panels, on the inside. Attach to the 2x2 legs. Also nail and glue (1-1/4" nails) to the 1x2 trim pieces.
Step 3
If you don't have a right angle drill and are adding the hinge down drawer face, consider attaching it first as you won't be able to do this after assembly without a right angle drill. Attach trim pieces to side panels to tie the project together. Use glue at all joints.
Step 4
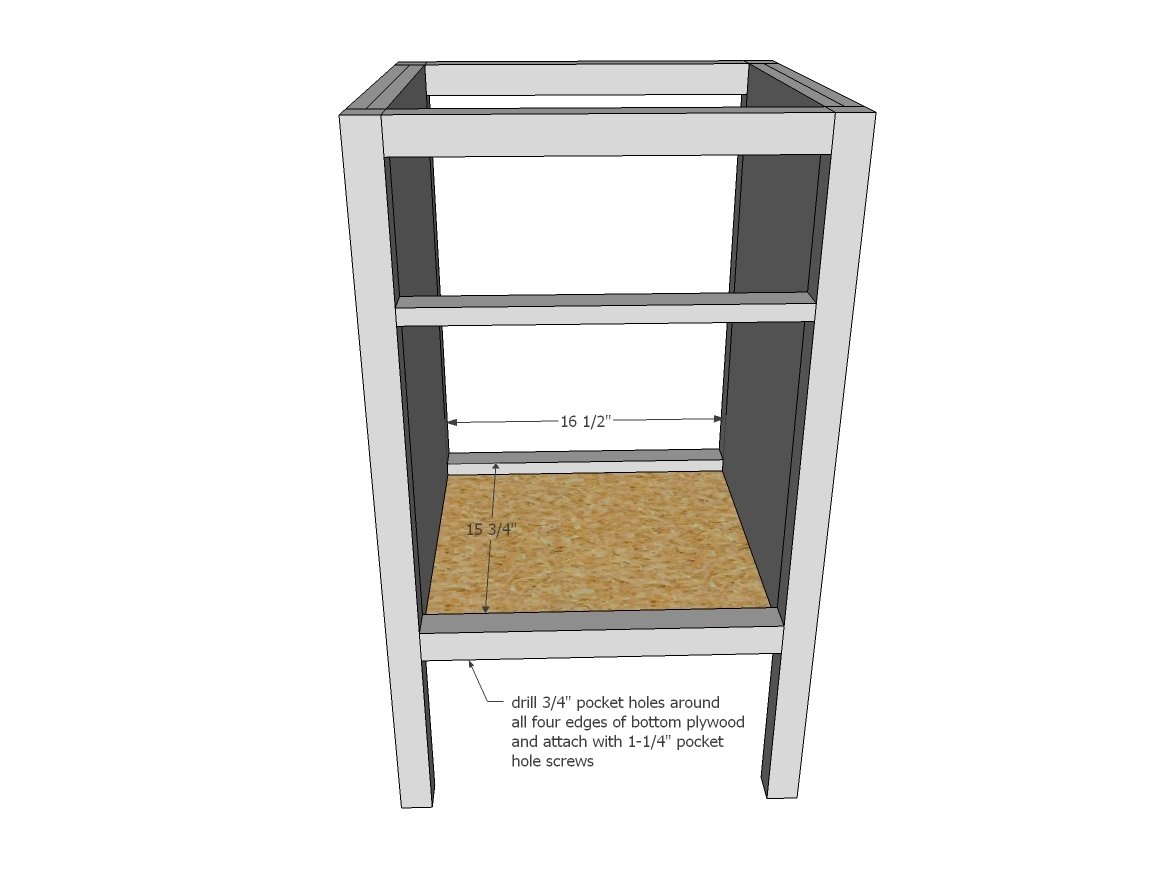
Drill 3/4" pocket holes around all four sides of the bottom plywood piece. Attach wtih 1-1/4" pocket holes and glue.
Step 5
Step 6
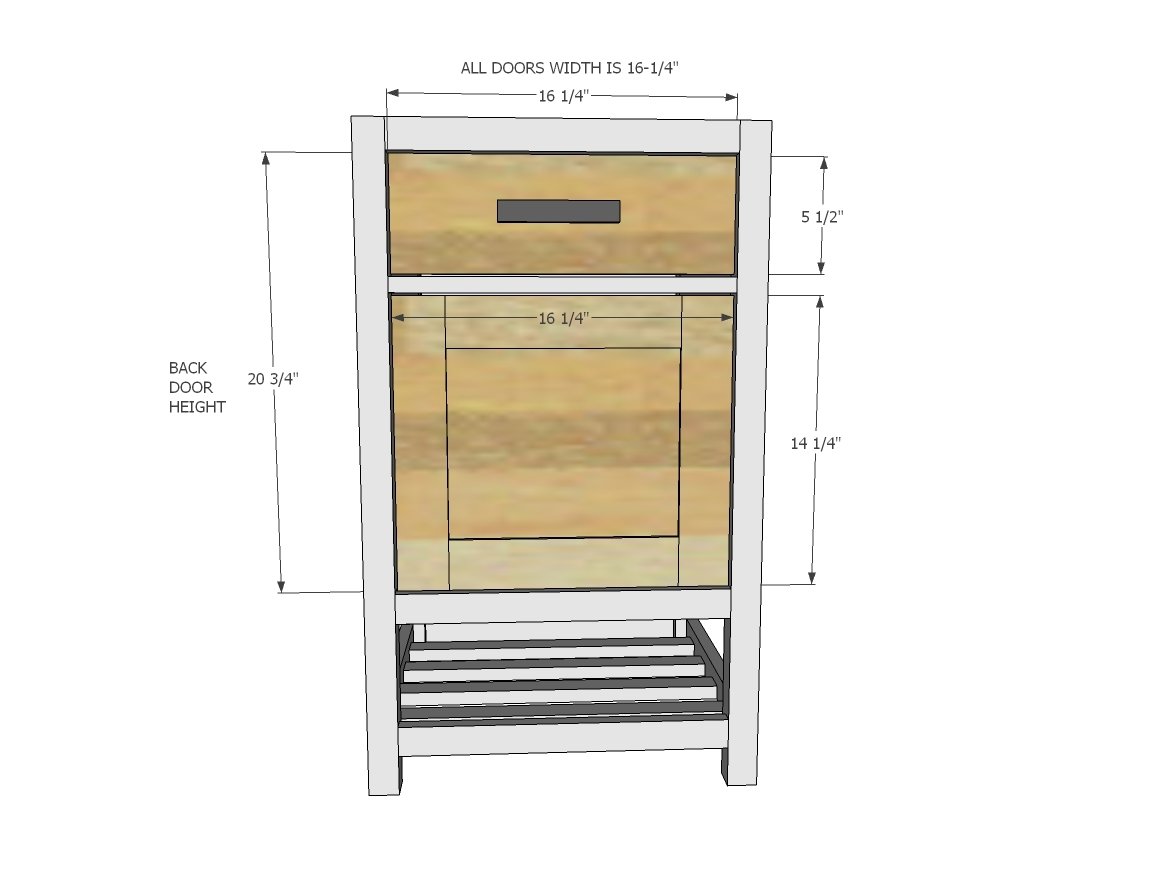
As with all doors/drawers, they should be made to fit. I like to leave an 1/8" gap around all sides - this will vary depending on the type of hinges you are using. I used simple butt hinges that actually took up more like 1/4" - so measure your hinges and factor in that width before building the doors. I used a router to build my doors (am working on a video of how to do that to share soon with you!) with the frame 1x3s and the panel 1/4" plywood. Here's an easy way to build doors using just the Kreg Jig that will give you a similar look.
Step 7
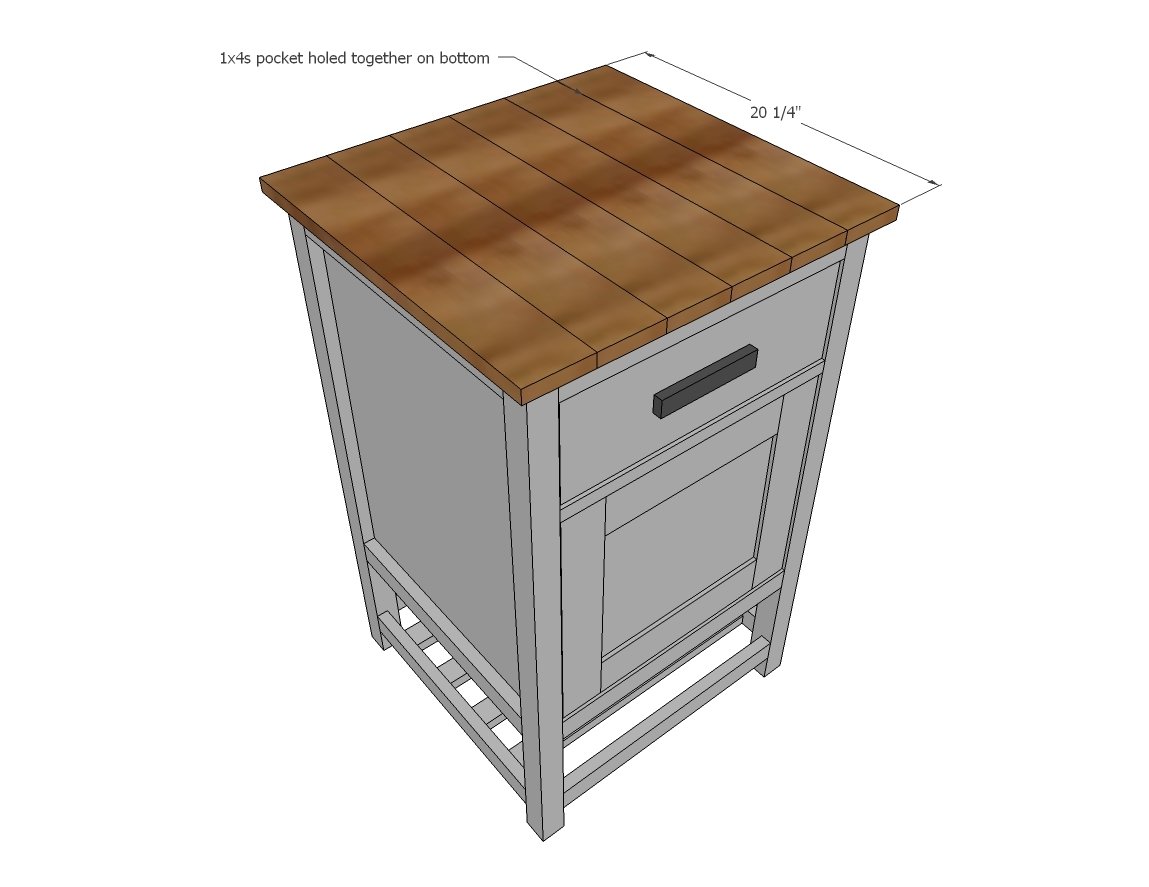
I built my island top out of 1x4 boards first using pocket holes on underside, stained and finished it, and then attached it through the pocket holes drilled in the side panels and also with a couple of 2" long screws through the 2x2 top pieces above the doors. The overhang is even on all sides, approximately 3/4".
Step 8
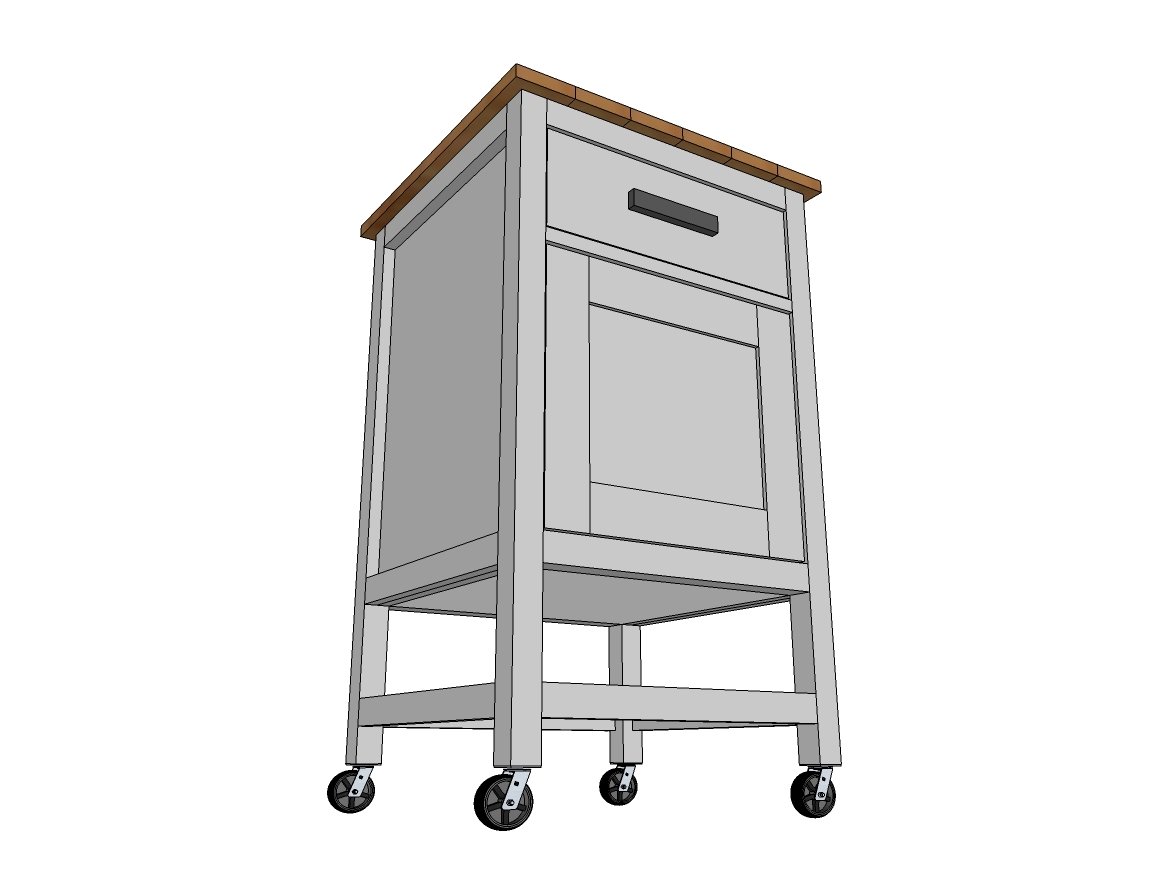
After painting the entire project, I drilled holes for the caster wheels and added the caster wheels.
Finishing
Sand all surfaces, starting with a medium grit and finishing with fine. Wipe off the dust, fill any holes or gaps with wood filler, and sand smooth once dry. Apply primer if you're painting, then finish with your choice of paint or stain and seal with a durable clear topcoat. For outdoor projects, use exterior-rated primer, paint or stain, and sealer so the piece stands up to the weather.
Source (temporary): https://www.ana-white.com/woodworking-projects/tiny-kitchen-island-prep-cart-trash-free-plans