Toddler Chalkboard Easel
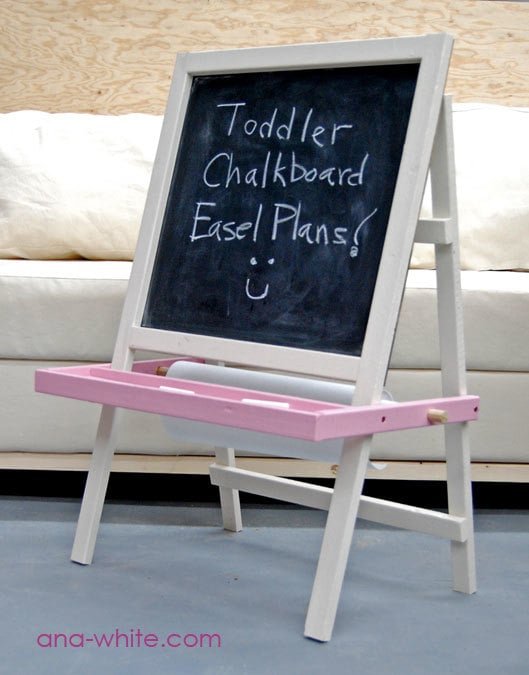
My daughter's favorite thing. A just my height toddler chalkboard that also works with a roll of craft or freezer paper to become a easel.
Specifications
| Project type | Toys |
|---|---|
| Room | Kids and Toys |
| Style | Children's and Kid's Room Furniture and Toy Plans |
| Difficulty | Intermediate |
| Estimated cost | Under $20 |
Dimensions
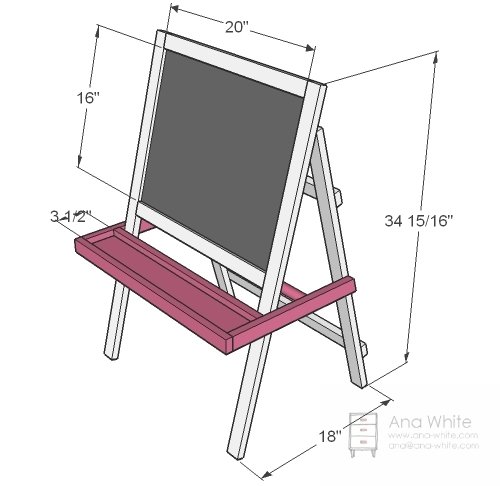
Use the size-specific shopping and cut lists below.
Shopping List
1×2
1×4, 24 inches
2″ screws
3/4″ screws
wood glue
1/4″ hardboard scrap (I used the backside of scrap paneling)
chalkboard paint
finishing supplies
Cut List
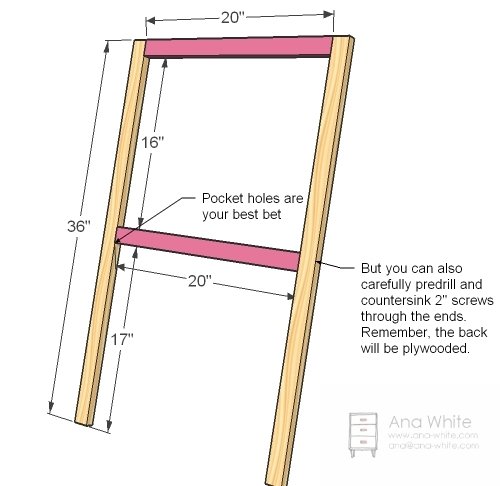
2 – 1×2 @ 20″ (Tops and Bottom of Frame)
2 – 1×2 @ 36″ (Frame Legs)
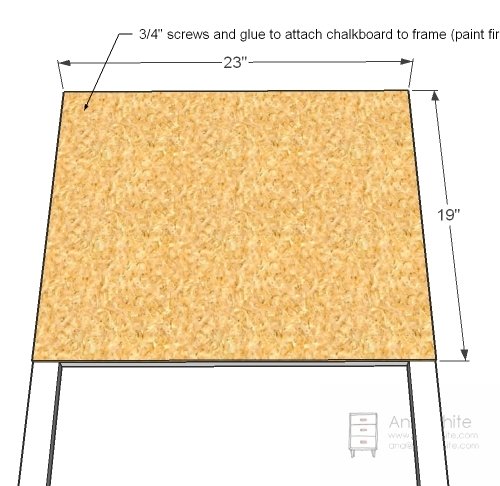
1 – Chalkboard (made my own out of hardboard paneling and chalkboard paint) @ 23″ x 19″
2 – 1×2 @ 23″ (Back)
2 – 1×2 @ 31″ (Back)
1 – 1×4 @ 23″ (Tray)
1 – 1×2 @ 23″ (Tray Back)
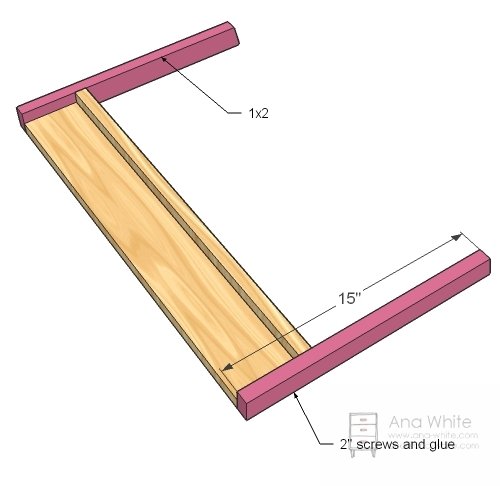
2 – 1×2 @ 15″ (Tray Sides)
1 – 1×2 @ 24 1/2″ (Tray Front)
3/4″ wood dowel @ 28″ (Paper Holder)
Tools
- measuring tape
- square
- pencil
- safety glasses
- hearing protection
- kreg-jig
- drill
- circular saw
- sander
- level
- countersink drill bit
Step-by-step Instructions
Build the Chalkboard Frame
Simply glue and screw the chalkboard frame together. Check for square. Then paint and paint the chalkboard too.
Chalkboard
With the frame and the chalkboard painted, screw the chalkboard to the frame. Use the 3/4″ screws.
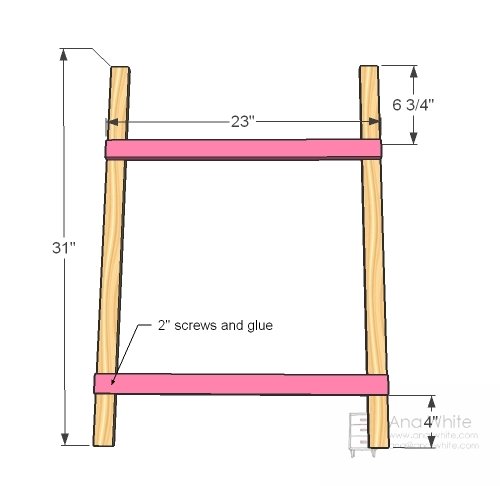
Back
Now build the back as shown above. Adjust for square.
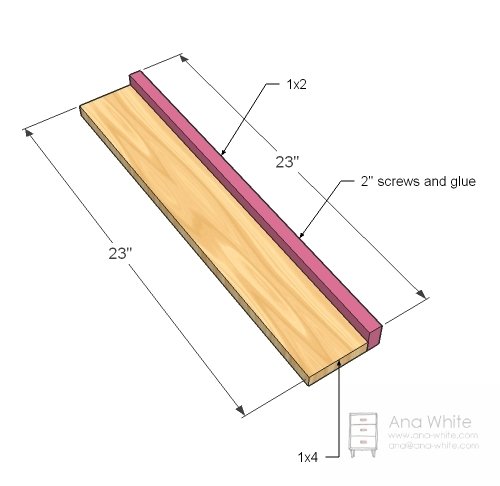
Back Edge of Tray
Screw the back edge of the tray to the tray bottom with 2″ screws and glue.
Step 5
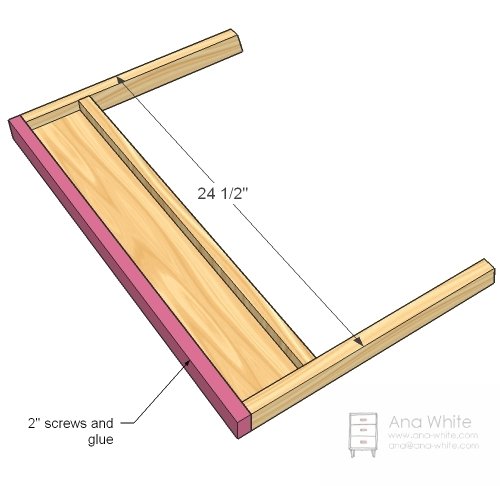
Tray Front
Attach the tray front as shown above.
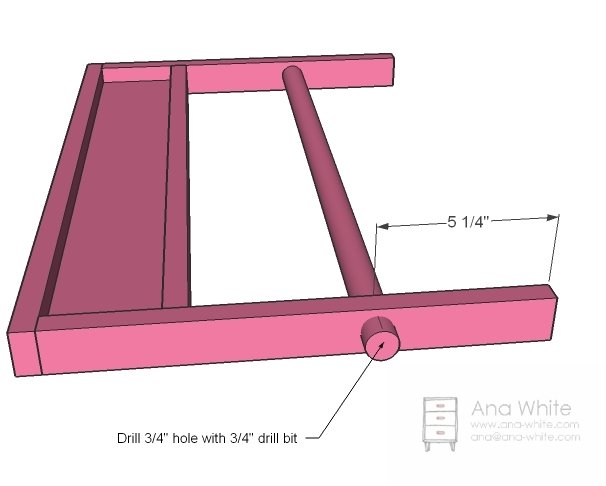
Dowel Holes
Mark the tray sides as shown above and drill 3/4″ pilot holes. Thread the dowel through. I cut my dowel with 1 1/2″ on each end so that the dowel wouldn’t easily slip throug
Assembly
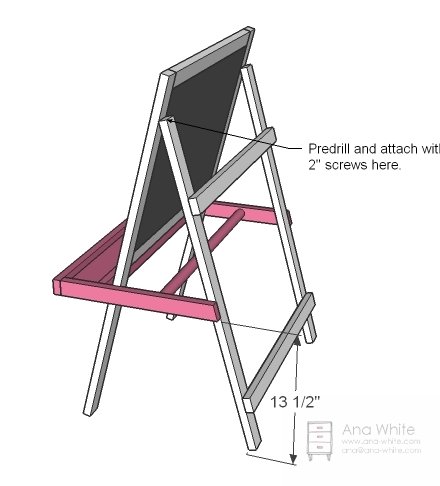
Now simply assemble everything, and use a level to get that tray on straight with the floor.
Finishing
Sand all surfaces, starting with a medium grit and finishing with fine. Wipe off the dust, fill any holes or gaps with wood filler, and sand smooth once dry. Apply primer if you're painting, then finish with your choice of paint or stain and seal with a durable clear topcoat. For outdoor projects, use exterior-rated primer, paint or stain, and sealer so the piece stands up to the weather.
Source (temporary): https://www.ana-white.com/woodworking-projects/toddler-chalkboard-easel