Toddler Ride On Toys Wood Scooter for Toddlers
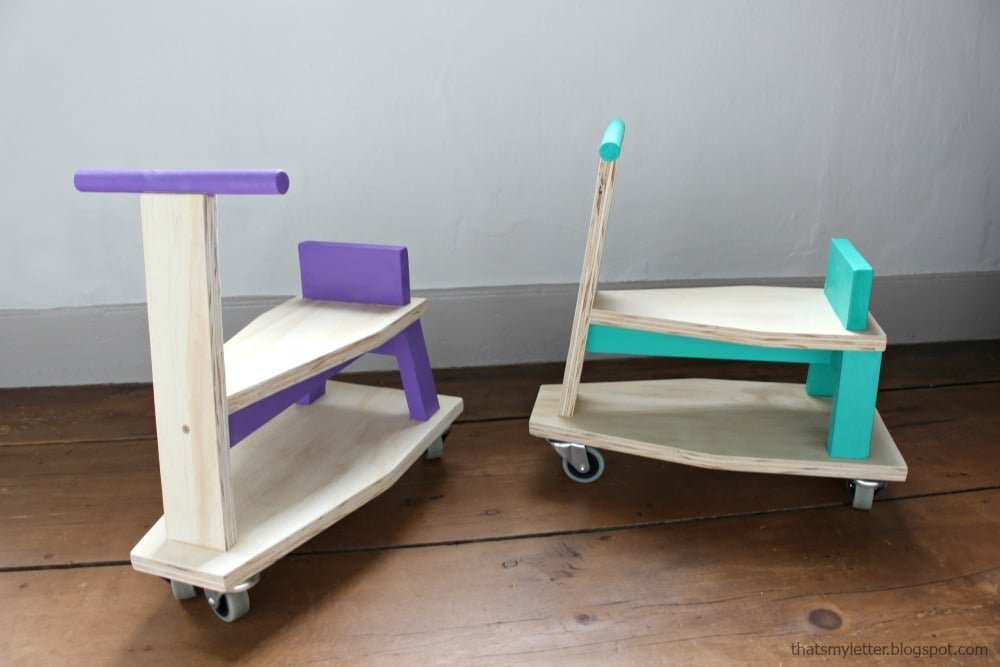
Make a scrap wood scooter toddlers ride on toys that is durable and adorable. Free
Specifications
| Project type | Toys |
|---|---|
| Room | Kids and Toys |
| Style | Children's and Kid's Room Furniture and Toy Plans |
| Difficulty | Intermediate |
| Estimated cost | scraps |
Dimensions
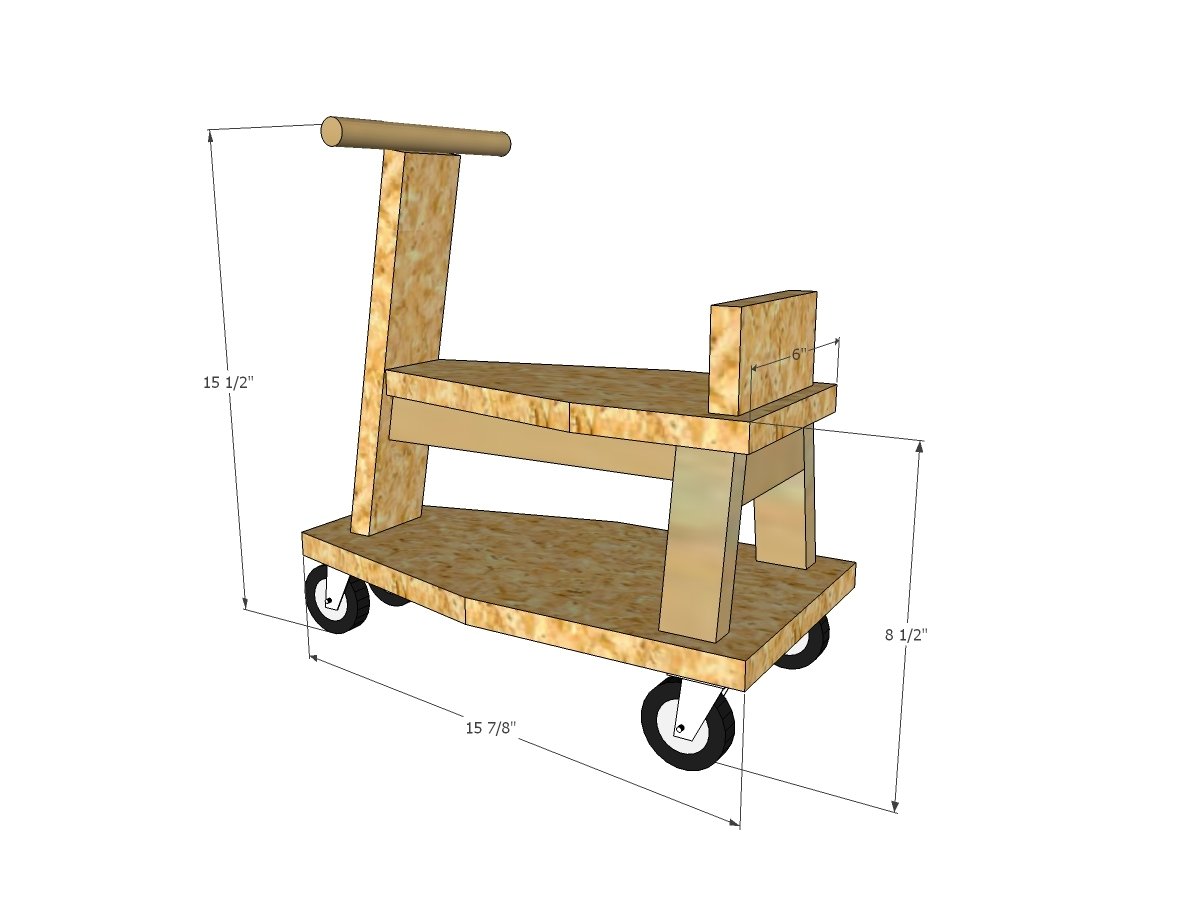
Use the size-specific shopping and cut lists below.
Shopping List
3/4" plywood scraps
1x2 scraps
2x2 scraps
3/4" dowel, 8" long
4 - high quality, non marking full swivel caster wheels with 3/4" screws for attaching casters to plywood bottom
Cut List
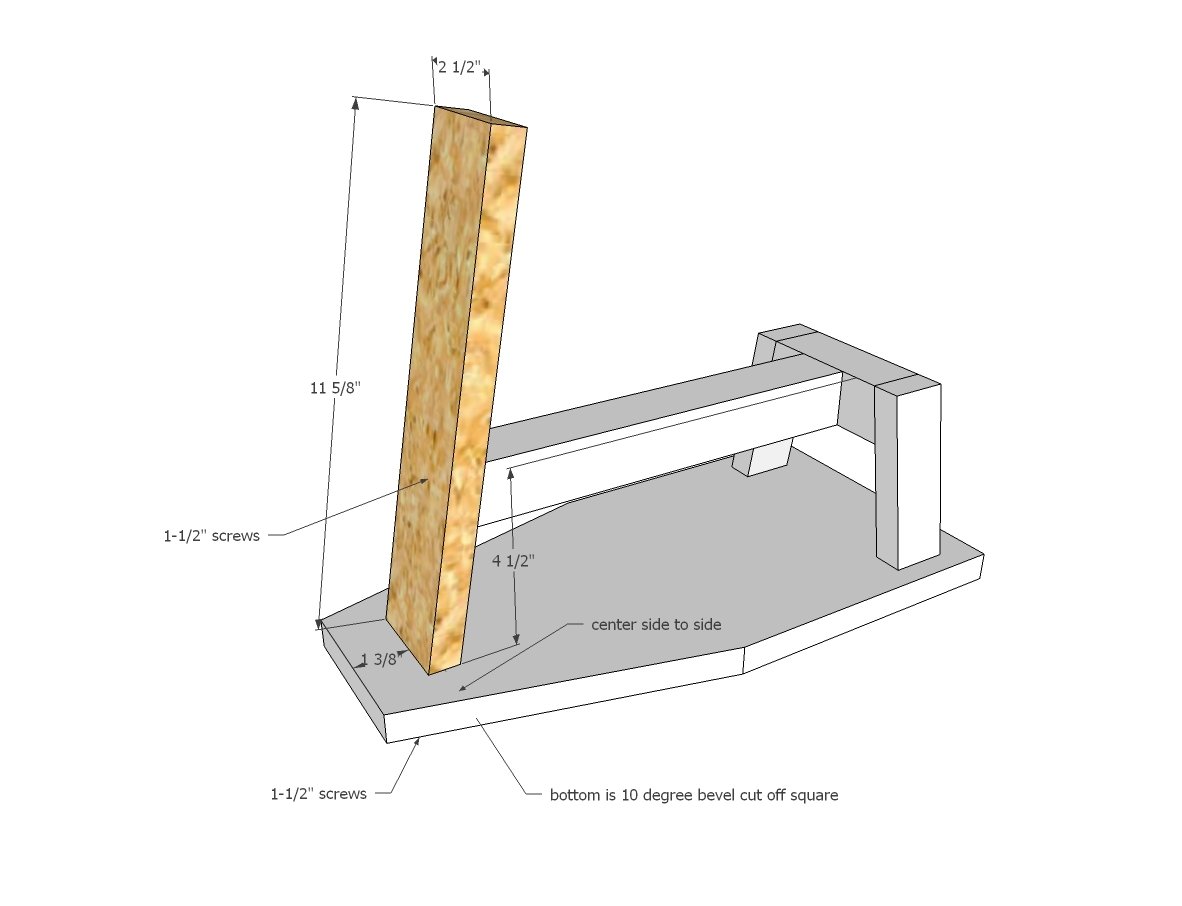
1 - 3/4" plywood @ 2-1/2" x 11-5/8" - bevel bottom end at 10 degrees off square - front
1 - 3/4" plywood @ 15-3/4" x 8" - bottom
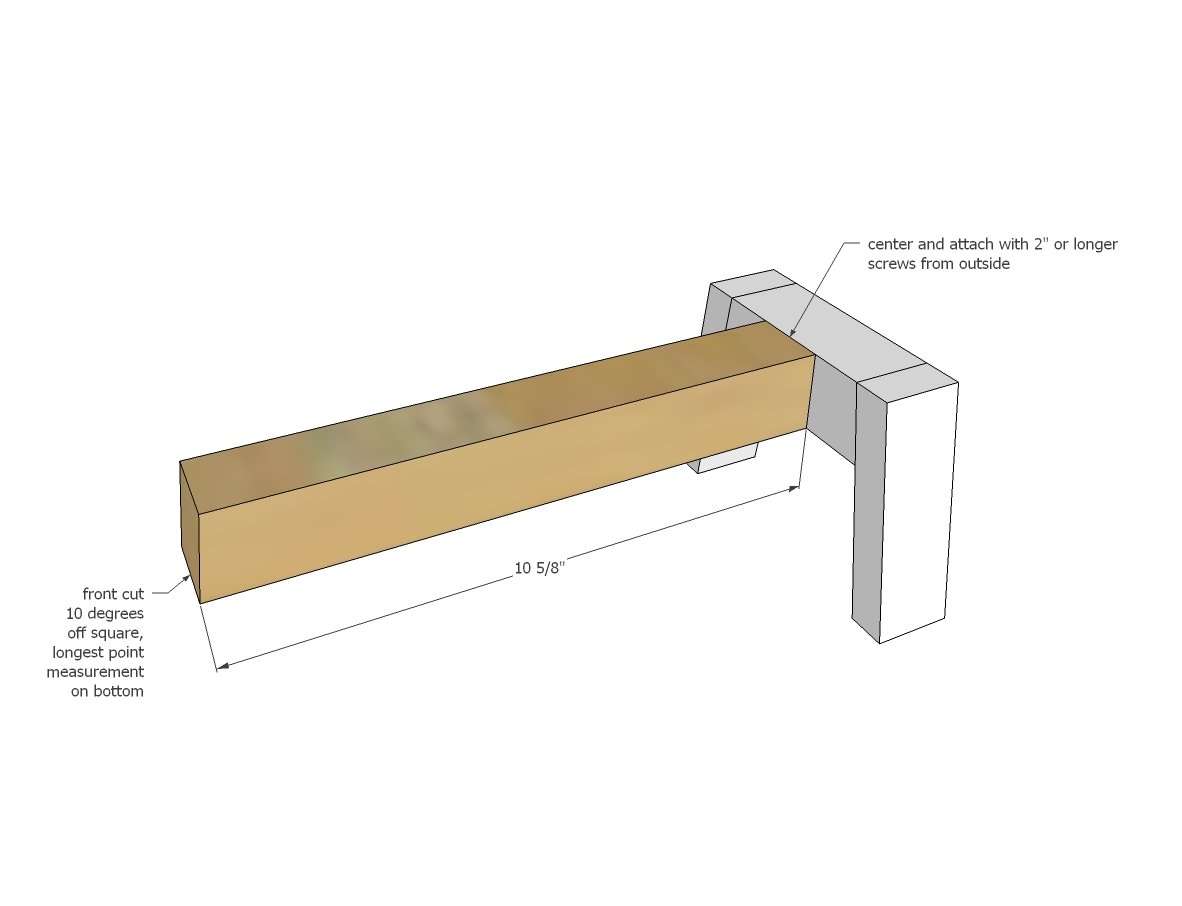
1 - 2x2 @ 10-5/8" - front cut at 10 degrees - center support
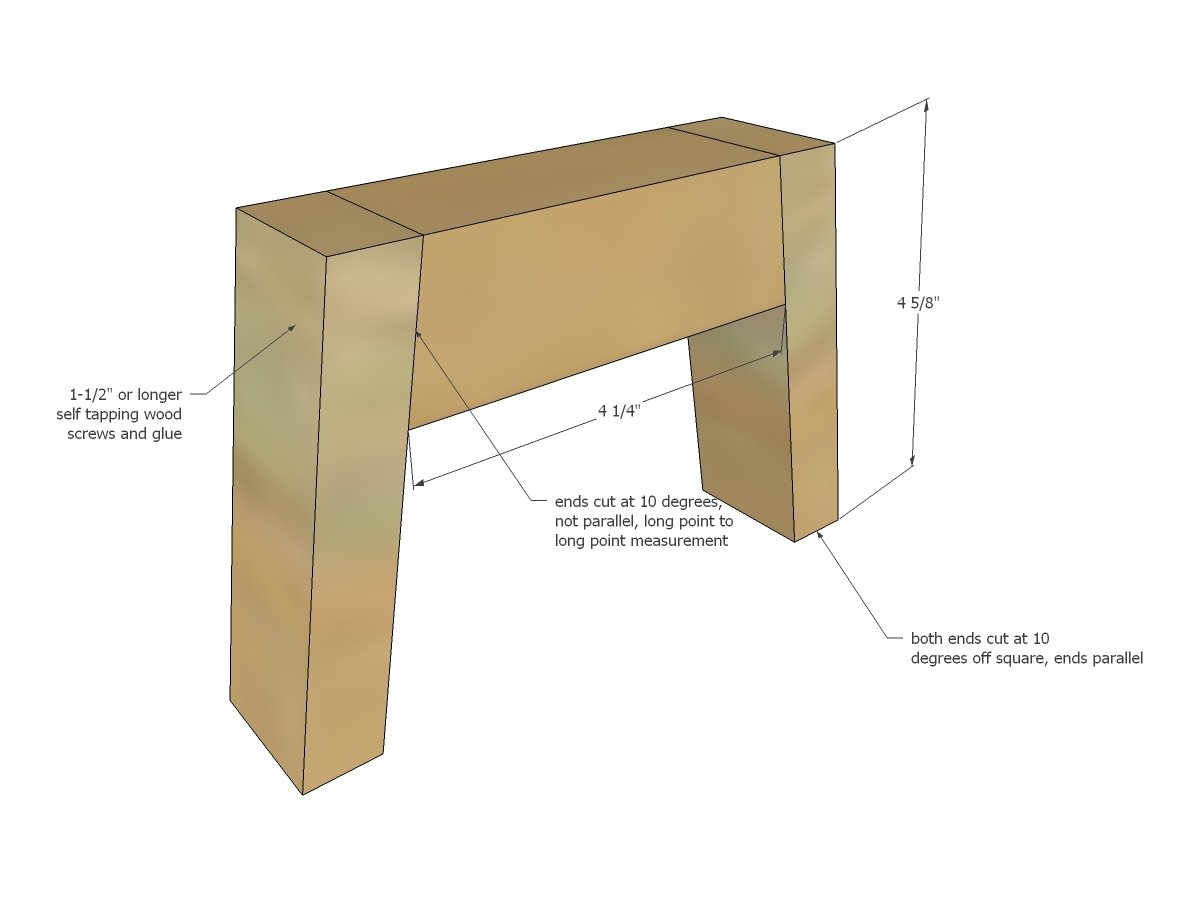
2 - 1x2 @ 4 - 5/8" both ends cut at 10 degrees parallel to each other, long point to short point - back legs
1 - 2x2 @ 4-1/4" both ends cut at 10 degrees not parallel, long point to long point - back support
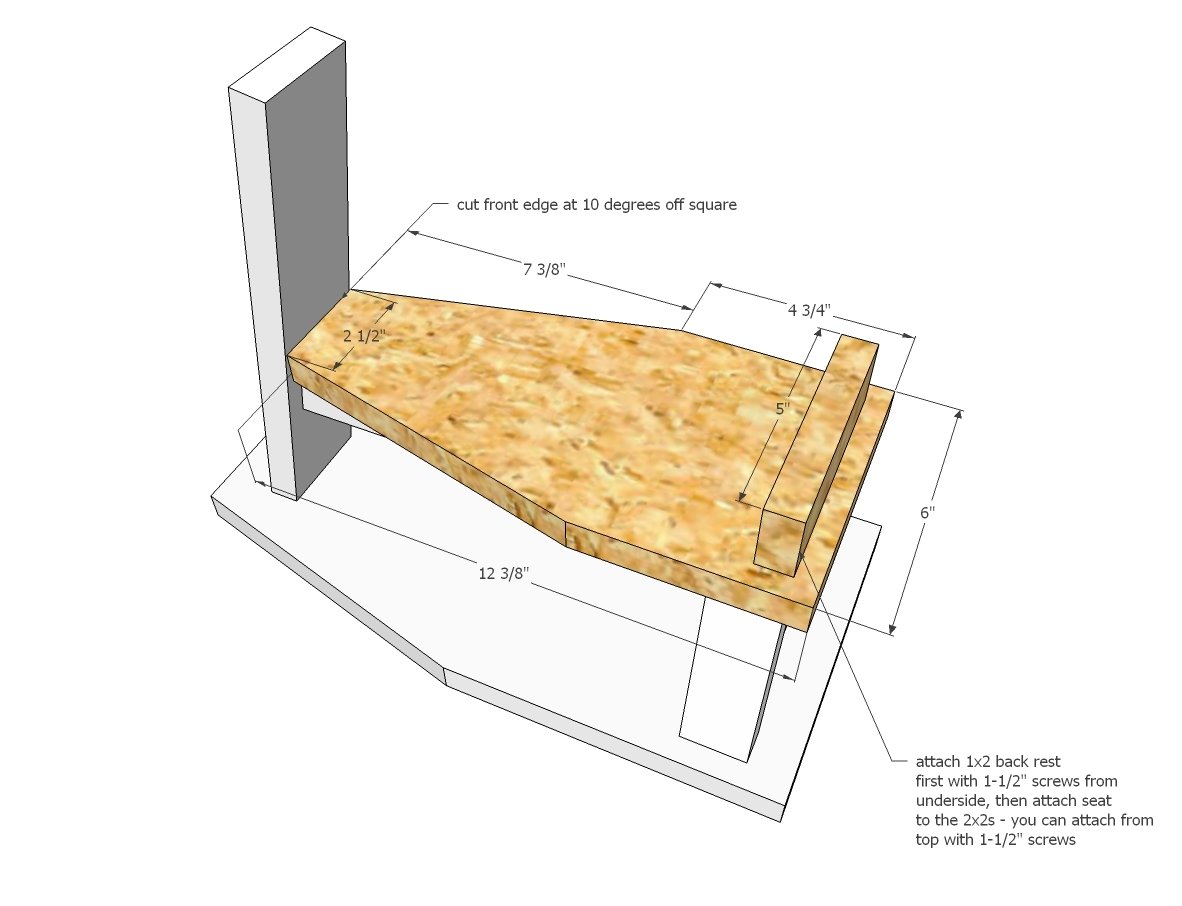
1- 3/4" plywood @ 6" x 12-3/8" - front cut at 10 degrees off square, long point measurement - seat
1 - 1x2 @ 5" - seat back rest
Tools
- measuring tape
- square
- pencil
- safety glasses
- hearing protection
- drill
- circular saw
- jigsaw
- compound miter saw
- sander
- countersink drill bit
Step-by-step Instructions
Step 1
Attach the 1x2 legs to the 2x2 back support piece with 1-1/2" self tapping screws or similar. I used Spax brand - they are available in small packages in different sizes.
Step 2
Then attach the main center support to the back. I used 2-1/2" screws and glue - you could also use a pocket hole here too.
Step 3
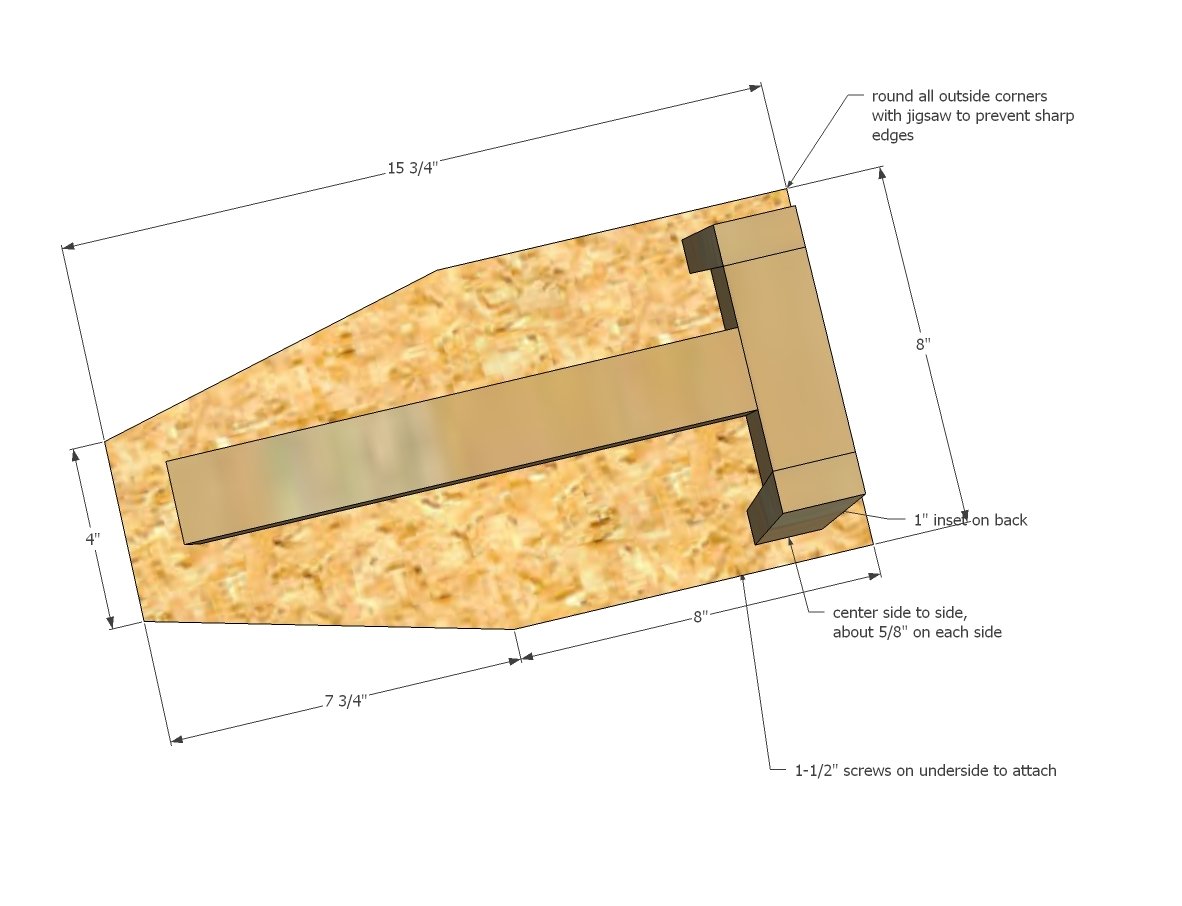
Next, attach to the base. Back to the 1-1/2" screws. You don't have to be perfect here, just get it in the right position.
Step 4
Now the front piece. I recommend plywood here over using a 1x3 just because plywood will support the handle bars better. The bottom needs to be cut a a 10 degree off square bevel. So I cut the plywood first into the right size, and then used the miter saw to bevel that front end (you could also set your circular saw to a 10 degree bevel and cut it).
Step 5
Step 6
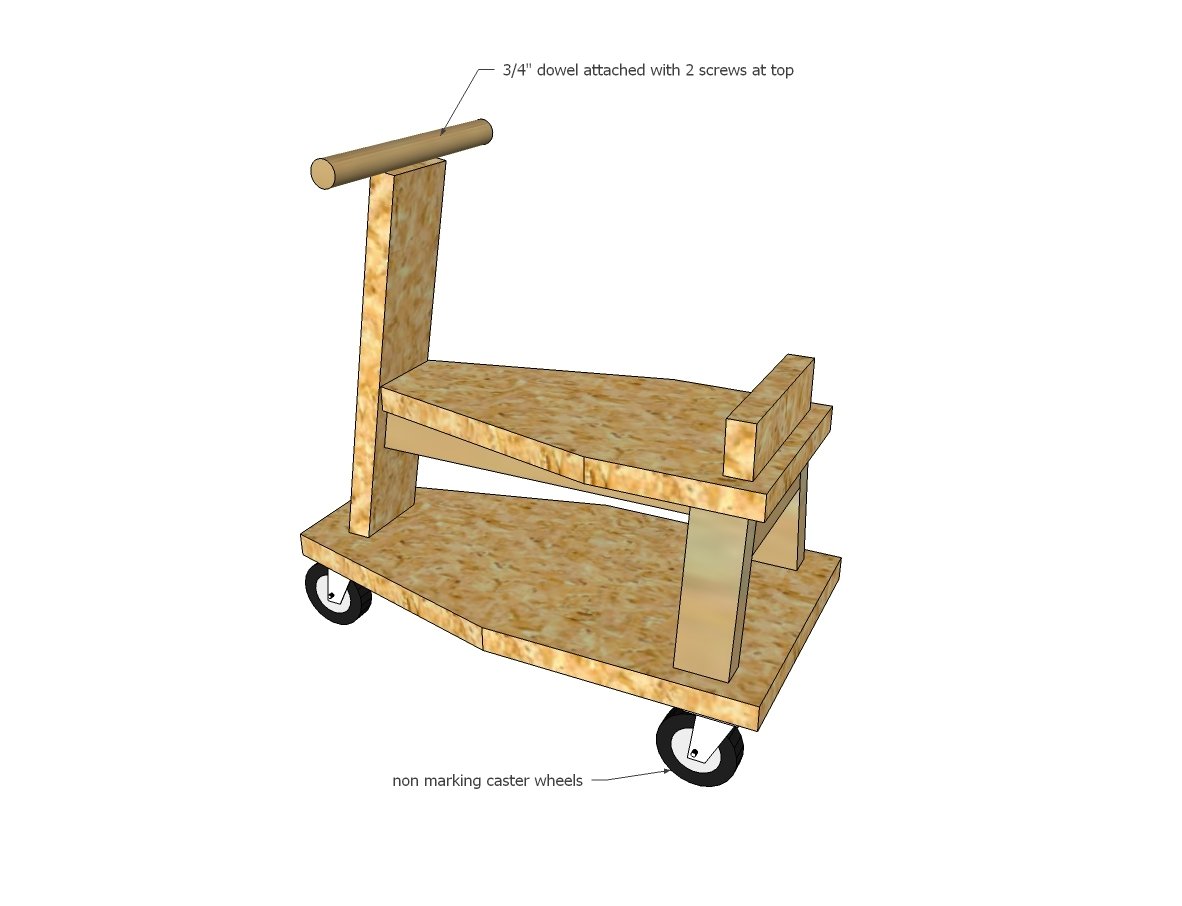
Attach caster wheels with screws less than 3/4" and the handle bars.
Finishing
Sand all surfaces, starting with a medium grit and finishing with fine. Wipe off the dust, fill any holes or gaps with wood filler, and sand smooth once dry. Apply primer if you're painting, then finish with your choice of paint or stain and seal with a durable clear topcoat. For outdoor projects, use exterior-rated primer, paint or stain, and sealer so the piece stands up to the weather.
Source (temporary): https://www.ana-white.com/woodworking-projects/toddler-ride-toys-wood-scooter-toddlers