Toddler Upholstered Bed
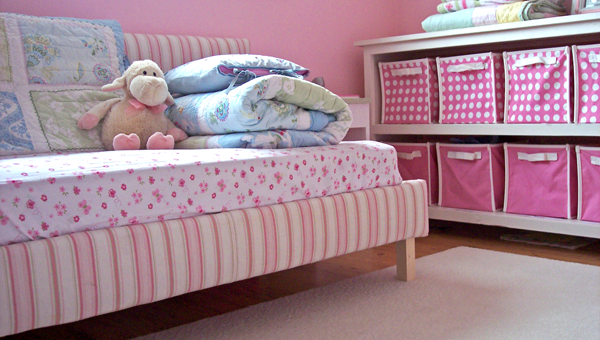
A cute simple project that uses a standard crib mattress to create both a seating and sleeping surface in your child's room. This daybed is easy to build and inexpensive.
Specifications
| Project type | Upholstered Projects |
|---|---|
| Room | Bedroom |
| Style | Cottage Style Furniture Plans |
| Difficulty | Intermediate |
| Estimated cost | $20 - $50 |
Dimensions
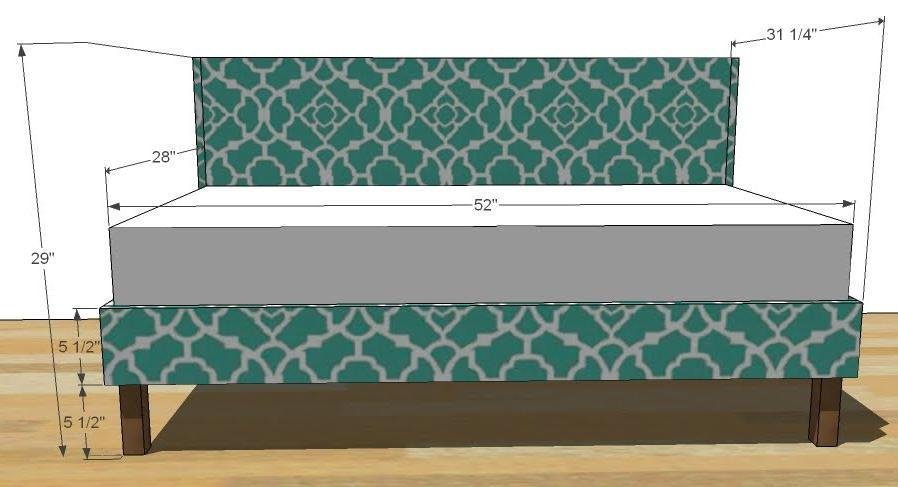
Use the size-specific shopping and cut lists below.
Shopping List
3 Yards of Batting, 60″ wide (double up on the headrest)
2 Yards of fabric, 60″ wide and sewing notions
1 – Sheet of 1/2 Plywood (can be OSB, cheap stuff works just fine!)
5 – 2×2 Boards
1 – 1×3
1 – 10′ 1×6 Board
1 – 2×6 Board (Stud Length or 8′ Length)
2 1/2″ Screws
2″ Screws
Staples (1/2″)
Cut List
Cut List for Bed Frame and Side Rails
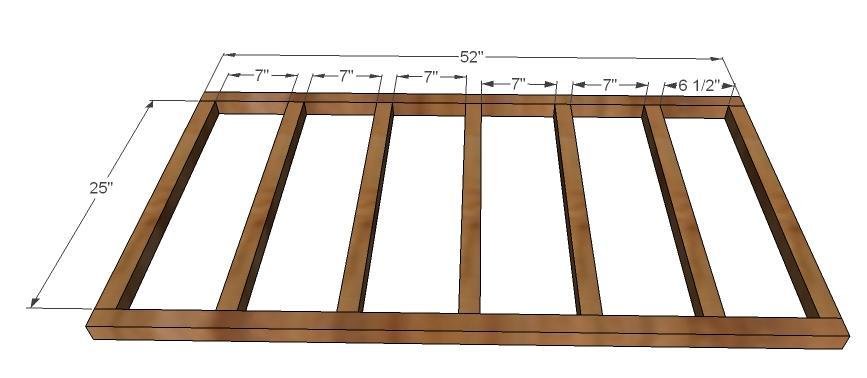
2 – 2×2 @ 52″ (Frame Sides)
7 – 2×2 @ 25″ (Frame Slats)
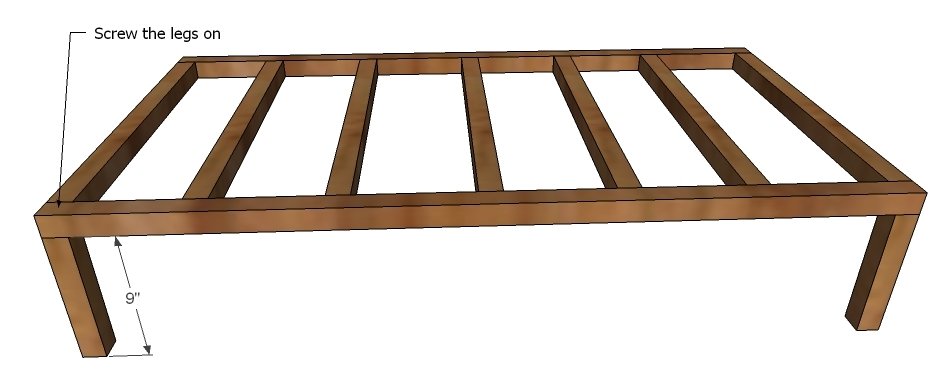
2 – 2×2 @ 9″ (Front Legs)
2 – 1×6 @ 28″ (Siderails)
1 – 1×6 @ 54″ (Measure to fit, front rail)
Cut List for Headboard
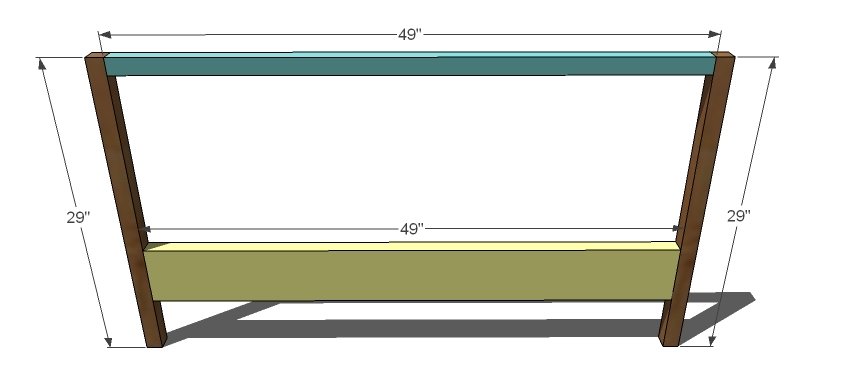
2 – 2×2 @ 29″ (Headboard Legs)
1 – 2×2 @ 49″ (Headboard Top Frame)
1 – 2×6 @ 49″ (Headboard Bottom Frame)
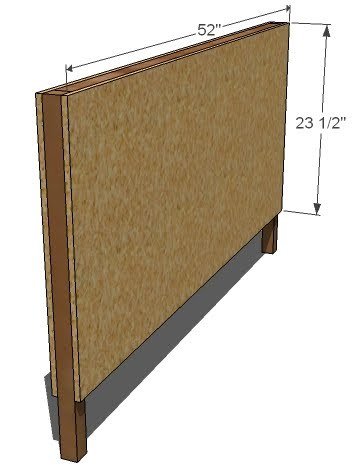
2- 1/2″ Plywood @ 23 1/2″ x 52″ (Panel)
2 – 1×3 @ 23 1/2″ (Side Trim)
Tools
- measuring tape
- square
- pencil
- safety glasses
- hearing protection
- drill
- circular saw
- staple gun
Step-by-step Instructions
Step 1
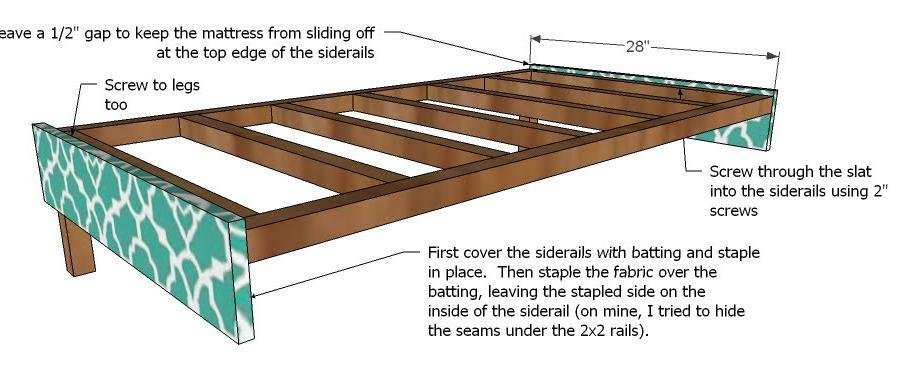
Bed Frame. Like all of our projects, this one is no different in that we start with a “box” and trim it out. Use 2 1/2″ screws to build the frame above. The space doesn’t have to be exact, and you could actually add more slats if you wanted to (for example you are concerned about your kids jumping on the bed).
Step 2
Legs. Use 2 1/2″ screws to screw the legs to the frame on the front two corners, as shown above.
Step 3
Siderails. First cover your siderails with batting, stapling in place. Then cover with fabric, stapling in place from the inside of the siderail to hide your staples. Fasten to the end slats, keeping ends flush but leaving 1/2″ gap on the top to keep your mattress from sliding off. Make sure your screws grip the wood of the siderails.
Step 4
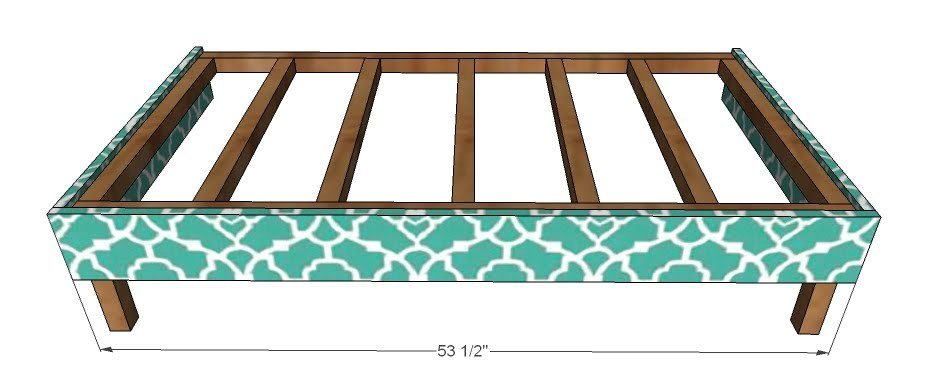
Front Rails. Upholster the front rail as you did in the previous step and attach with 2″ screws to the front of the bed frame. Don’t forget to fasten to the legs, too.
Step 5
Step 6
Panel. Use 2″ screws or nails to the frame, as shown here. Square up your headboard first. Keep outside edges flush.
Step 7
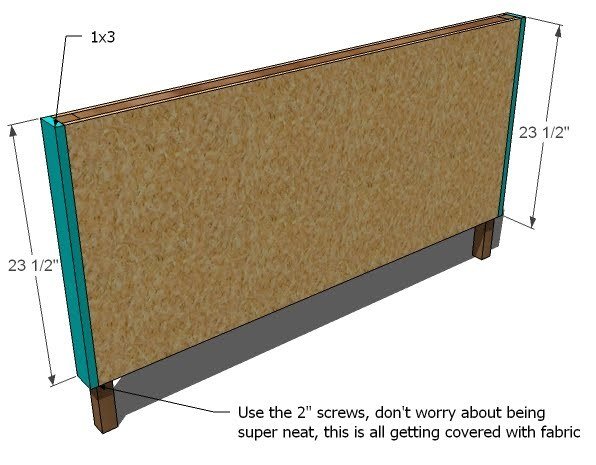
Sides of Headboard. Finish the sides of the headboard by adding the 1x3s to the sides, as shown above. This also give you a clean spot to fold your fabric under and staple.
Step 8
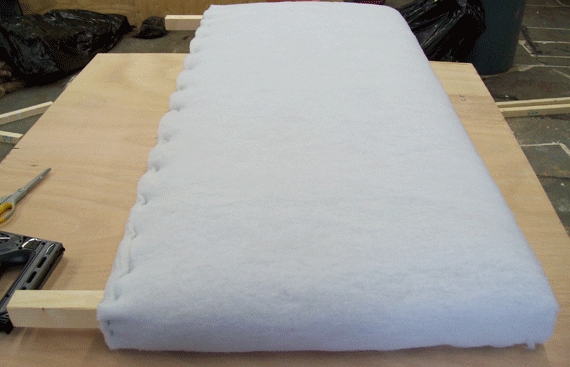
Upholstering. Cover the headboard in batting, as shown above. Staple in place and trim if necessary. Then neatly cover with fabric, carefully hiding your staples on the bottom edge. You may wish to instead sew a slipcover.
Step 9
Assembly. Using a level, line the bed frame up with the headboard. Then use the 2 1/2″ screws to fasten through the back frame board directly into the headboard. Remember, we used a 2×6 for this very purpose.
Finishing
Sand all surfaces, starting with a medium grit and finishing with fine. Wipe off the dust, fill any holes or gaps with wood filler, and sand smooth once dry. Apply primer if you're painting, then finish with your choice of paint or stain and seal with a durable clear topcoat. For outdoor projects, use exterior-rated primer, paint or stain, and sealer so the piece stands up to the weather.
Source (temporary): https://www.ana-white.com/woodworking-projects/toddler-upholstered-bed