Tomato Cage Planter
Build your own tomato cage planters from! Built using cedar fence pickets, this is an inexpensive and easy build to help you grow tomatoes this summer.
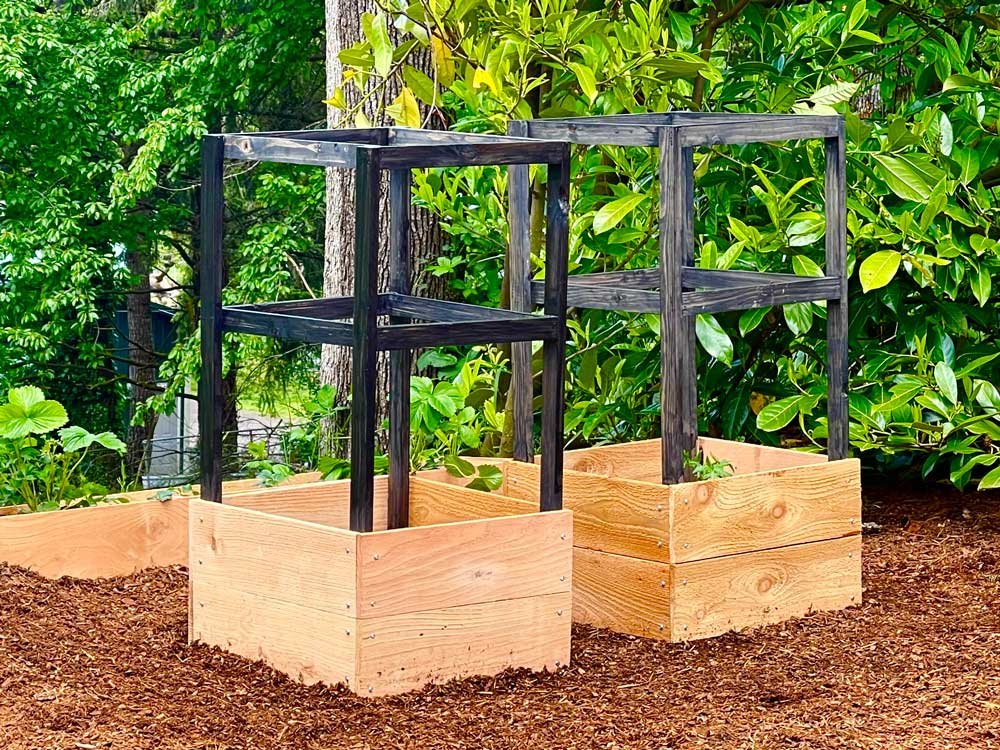
Specifications
| Project type | Planters, Garden Beds, and Greenhouses |
|---|---|
| Room | Outdoor |
| Difficulty | Starter Projects |
Dimensions
Use the size-specific shopping and cut lists below.
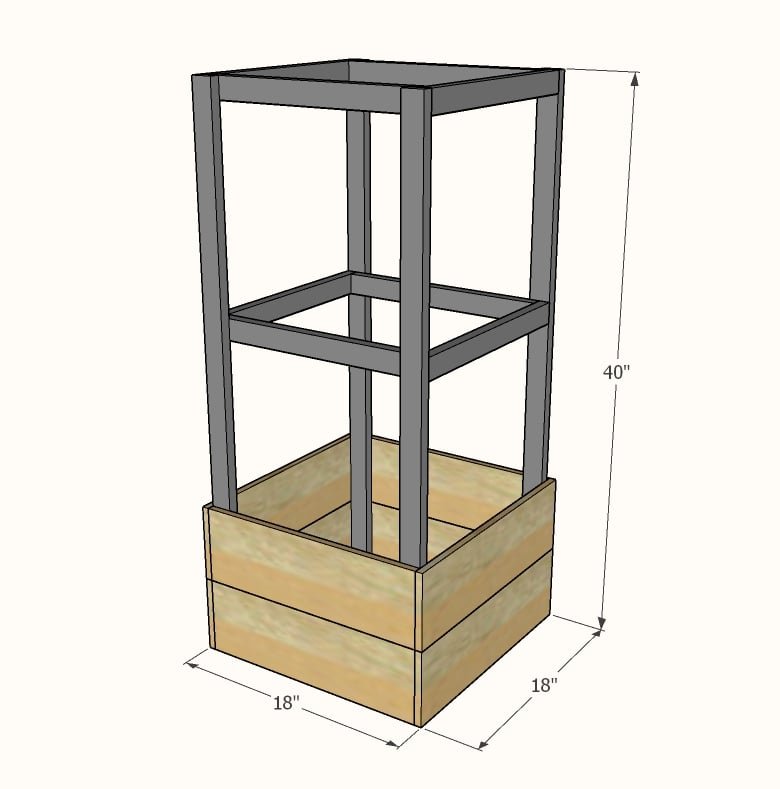
Shopping List
2 - 72" cedar fence pickets
3 - 1x2x8 furring strips
1-5/8" long exterior self tapping star bit screws like these (pack of 50 per planter)
Cut List
- 4 - cedar fence pickets @ 18"
- 4 - cedar fence pickets @ 17"
- 4 - 1x2 @ 40"
- 8 - 1x2 @ 15-1/2"
To get all the cuts on the boards with minimal waste, here's how to cut each board:
- Cedar Fence Picket: | 18" | 18" | 17" | 17" |
- Cedar Fence Picket: | 18" | 18" | 17" | 17" |
- 1x2: | 40" | 40" | 15-1/2" |
- 1x2: | 40" | 40" | 15-1/2" |
- 1x2: | 15-1/2" | 15-1/2" | 15-1/2" | 15-1/2" | 15-1/2" | 15-1/2" |
Tools
- measuring tape
- square
- pencil
- safety glasses
- drill
- circular saw
Step-by-step Instructions
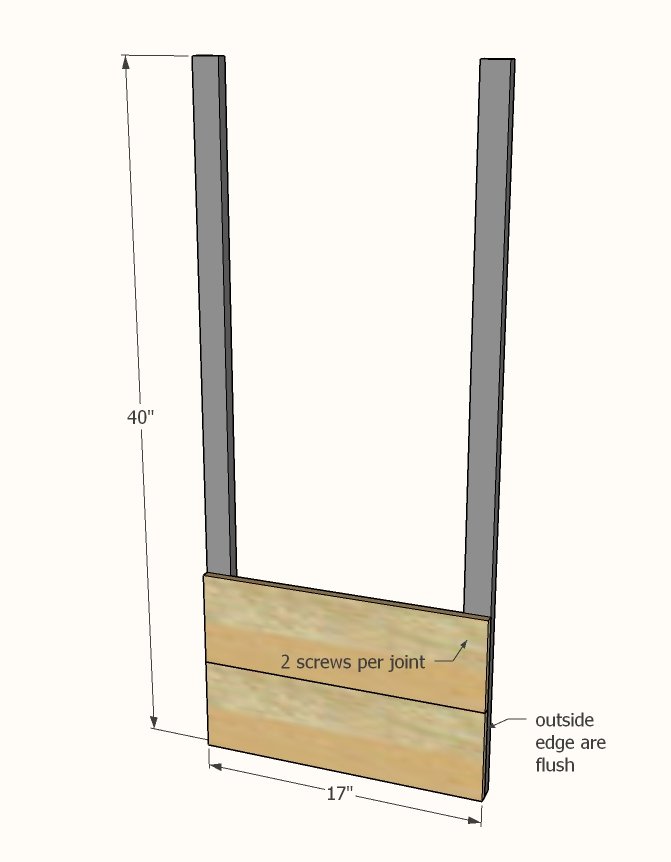
Build two identical, attaching the 17" cedar fence pickets to the 40" 1x2 boards.
Use two screws per joint, and make sure attached square (distance at top is also 17" and outside edges at bottom line up).
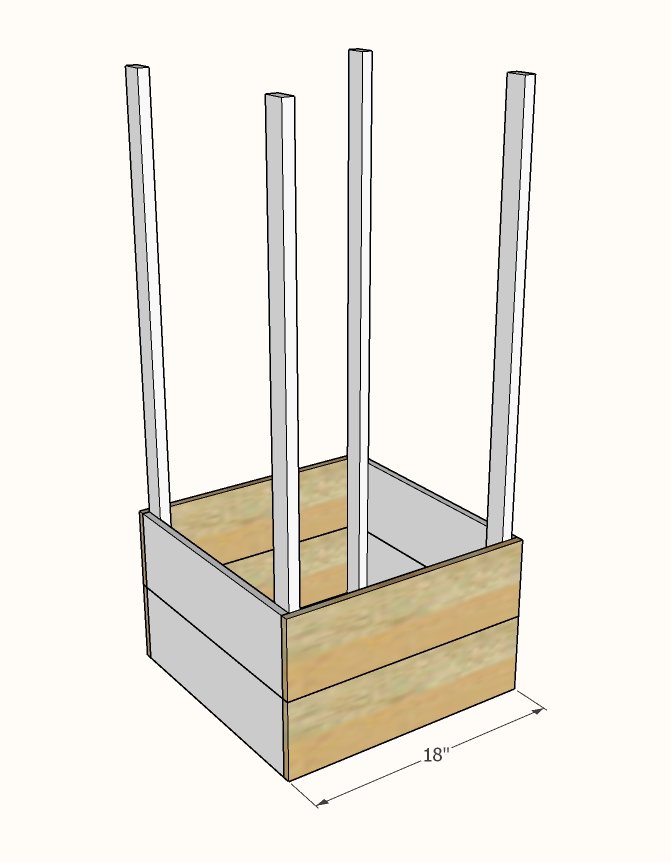
Step 2
Attach the 18" cedar fence pickets tot he outside, screwing to the 1x2s.
Step 3
Attach the 1x2s as shown with screws, to the inside of the 1x2s.
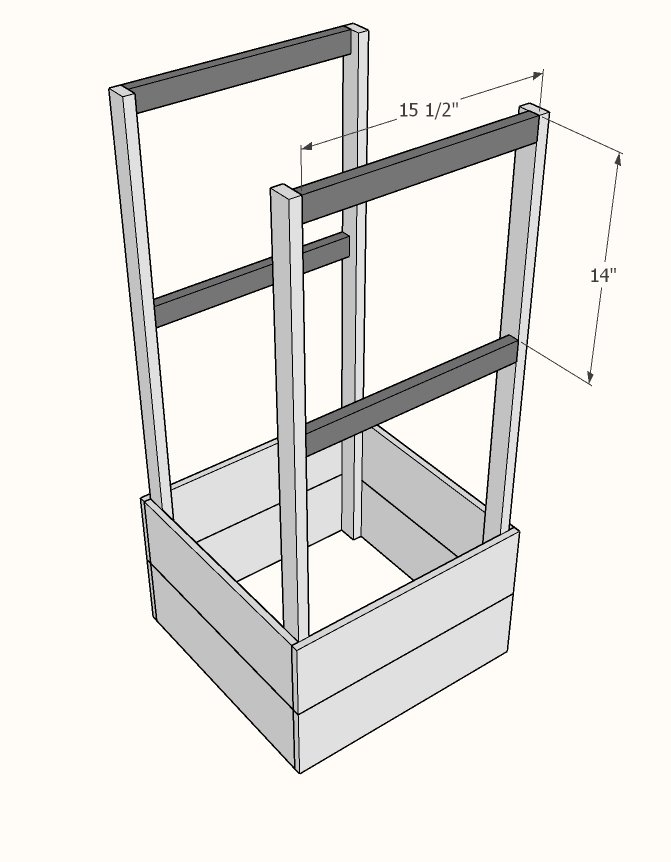
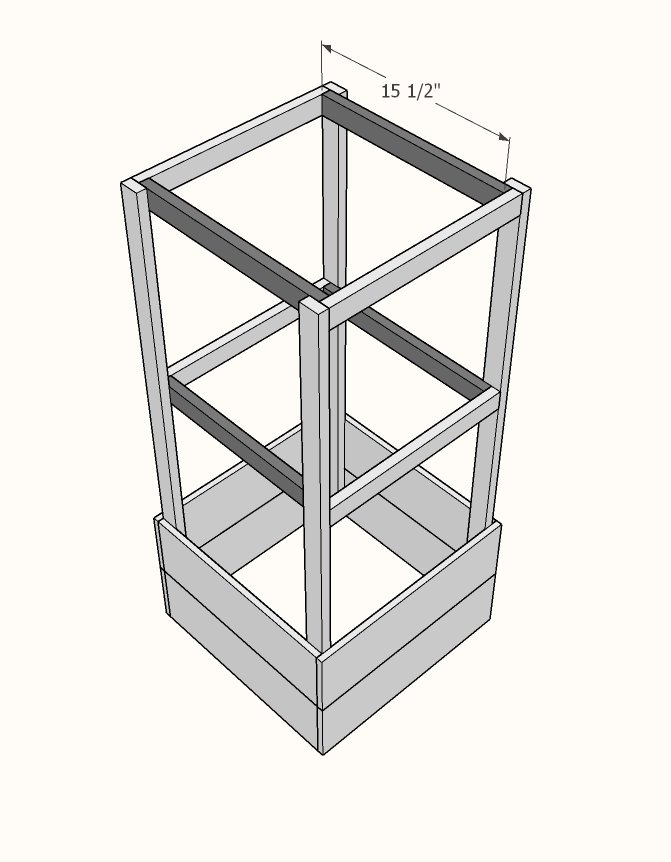
Finally, add the remaining 1x2s to finish the planter.
Use a pot on the inside, or staple landscaping fabric on the inside.
Finishing
Sand all surfaces, starting with a medium grit and finishing with fine. Wipe off the dust, fill any holes or gaps with wood filler, and sand smooth once dry. Apply primer if you're painting, then finish with your choice of paint or stain and seal with a durable clear topcoat. For outdoor projects, use exterior-rated primer, paint or stain, and sealer so the piece stands up to the weather.
Source (temporary): https://www.ana-white.com/woodworking-projects/tomato-cage-planter