Top Bunk organizer
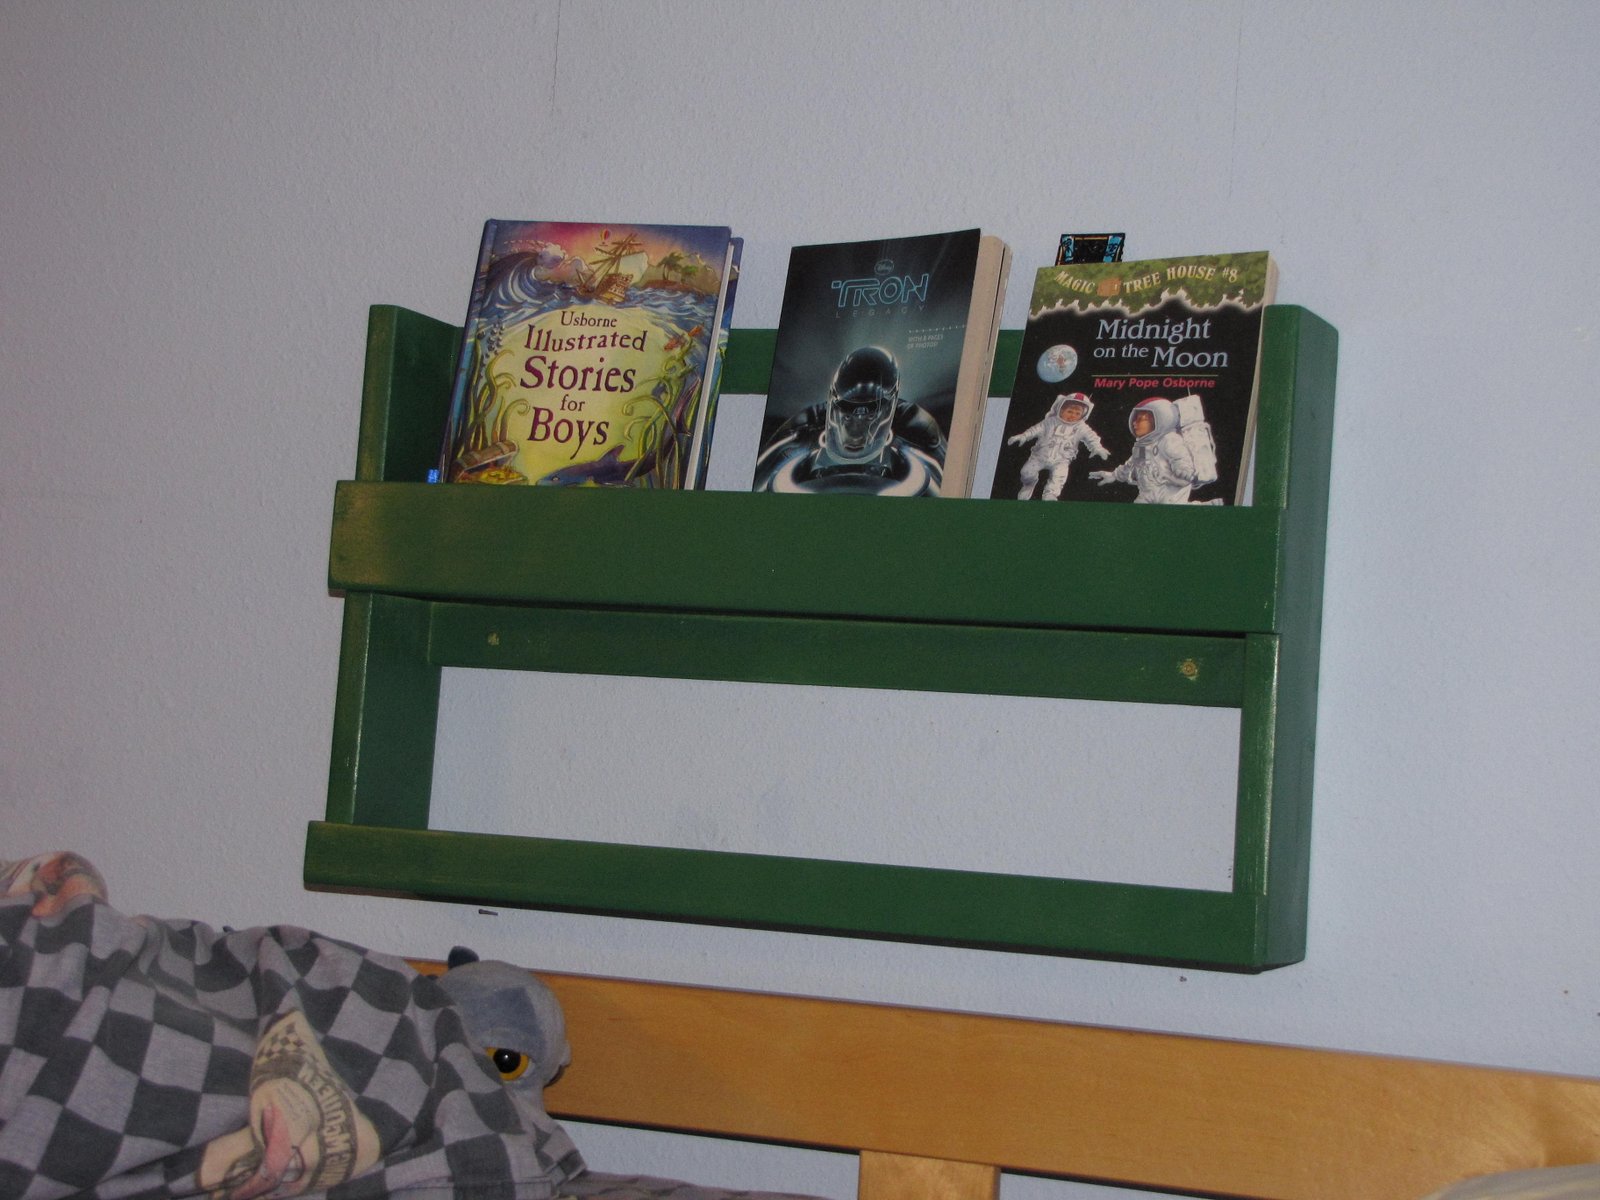
So we just put some bunkbeds in my sons' room. The problem is my oldest always likes water by his bed so I needed somesort of a nightstand. After searching I found a shelf online that was pretty pricey and of course I thought I could do something cheaper. I didn't make it exactly the way it looks but hey all I had to buy was some spray paint, so yay!
Specifications
| Project type | Nightstands |
|---|---|
| Room | Bedroom |
| Style | Children's and Kid's Room Furniture and Toy Plans |
| Difficulty | Beginner Projects |
| Estimated cost | Under $20 |
Shopping List
1 - 1 X 2 (6 ft or scraps see cut list)
1 - 1 X 3 (6 ft or scraps see cut list)
1 - 1 X 4 (6ft)
Cut List
2 - 1X2 @ 20"
1 - 1X2 @ 21 1/2"
1 - 1X3 @ 21 1/2"
2 - 1X4 @ 13"
2 - 1X4 @ 20"
Tools
- measuring tape
- square
- pencil
- hammer
- drill
- level
- countersink drill bit
Step-by-step Instructions
Step 1
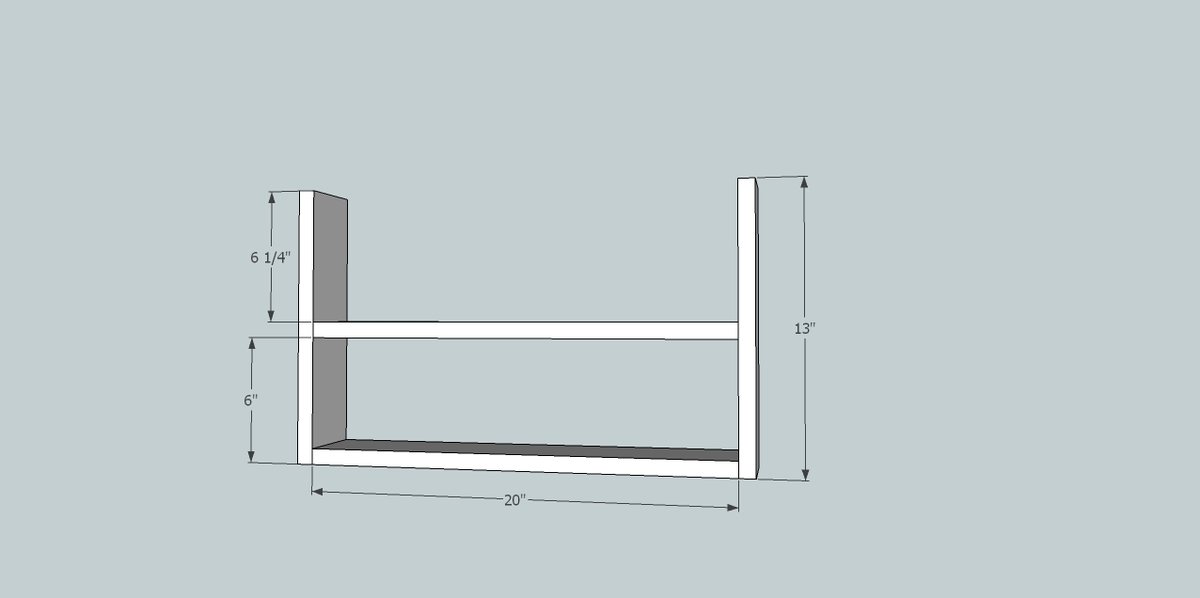
Predrill and countersink holes on both 13" boards. I did three holes across the bottom of each board. Measure up 6 1/4 in. from the bottom edge of each 13" and predrill 2 holes. Now attach the bottom board and the middle board using 2in. screws.
Step 2
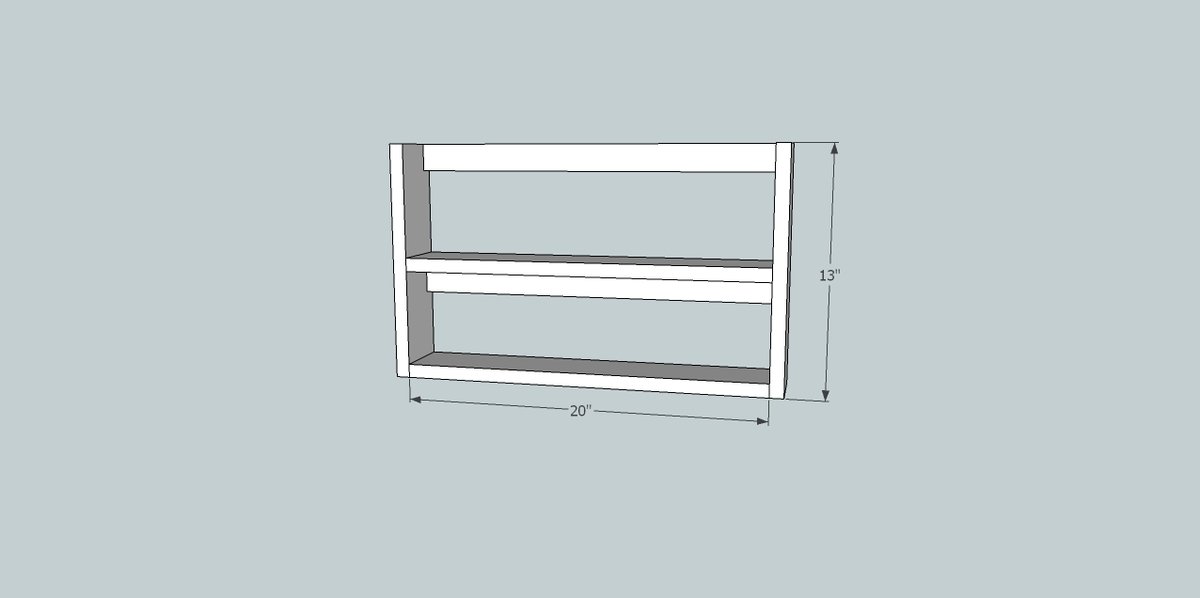
Under the middle shelf I added a 1X2, predrill and screw this into the sides using 2in. screws. Also add a 1X2 at the top of the shelf. Both of these 1 X 2 will be used to attach the unit to the wall.
Step 3
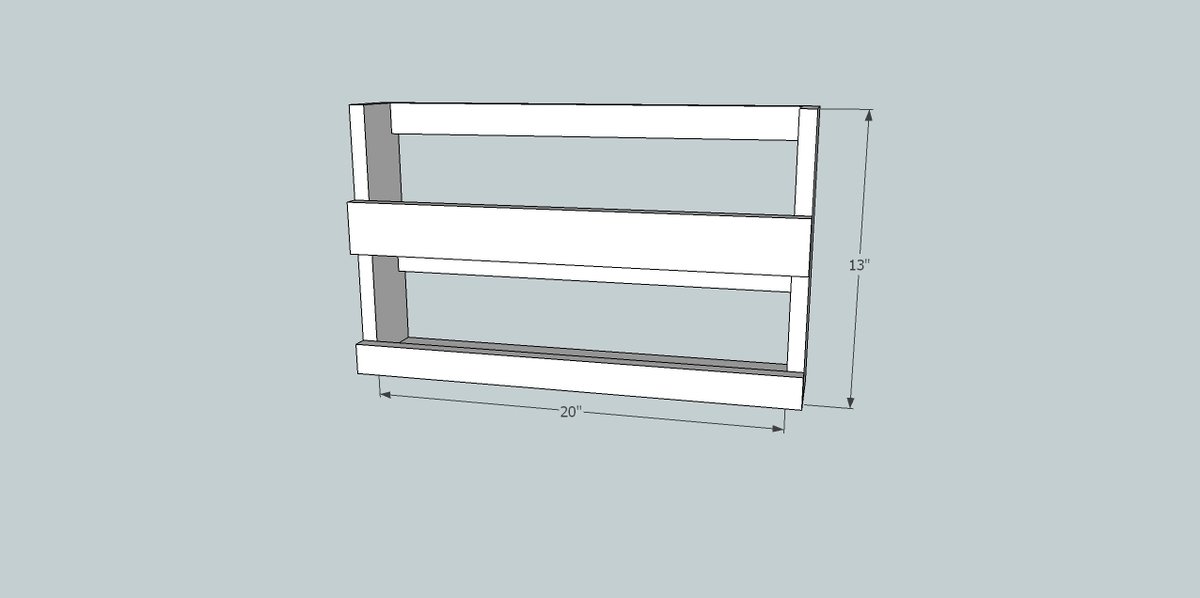
Flush with the bottom edge of the bottom shelf, attach the 1X2@21 1/2" to the front using wood glue and finishing nails. Then attach the 1X3@21 1/2" to the middle shelf in the same manner.
Step 4
Before painting or staining locate the studs on your wall where you will be hanging the unit. You should be able to hang the unit on 2 studs, predrill the holes for the studs on the 1X2 boards. Then proceed to sand and paint as you like. Hopefully my instructions weren't too confusing.
Finishing
Sand all surfaces, starting with a medium grit and finishing with fine. Wipe off the dust, fill any holes or gaps with wood filler, and sand smooth once dry. Apply primer if you're painting, then finish with your choice of paint or stain and seal with a durable clear topcoat. For outdoor projects, use exterior-rated primer, paint or stain, and sealer so the piece stands up to the weather.
Source (temporary): https://www.ana-white.com/woodworking-projects/top-bunk-organizer