Tower Based Master Closet System
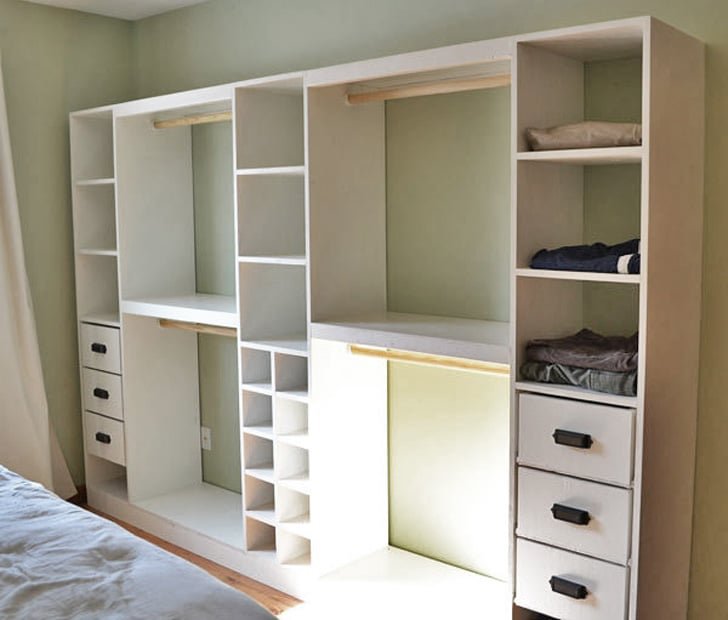
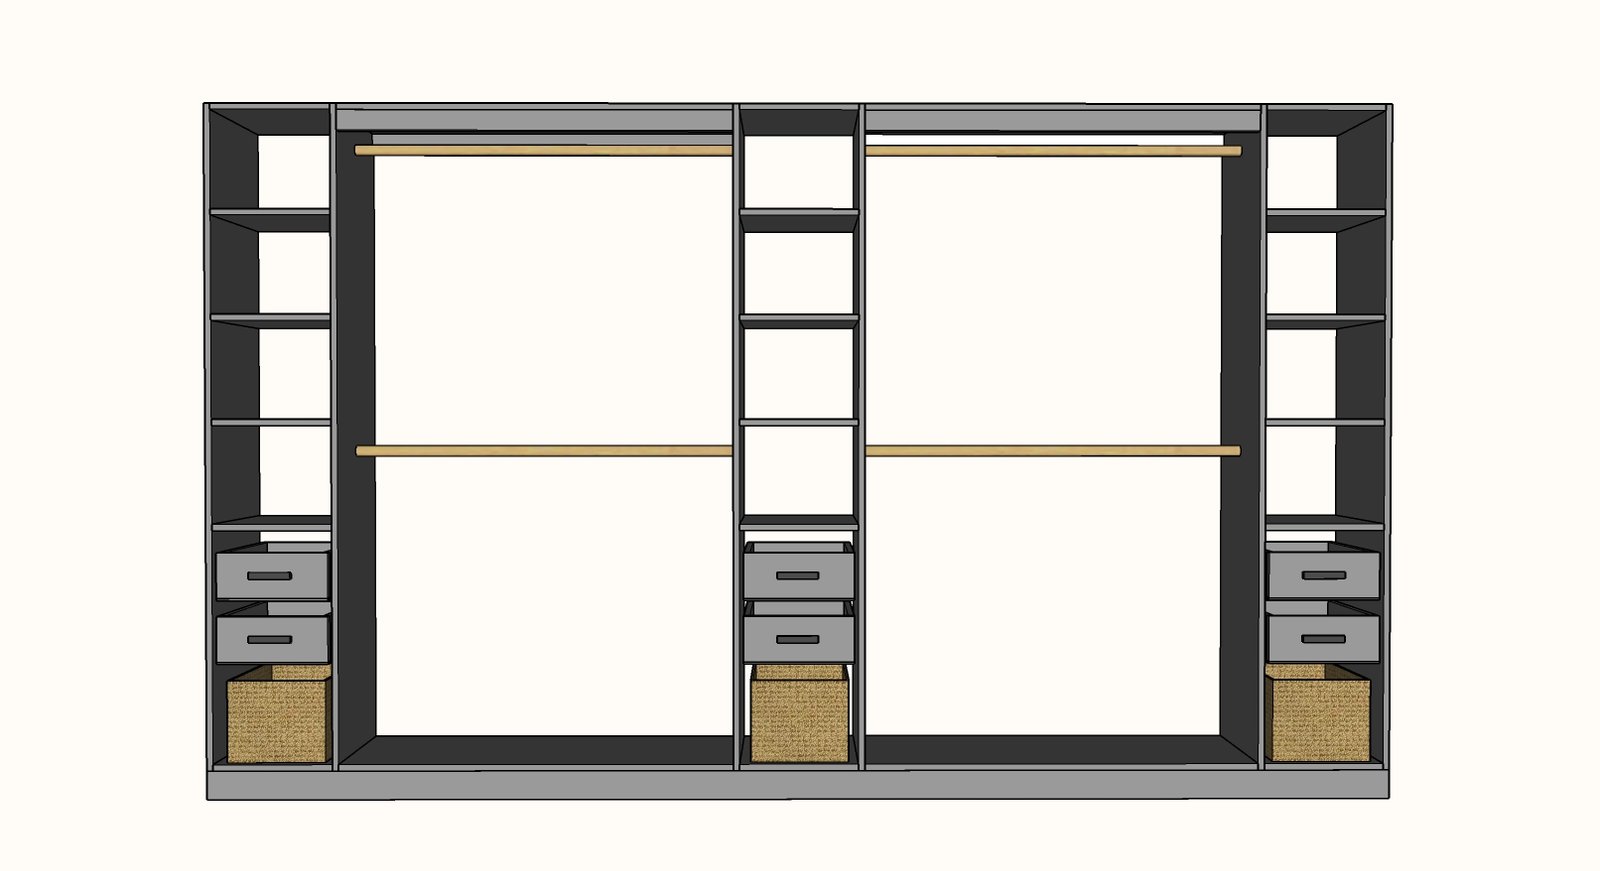
Build your own master closet system. This sturdy, freestanding closet can be customized to suit your space and needs. from
Specifications
| Project type | Home DIY |
|---|---|
| Room | Storage Solutions |
| Style | Cottage Style Furniture Plans |
| Difficulty | Beginner Projects |
| Estimated cost | $150 - $200 |
Dimensions
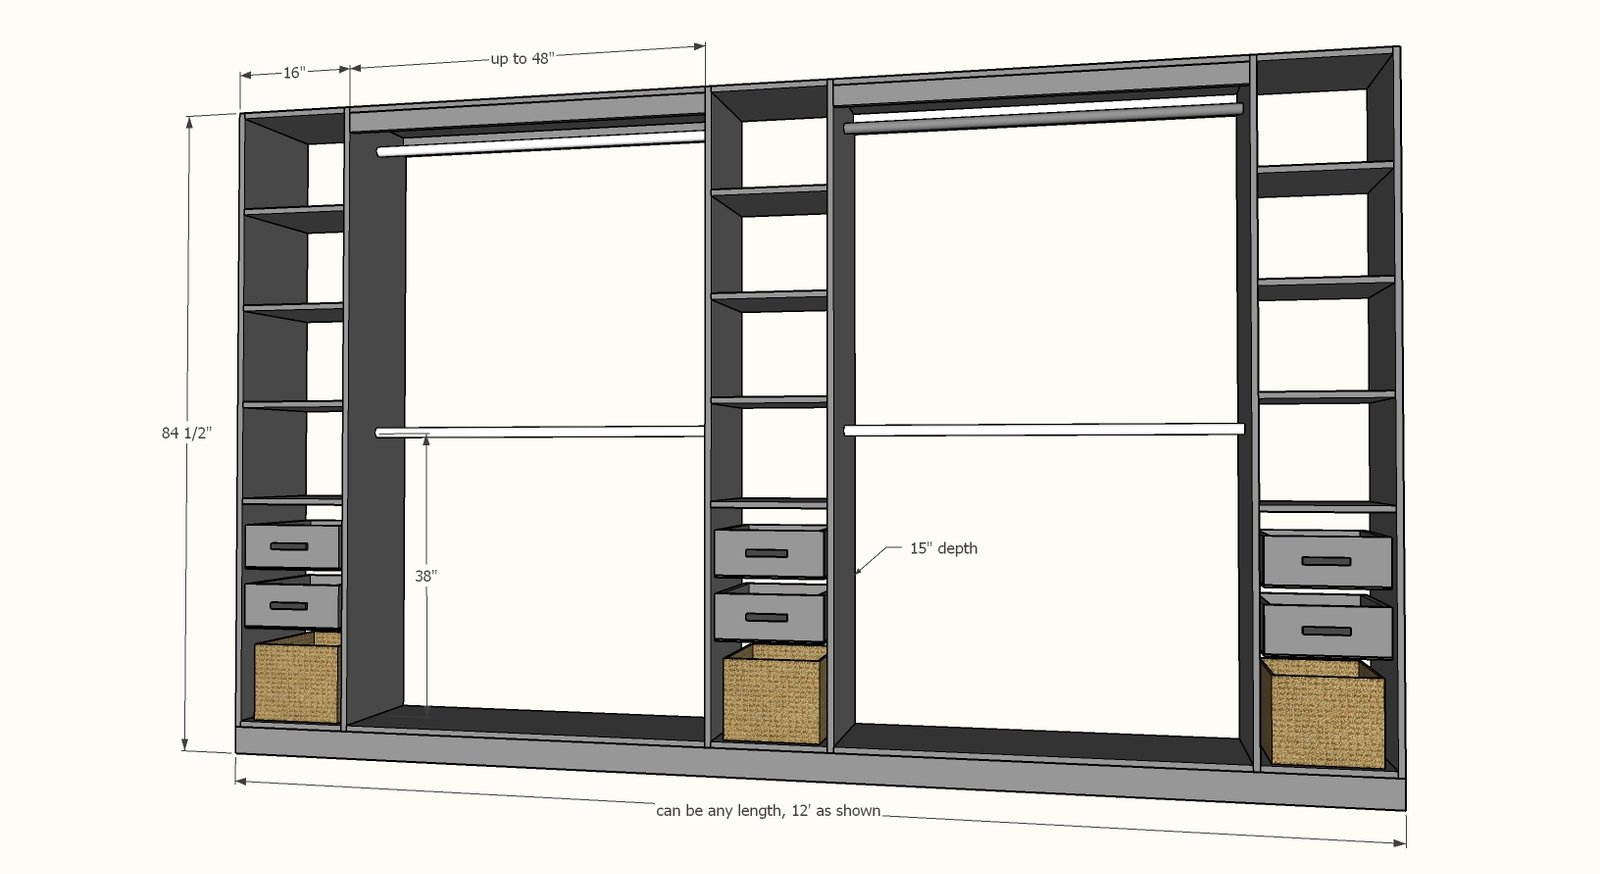
Use the size-specific shopping and cut lists below.
Shopping List
- 4x8 sheet of 3/4" cabinet grade plywood (1 sheet per tower plus an additional sheet for shelving) OR 3/4" thick melamine or particle board shelving like this (about three 8 foot long shelves per tower)
- IF using the melamine strips, you'll need 1x3s for the top shelf supports, one 1x3 per opening, IF using the plywood sheets, there will be an extra scrap about 2-1/2" wide, you can use this scrap for the supports
- 2 - 2x4s (use 2x6s if your base moulding is over 3-1/2" tall) in the entire length of the closet run (as shown in diagram this is 12' long) PLUS 24" for the ends of the base
- 5 feet of 1x6 or 1x8 boards (width of board determines drawer box depth) PER drawer
- 1 set of 14" euro style drawer slides PER drawer
- Closet rod sockets (one set per each run of closet rod)
- Wood closet rods (max run is about 48" without additional support)
- 1-1/4" Kreg Pocket Hole Screws OR 2" self tapping construction screws (#7 or #8)
- 1-1/4" and 3/4" brad nails (can use screws if you don't have a brad nailer)
- 2-3/4" self tapping wood screws (#8 or #9) - you'll just need 8 for building the base but these are good to keep around for a variety of uses and projects, and can also be used to anchor the closet to the wall
- Wood glue
Cut List
Cut list per ONE tower
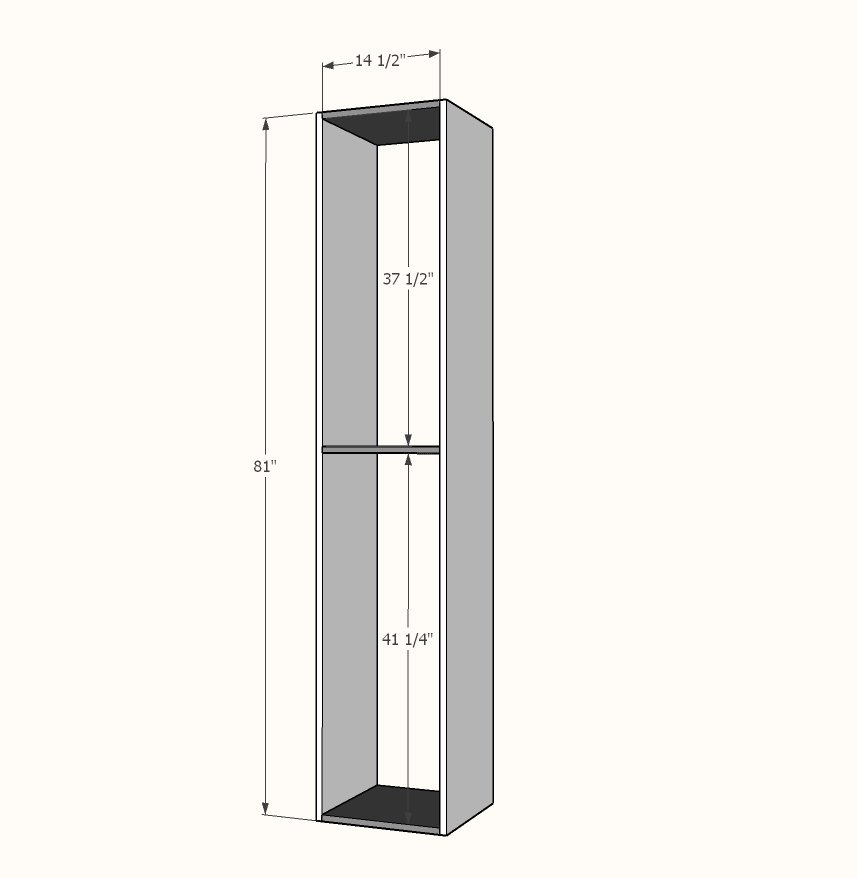
- 2 - 3/4" plywood @ 15" x 81" OR melamine shelf board @ 81" - sides of tower
- 3 - 3/4" plywood @ 15" x 14-1/2" OR melamine shelf board @ 14-1/2" - fixed shelves
- Additional shelves are 3/4" plywood @ 15" x 14-1/2" OR melamine shelf board @ 14-1/2" - additional shelves
Cut list per ONE drawer
- 4 - 1x6 or 1x8 @ 13-1/2"
- 1 - 1/4" plywood @ 13-1/2" x 15"
Cut list for base
- 2 - 2x4 or 2x6 for taller baseboards @ overall length of closet
- 2 - 2x4 or 2x6 for taller baseboards @ 10"
Cuts for Shelves in Between Towers
- 3/4" plywood 15" wide, cut to fit in between the towers on installation
- 1x3 or scrap plywood cut to fit in between the towers on installation
Tools
- measuring tape
- square
- pencil
- safety glasses
- hearing protection
- drill
- circular saw
- nailer
- sander
Step-by-step Instructions
Step 1
Attach the two side boards to the shelf boards. You can use 3/4" pocket holes and 1-1/4" pocket hole screws, or 2" self tapping wood screws, or 1-1/4" brad nails and wood glue. It is important that the center shelf is fixed to keep the closet structural good.
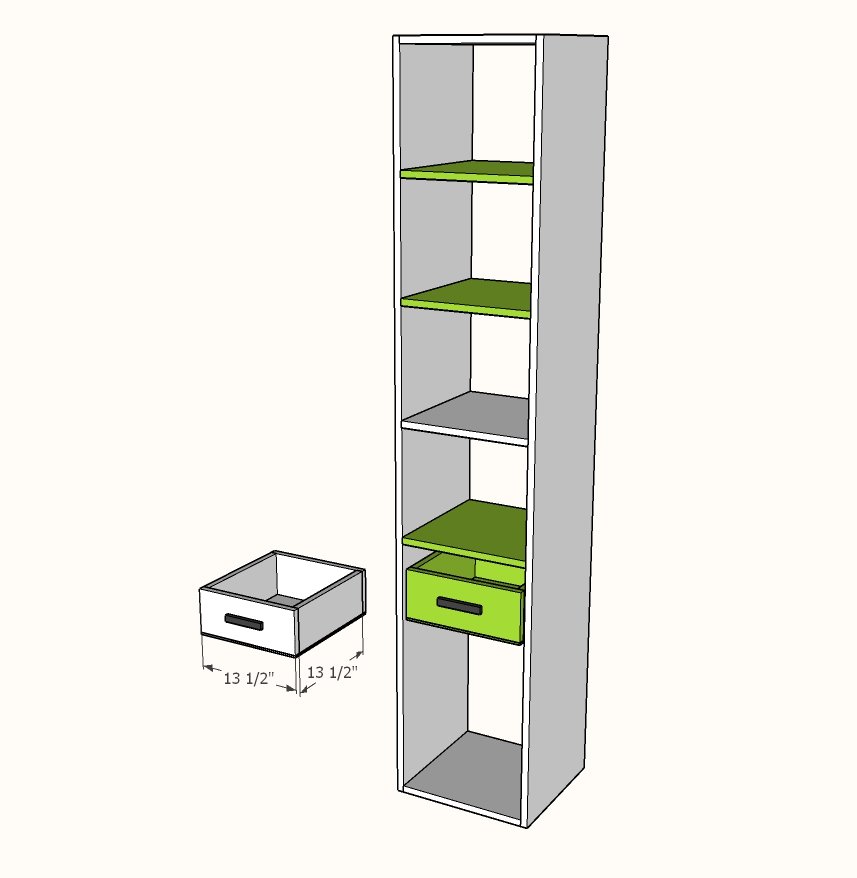
Add additional shelves as desired. As shown, there is a 12" space between the shelves.
For the drawer boxes, build the box first using the same fastener as you used for building the tower. Attach bottom 1/4" plywood with 3/4" brad nails and glue. Install the drawer boxes using the drawer slides. TIP: You may wish to finish the towers at this point.
Cut two 2x4s to the entire desired length of your closet.
Attach with the 2-3/4" screws to the 10" long 2x4s. NOTE: I recommend building the base slightly smaller front to back so that the closet can sit above your base moulding. If you have taller base moulding, consider using a 2x6 for the base frame to bring your closet up above the base moulding. TIP: You may wish to finish the base at this point.
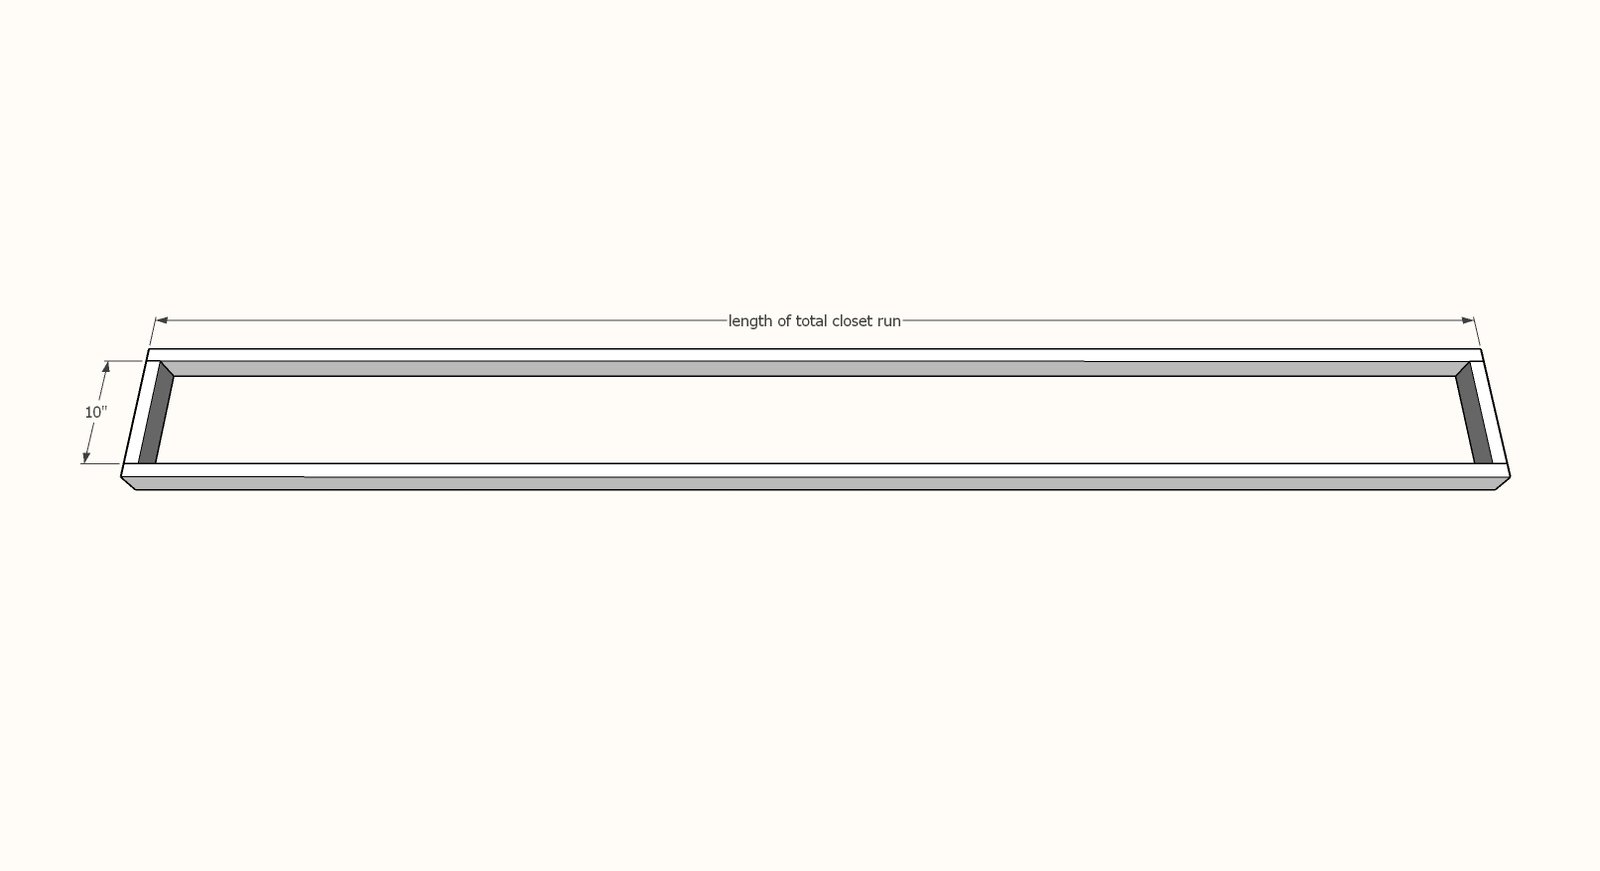
Place base in installation location.
Place the towers on the base, so the towers are flush to the back wall. Screw towers to the bases.
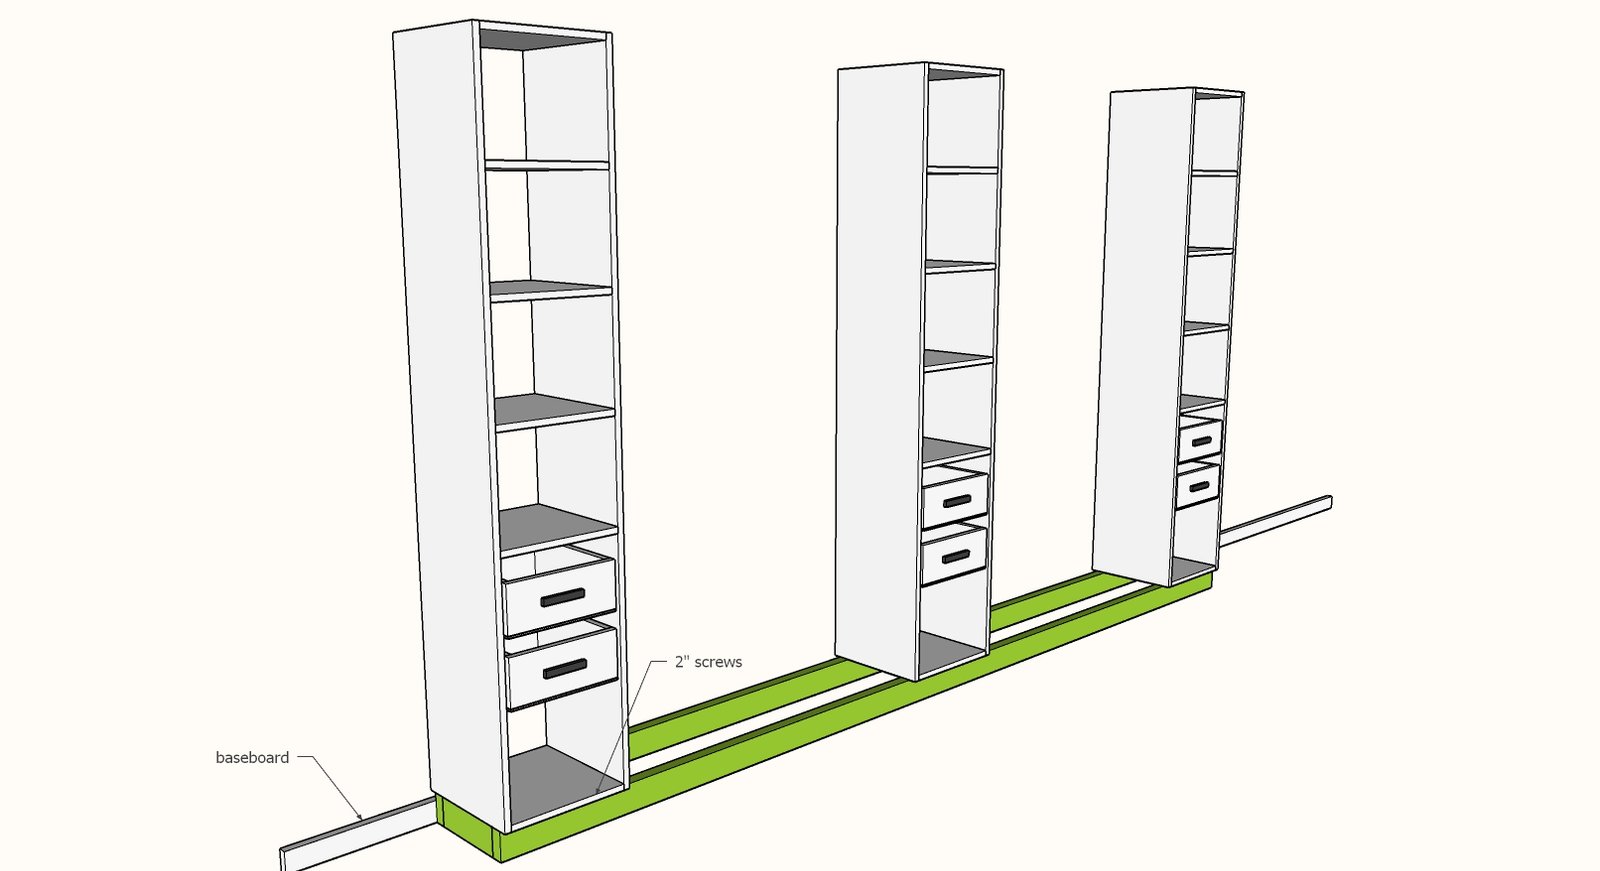
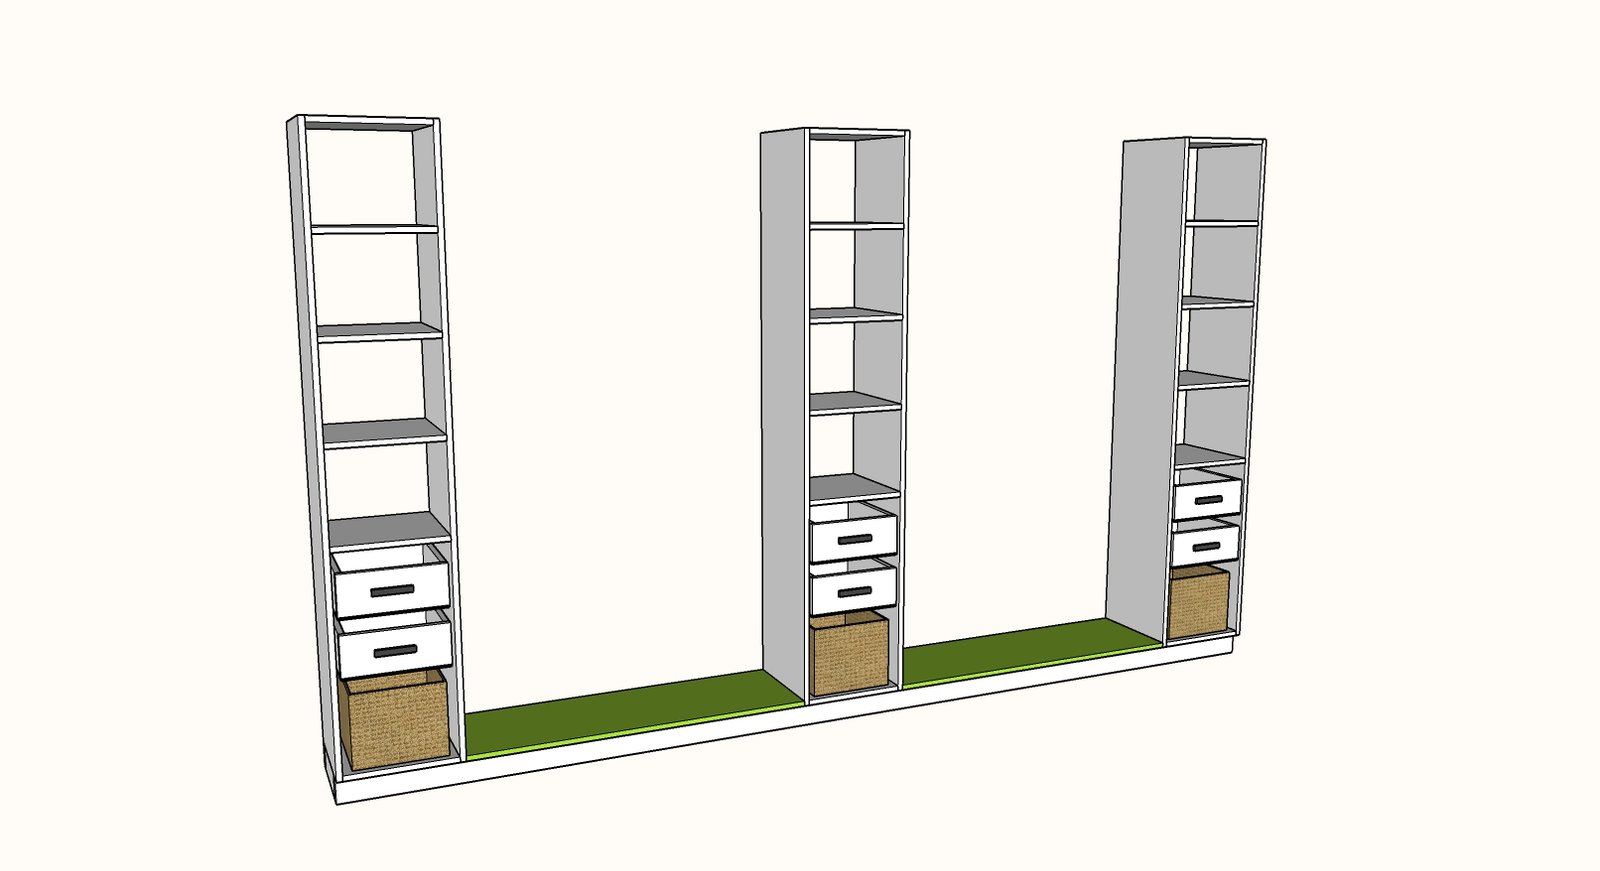
Cut plywood to fit in between towers.
TIP: You may wish to finish the shelves prior to installation. Attach plywood shelves to fit on the bases.
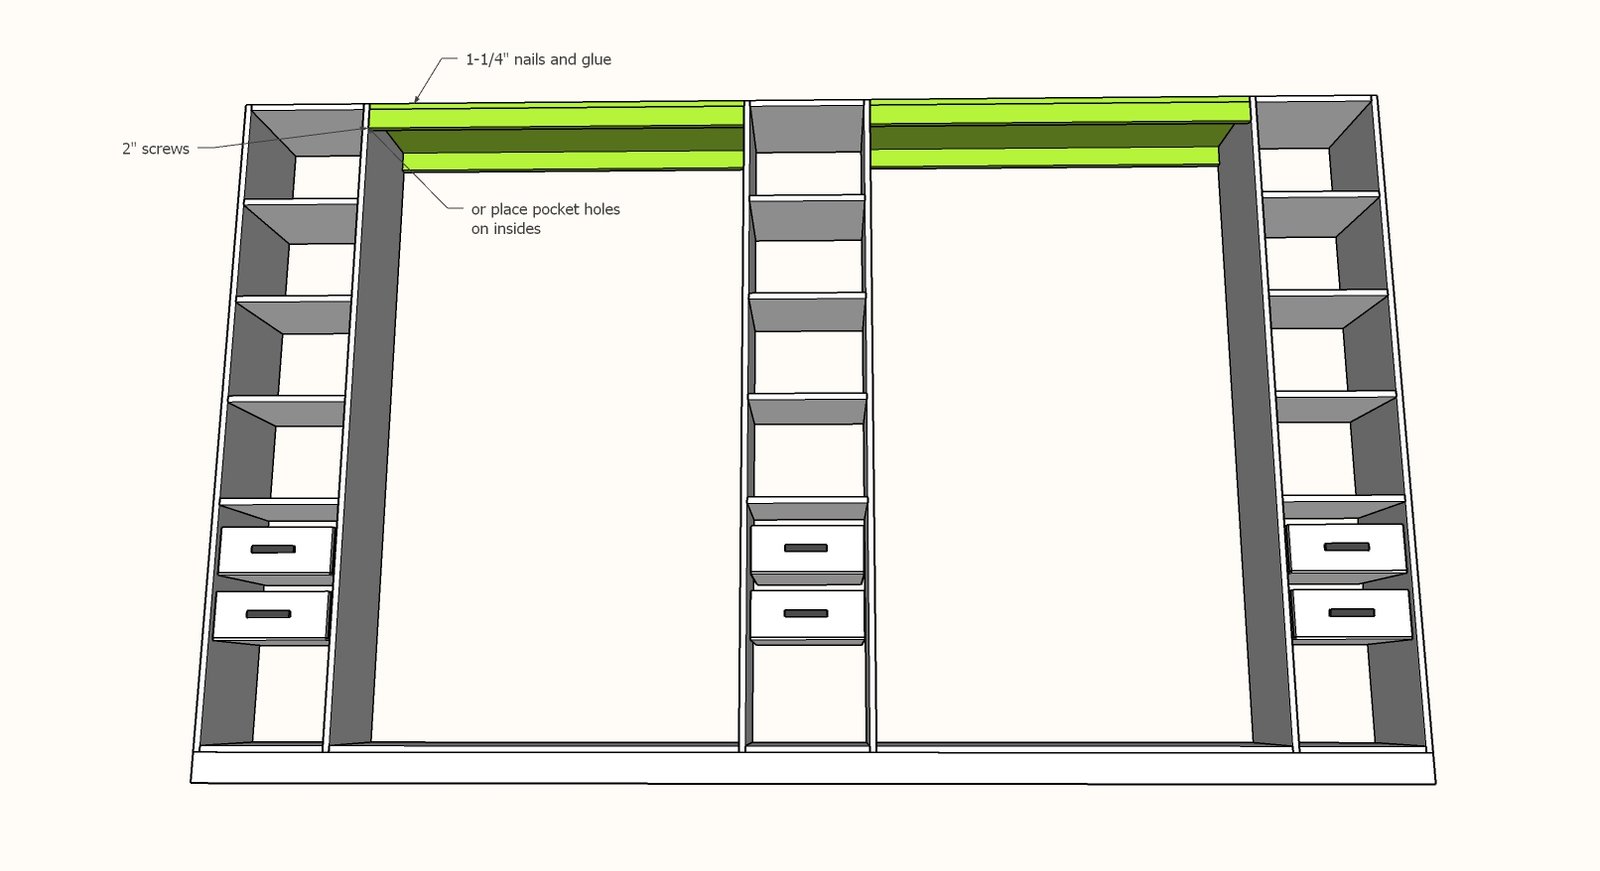
Cut the top shelf boards to width. Cut the supports from plywood or 1x3s.
NOTE: If using pocket holes in the supports drill pocket holes before attaching. Attach shelf to the supports with glue and 1-1/4" brad nails. Attach the top shelves to the towers.
Step 7
Install closet rods between towers.
Finishing
Sand all surfaces, starting with a medium grit and finishing with fine. Wipe off the dust, fill any holes or gaps with wood filler, and sand smooth once dry. Apply primer if you're painting, then finish with your choice of paint or stain and seal with a durable clear topcoat. For outdoor projects, use exterior-rated primer, paint or stain, and sealer so the piece stands up to the weather.
Source (temporary): https://www.ana-white.com/woodworking-projects/tower-based-master-closet-system