Toy Barn with Stables
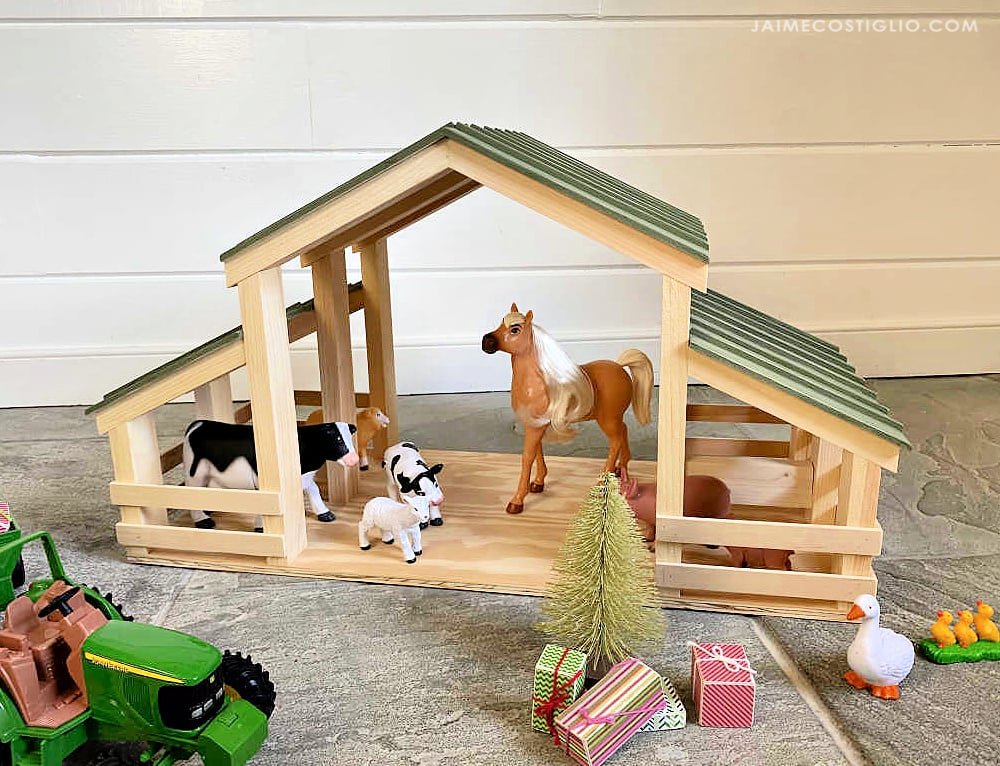
to build your own toy barn! This toy barn features an open style, so it's easy to play with horses or farm animals. This is an easy build and makes a great gift. More photos and build tips from Jaime Costiglio
Specifications
| Project type | Toys |
|---|---|
| Room | Kids and Toys |
| Difficulty | Intermediate |
Dimensions
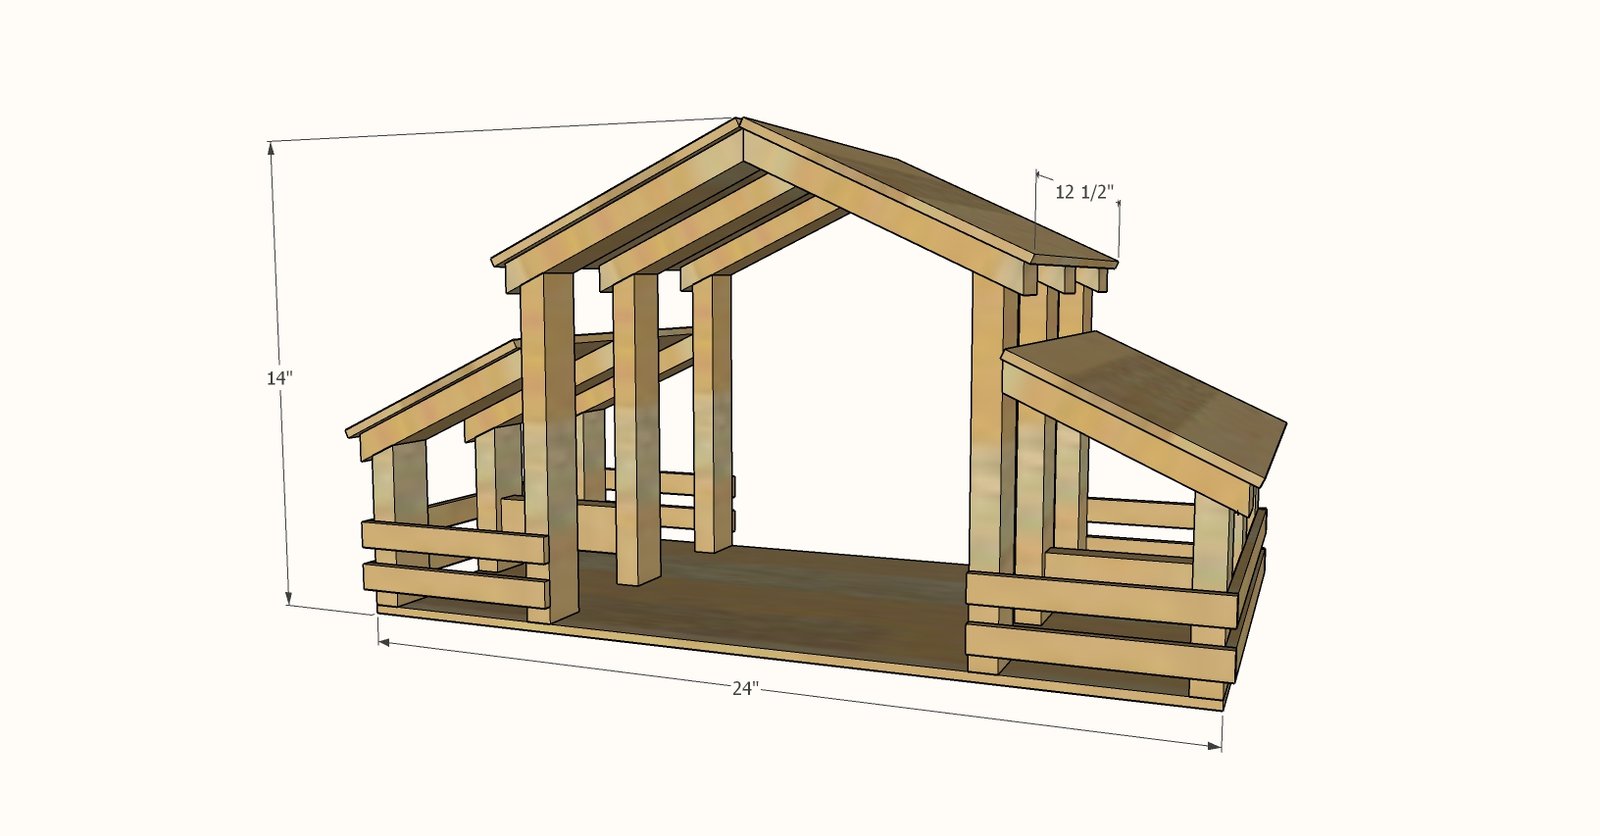
Use the size-specific shopping and cut lists below.
Shopping List
- 1 - 1/4" plywood panel, 24" x 48"
- 2 - 1x2 @ 8 feet long (can also use 3/4" x 3/4" square dowels)
- 1-1/4" and 5/8" brad nails
- wood glue
Cut List
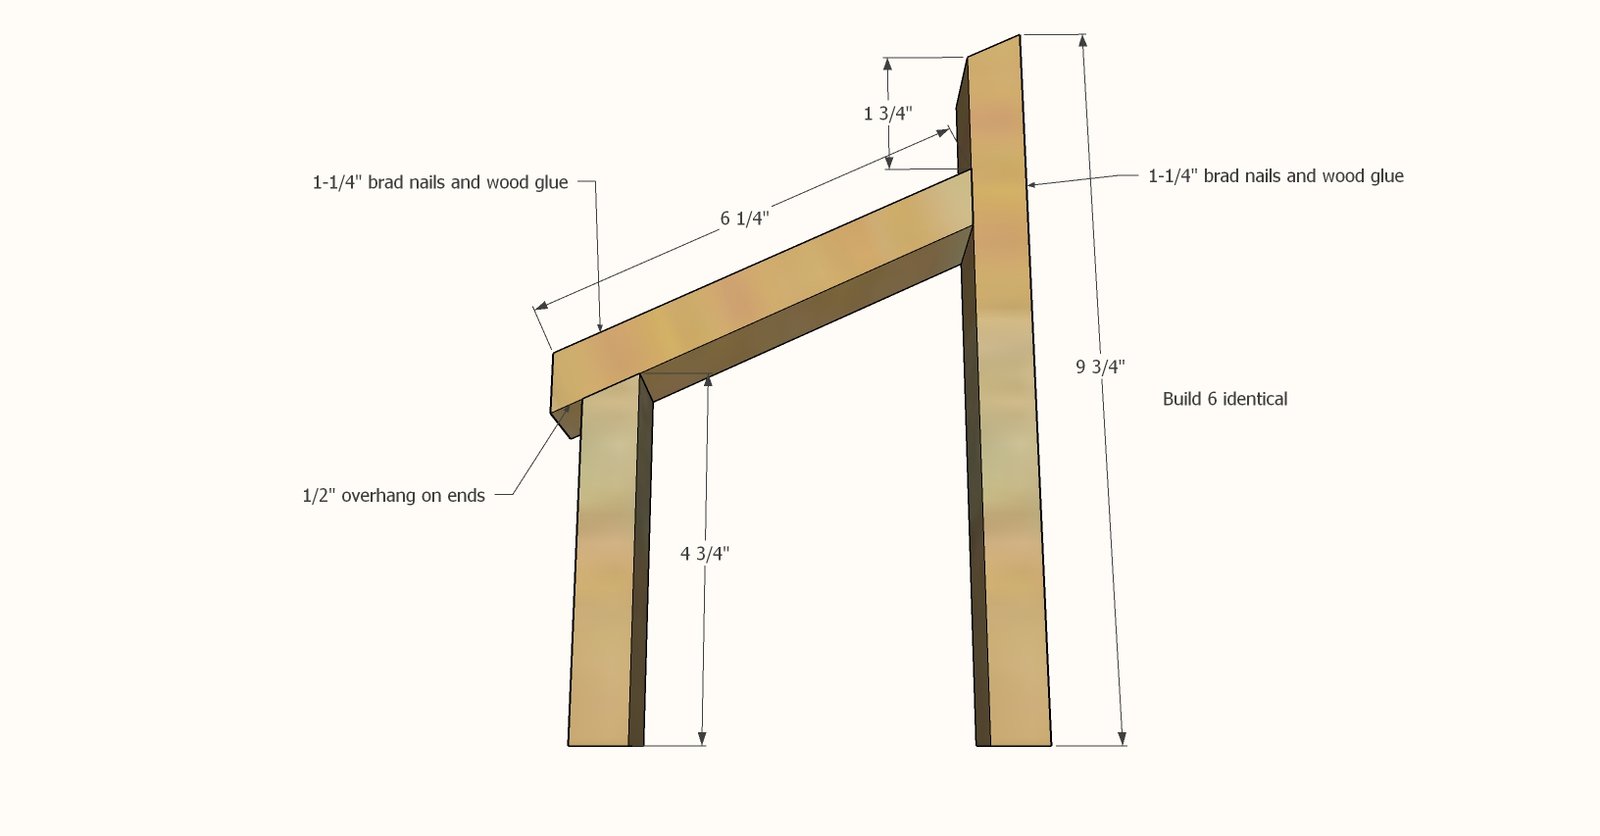
- 6 - 1x2 @ 9-3/4" - one end cut at 25 degrees off square, long point measurement
- 6 - 1x2 @ 6-1/4" - both ends cut at 25 degrees off square, long point to short point measurement, ends are parallel
- 6 - 1x2 @ 4-3/4" - one end cut at 25 degrees off square, long point measurement
- 6 - 1x2 @ 8" - both ends cut at 25 degrees off square, long point to short point measurement, ends are parallel
- 2 - 1x2 @ 4-1/2" - center stall divider
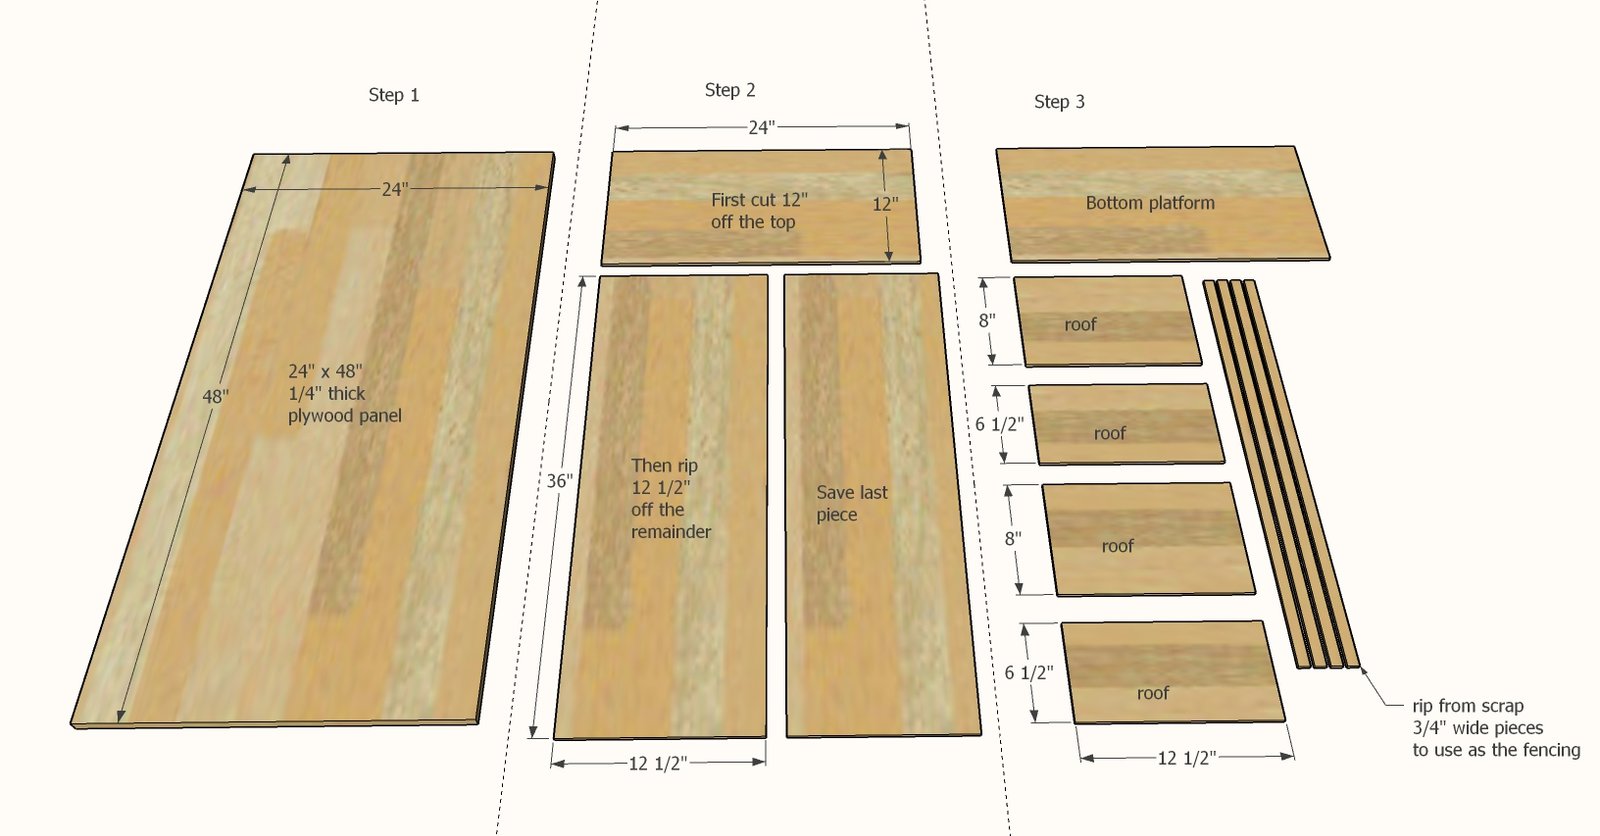
- 1 - 1/4" plywood @ 12" x 24" - bottom
- 4 - 1/4" plywood @ 3/4" x 12" - railing
- 8 - 1/4" plywood @ 3/4" x 6-1/4" - railing
- 2 - 1/4" plywood @ 8" x 12-1/2" - top roof
- 2 - 1/4" plywood @ 6-1/2" x 12-1/2" - side roof
Tools
- measuring tape
- square
- safety glasses
- circular saw
- nailer
- sander
Step-by-step Instructions
Step 1
Break the 24" x 48" plywood panel down by cutting the floor piece off first, then the roof panel piece. Save the scrap. Then cut the roof panel piece down into the smaller roof pieces. Rip some strips of 1/4" plywood for the railing (or you can use craft wood pieces for the railing if you can't rip this small).
Step 2
Build the outer wall sections first. Build six identical.
Step 3
Add the roof pieces to the outer walls to make three.
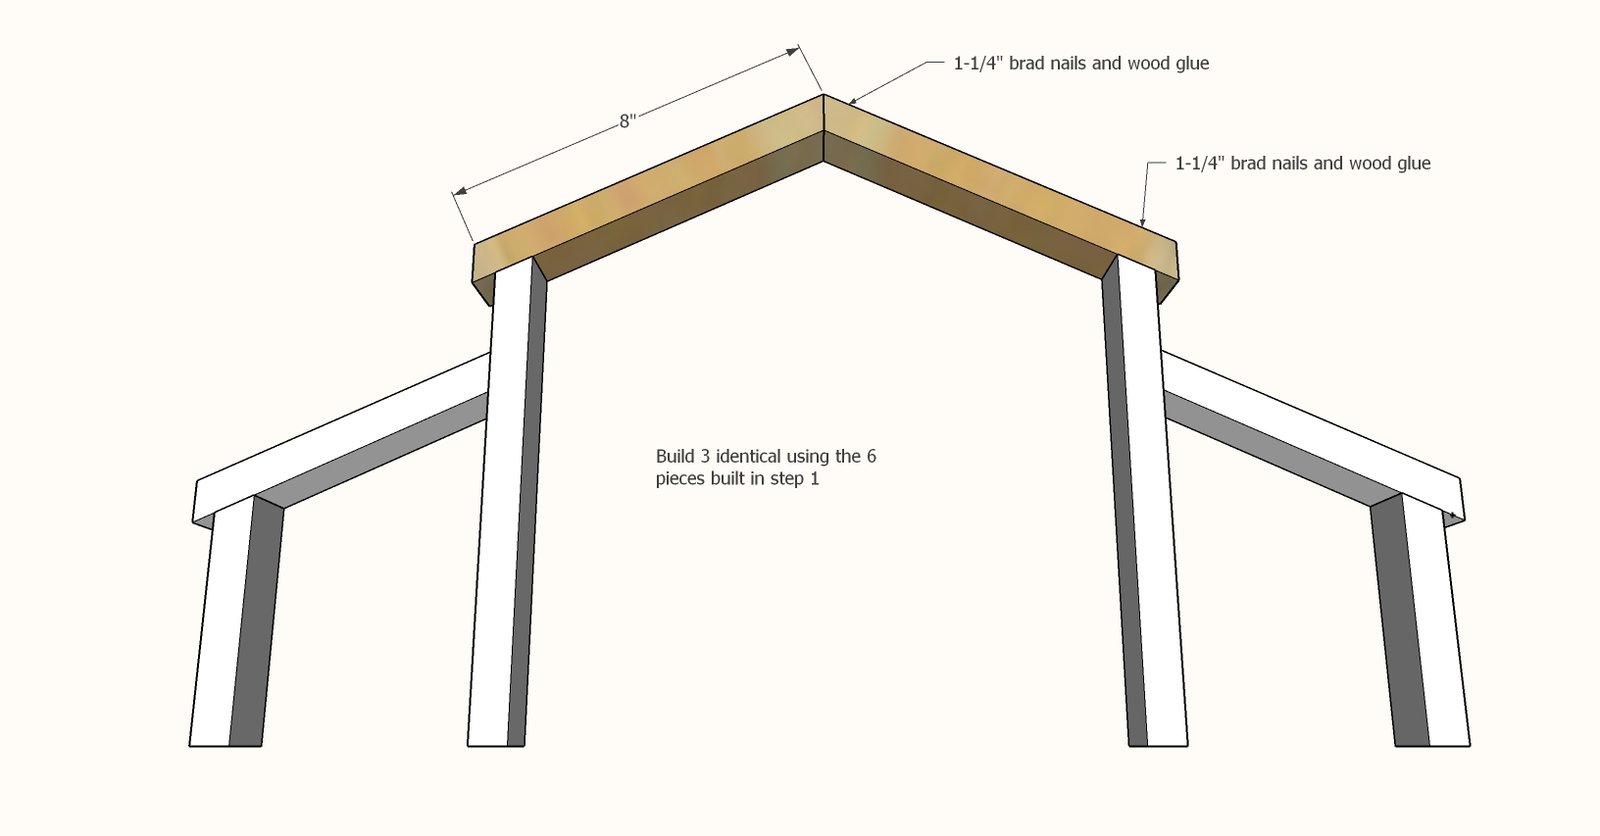
Step 4
For the center walls, if you want to add a divider between stalls, do this now.
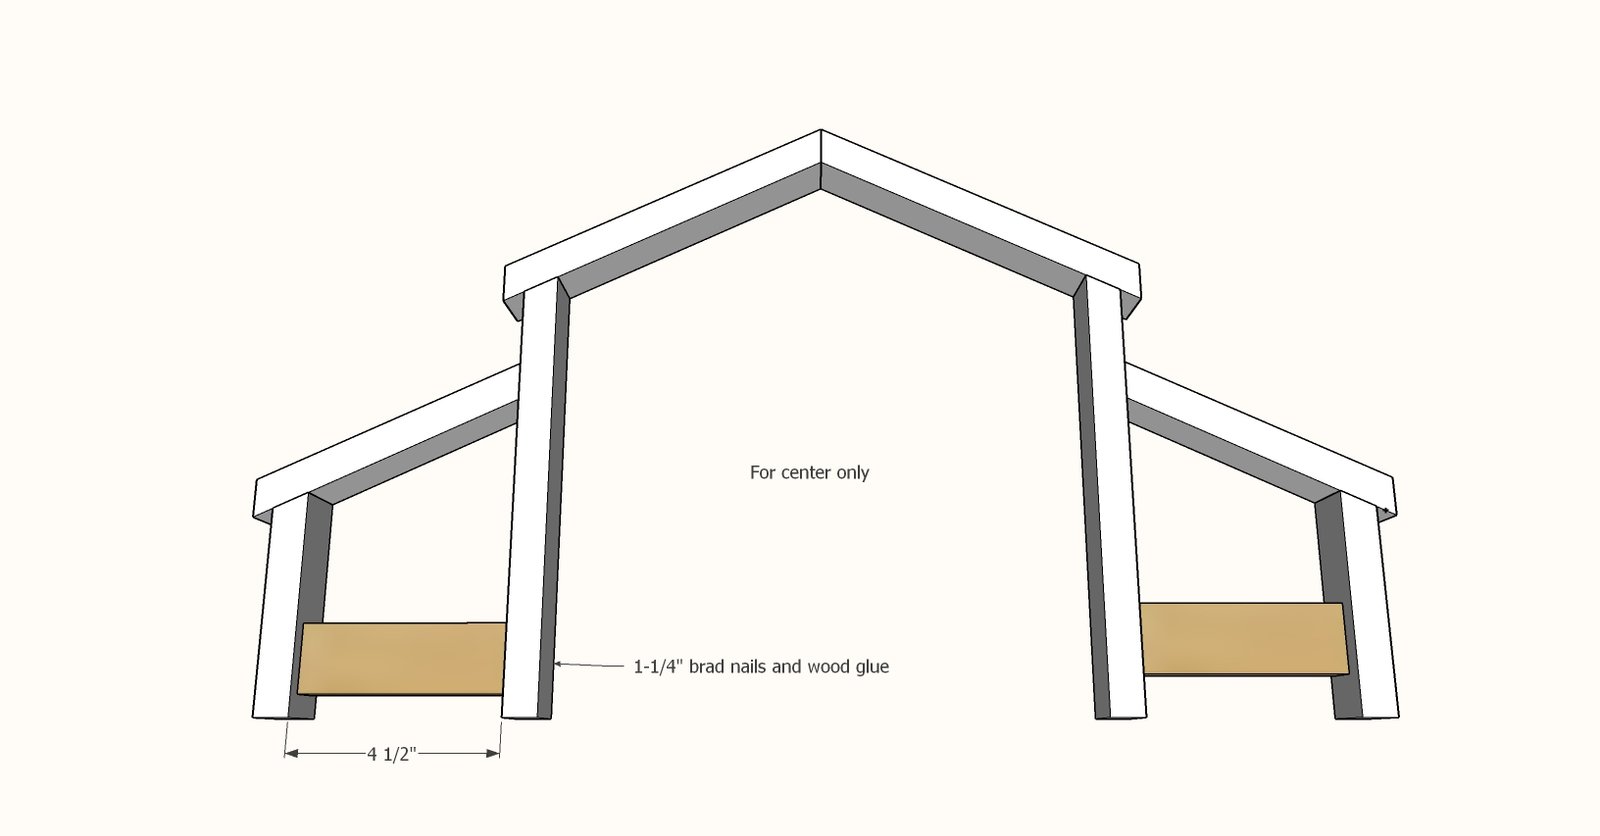
Step 5
Attach floor to one wall.
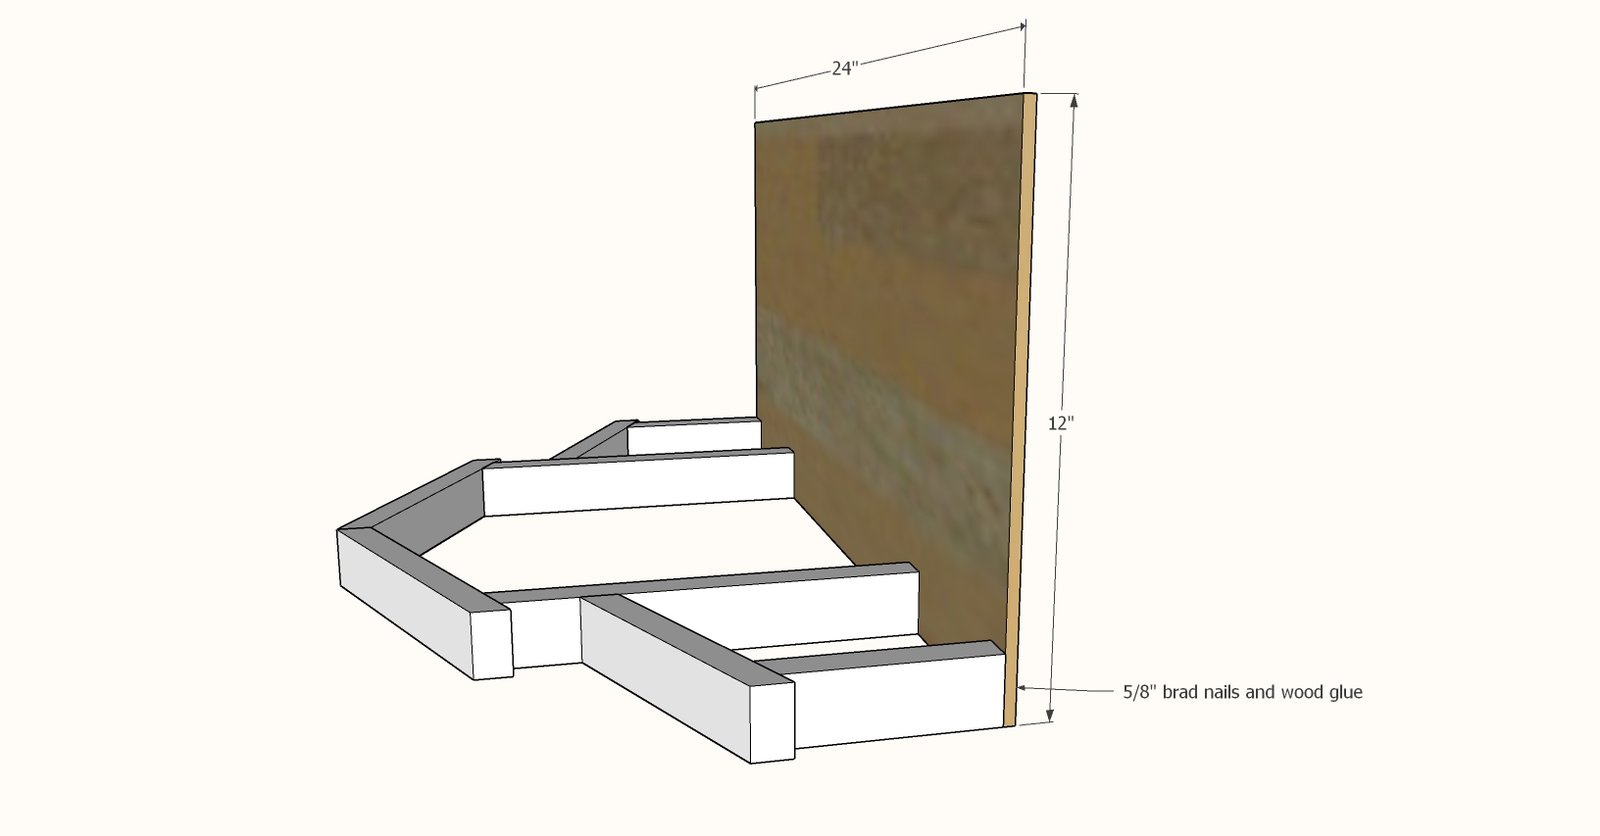
Step 6
Attach other outside wall.
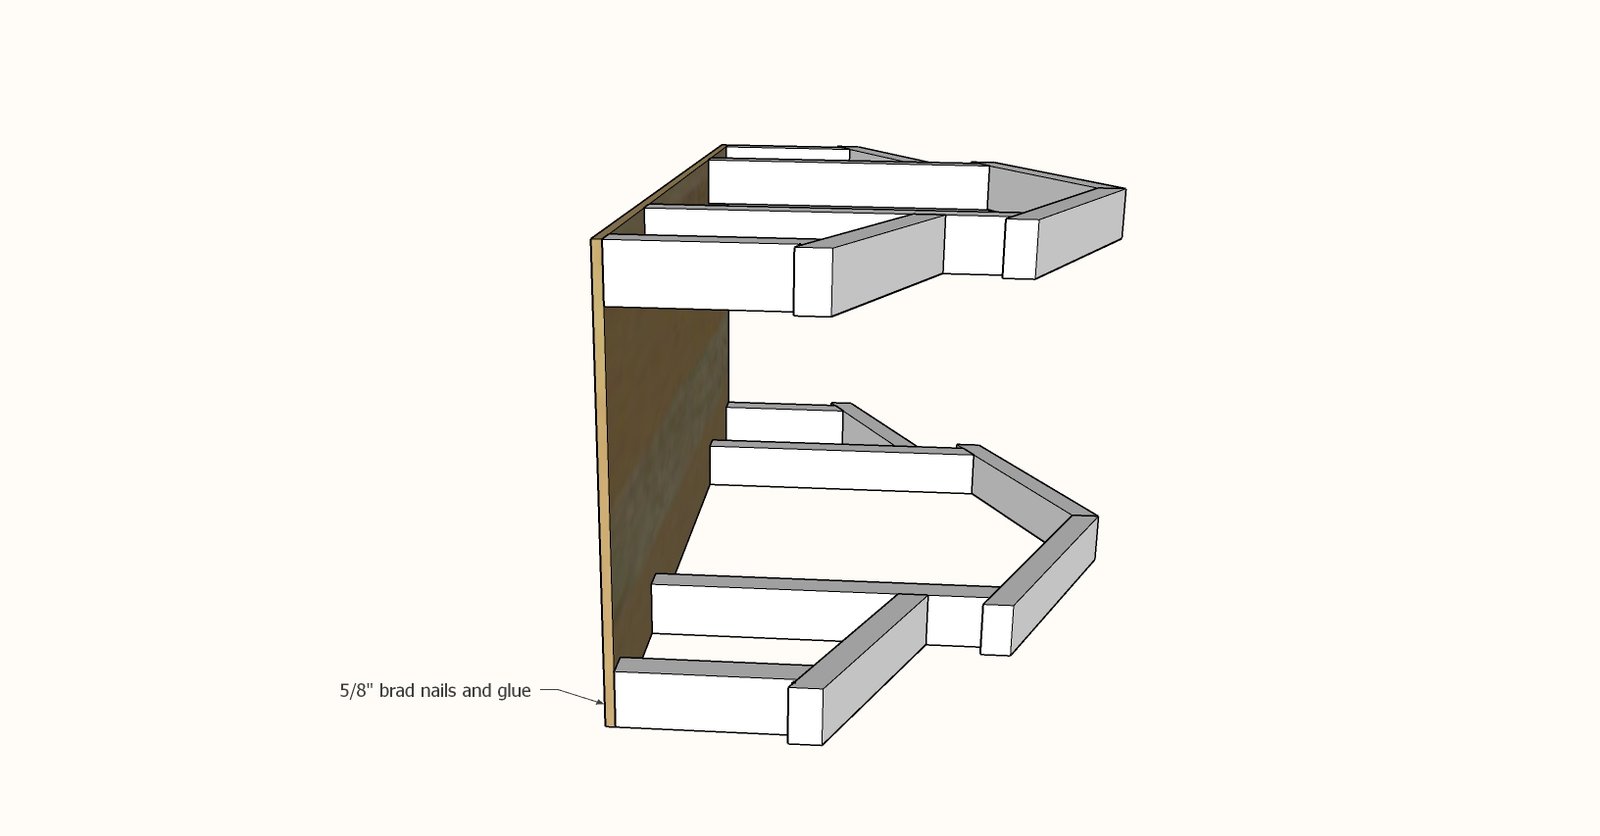
Step 7
Position the remaining wall in the center and attach.
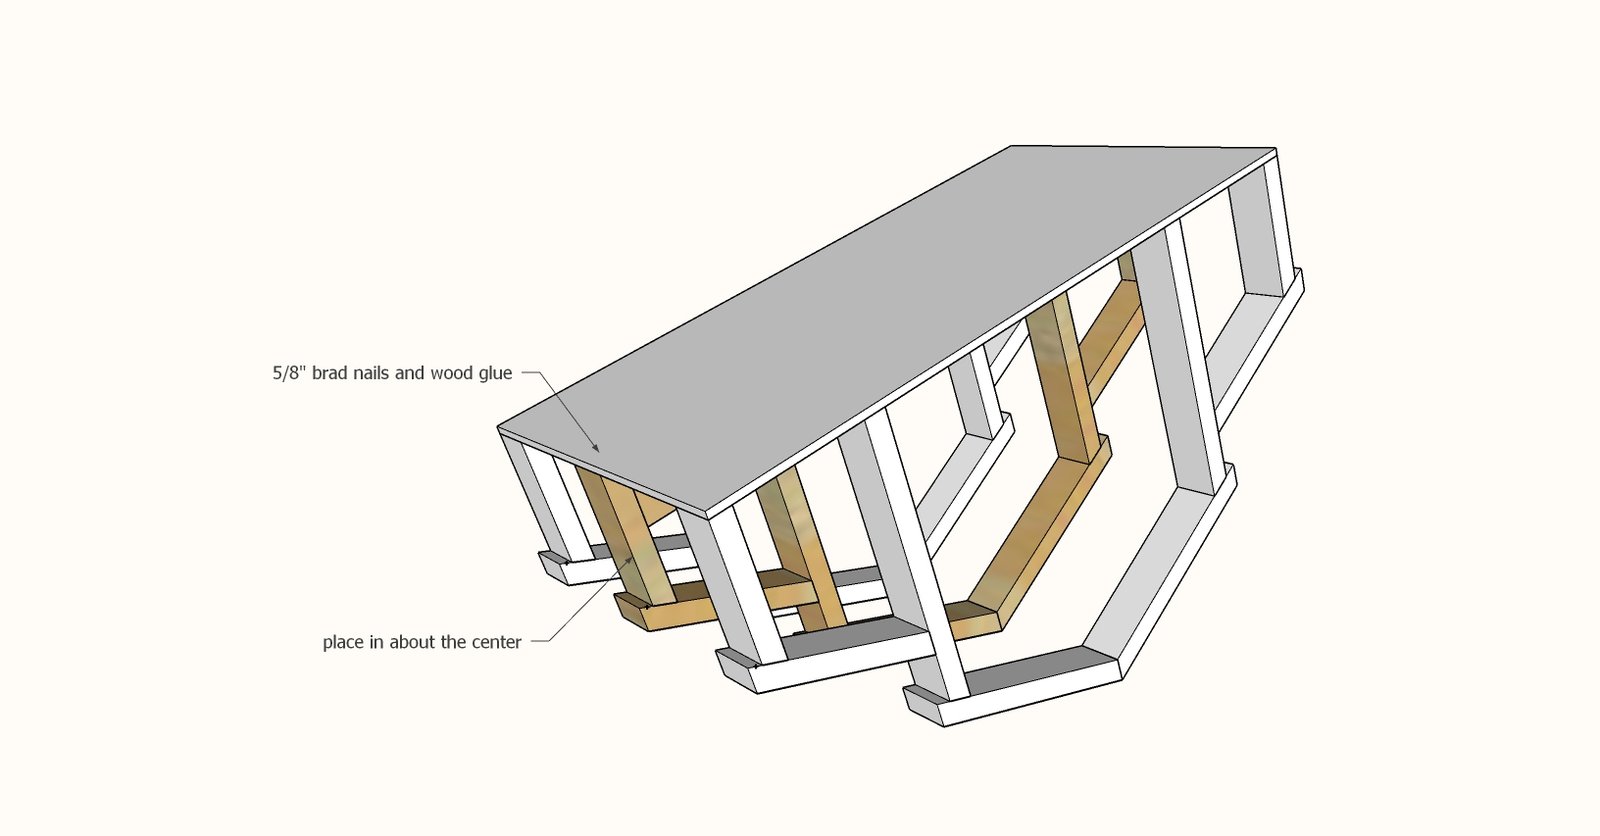
Step 8
Add railing to the outside.
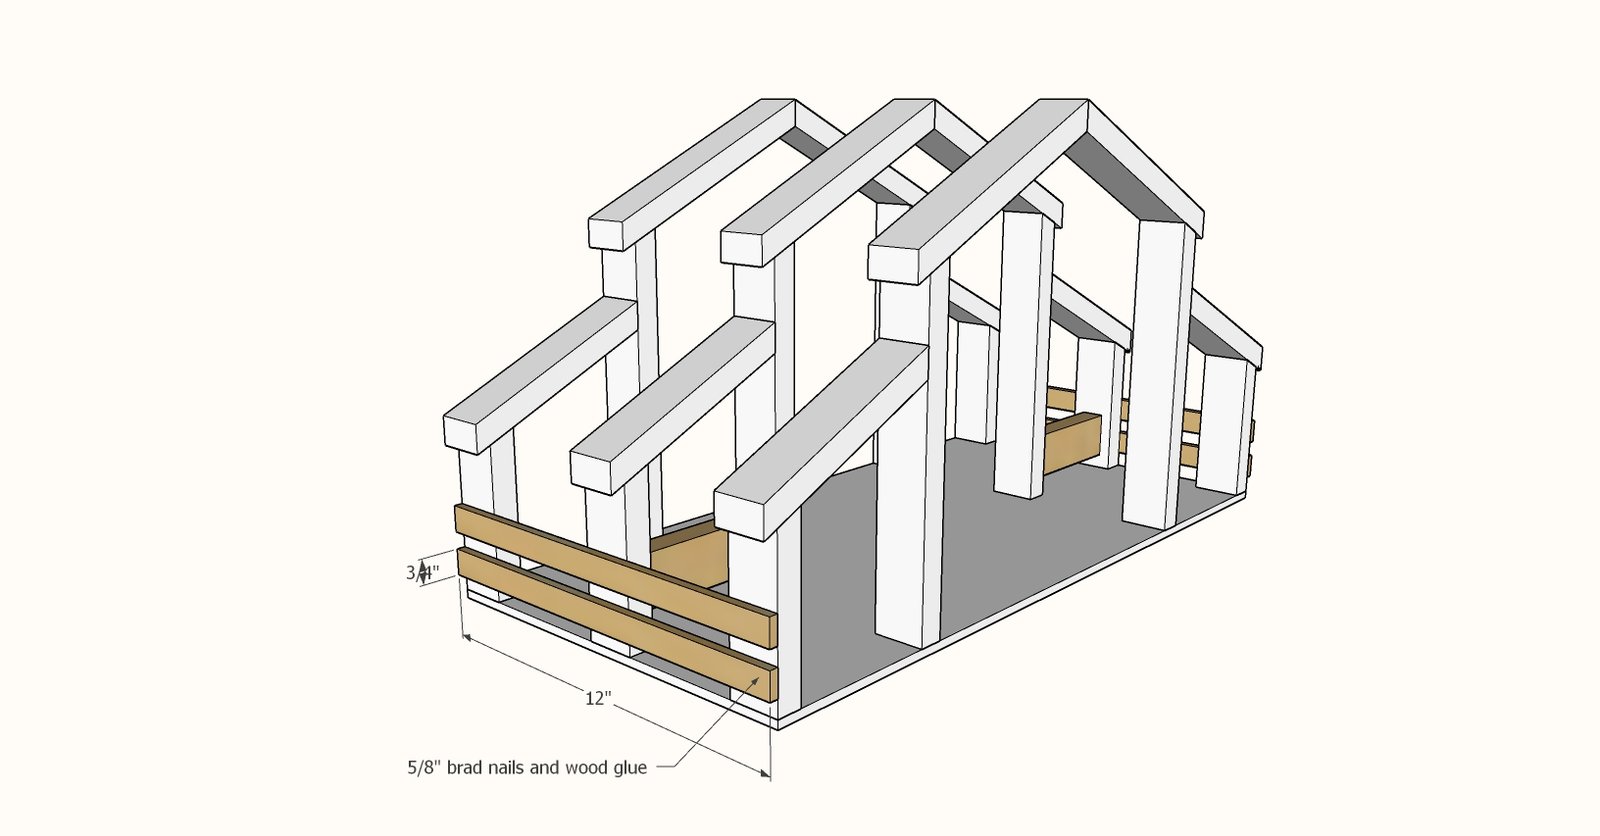
Step 9
Add railing to the front and back.
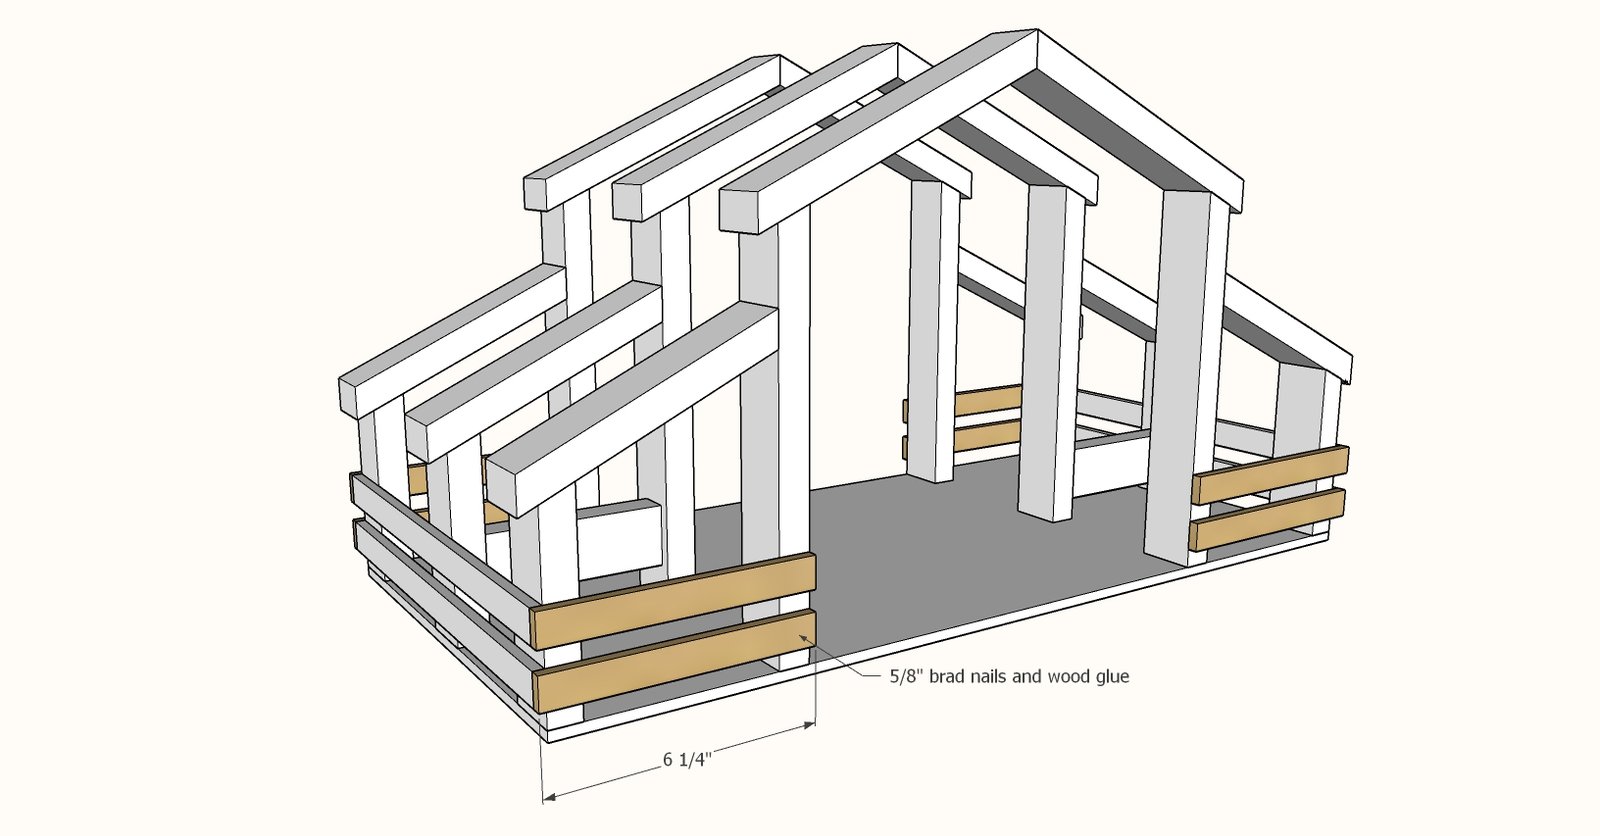
Step 10
Attach roof panels, there will be a slight overhang on ends.
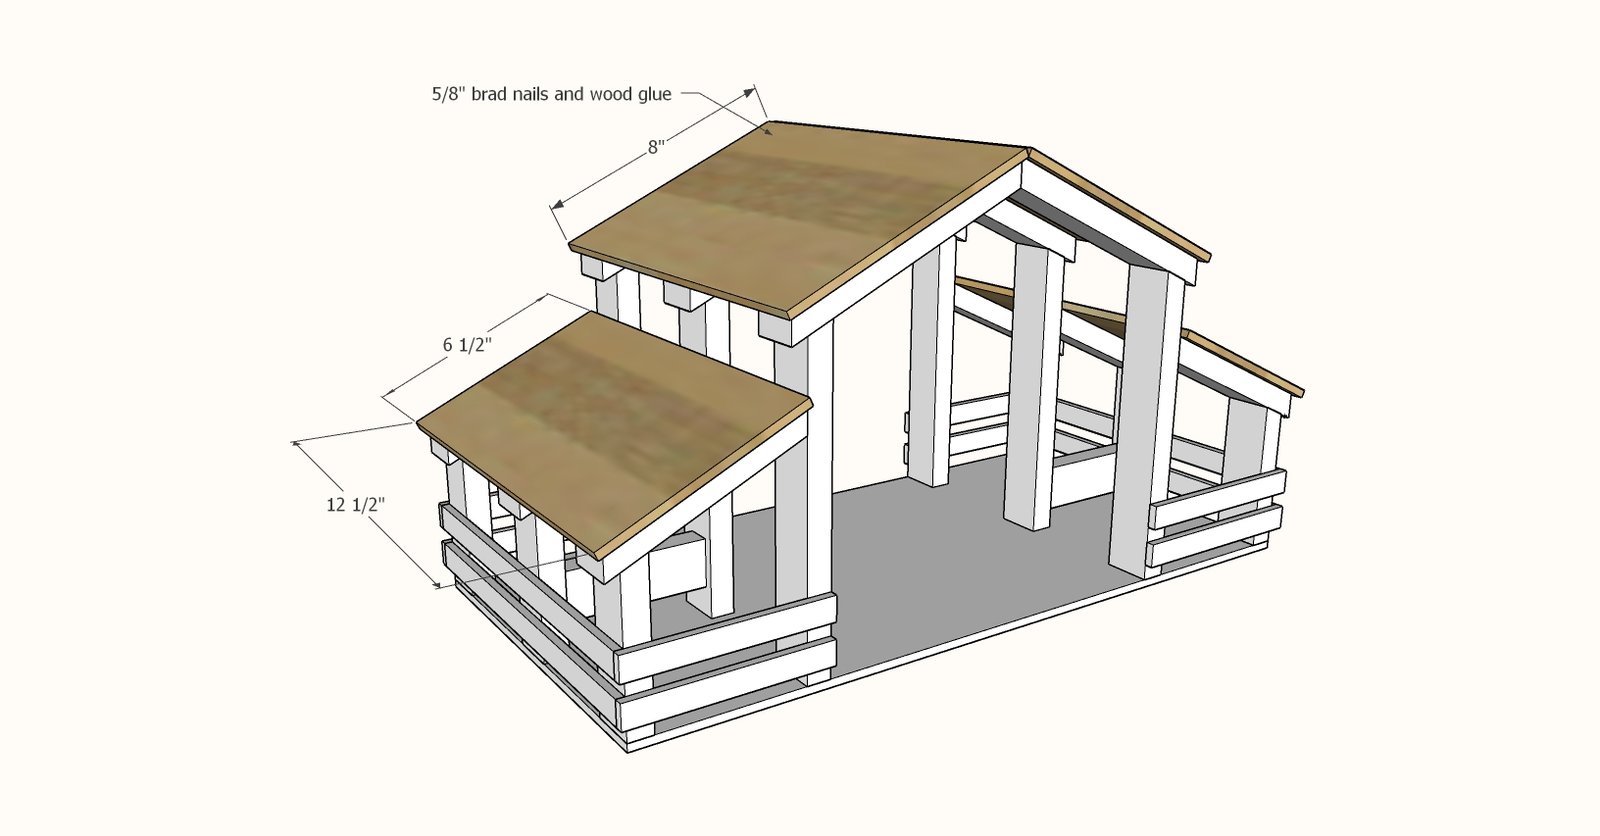
Finishing
Sand all surfaces, starting with a medium grit and finishing with fine. Wipe off the dust, fill any holes or gaps with wood filler, and sand smooth once dry. Apply primer if you're painting, then finish with your choice of paint or stain and seal with a durable clear topcoat. For outdoor projects, use exterior-rated primer, paint or stain, and sealer so the piece stands up to the weather.
Source (temporary): https://www.ana-white.com/woodworking-projects/toy-barn-stables