Toy Bunny Hutch
Adorable pretend play bunny hutch build
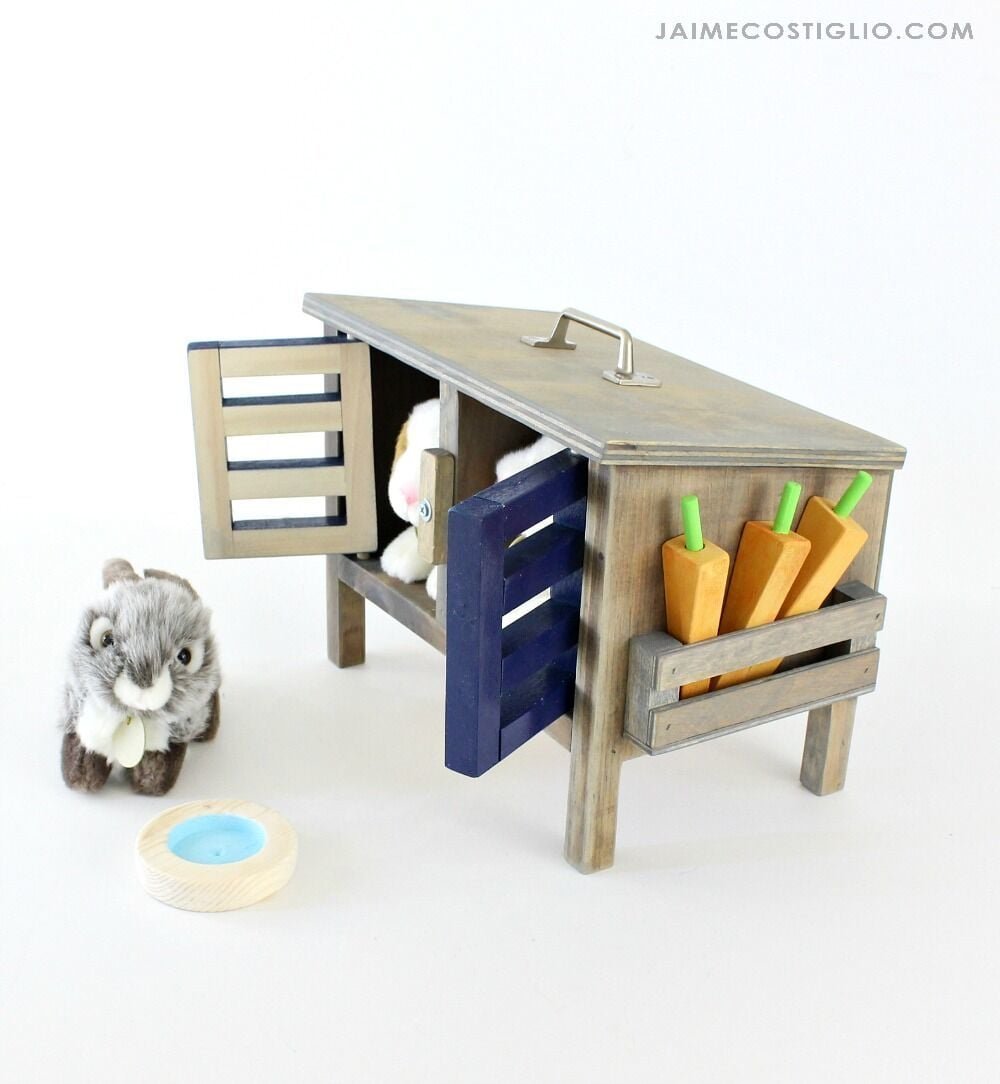
Specifications
| Project type | Toys |
|---|---|
| Room | Kids and Toys |
| Style | Farmhouse Furniture |
| Difficulty | Intermediate |
Dimensions
Use the size-specific shopping and cut lists below.
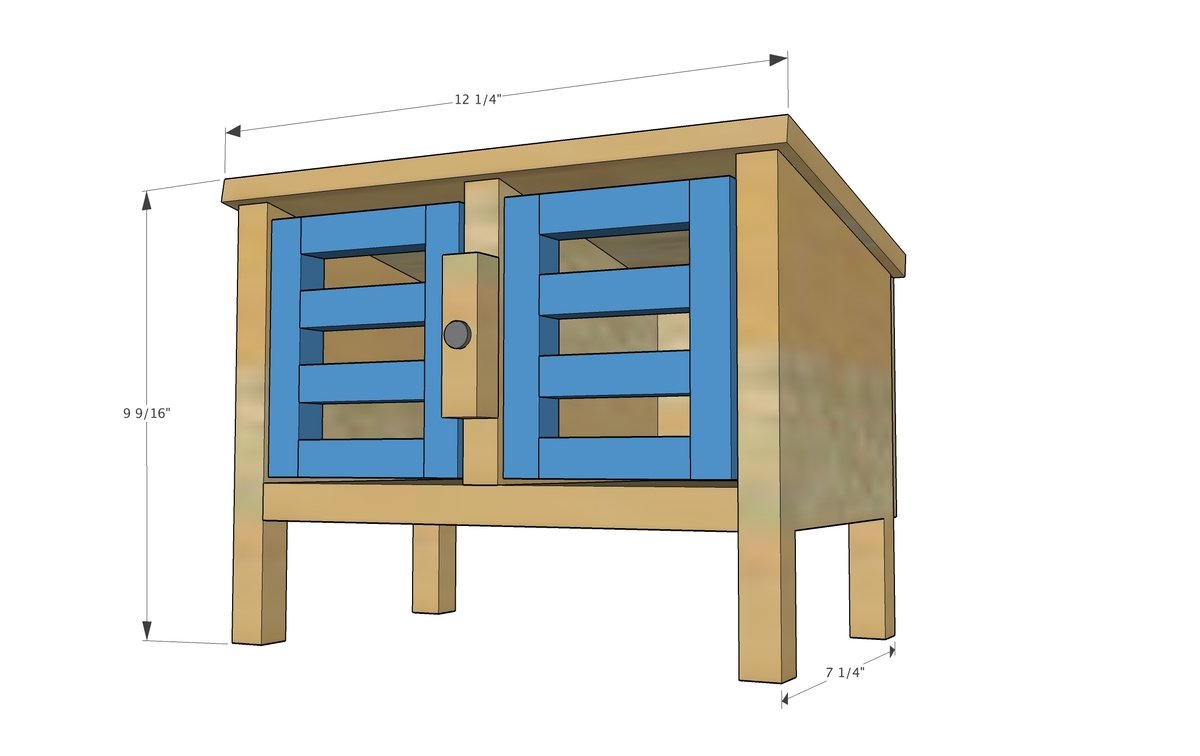
Shopping List
1 - 1x8 @ 3 feet long
1 - 1x1 @ 4 feet long
1 - 1/2" plywood @ 8" x 12-1/4"
1 - 1/4" plywood @ 5-1/4" x 11-3/4"
Small wood dowels (1/4" diameter)
See steps for fastener recommendations
Cut List
2 - 1x8 @ 9" - longest point measurement, one end cut at 10 degrees off square
1 - 1x8 @ 10-1/4"
1 - 1x8 @ 5-3/4" - longest point measurement, one end cut at 10 degrees off square
4 - 1x1 @ 5- 1/4"
8 - 1x1 @ 3"
1 - 1/2" plywood @ 8" x 12-1/4"
1 - 1/4" plywood @ 5-1/4" x 11-3/4"
Tools
- measuring tape
- square
- pencil
- safety glasses
- hearing protection
- drill
- jigsaw
- compound miter saw
- nailer
- countersink drill bit
Step-by-step Instructions
Step 1
From side pieces, cut out bottom with jigsaw.
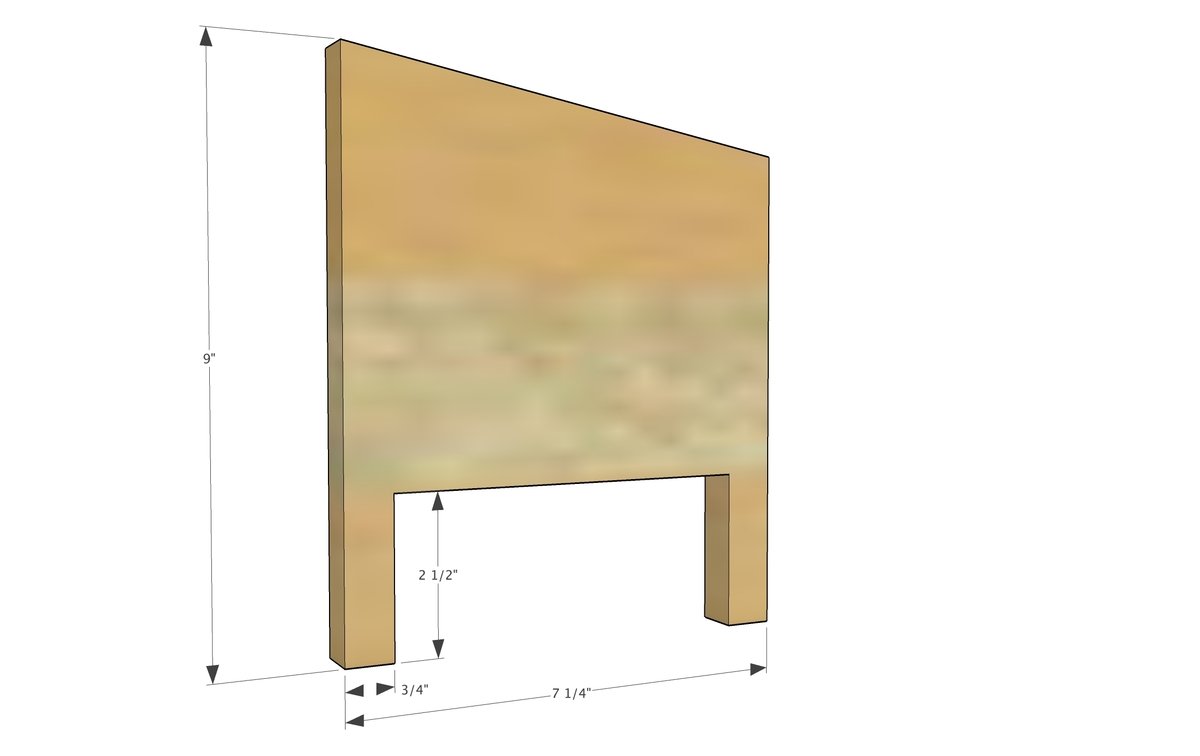
Step 2
Attach bottom to sides. You can use brad nails (at least 1-1/4" long) wood screws or pocket hole screws.
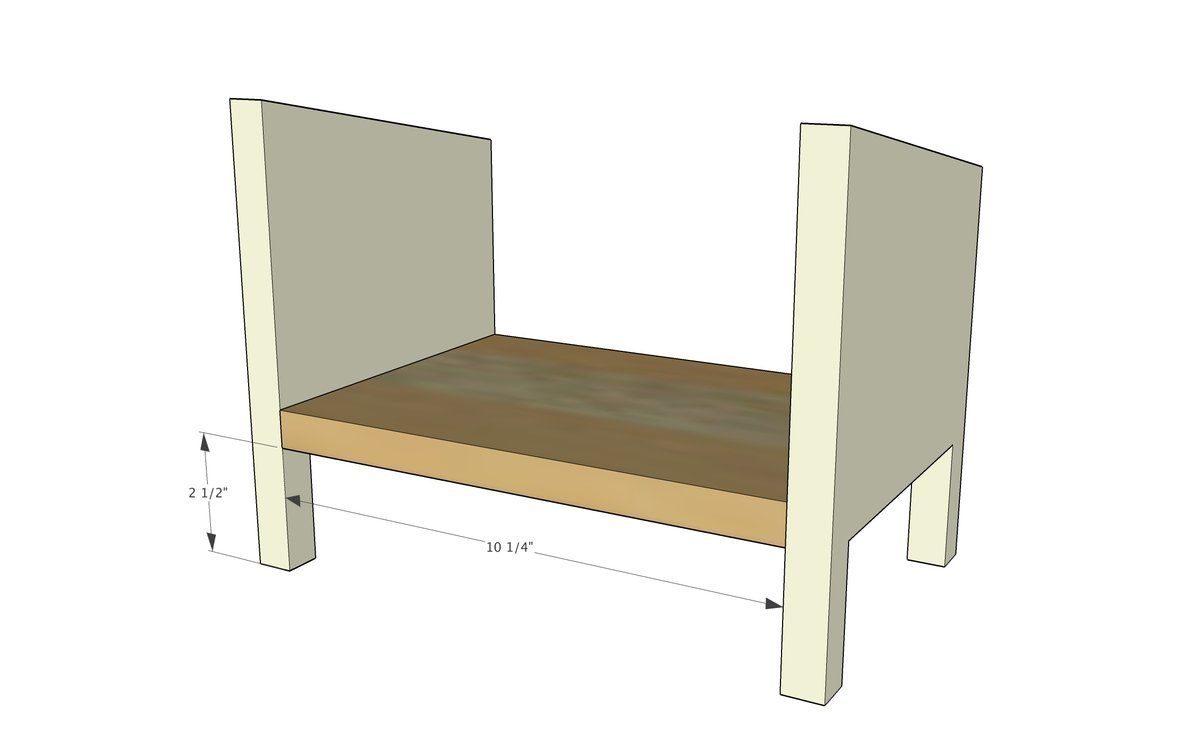
Step 3
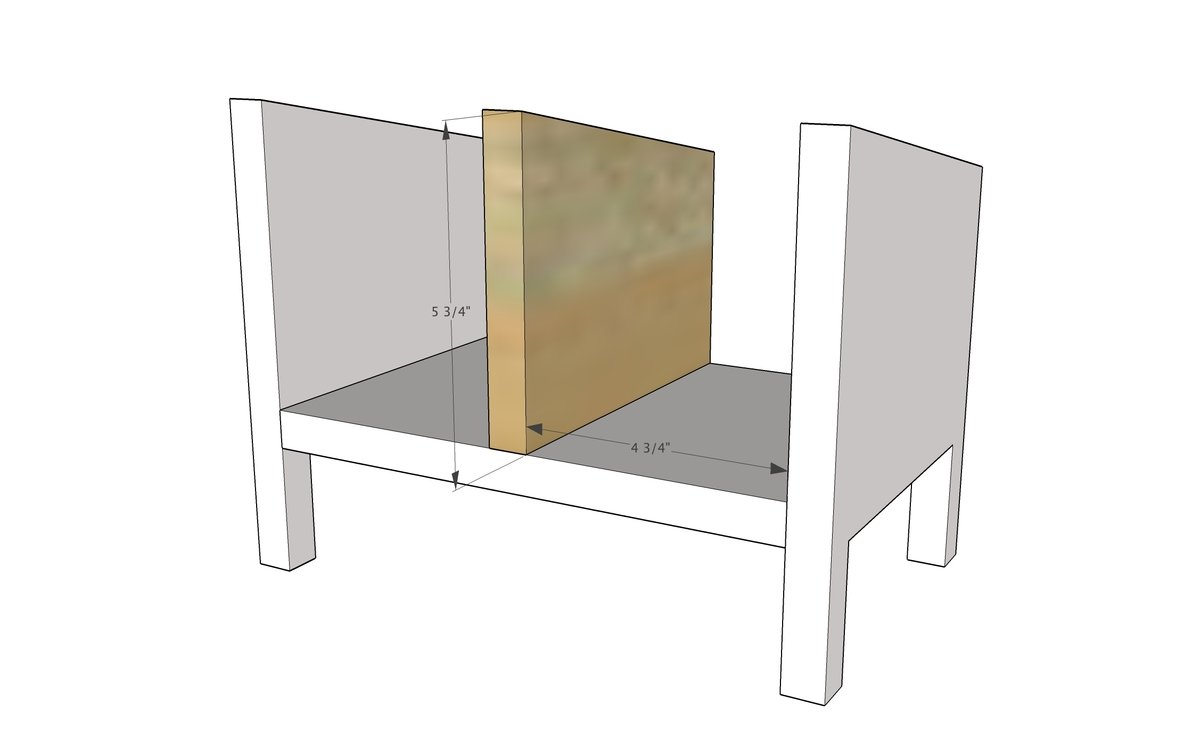
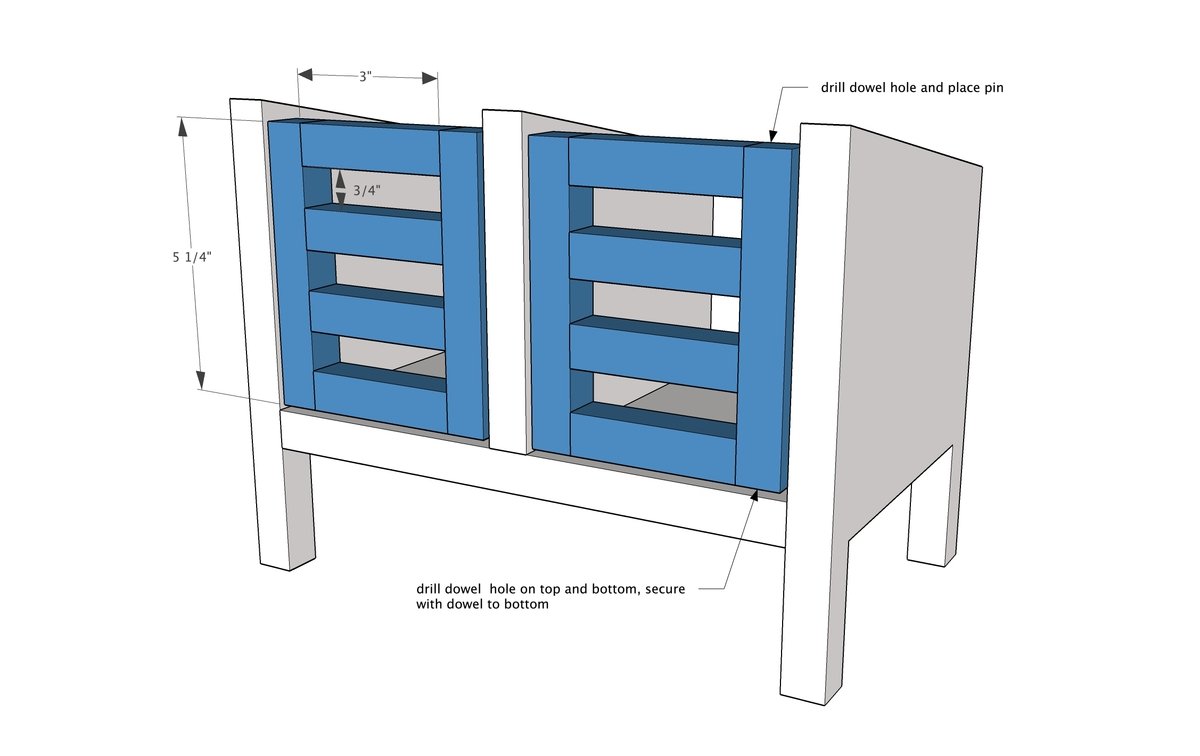
Build doors (I'd use glue and brad nails 1-1/4" length).
Drill dowels hole on top and bottom and fit inside bunny hutch.
Step 5
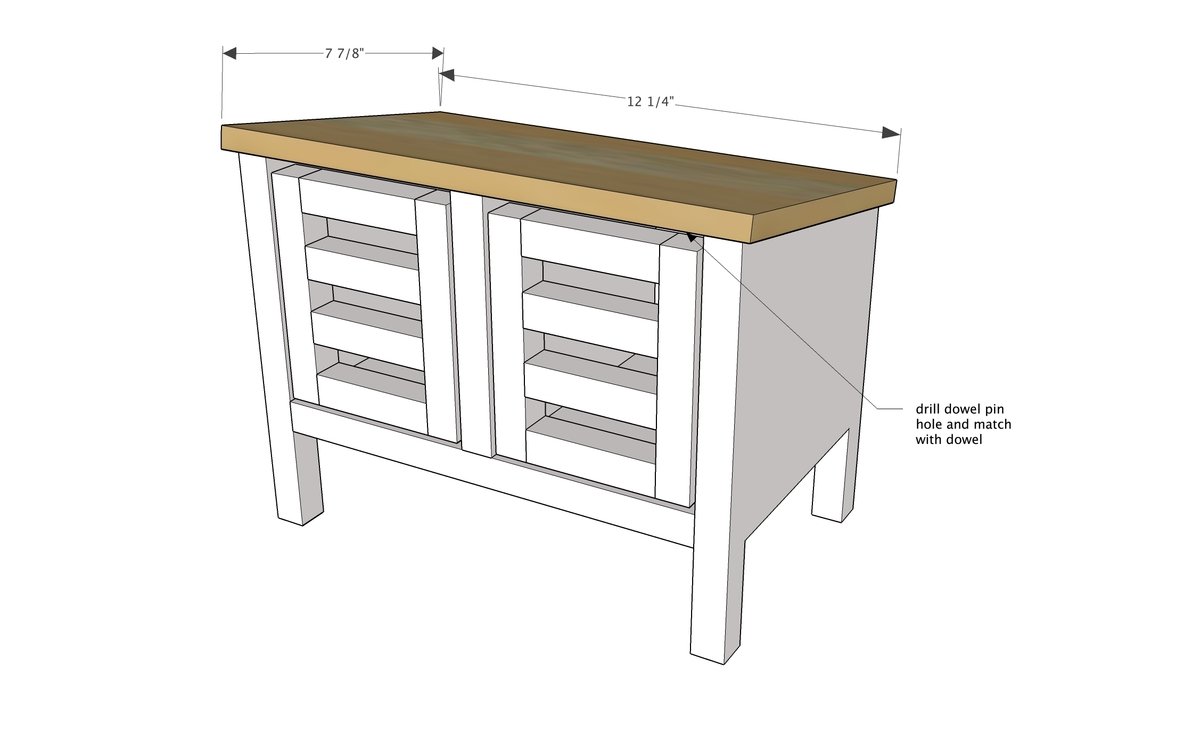
Step 6
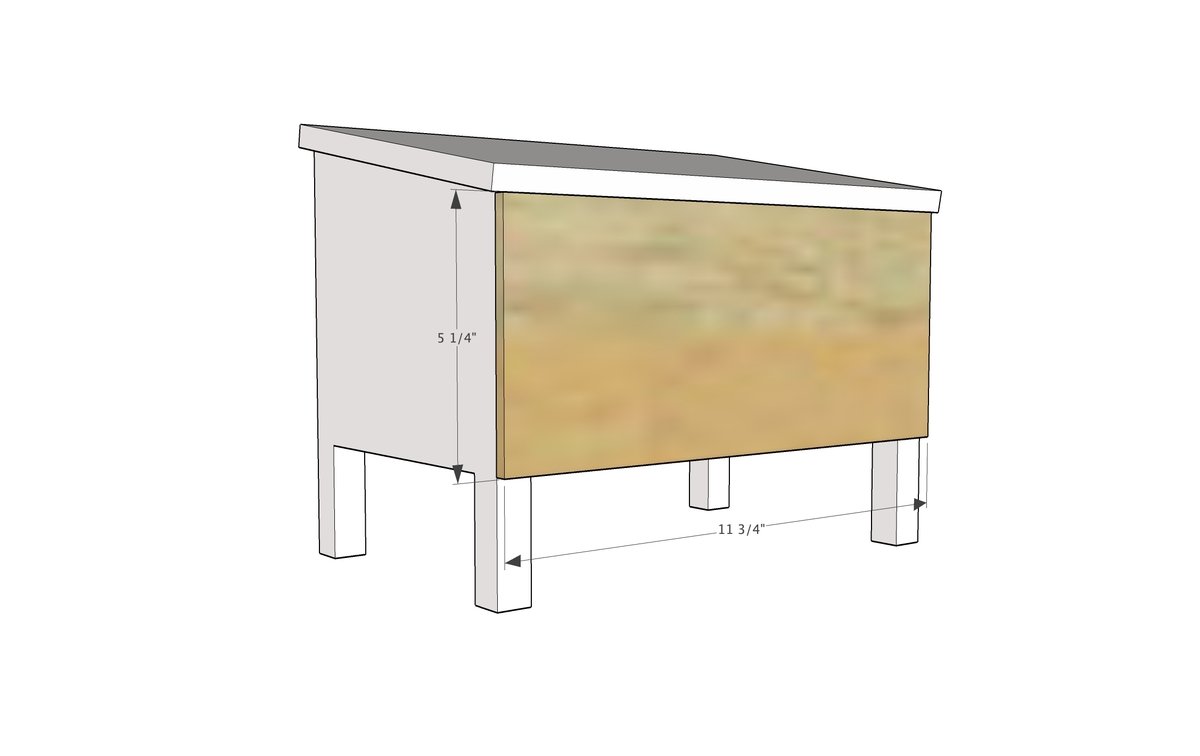
Attach back with glue and brad nails (3/4" length).
Finishing
Sand all surfaces, starting with a medium grit and finishing with fine. Wipe off the dust, fill any holes or gaps with wood filler, and sand smooth once dry. Apply primer if you're painting, then finish with your choice of paint or stain and seal with a durable clear topcoat. For outdoor projects, use exterior-rated primer, paint or stain, and sealer so the piece stands up to the weather.
Source (temporary): https://www.ana-white.com/woodworking-projects/toy-bunny-hutch