Traditional Wood Toddler Bed
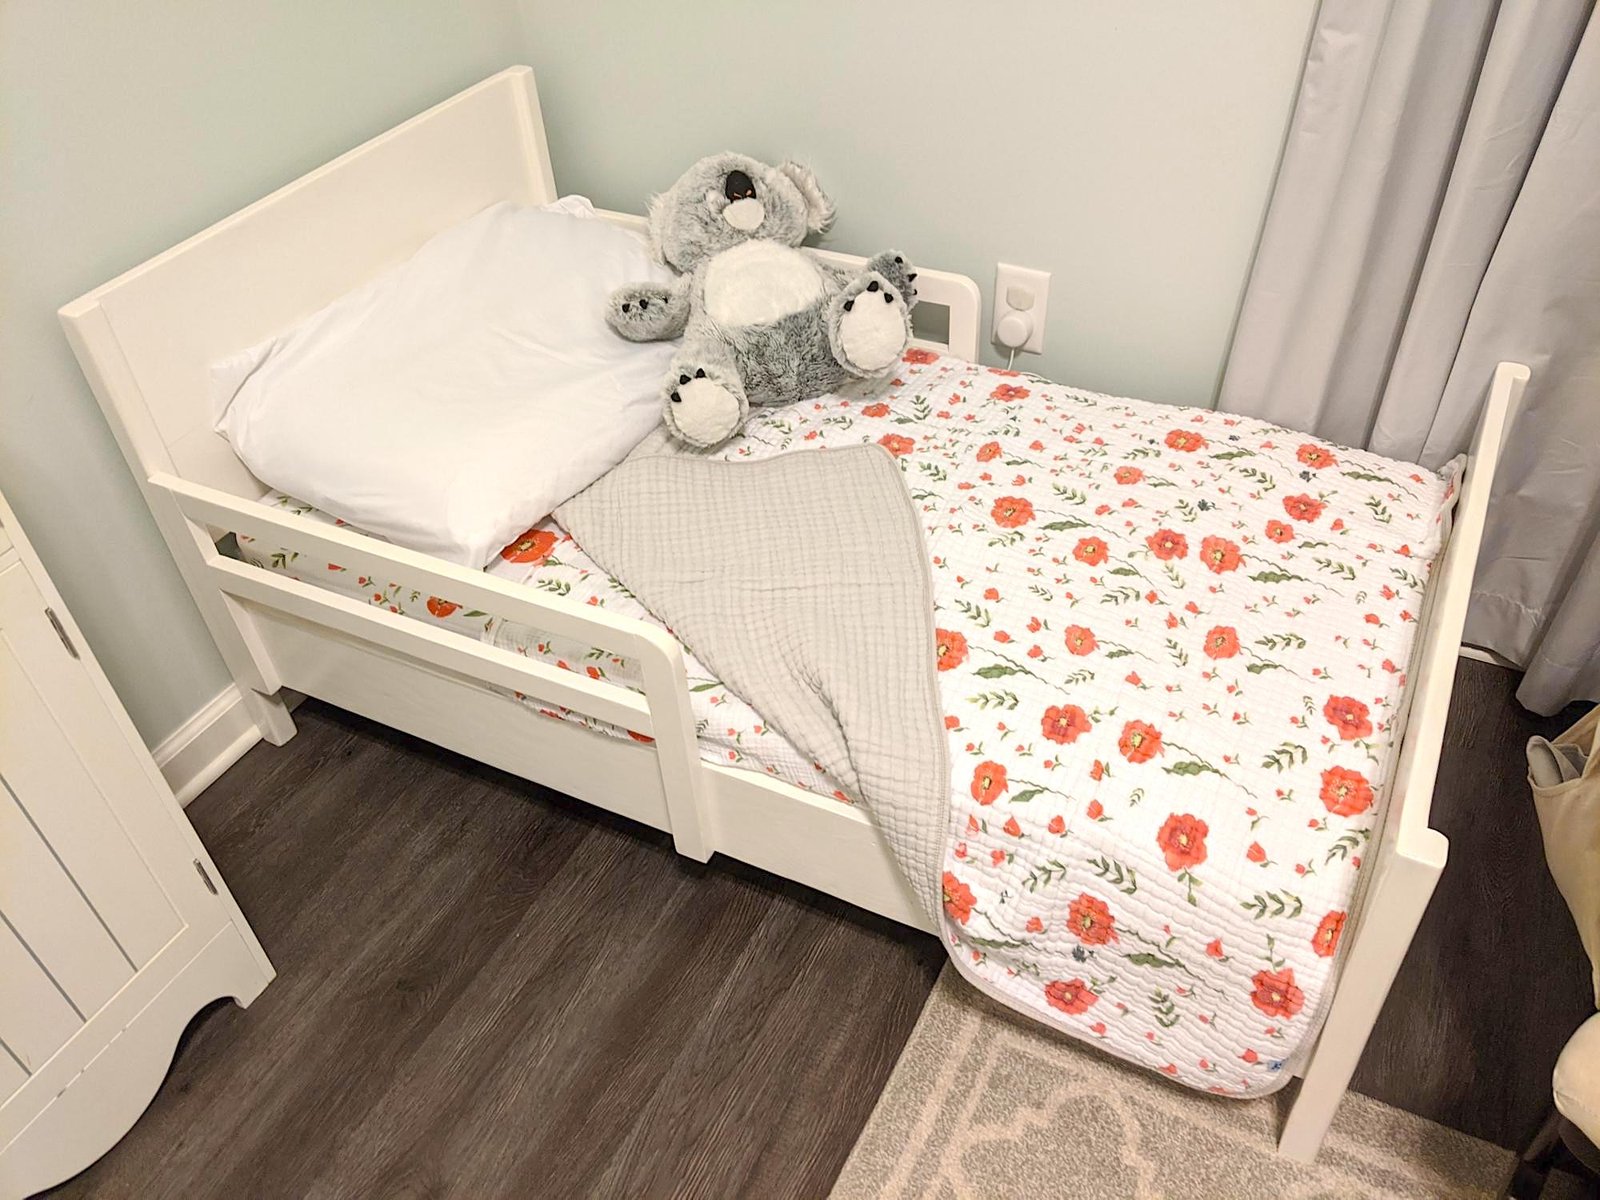
Build your own toddler solid wood bed - This do it yourself is easy to build and can save you hundreds off the retail! By using standard off the shelf materials and an inexpensive piece of beadboard wainscoting you can build this bed for about $35 in lumber - and that's real solid wood!
Specifications
| Project type | Toys |
|---|---|
| Room | Bedroom |
| Style | Children's and Kid's Room Furniture and Toy Plans |
| Difficulty | Intermediate |
| Estimated cost | $20 - $50 |
Dimensions
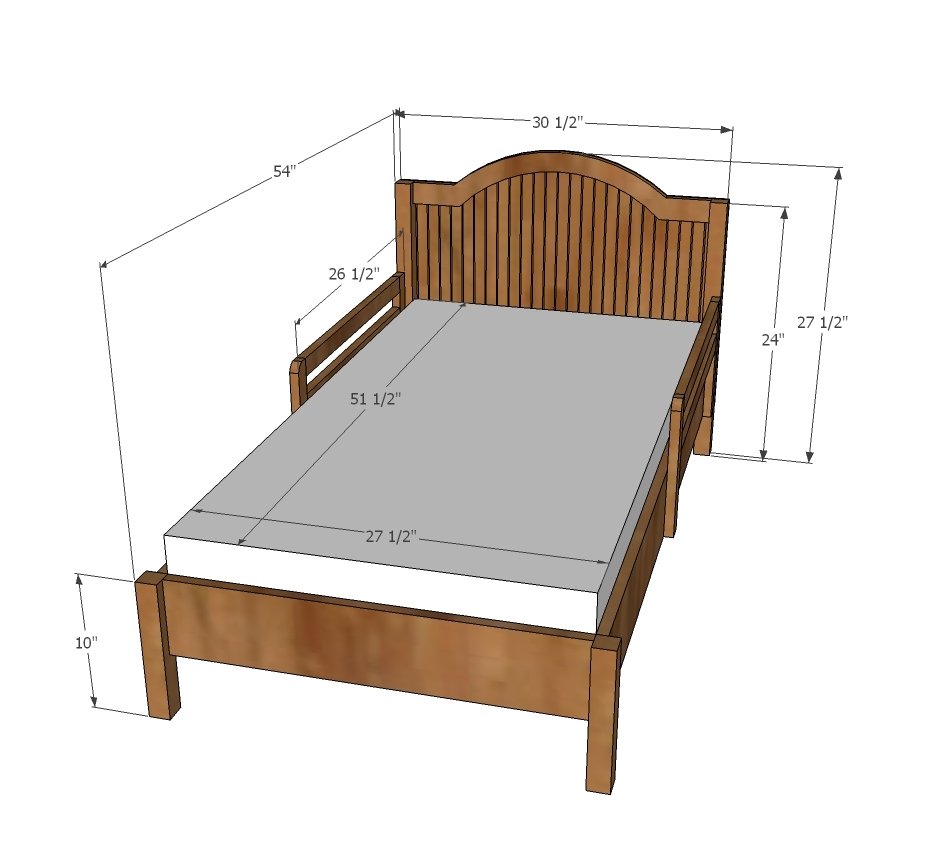
Use the size-specific shopping and cut lists below.
Shopping List
- 2 - 2x2 @ 8 feet long
- 1 - 1x6 @ 8 feet long
- 1 - 1x6 @ 10 feet long
- 5 - 1x3 @ 8 feet long
- 2 - 1x2 @ 8 feet long
- 1 - beadboard wainscoting like this from Lowes
- 1" finish nails
Cut List
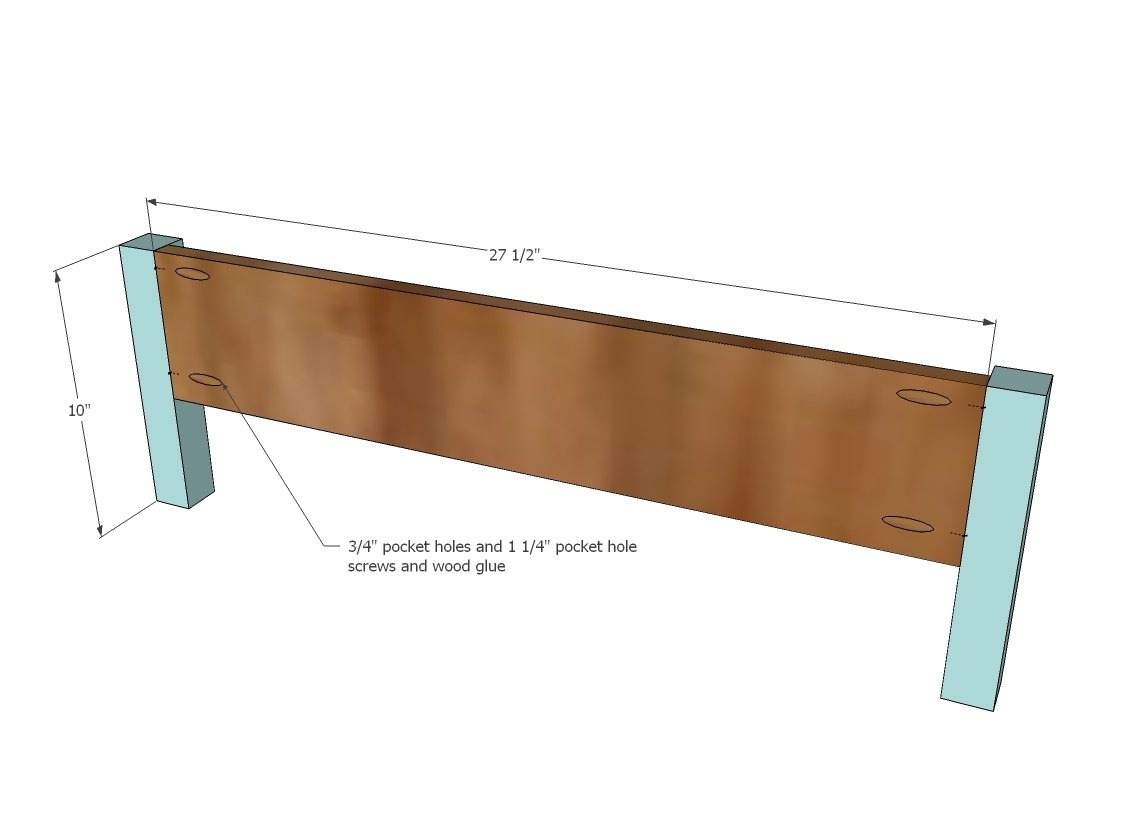
- 3 - 1x6 @ 27 1/2"
- 2 - 2x2 @ 24"
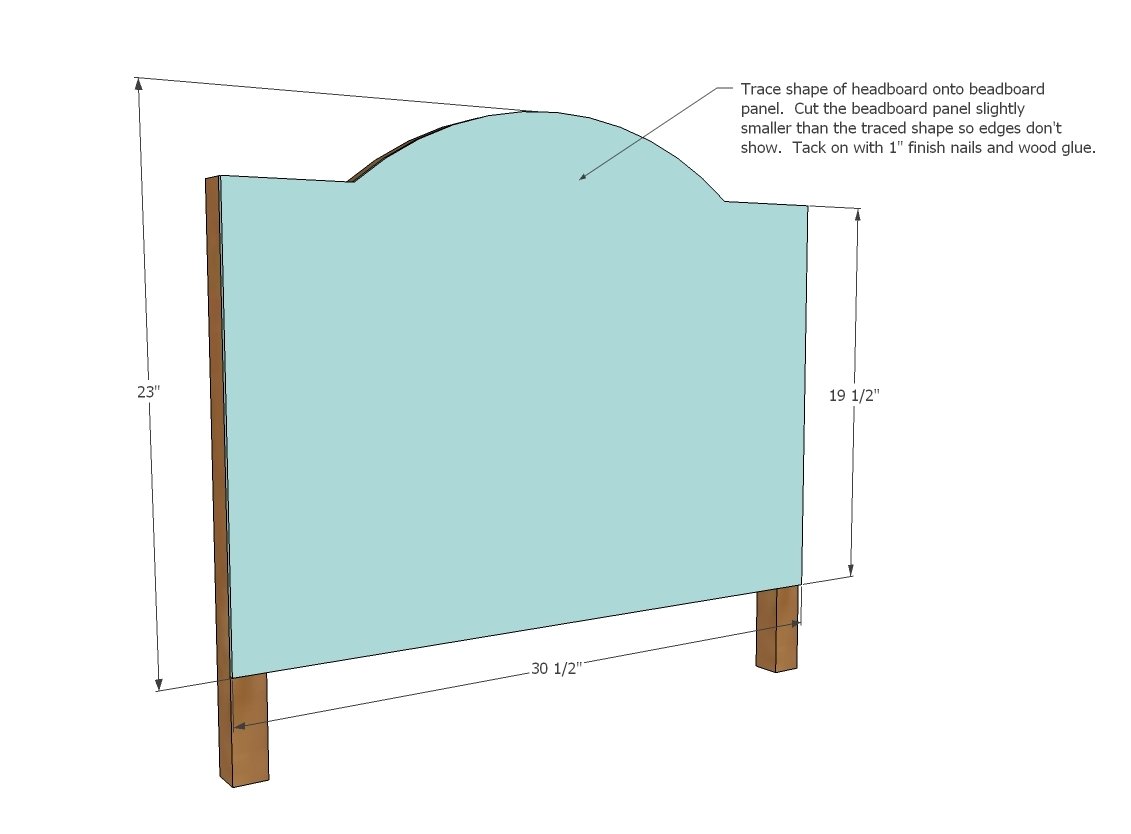
- 1 - Beadboard Paneling @ 23" high x 30 1/2" wide - cut to fit
- 2 - 2x2 @ 10"
- 2 - 1x6 @ 50 3/4"
GUARDRAILS
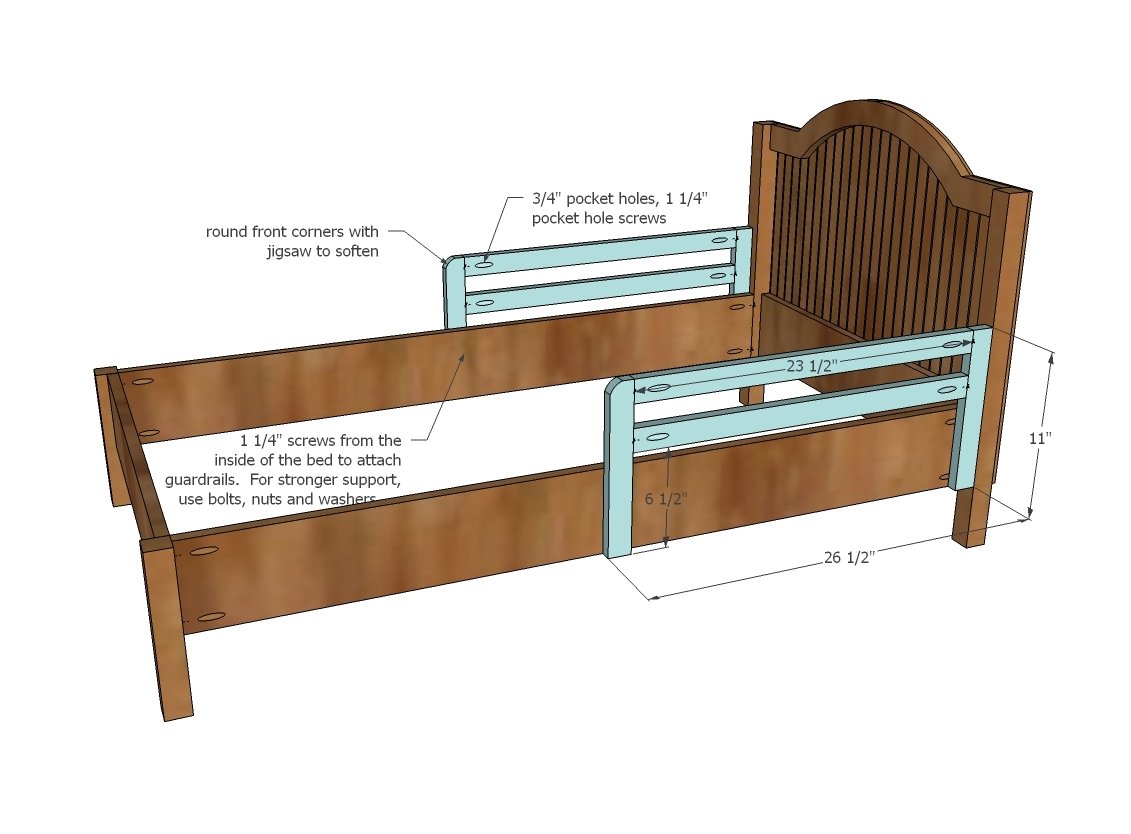
- 4 - 1x2 @ 11"
- 4 - 1x2 @ 24 1/2"
SLATS
- 2 - 2x2 @ 51 1/2"
- 15 - 1x3 @ 27 1/2"
Tools
- measuring tape
- square
- pencil
- safety glasses
- hearing protection
- kreg-jig
- drill
- circular saw
- jigsaw
- nailer
- sander
- countersink drill bit
Step-by-step Instructions
Step 1
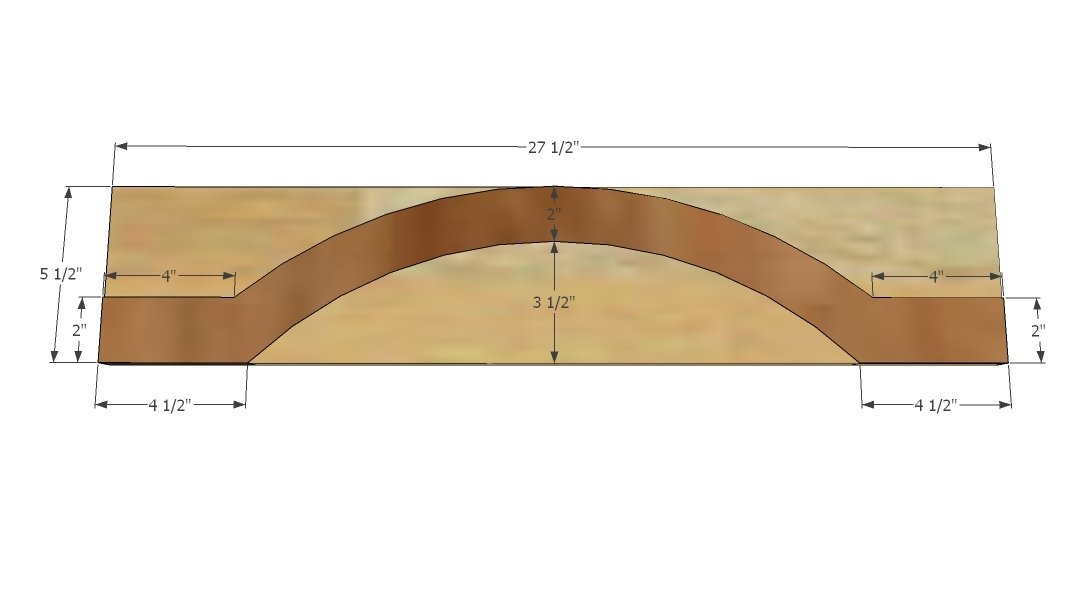
With one of the 1x6 boards, cut out the header shape as shown above. I recommend using a piece of legal sized paper to create a pattern, and trace that pattern on both sides so both are identical. Use a jigsaw and carefully cut. Follow by sanding until you are satisfied.
Step 2
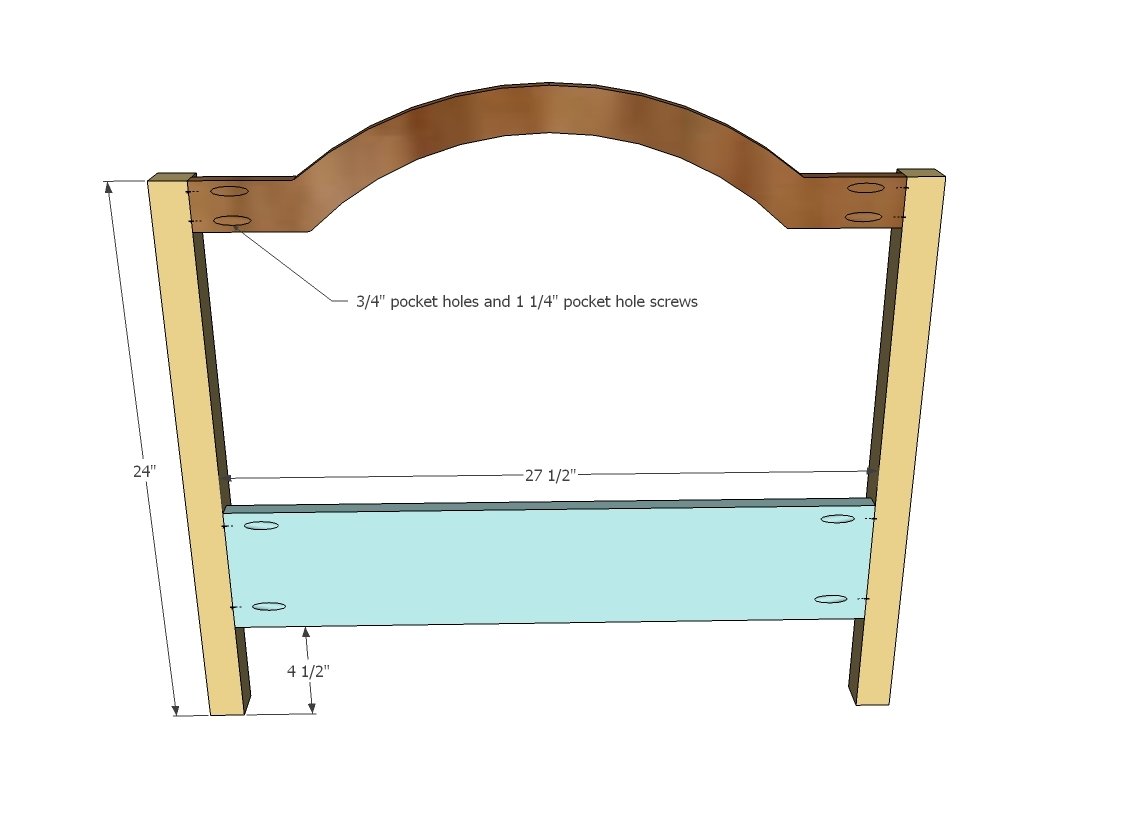
With the header cut, go ahead and drill Kreg Jig pocket holes on ends and attach to legs as shown in diagram.
Step 3
Trace the shape of the headboard on to your beadboard paneling. Cut shape out slightly smaller so your edges are not visible from front. Tack on with 1" finish nails and wood glue.
Step 4
Build your footboard as shown above.
Step 5
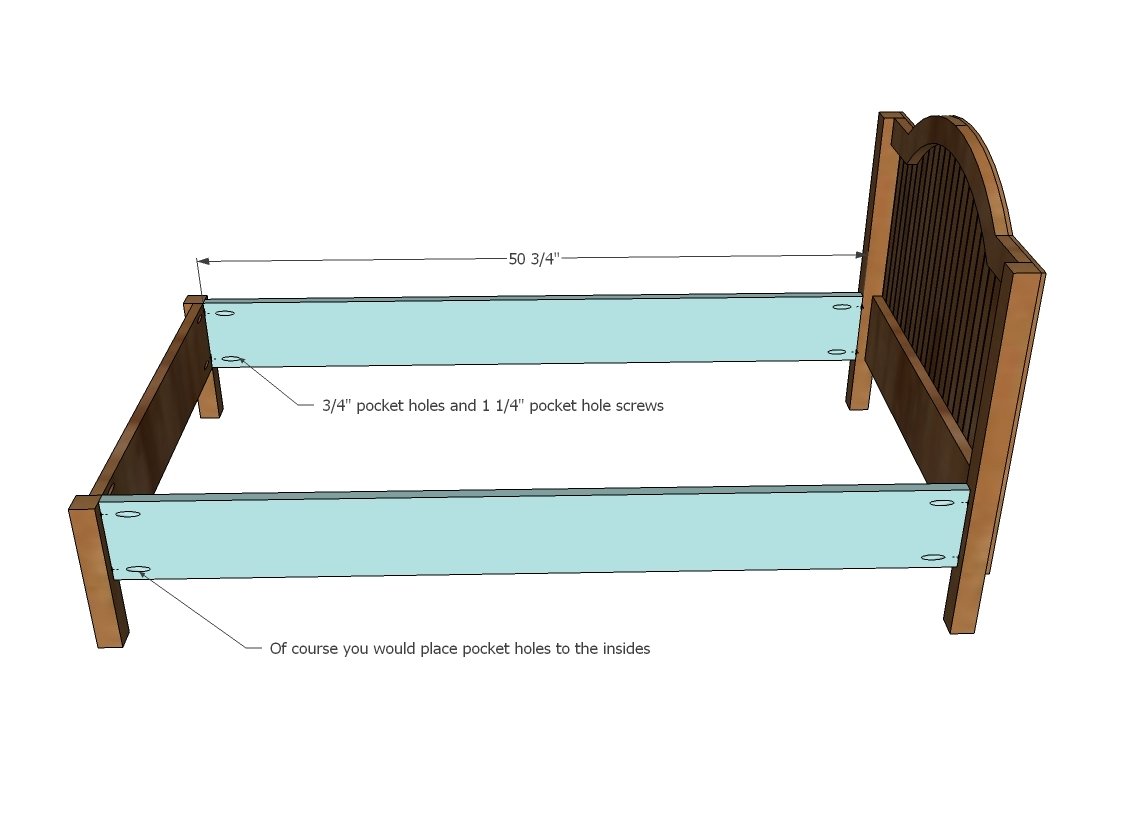
Step 6
Guardrails should be a piece of cake. Just make sure you round the front corner. For stronger guardrail attachment, use 1/4" bolts, 2" long, with nuts and washers through predrilled 1/4" bolt holes.
Step 7
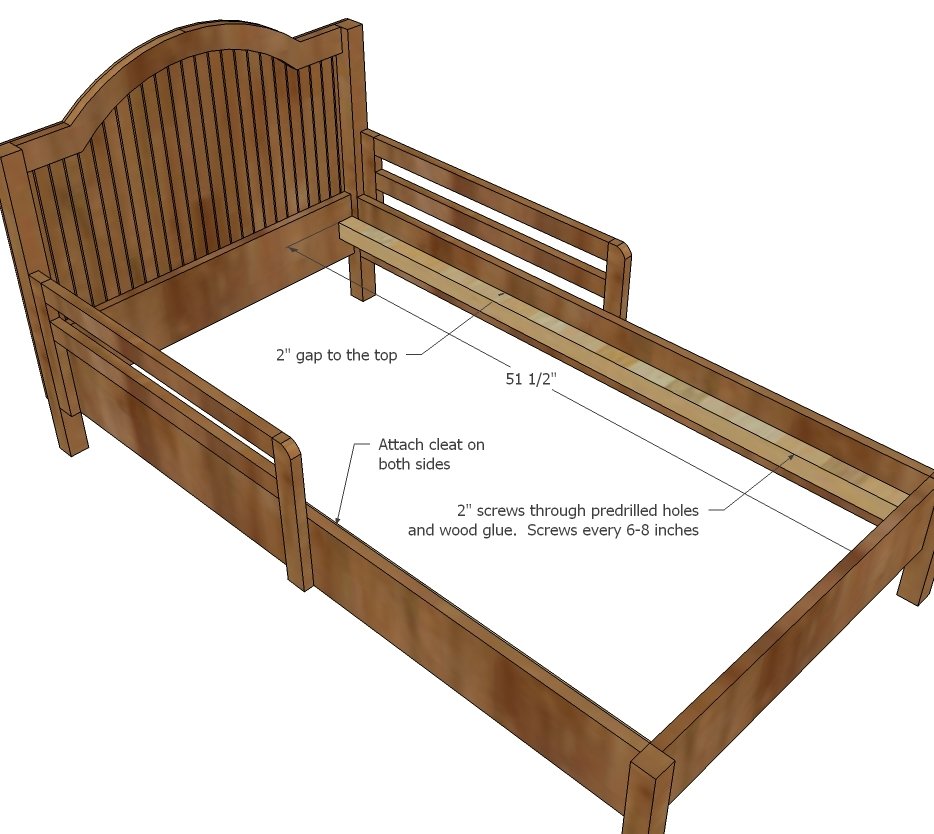
Now the cleats. Measure and mark the insides of your siderails 2" down. Attach cleats with 2" screws and wood glue. TIP: Predrill holes with your countersink bit every 6-8" with the cleats on your work surface. Then screw in place.
Step 8
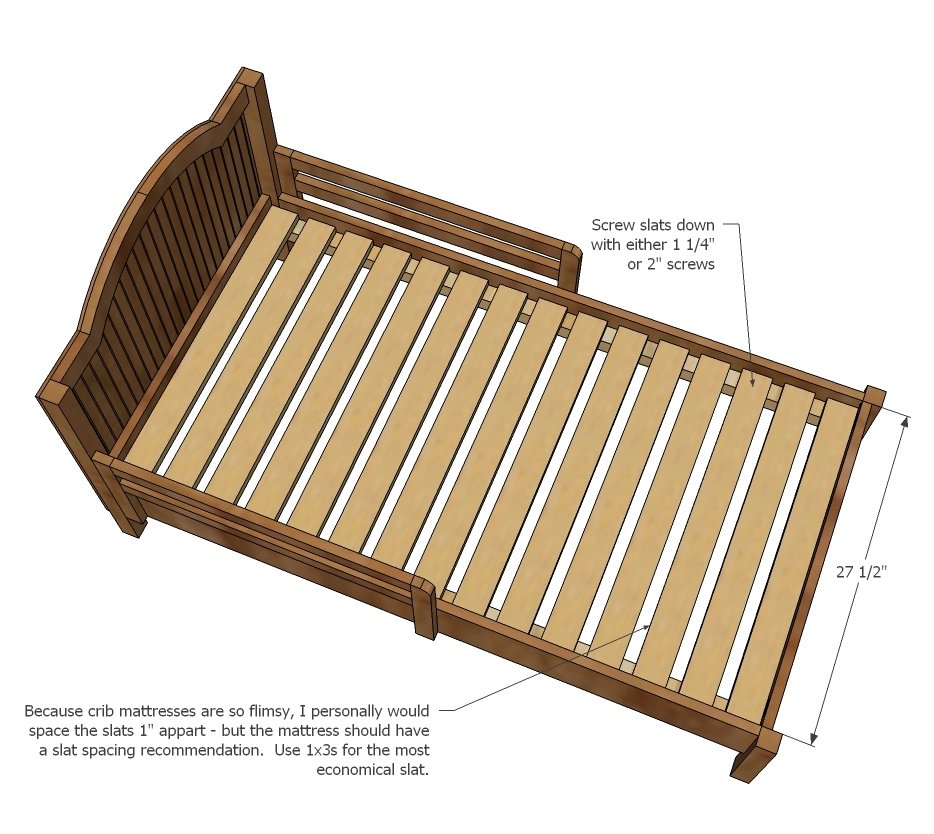
Now add the slats! I found that closer slat spacing is better for crib mattresses because the mattresses themselves are so flimsy. Plus, a little foot could slip through wider spacing. Using 1x3 boards - which are about $1.50 each - you will only need 5 total 1x3s. The difference between wider spaced slats and narrower spaced slats is about the cost of a fancy cup of coffee.
Finishing
Sand all surfaces, starting with a medium grit and finishing with fine. Wipe off the dust, fill any holes or gaps with wood filler, and sand smooth once dry. Apply primer if you're painting, then finish with your choice of paint or stain and seal with a durable clear topcoat. For outdoor projects, use exterior-rated primer, paint or stain, and sealer so the piece stands up to the weather.
Source (temporary): https://www.ana-white.com/woodworking-projects/traditional-wood-toddler-bed