Train Toybox
Build a train toybox from 1/2 sheet of plywood! Looking for a cute train toy box? These toy box plans are easy to build and include diagrams, cut list and shopping list.
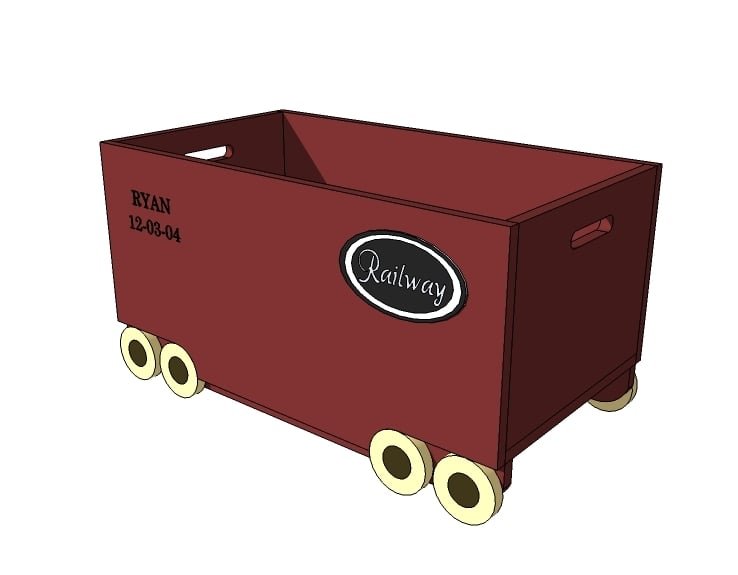
Specifications
| Project type | Toy box Plans |
|---|---|
| Room | Kids and Toys |
| Style | Children's and Kid's Room Furniture and Toy Plans |
| Difficulty | Beginner Projects |
| Estimated cost | $20 - $50 |
Dimensions
Use the size-specific shopping and cut lists below.
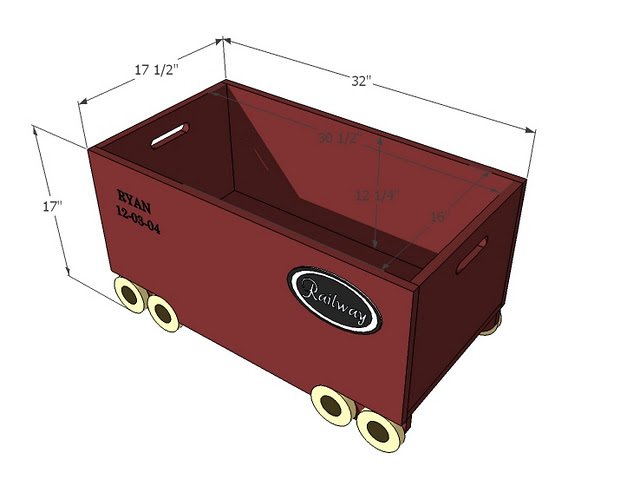
Shopping List
1/2 sheet 3/4" hardwood plywood (shown in PureBond Formaldehyde Free White Oak )
1 - 1/2" dowel, 36" long
Use either nails and glue, pocket holes, or screws to assemble.
Cut List
- 3 - 3/4" Plywood @ 15 3/4" x 32"
- 2 - 3/4" Plywood @ 15 3/4" x 12"
- 4 - 3/4" Plywood @ 3" x 12"
Tools
- measuring tape
- square
- pencil
- safety glasses
- hearing protection
- kreg-jig
- drill
- circular saw
- jigsaw
- nailer
- sander
- countersink drill bit
Step-by-step Instructions
Step 1
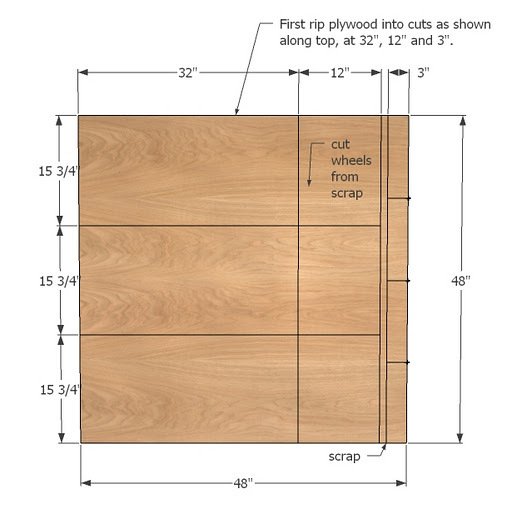
If your hardware store is so kind, have them at least make the initial rip cuts, ripping the plywood into pieces measuring 32" x 48", 12" x 48" and 3" x 48". From there, it's all cross cuts.
Step 2
Handles can be cut before or after assembly. Attach sides to bottoms, you can use your favorite fastening method, don't forget the glue.
Step 3
Cut sides out as shown above. Use a jigsaw and sand edges. Save scrap to use as a pattern for cutting remaining sides out, considerate of what side of the line you should cut. Make sure cut edges match. NOT PICTURED: Attach sides to the toy box with finish nails and glue or pocket hole screws or 2" screws and glue.
Step 4
Round edges of bottom boards to match the cut edges for the sides as shown in diagram. Attach backs to sides using 1 1/4" finish nails and glue. Also attach to bottom, either through bottom of toybox or using pocket holes.
Step 5
Now just cut wheels with jigsaw from scraps. You can use a hole saw kit, but this may leave a hole in the center, depending on how your hole saw kit works. Easy enough to patch with wood filler. I personally would make the wheels fixed. If you want the toybox to roll, the better method is to add caster wheels behind the wood wheels, blocked so the toybox sits just above the ground (far enough above that it can roll on carpet, but not too far so the train doesn't look like it's floating).
Finishing
Sand all surfaces, starting with a medium grit and finishing with fine. Wipe off the dust, fill any holes or gaps with wood filler, and sand smooth once dry. Apply primer if you're painting, then finish with your choice of paint or stain and seal with a durable clear topcoat. For outdoor projects, use exterior-rated primer, paint or stain, and sealer so the piece stands up to the weather.
Source (temporary): https://www.ana-white.com/woodworking-projects/train-toybox