Treehouse Bed
Build your own treehouse bed for about $200! This include step by step diagrams, cut list and shopping list. You'll just need a few basic power tools to build - no plywood and no pocket holes!
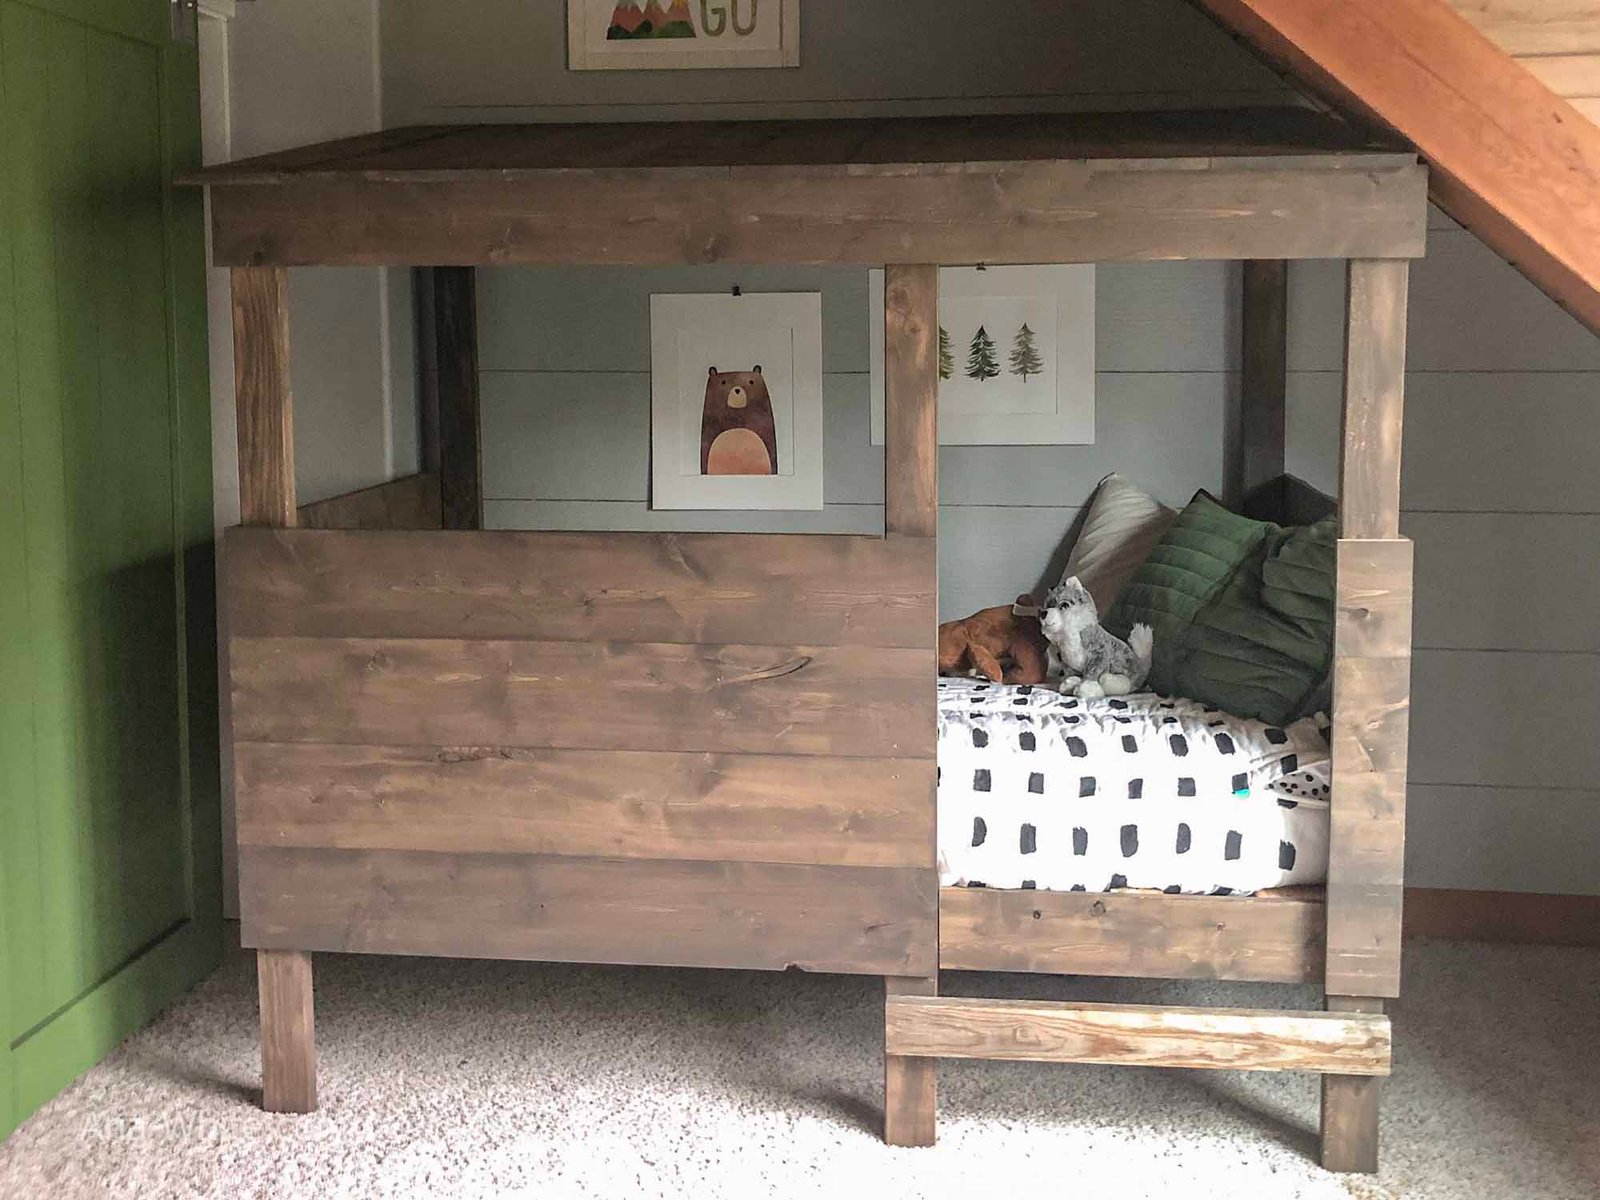
Specifications
| Project type | Twin Beds and Twin Bed Frames |
|---|---|
| Room | Bedroom |
| Style | Farmhouse Furniture |
| Difficulty | Beginner Projects |
| Estimated cost | $150 - $200 |
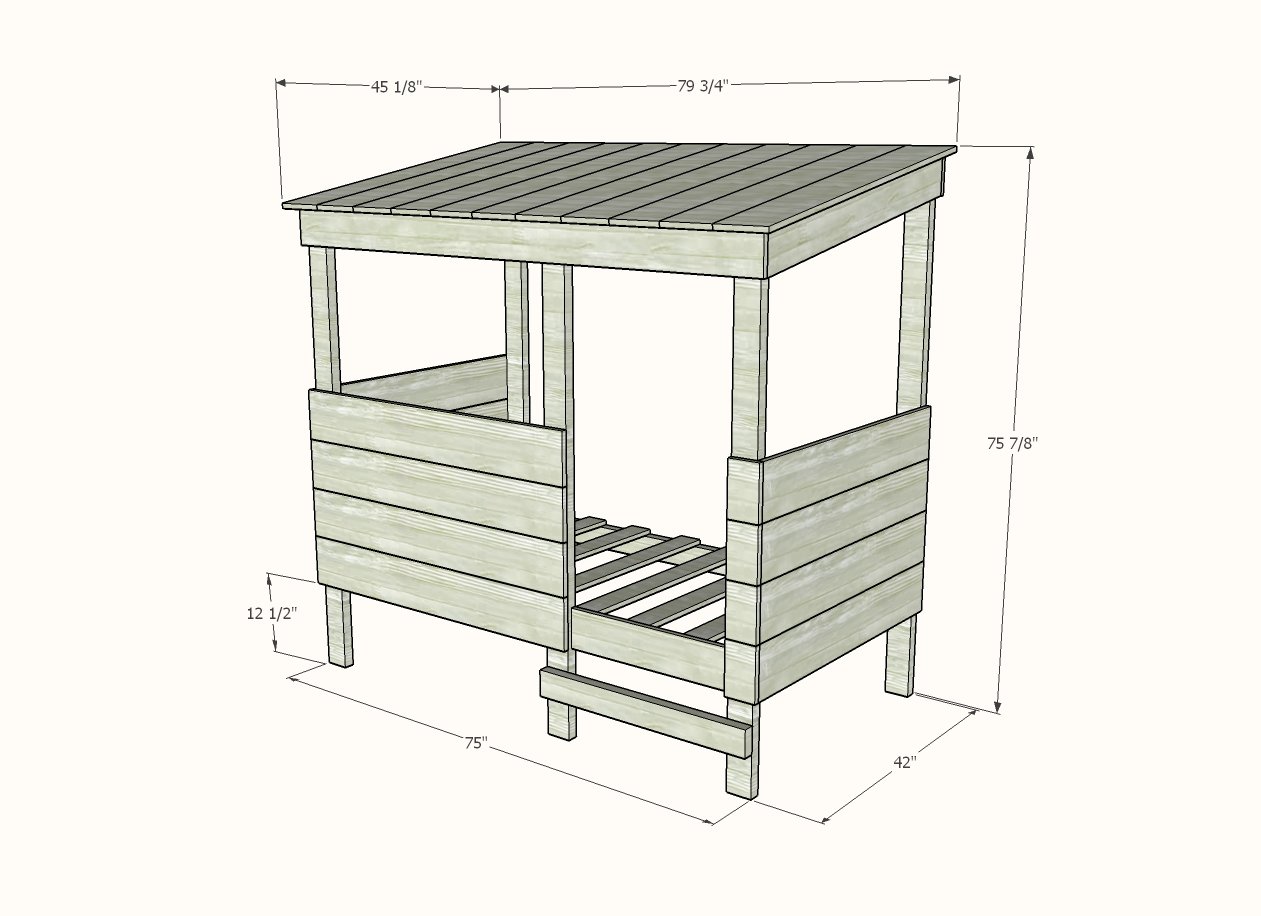
Dimensions
Use the size-specific shopping and cut lists below.
Shopping List
12 - 2x4 @ 8 feet or stud length (whatever is cheaper or better material)
3 - 1x6 @ 8 feet long
12 - 1x8 @ 8 feet long
About 60 - 2-3/4" self tapping screws (SPAX or similar) (can be 2-1/2" length to 3" length)
About 150 - 1 - 3/4" self tapping screws (SPAX or similar) (can also use brad nails but will be hard to dismantle bed to move from room)
Cut List
2 - 2x4 @ 75" - longest point measurement, one end cut at 10 degree bevel - back legs
3 - 2x4 @ 67-7/8" - longest point measurement, one end cut at 10 degree bevel - front legs
2 - 2x4 @ 75" - mattress cleats
2 - 1x6 @ 42-5/8" - long point to short point measurement, both ends cut at 10 degree angle, ends ARE parallel - side roof trim
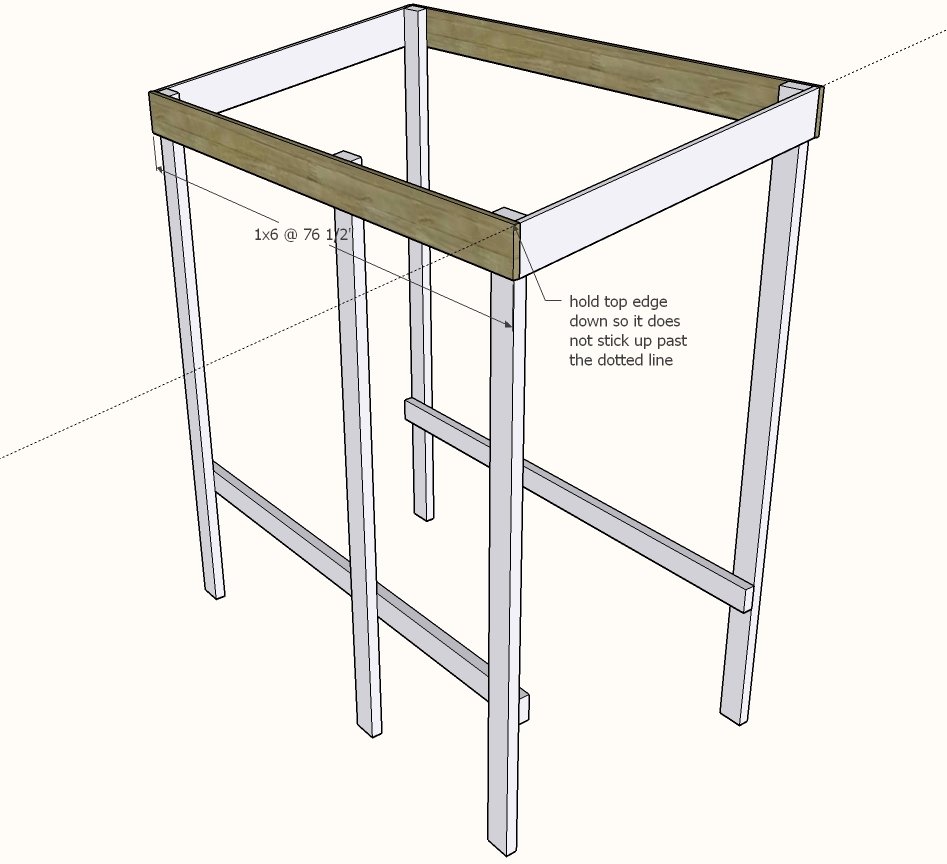
2 - 1x6 @ 76-1/2" - front/back roof trim
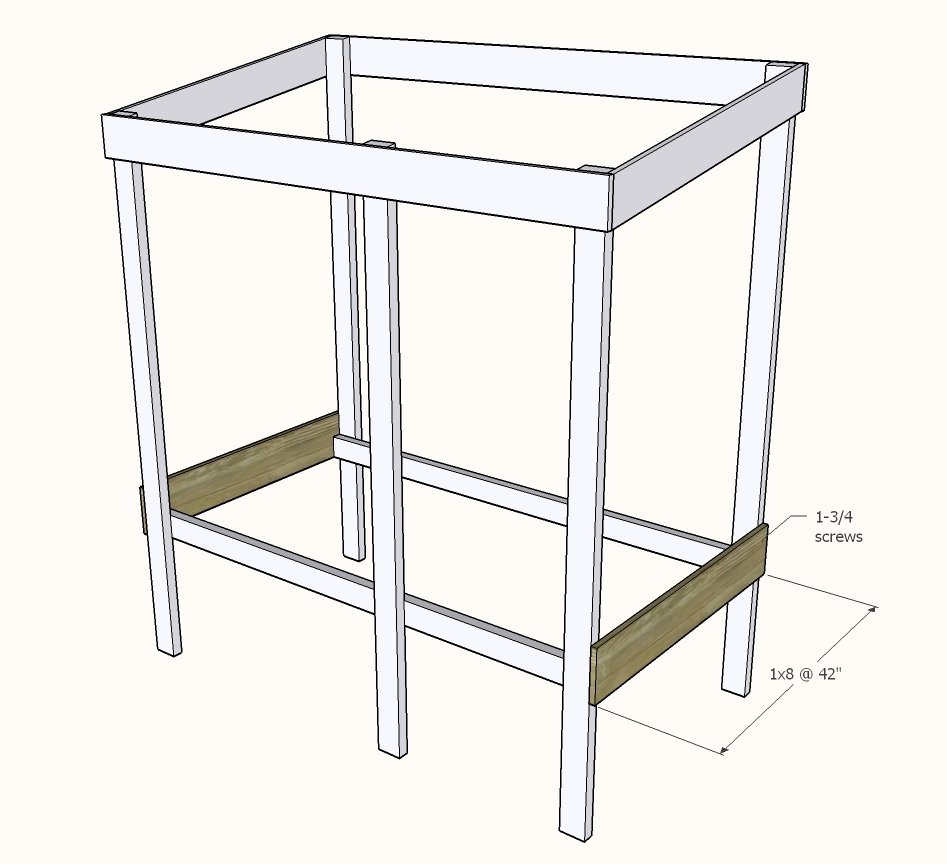
8 - 1x8 @ 42" - side siding
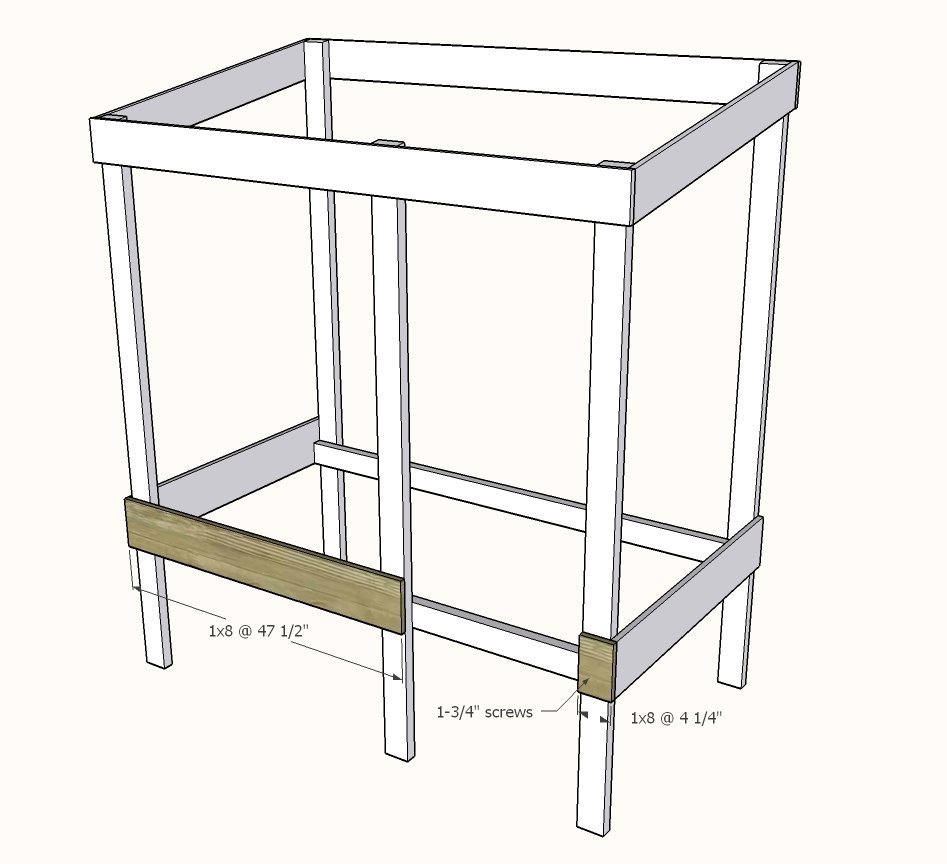
4 - 1x8 @ 47-1/2" - front siding
4 - 1x8 @ 4-1/4" - small front siding - cut last from scraps
1 - 1x8 @ 24-3/4" - front mattress trim
1 - 2x4 @ 31-3/4" - step
11 - 1x8 @ 45-3/4" - roof
9 - 2x4 @ 39" - mattress slats
Tools
- measuring tape
- square
- pencil
- safety glasses
- hearing protection
- drill
- compound miter saw
- sander
Step-by-step Instructions
Step 1
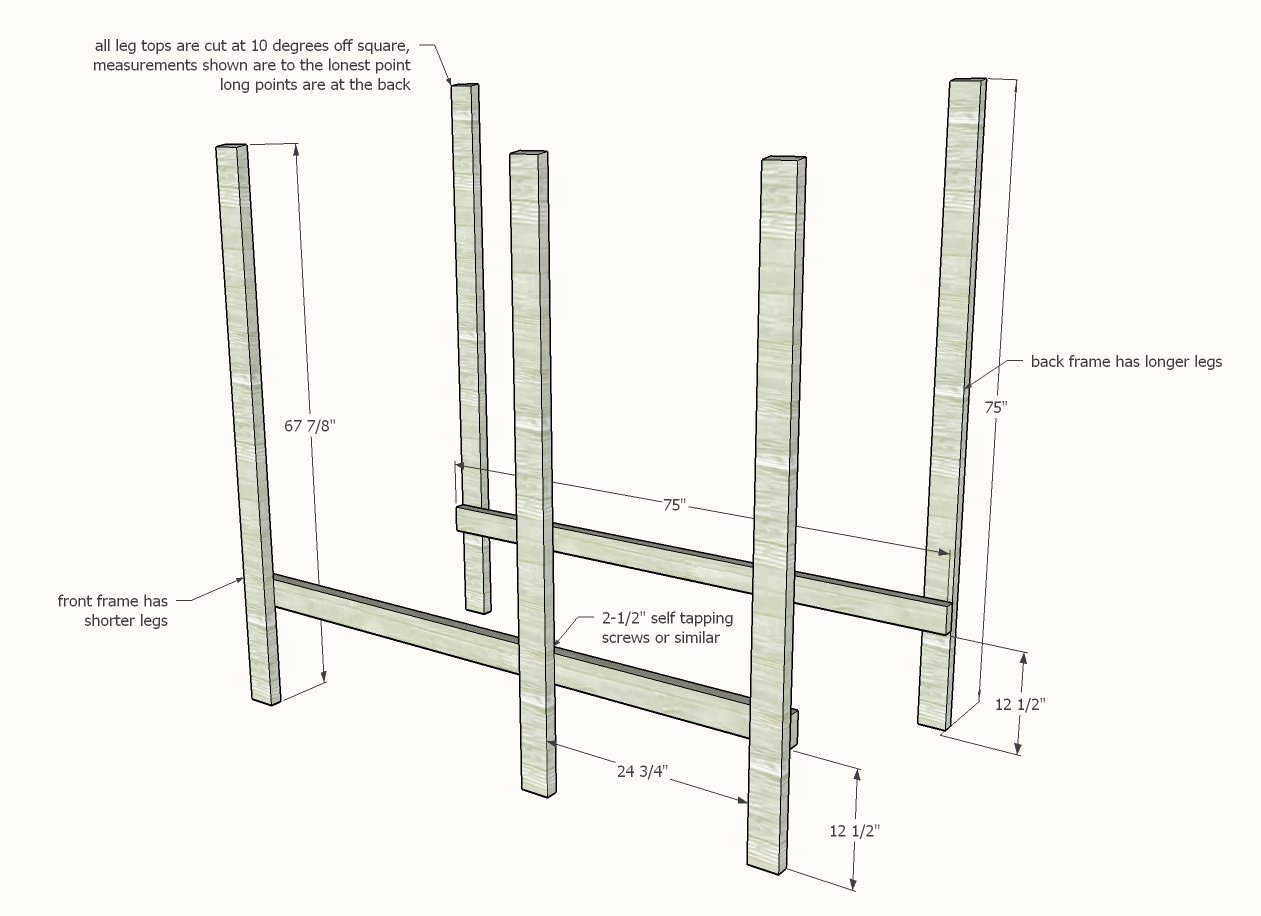
Layout the front and back frames carefully and attach the mattress cleats as shown, taking care to keep the roof angles right on the tops of the legs. Make sure the top of the legs are 75" wide, as is the bottom.
Step 2
Attach the front frame to the back frame with the roof angled trim.
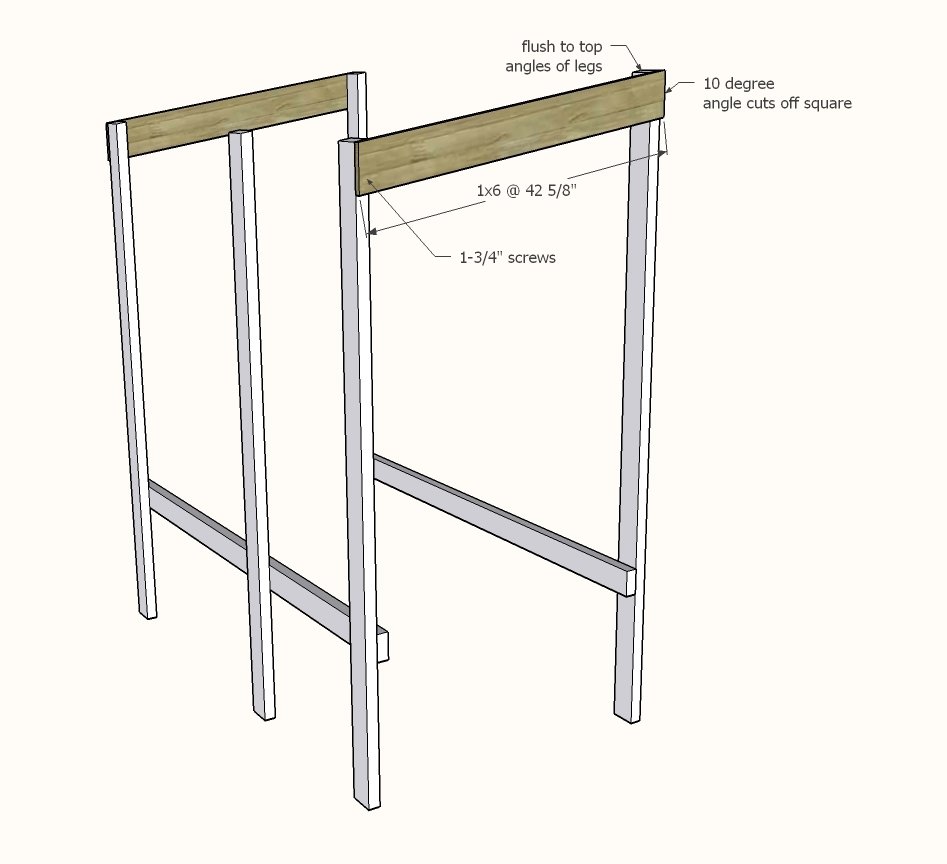
Attach remaining roof trim to the fronts of the legs and back.
For the front, keep the top down enough so the roofing boards attached in later steps will be able to lay flat on the dotted line.
Step 4
Attach the bottom side siding first, adjusting for square and level.
Step 5
Step 6
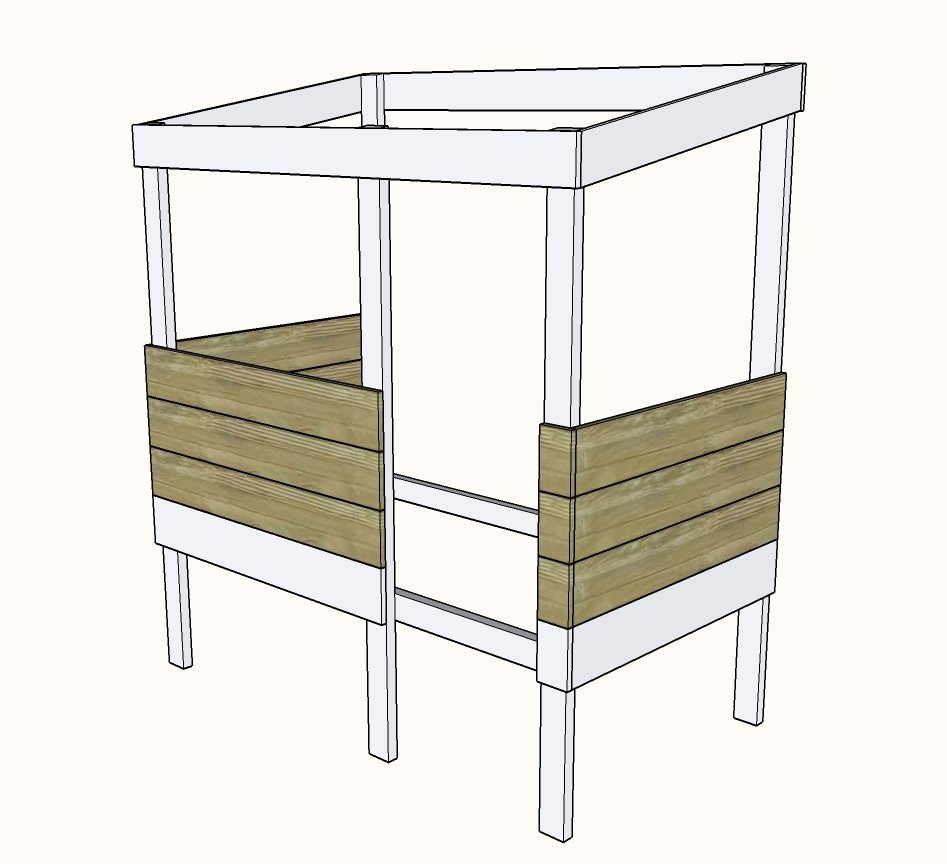
Repeat siding steps to complete the siding.
Step 7
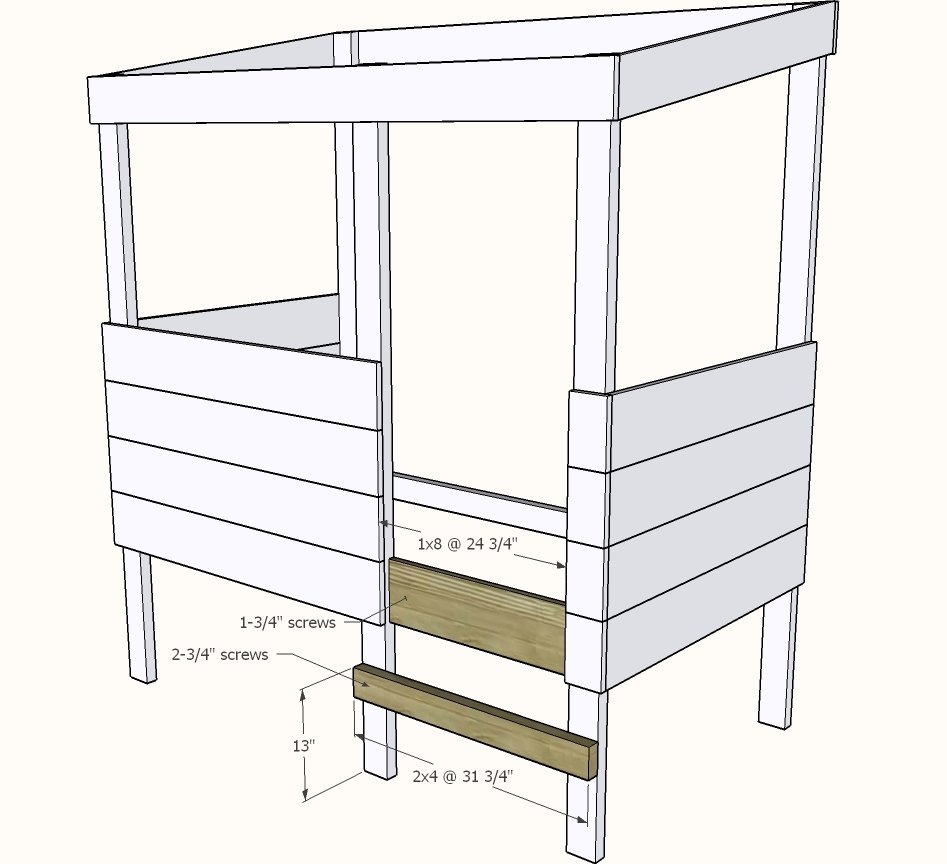
Add the mattress trim and ladder rung. Note: ladder rung should be centered vertically on height of bed
Step 8
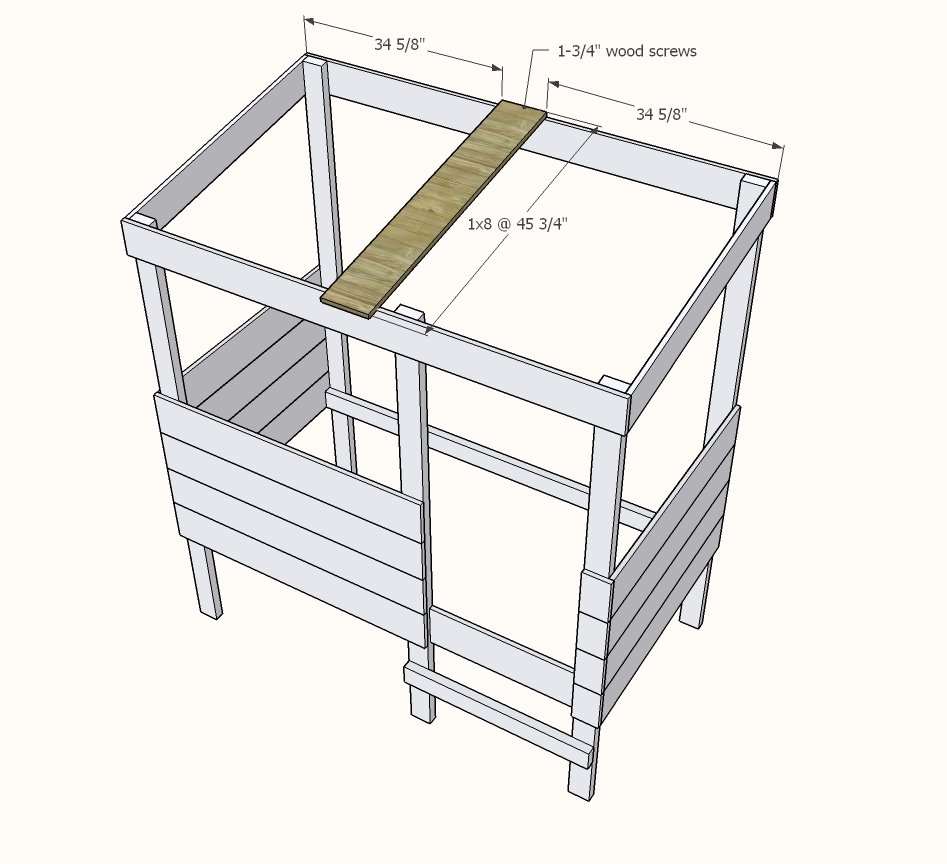
Attach center roof panel first, carefully screwing into the front 1x6 roofing trim. This may be a little tricky, so take your time and make sure the screw hits the board.
Step 9
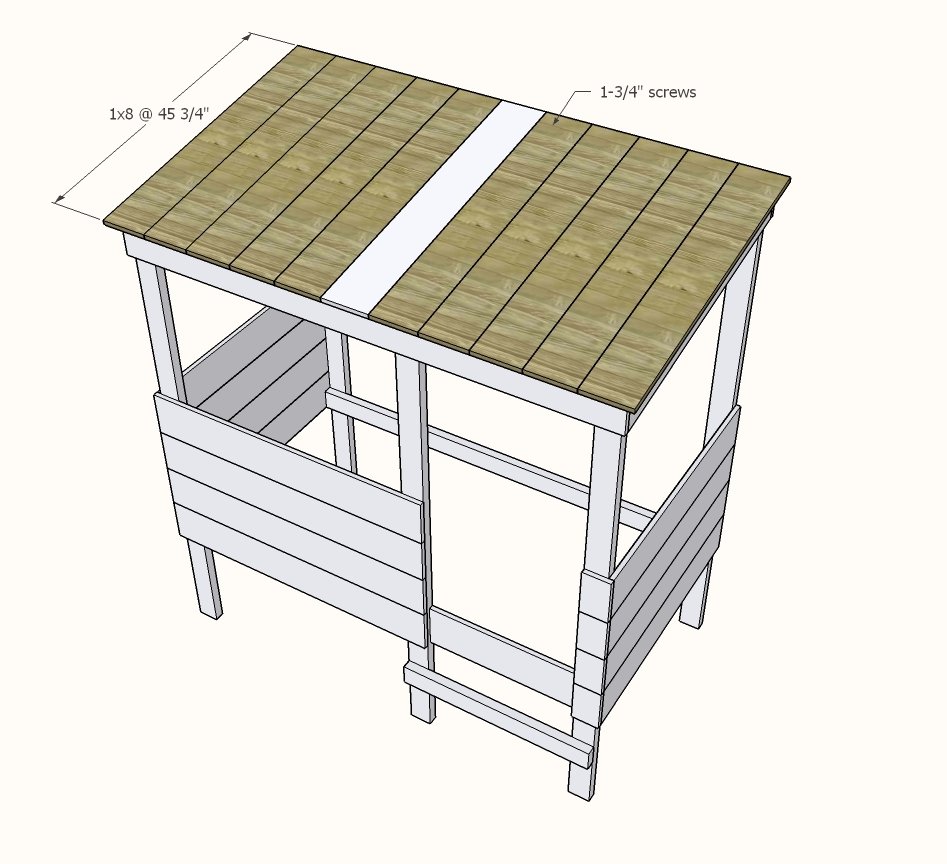
Repeat, working from the center out, for the rest of the roof boards.
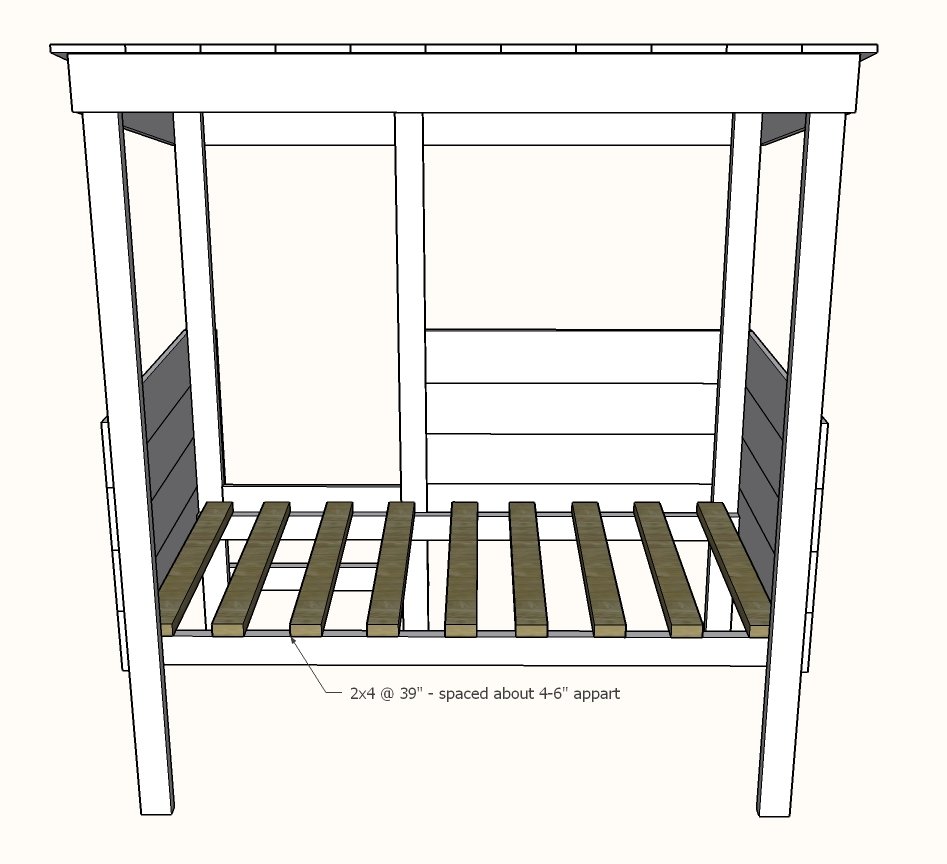
Lay 2x4 slats inside the bed on the mattress cleats. Attach with screws.
NOTE: Your mattress may require more slats than shown. Spacing shown is about 5" appart - add mor slats if in doubt.
Finishing
Sand all surfaces, starting with a medium grit and finishing with fine. Wipe off the dust, fill any holes or gaps with wood filler, and sand smooth once dry. Apply primer if you're painting, then finish with your choice of paint or stain and seal with a durable clear topcoat. For outdoor projects, use exterior-rated primer, paint or stain, and sealer so the piece stands up to the weather.
Source (temporary): https://www.ana-white.com/woodworking-projects/treehouse-bed