Triangle Wedding Arch
to build your own triangle wedding arch from This includes shopping list, cut list, and detailed step by step diagrams, everything you need to build your own triangle wedding arch. This project should cost about $50. The arch is reusable, or you can repurpose the wood into a bench or other project to keep in your home.
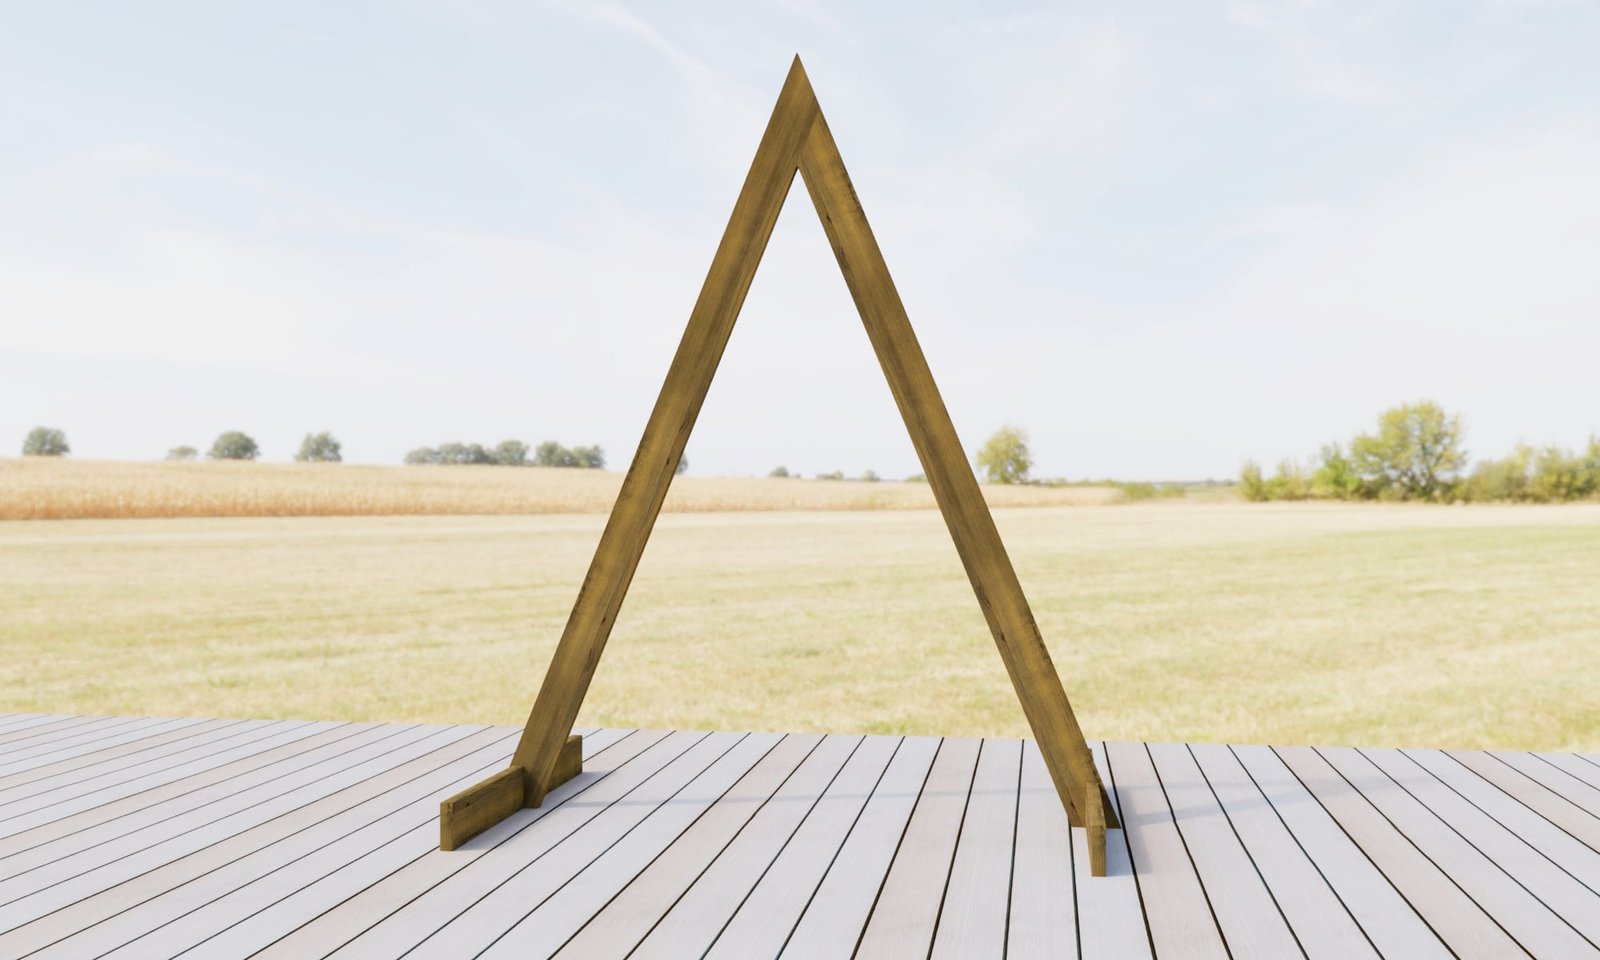
Specifications
| Project type | Home Decor |
|---|---|
| Room | Parties and Events |
| Difficulty | Intermediate |
| Estimated cost | $20 - $50 |
Dimensions
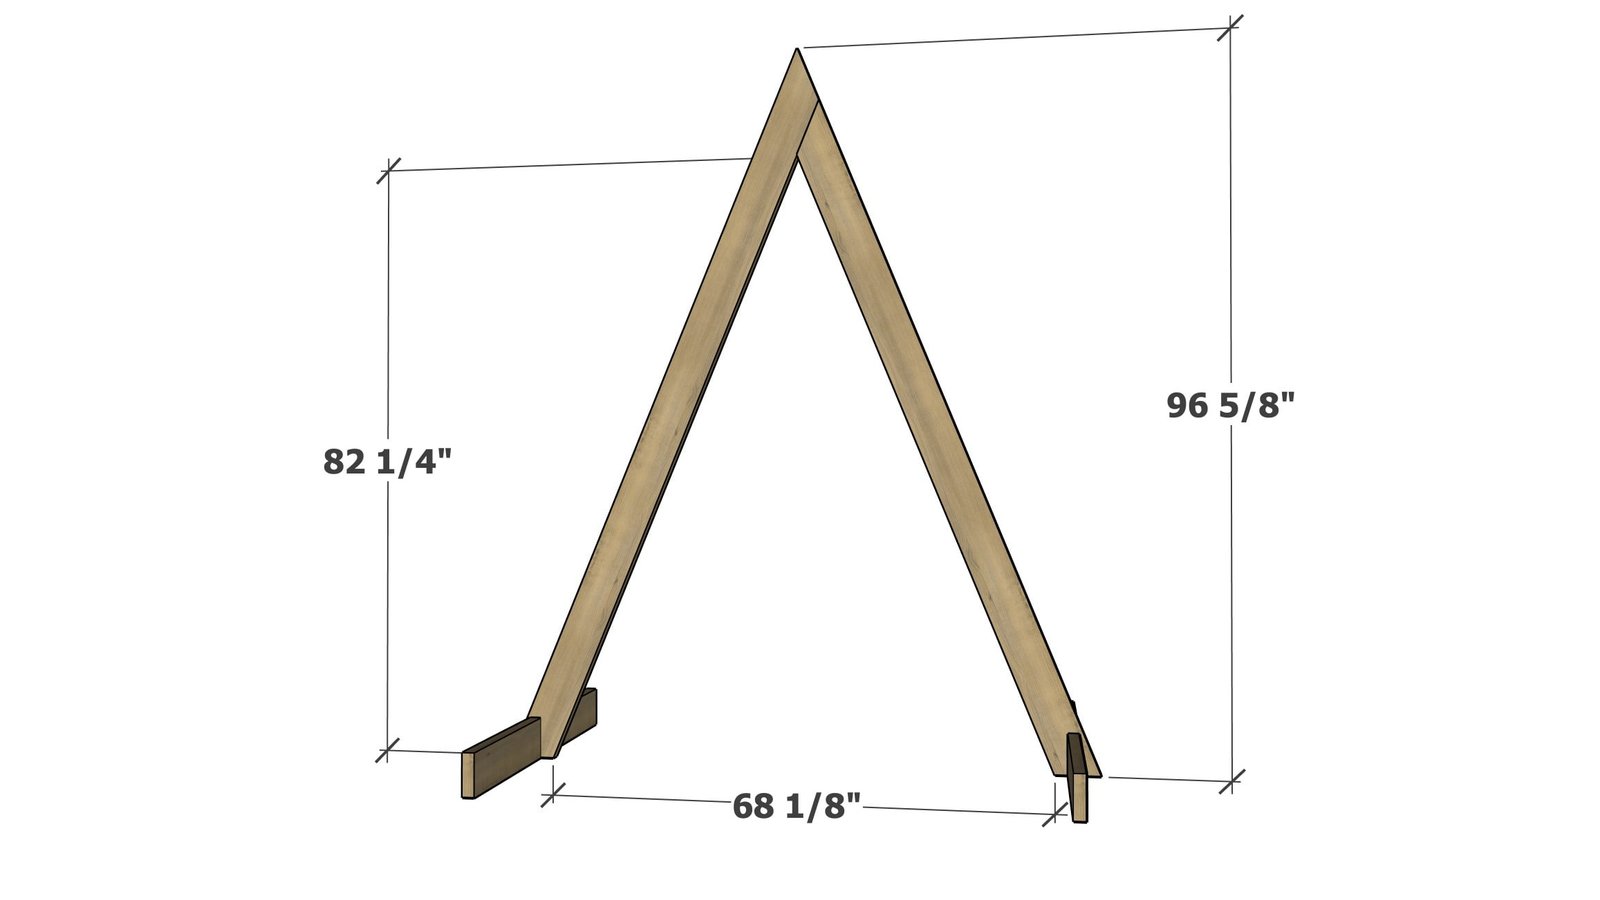
Use the size-specific shopping and cut lists below.
Shopping List
- 2 - 2x6 @ 104-5/8" *
- 1 - 2x6 @ 96" *
- 1-1/4" and 2-1/2" self tapping star bit wood screws
- tent anchors and heavy weight fishing line for anchoring (recommended)
- wood stain or paint
- Chisel
*You can substitute for 2x4s for a thinner look, this will also be less expensive and lighter weight. No changes need to be made to the cut list.
Cut List
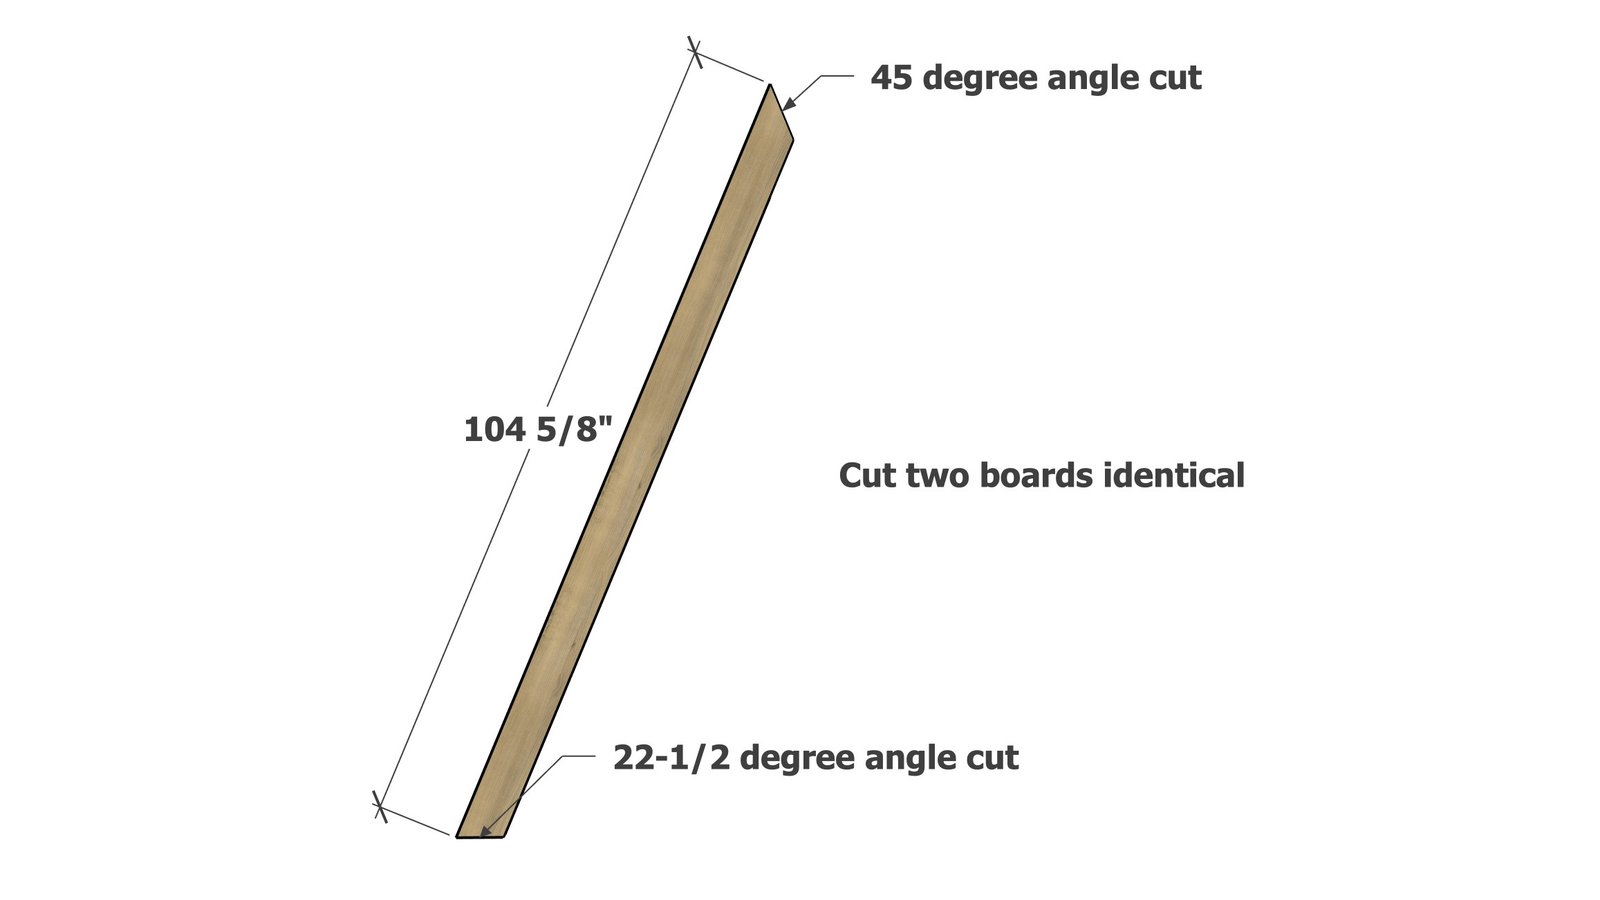
- 2 - 2x6 @ 104-5/8" - one end cut at 45 degrees, the other end cut at 22-1/2" degrees off square, long point to long point measurement (see step 1)
- 4 - 2x6 @ 24"
*If using 2x4s, no changes need to be made to the cut list
Tools
- measuring tape
- square
- pencil
- safety glasses
- circular saw
Step-by-step Instructions
Step 1
On the two 2x6 boards at 104-5/8", mark the angle cuts as shown and cut off with a miter saw or a circular saw. NOTE: The 22-1/2 degree cut is measured as a angle off a square (90 degree) cut. If using a miter saw, simply set the angle cut to 22-1/2 degrees and cut.
Layout the two cut boards, so the 45 degree cuts match each other at the top as shown.
Use a pencil to trace the overlaps.
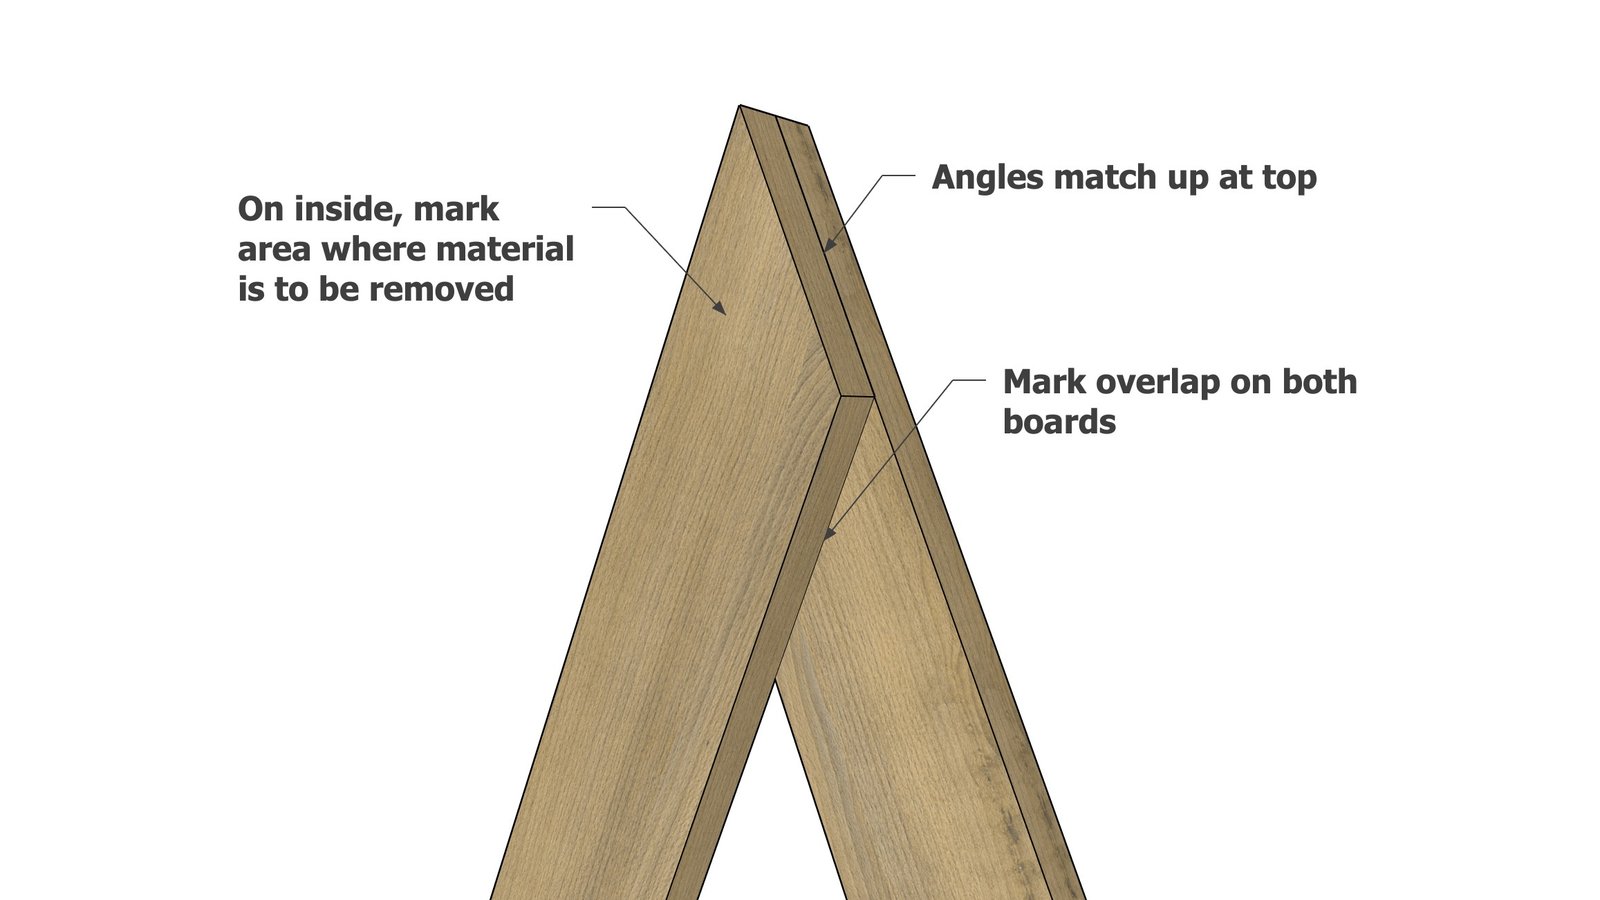
Set the circular saw cutting depth to 3/4".
Clamp the boards to a stable surface. Make cuts about 1/4" apart on the overlapping areas with the circular saw. Break the pieces out and then use a chisel to remove excess.
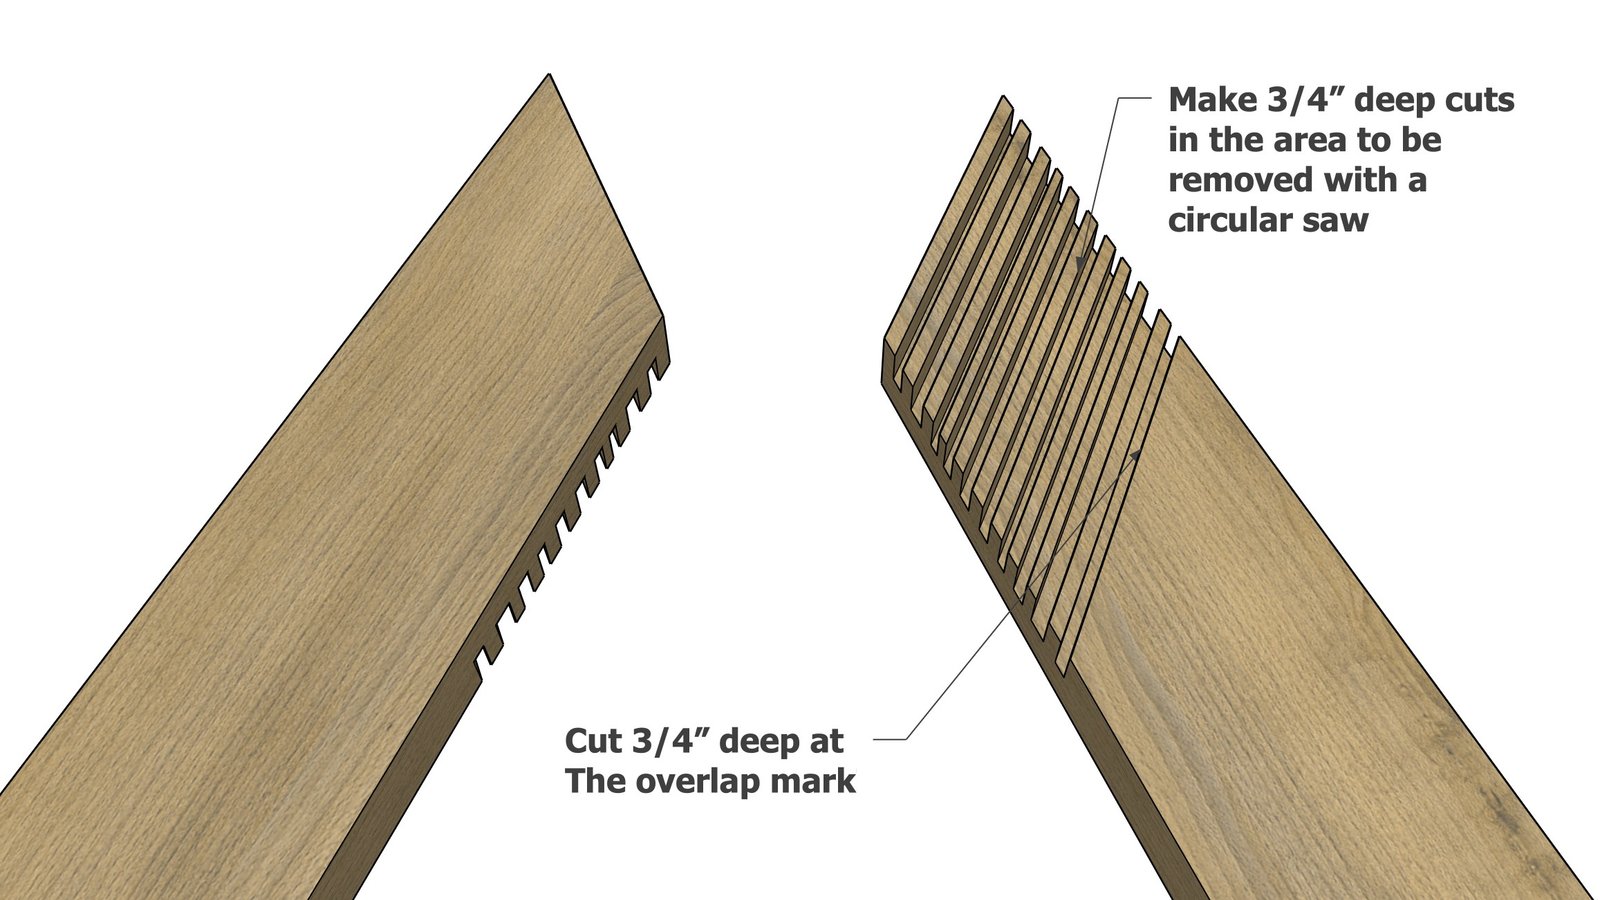
Lap the two pieces and test the fit.
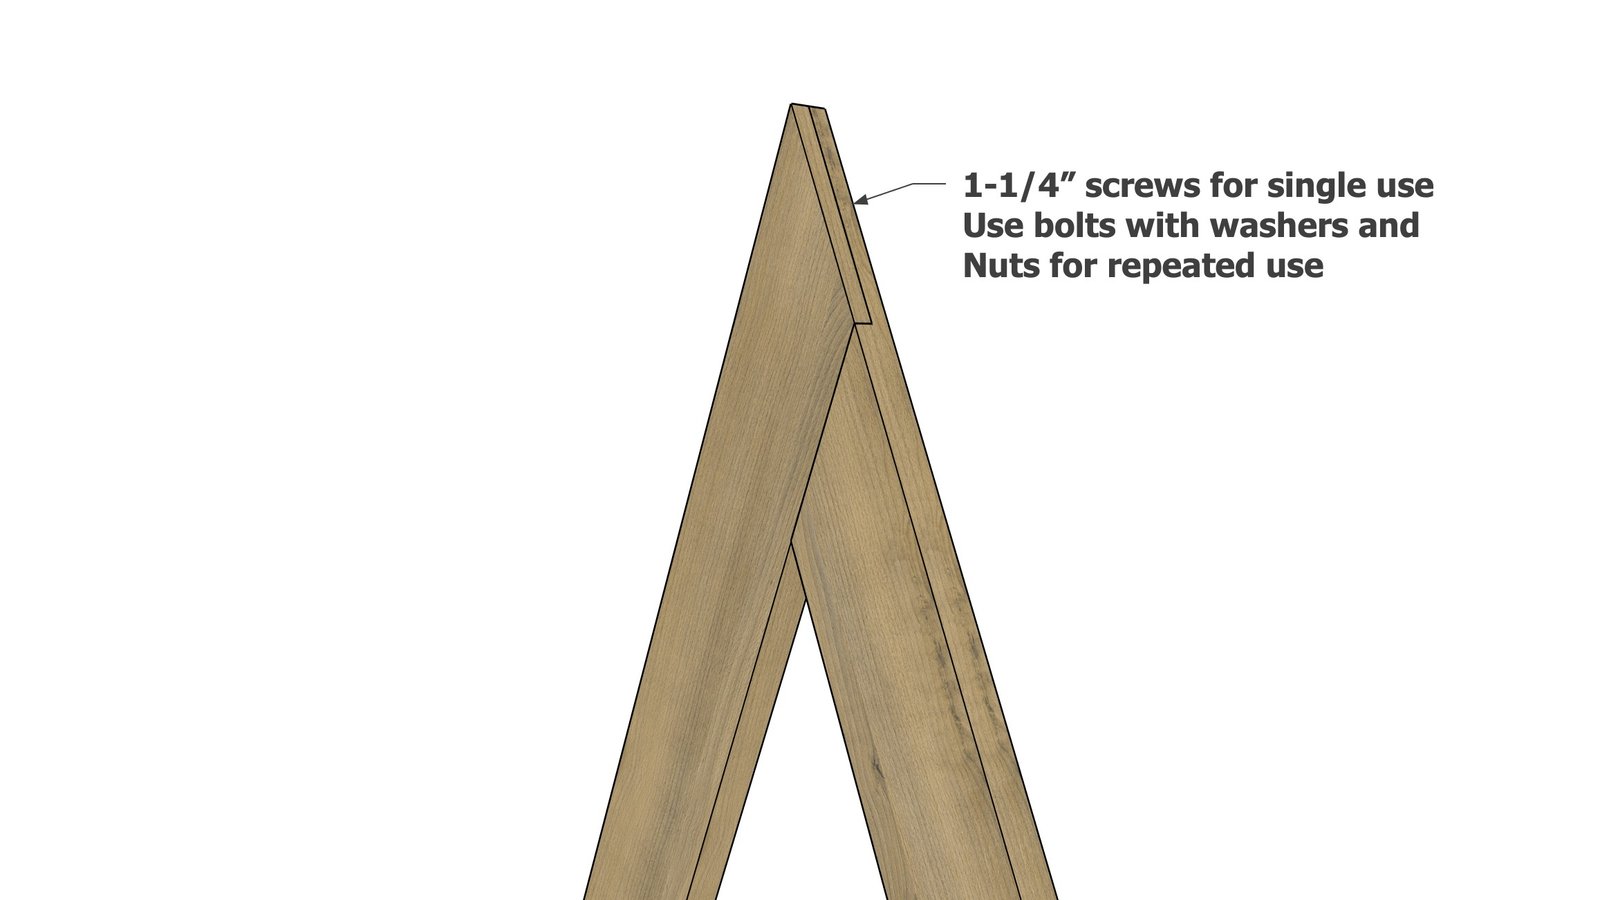
You can proceed to the next step and apply a finish before final assembly, or you can attach the two pieces together now with 1-1/4" screws. If you are planning to use the arch repeatedly, use 1-1/2" bolts and washers and nuts for easy assembly/disassembly.
Step 5
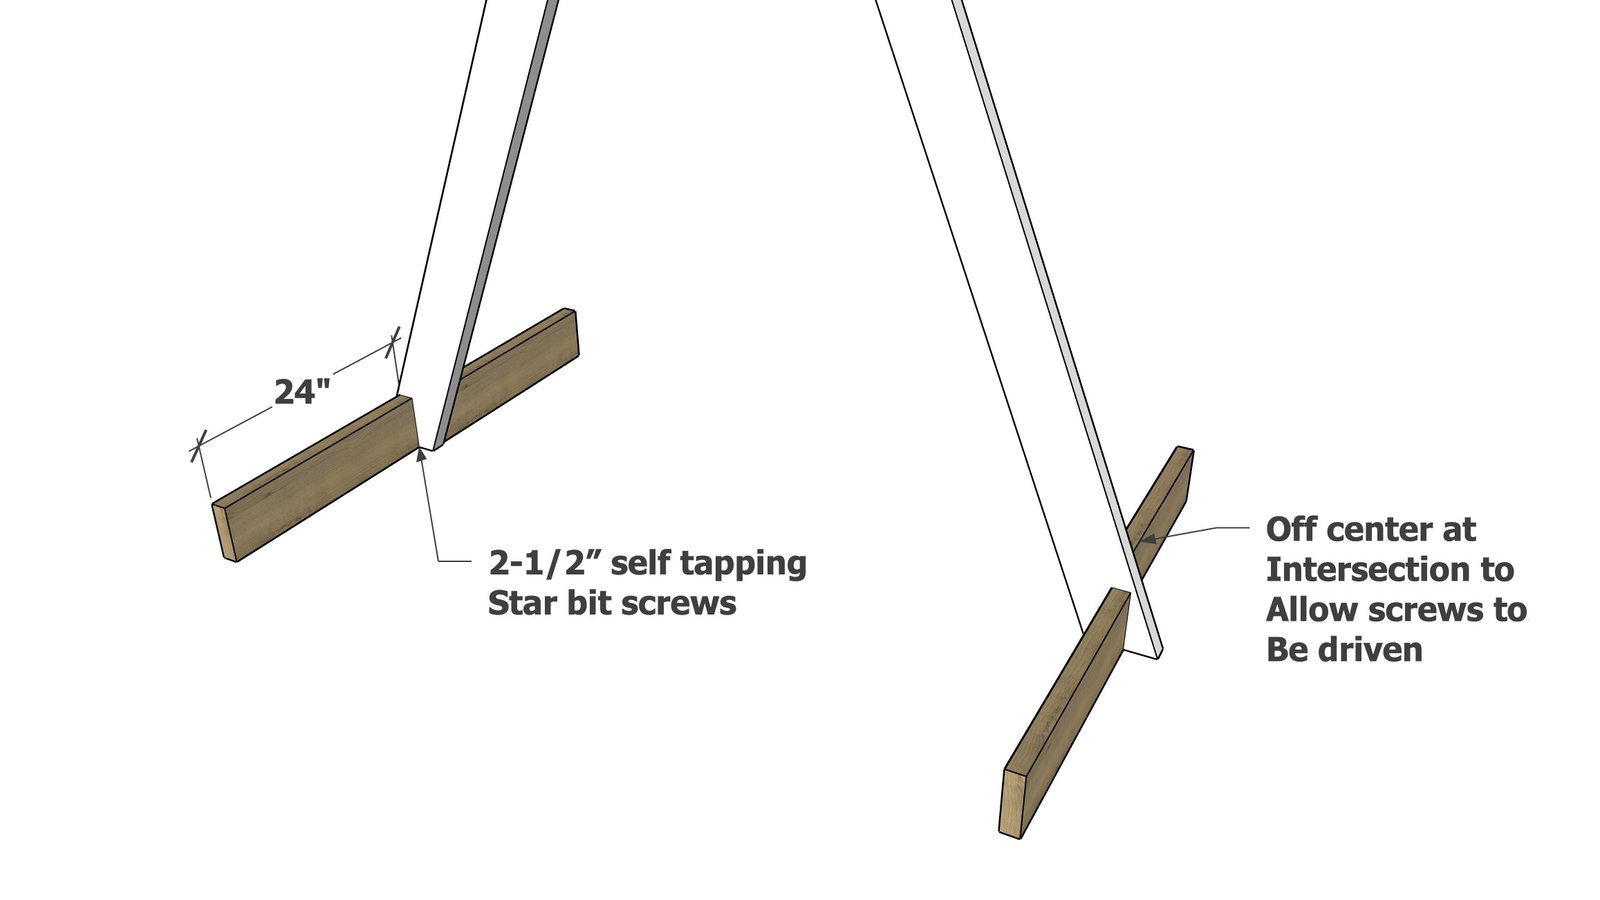
Screw the base pieces to the bottom of the arch with 2-1/2" screws.
Finishing
Sand all surfaces, starting with a medium grit and finishing with fine. Wipe off the dust, fill any holes or gaps with wood filler, and sand smooth once dry. Apply primer if you're painting, then finish with your choice of paint or stain and seal with a durable clear topcoat. For outdoor projects, use exterior-rated primer, paint or stain, and sealer so the piece stands up to the weather.
Source (temporary): https://www.ana-white.com/woodworking-projects/triangle-wedding-arch-free-plans-cut-list