Triple Laundry Basket Organizer
to build our own triple bay laundry basket organizer system. This beginner woodworking project is a great low cost and easy to build solution to get your laundry room more organized and free up floor space. The top also can work as a drying rack or a folding center. Other awesome uses for this plan - sort toys, gear, blankets, shoes, and more! This is a with step by step diagrams, shopping and cut list.
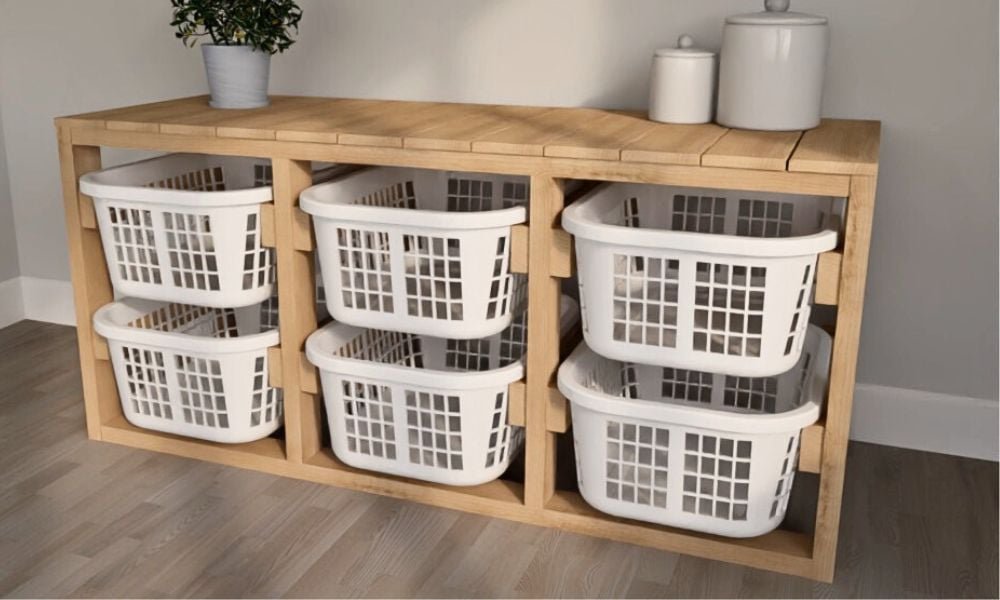
Specifications
| Project type | Dresser Plans |
|---|---|
| Room | Laundry Room |
| Difficulty | Beginner Projects |
Shopping List
- 7 - 2x4 @ 10 feet long (estimate)
- 3 - 1x6 @ 8 feet long (estimate)
- 2-1/2" self tapping star bit screws (about 80 screws needed)
- 1-3/4" self tapping star bit screws (about 50 screws needed)
- Wood glue
- 120 grit sandpaper
- Paint, stain, or finishing supplies of choice
- 6 - 1.5 Bushel Laundry Baskets
Cut List
- Outer Legs: 4 - 2x4 @ 29-1/4"
- Inner Legs: 4 - 2x4 @ 26-1/4"
- Long Horizontal Frame: 4 - 2x4 @ (inside lip measurement + 3" ) x 3 then add 3" (should be about 60")
- Cleats to Support Baskets: 12 - 2x4 @ depth of basket (should be about 24")*
- Top Planking: 1x6 @ depth of basket, quantity needed will depend on overall width, about 10-12 planks estimate*
*If this number is close to 24", choose a 23-7/8" cut length to maximize material use
Tools
- measuring tape
- square
- pencil
- safety glasses
- drill
- circular saw
- sander
Step-by-step Instructions
Build two frames as shown, using the longer screws.
Make sure the frames are square by taking opposite diagonal measurements and then adjusting the frames until the two opposite diagonals match.
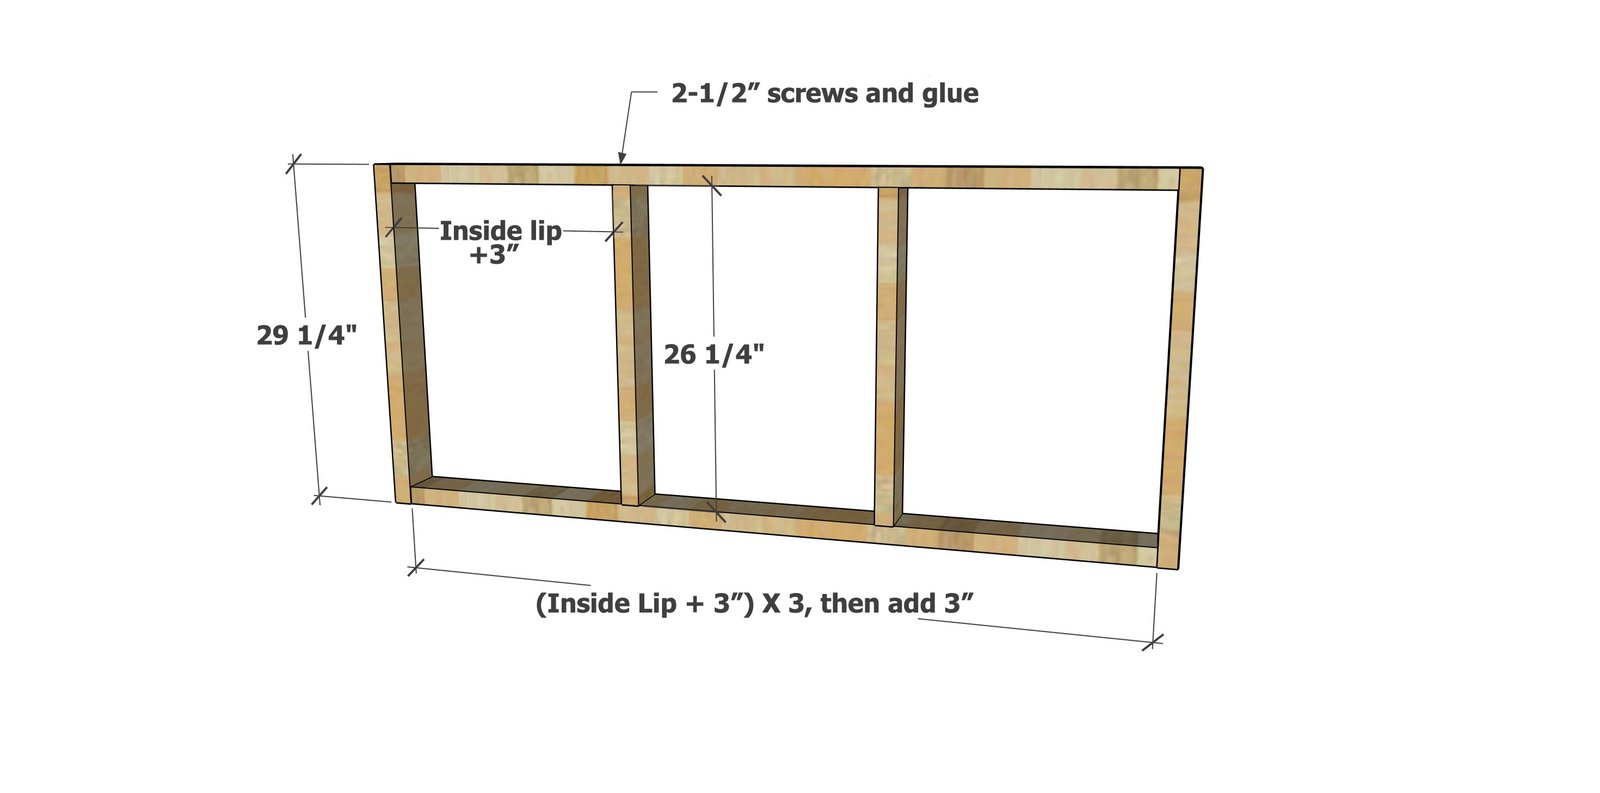
Step 2
Mark location of the cleats/runners and attach level inside the frames with two screws per joint.
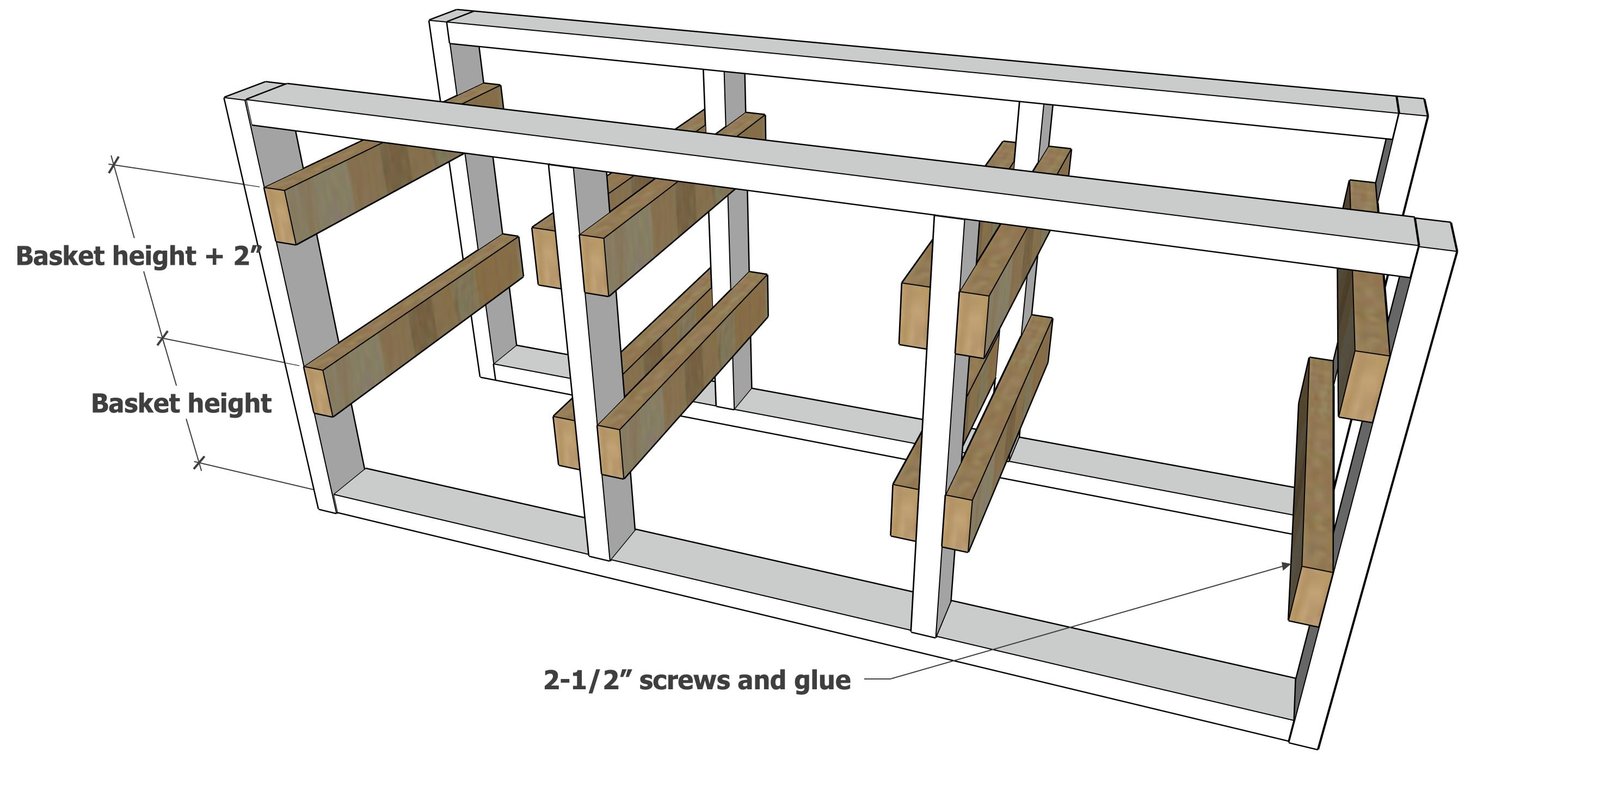
Step 3
Make sure the project is square then attach the 1x6 planking to the top with the shorter screws.
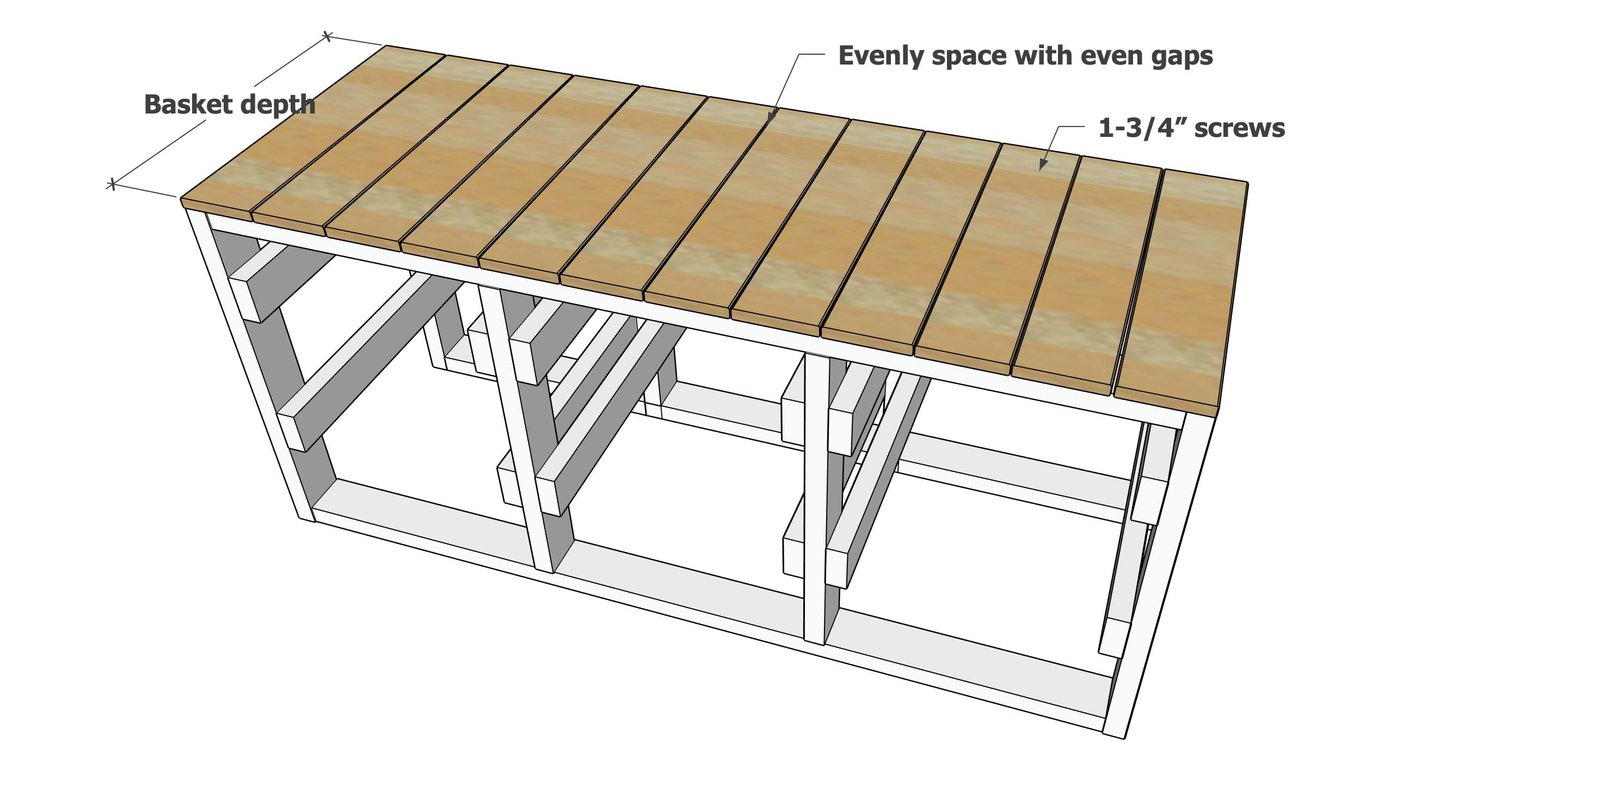
Finishing
Sand all surfaces, starting with a medium grit and finishing with fine. Wipe off the dust, fill any holes or gaps with wood filler, and sand smooth once dry. Apply primer if you're painting, then finish with your choice of paint or stain and seal with a durable clear topcoat. For outdoor projects, use exterior-rated primer, paint or stain, and sealer so the piece stands up to the weather.
Source (temporary): https://www.ana-white.com/woodworking-projects/triple-laundry-basket-organizer