Truck Shelf or Desk Organizer
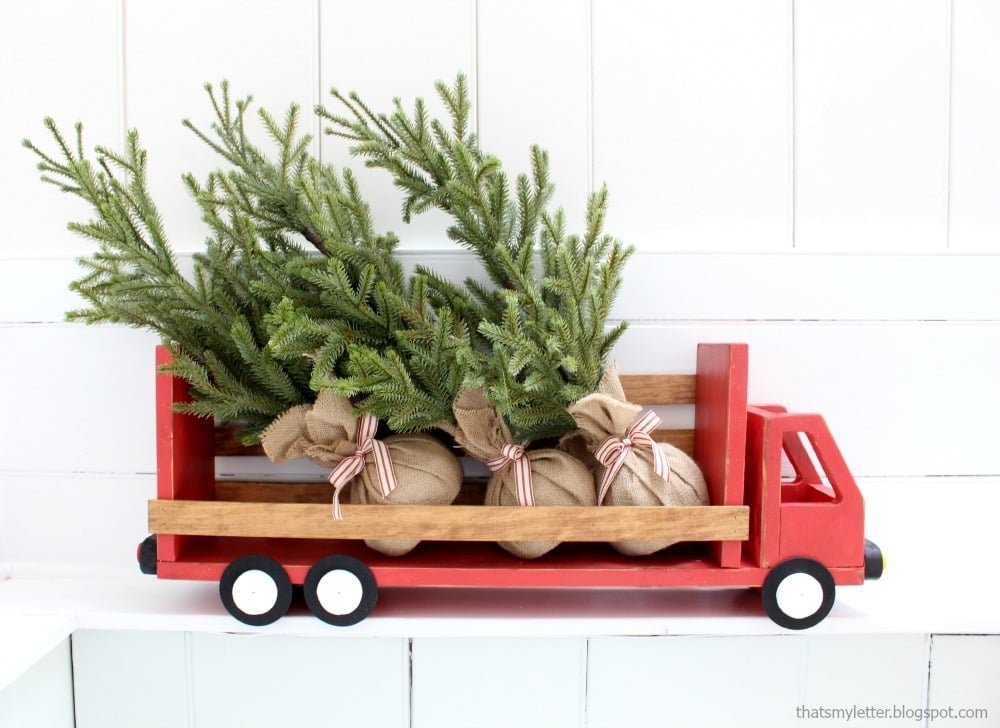
Storage might as well be cute! This darling truck shelf is made of scrap wood. The plans are easy and step by step. Perfect for a children's room.
Specifications
| Project type | shelves |
|---|---|
| Room | Kids and Toys |
| Style | Farmhouse Furniture |
| Difficulty | Beginner Projects |
Shopping List
1 - 1x6 @ 6 feet long
2 - 1x2 @ 8 feet long (unless you use something else for truck sides)
1x3 and 1x4 scraps for cab
1/2" and 1/4" plywood scraps
Cut List
1 - 1x6 @ 28-1/4" (main base)
2 - 1x6 @ 8-3/4" (truck bed front and back)
3 - 1x2 @ 5-1/2" (supports where wheels will be attached)
4 - 1x2 @ 23-3/4" or other material 1-1/2" wide -Jaime used scrap 1/4" plywood - truck bed sides
1 - 1x6 @ 5-1/2" (cab back)
2 - 1x4 @ 6" (cab sides)
1 - 1x3 @ 4" - (cab front)
2 - 1x2 @ 5-1/2" - cut into rounded shapes (bumpers)
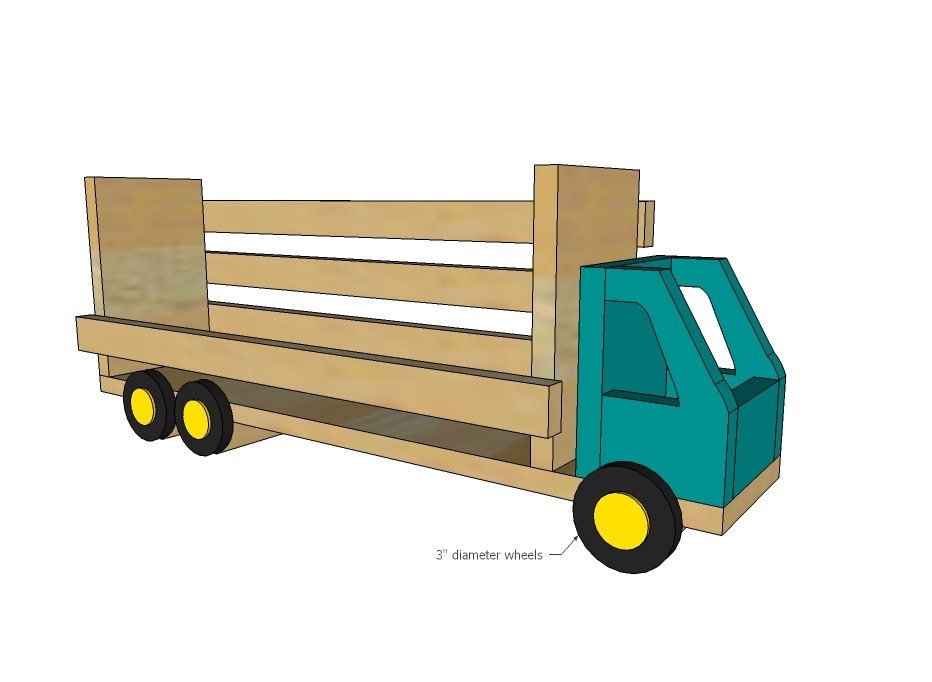
3 - 3" diamenter plywood pieces (1/2" preferred) (wheels)
Tools
- measuring tape
- square
- pencil
- safety glasses
- hearing protection
- drill
- jigsaw
- compound miter saw
- nailer
Step-by-step Instructions
NOTE: It may be easier to stain or paint pieces before assembly, especially if different colors.
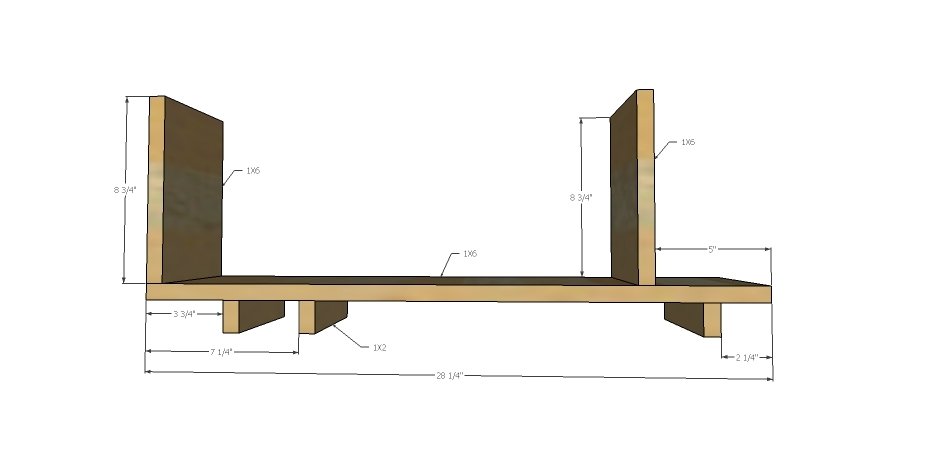
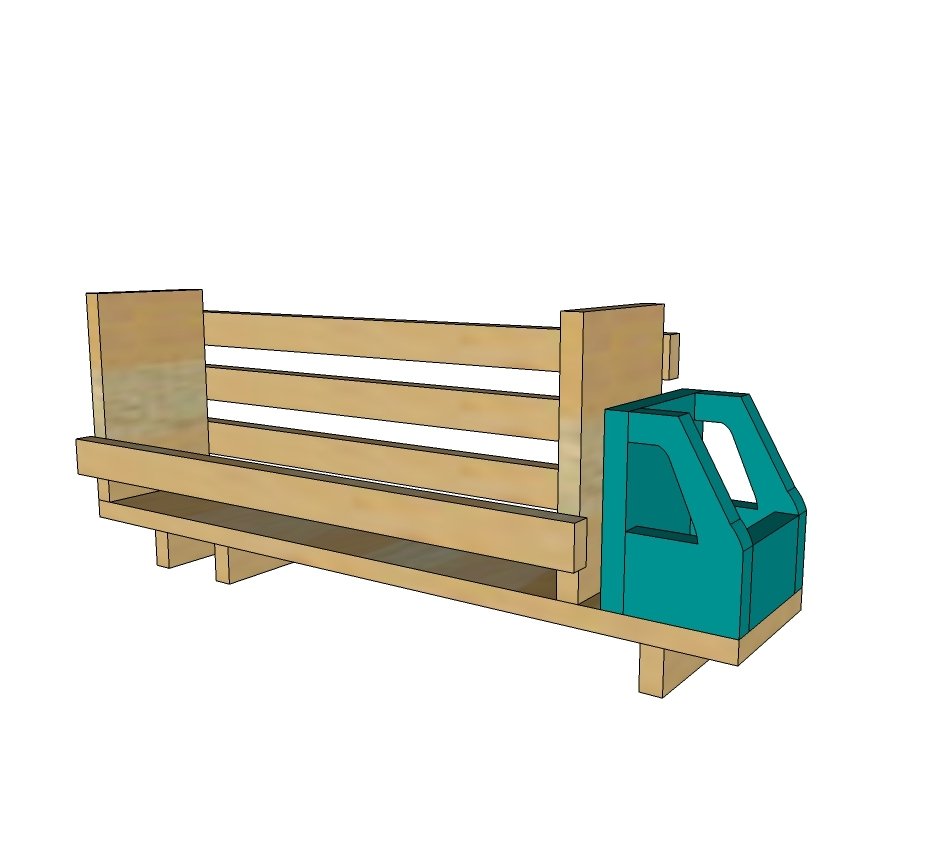
Attach to the main base the 1x2 wheels supports with glue and 1-1/4" staples or nails, nailing through the 1x6 into top edge of the 1x6. Now add the two 1x6 pieces, either in the same manner, or with 3/4" pocket holes and 1-1/4" pocket hole screws and glue.
Step 2
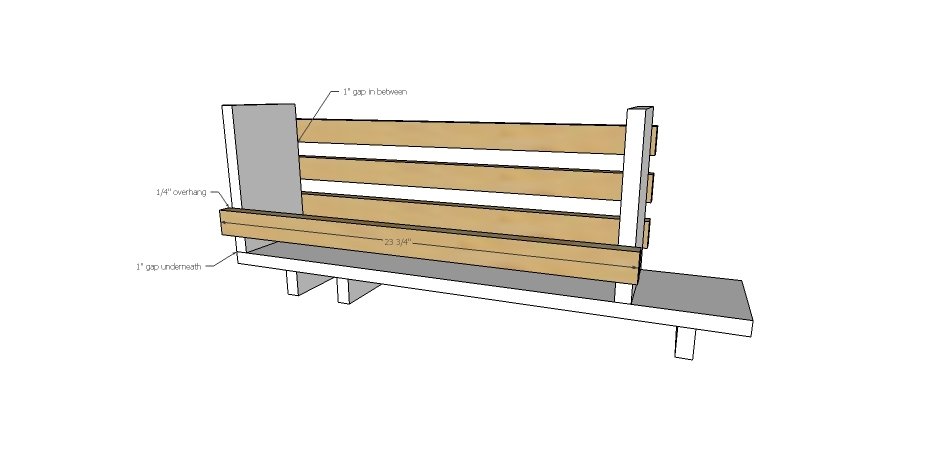
Nail the truck bed sides on with 1-1/4" brad nails (can use smaller nails or staples if using thinner stock, for example 1/4" plywood) with glue.
Step 3
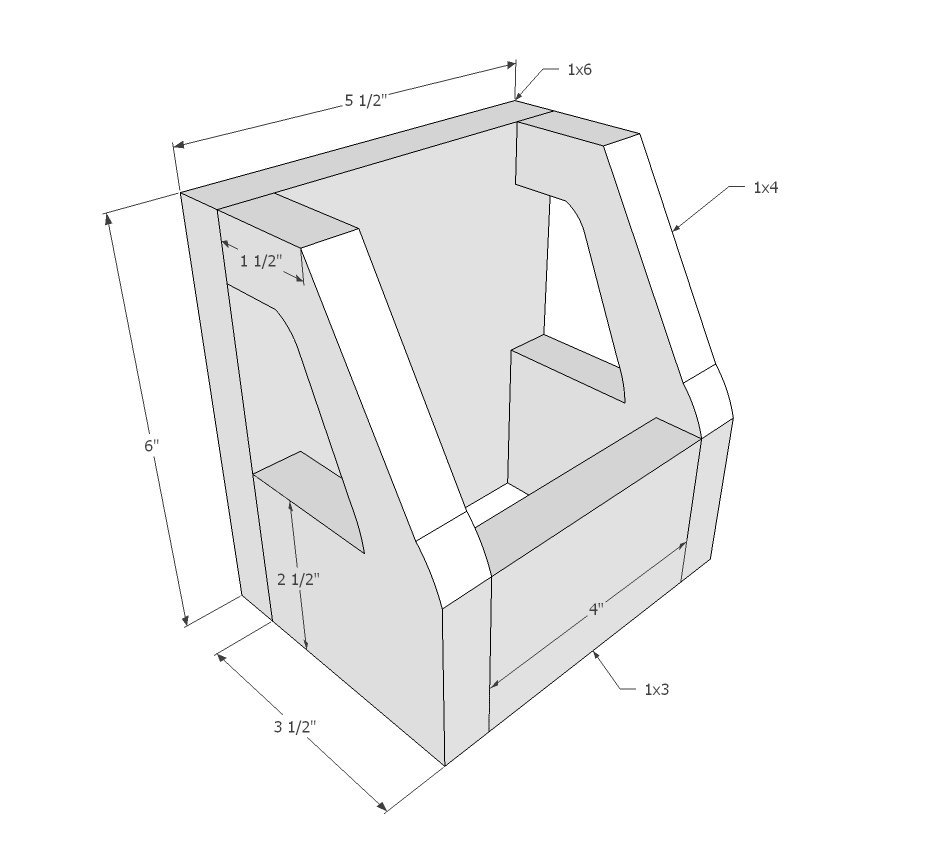
Cut the window and front of the cab out of the 1x4 pieces with a jigsaw. clamping piece to workbench. You could also do the jigsawing before cutting the 1x4 down in size (for example, take a 12" long 1x4, cut the window and windshield area out, then cut it down to 5" long). Attach all the pieces together with glue and 1-1/4" brad nails.
Step 4
Now attach the cab to the base with 1-1/4" nails and glue from underside.
Step 5
Finishing
Sand all surfaces, starting with a medium grit and finishing with fine. Wipe off the dust, fill any holes or gaps with wood filler, and sand smooth once dry. Apply primer if you're painting, then finish with your choice of paint or stain and seal with a durable clear topcoat. For outdoor projects, use exterior-rated primer, paint or stain, and sealer so the piece stands up to the weather.
Source (temporary): https://www.ana-white.com/woodworking-projects/truck-shelf-or-desk-organizer