Truss Coffee Table
to build a truss style coffee table from This coffee table features a solid wood design, so you can paint or stain it any color. It will add a rustic, authentic look to your space, and have the durability to put your feet up. This includes shopping and cut list, step by step diagrams and reader submitted photos.
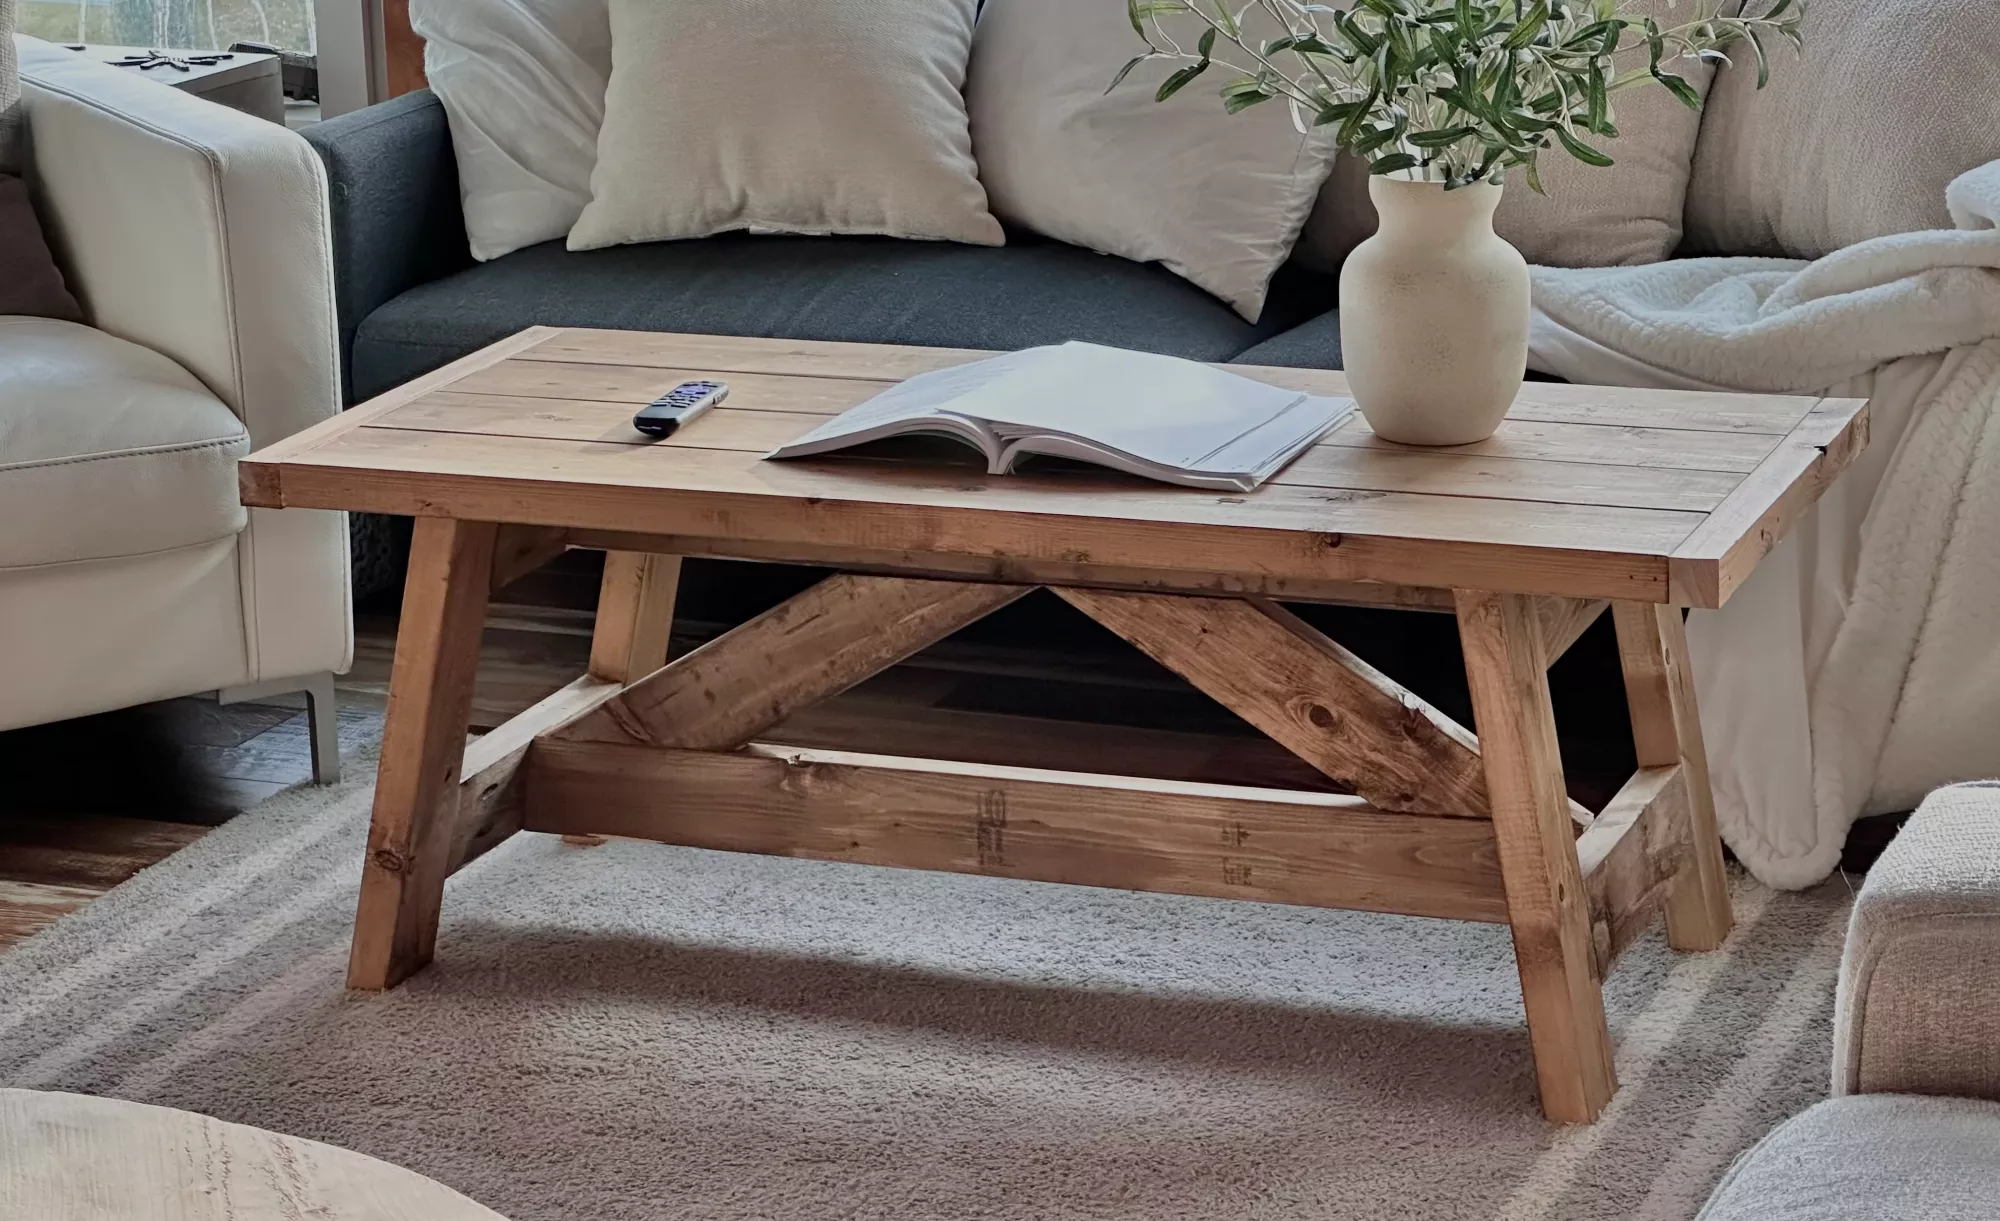
Specifications
| Project type | Coffee Tables |
|---|---|
| Room | living room |
| Style | Farmhouse Furniture |
| Difficulty | Advanced |
Dimensions
Use the size-specific shopping and cut lists below.
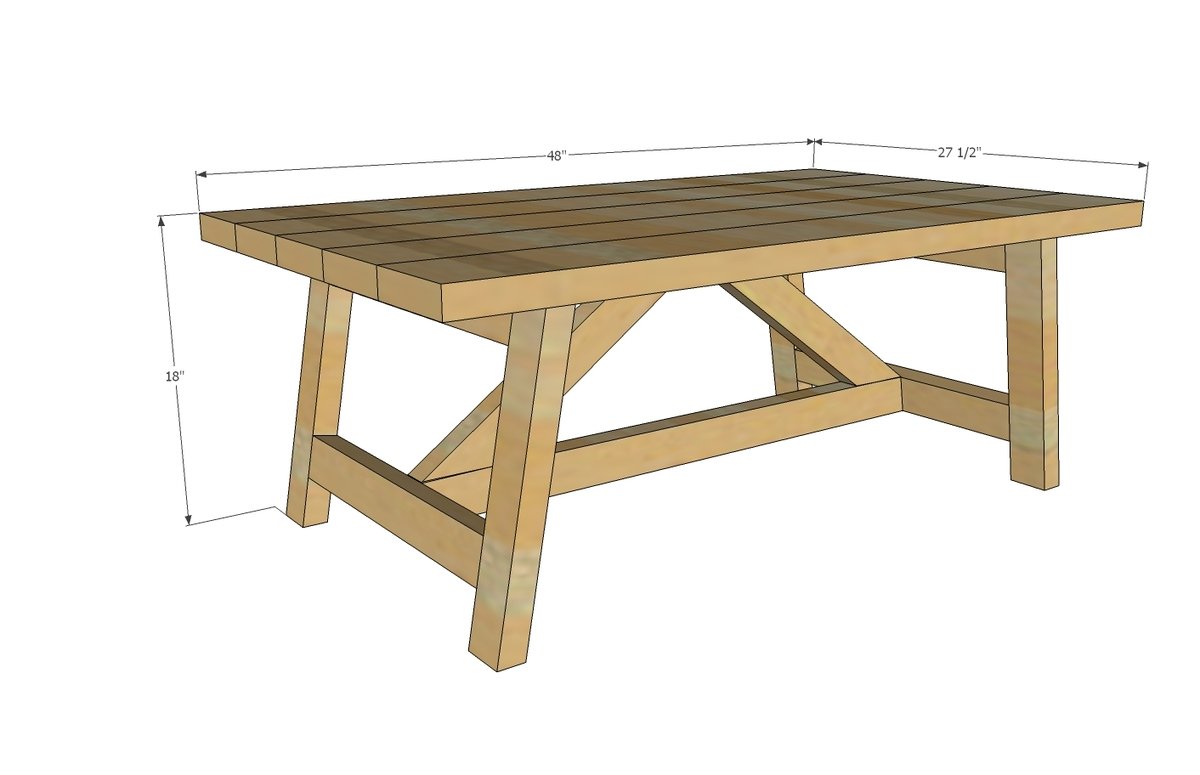
Shopping List
- 3 - 2x6 @ 8 feet long
- 3 - 2x3 @ 8 feet long
- For attaching, you can use countersunk screws (3" wood screws) or 2 1/2" PH screws and glue.
NOTE: I did end up using 2x4s for the base build instead of 2x3s. This did change the end stretcher measurements to 17" instead of 19" and the cross bracing changed as well.
Cut List
- 4 - 2x3 @ 16 3/4" (legs - both ends cut at 10 degrees off square BEVEL long point to short point, ends ARE parallel)
- 4 - 2x3 @ 19" (end stretchers)
- 1 - 2x3 @ 37 3/4" (bottom stretcher - both ends cut at 10 degrees off square ANGLE long point to long point ends are NOT parallel)
- 1 - 2x3 @ 33 3/4" (top stretcher - both ends cut at 10 degrees off square ANGLE long point to long point ends are NOT parallel)
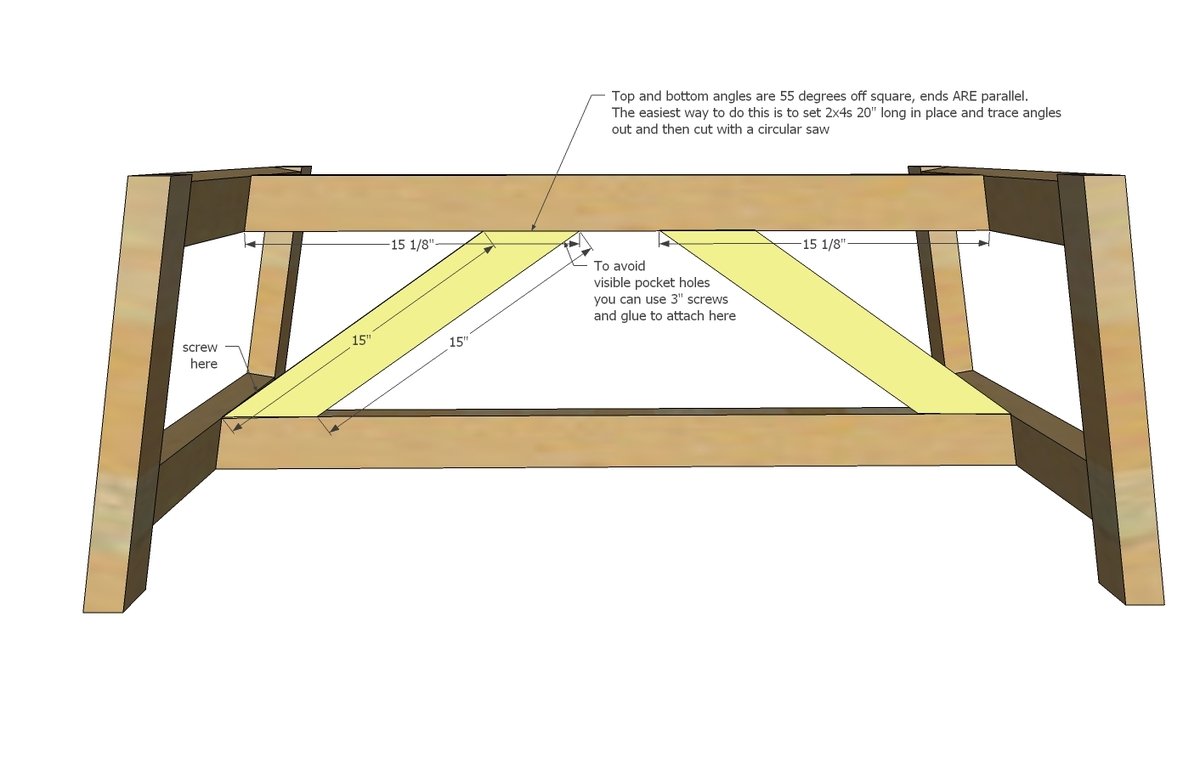
- 2 - 2x3 @ 20" (truss detail - cut down to make up truss parts - if you saw cuts 55 degree angles, you can also cut these with ends parallel at 55 degrees off square, long point to short point, 15" long)
- 5 - 2x6 @ 48" (tabletop)
Tools
- measuring tape
- square
- pencil
- safety glasses
- hearing protection
- kreg-jig
- drill
- circular saw
- compound miter saw
- countersink drill bit
Step-by-step Instructions
Step 1
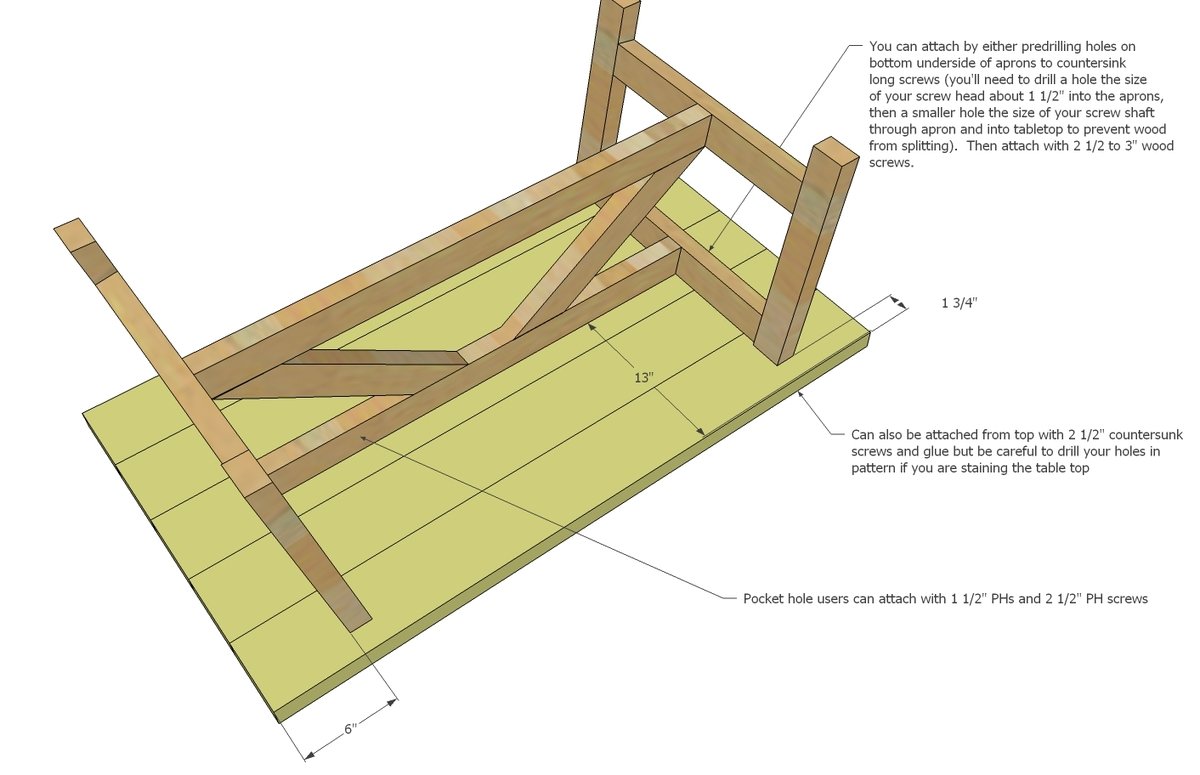
First, build your two leg ends. They will be identical. You can use 1 1/2" pocket holes on each end of the aprons and 2 1/2" pocket hole screws to attach, or you can attach from outsides with screws and glue. If you choose to countersink, first drill a hole the size of your screw head 1 1/2" into the leg. Then attach your screw, countersinking the head into the leg 1 1/2". TIP: If you plan to attach the coffee table top to the base in later steps with pocket holes (see step 5) then drill 1 1/2" pocket holes facing upward on insides of top aprons.
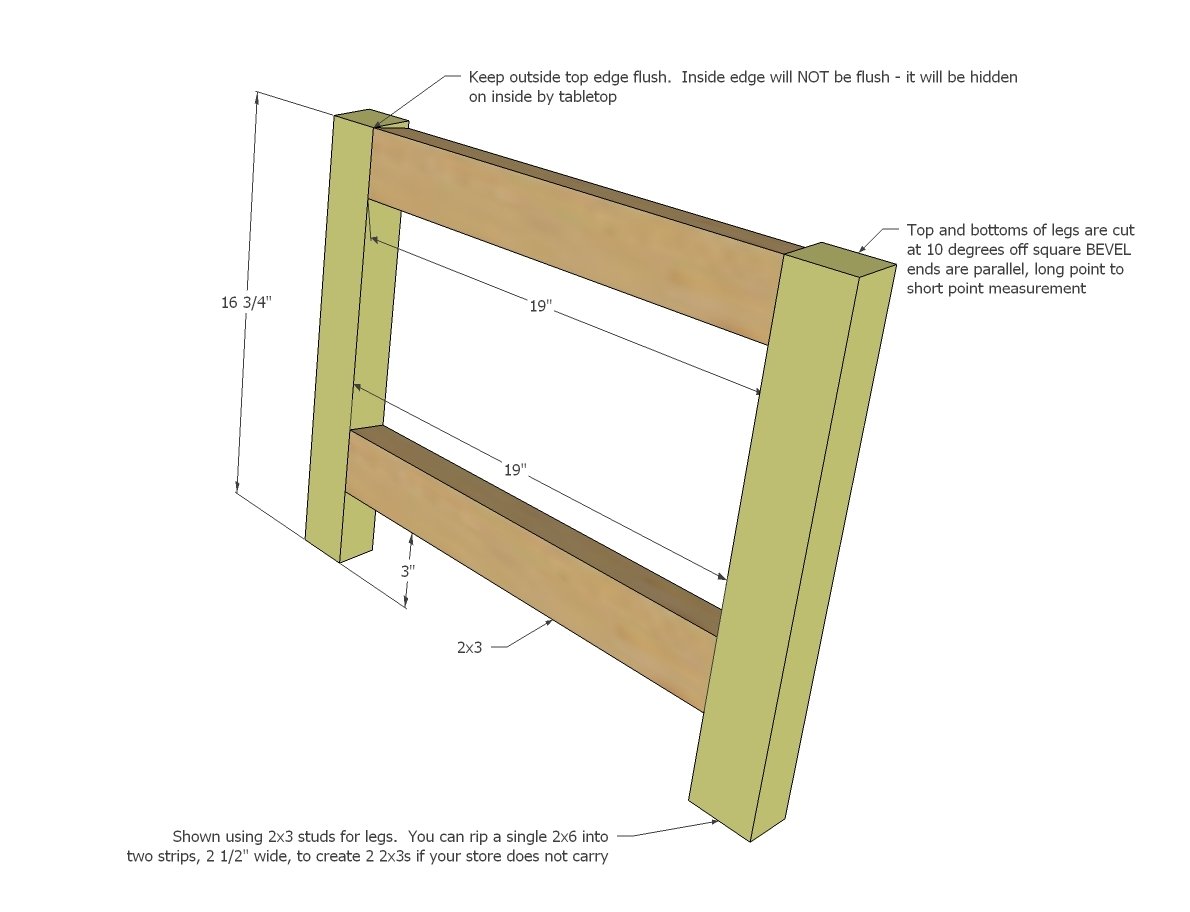
Step 2
First, with the legs upside down, attach the shorter center piece at the top, so the top is flush to the top of the legs. I used 2-1/2" screws from outside, centering everything. Then attach the lower center piece.
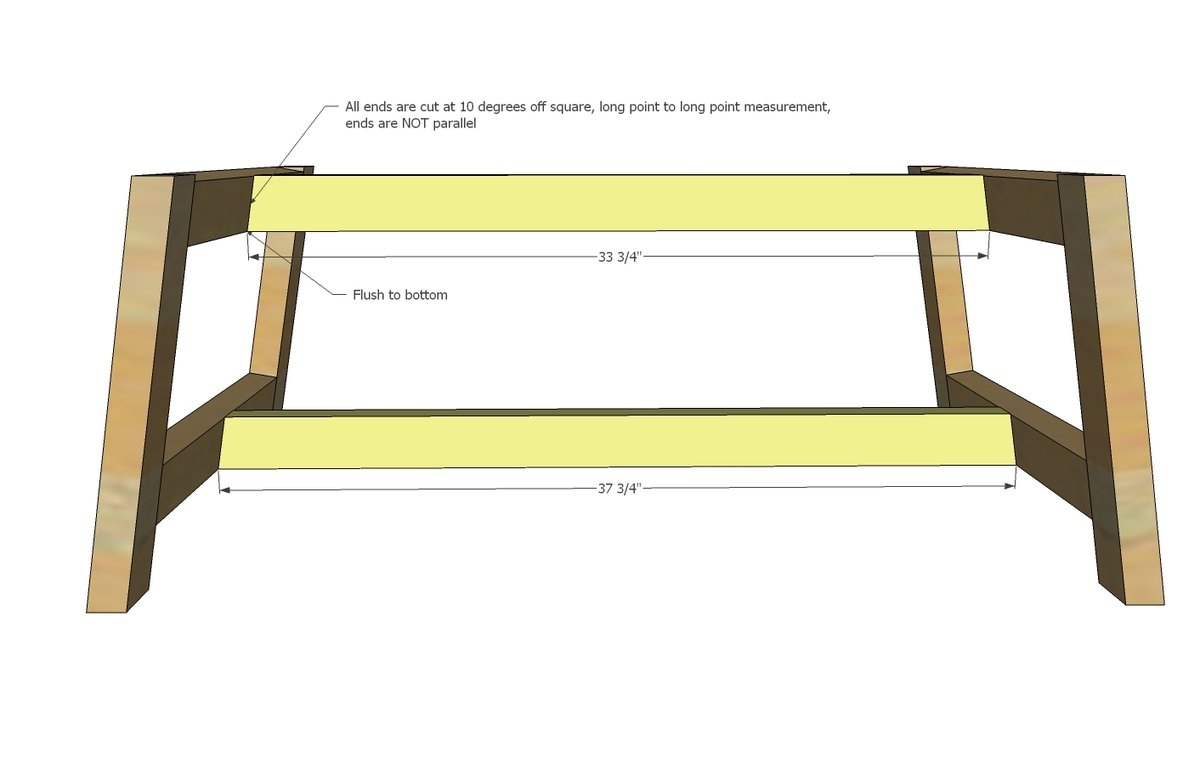
Step 3
Position your cross support pieces beside the final position, and trace with a pencil. Cut with a circular saw. Attach in place with glue and a screw at the pointed end of the cross support pieces.
Step 4
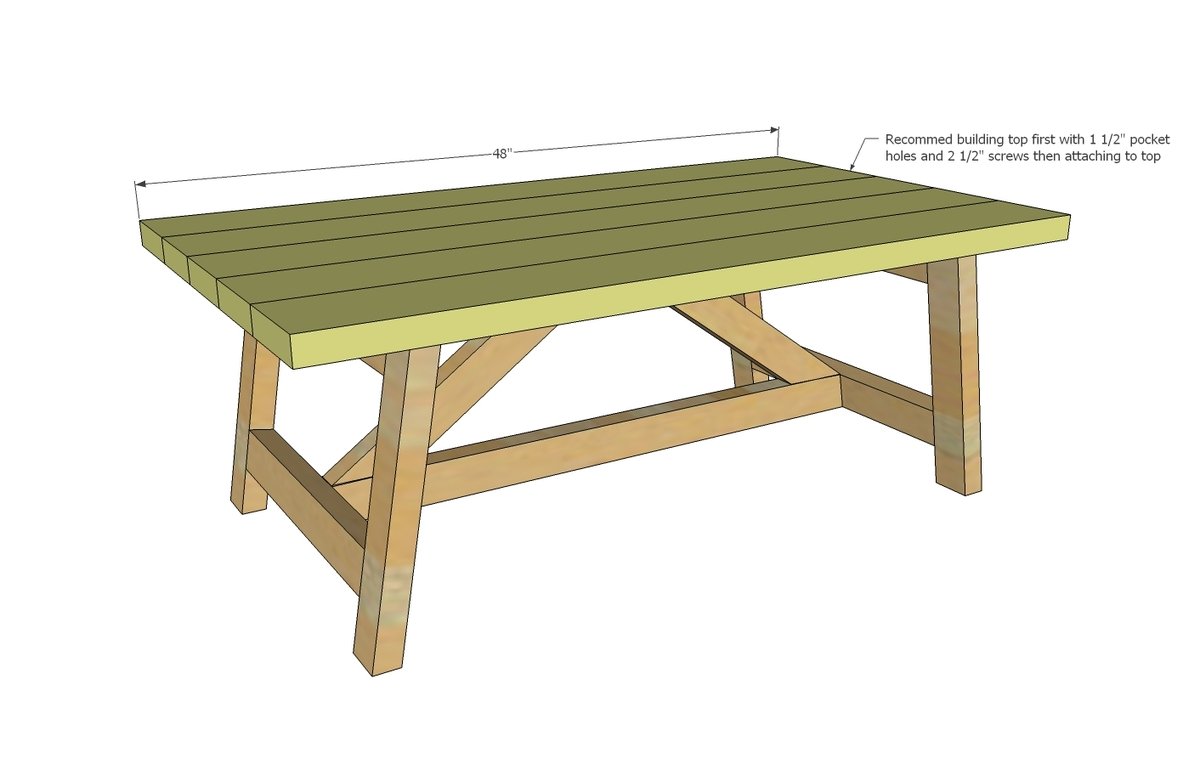
I recommend building tabletop first with 1 1/2" PHs and 2 1/2" PH screws, or edge gluing and clamping to create your tabletop. In the photo, I cut the tabletop boards down to 45" and then added 2x2s on the ends for a more finished look, this is optional. Attach the tabletop to the base with screws from the top or through pocket holes drilled in the inside of the aprons.
Step 5
Finishing
Sand all surfaces, starting with a medium grit and finishing with fine. Wipe off the dust, fill any holes or gaps with wood filler, and sand smooth once dry. Apply primer if you're painting, then finish with your choice of paint or stain and seal with a durable clear topcoat. For outdoor projects, use exterior-rated primer, paint or stain, and sealer so the piece stands up to the weather.
Source (temporary): https://www.ana-white.com/woodworking-projects/truss-coffee-table