Truss End Table
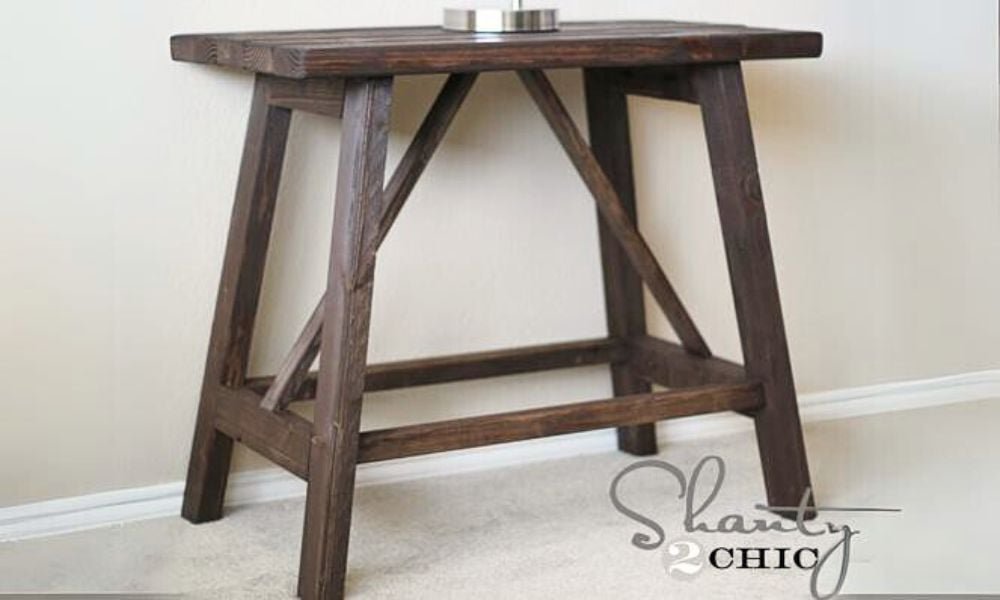
Build this end table! DIY this end table from!
Specifications
| Project type | Nightstands |
|---|---|
| Room | Bedroom |
| Style | Farmhouse Furniture |
| Difficulty | Intermediate |
| Estimated cost | $20 - $50 |
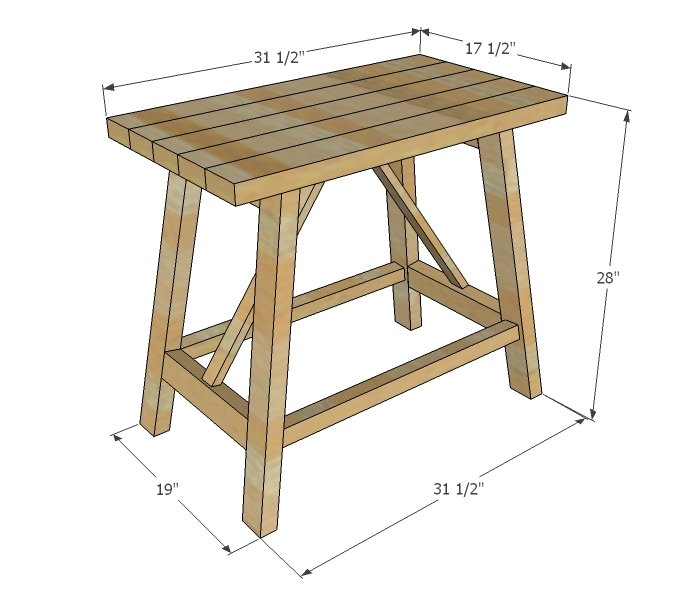
Dimensions
Use the size-specific shopping and cut lists below.
Shopping List
- 2 – 2x4 @ 8 feet long
- 2 – 2x3 @ 8 feet long
- 1 – 2x2 @ 6 feet long
- 1 – 1x2 @ 4 feet long
- 1 1/4” and 2 1/2" pocket hole screws
*If you can't find 2x3s - a 2x6 can be ripped in half to make two 2x3s. They should measure 2 1/2" wide x 1 1/2" thick.
Cut List
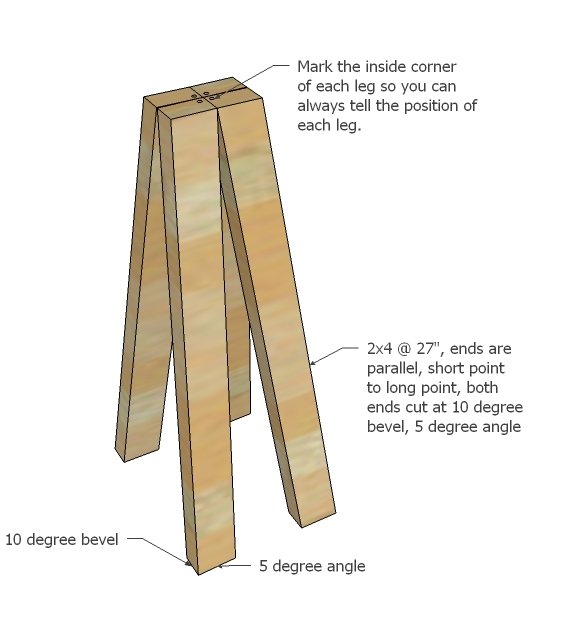
- 4 – 2x3 @ 27” (Both ends cut at 10 degree bevel/5 degree angle, parallel, long point to short point)
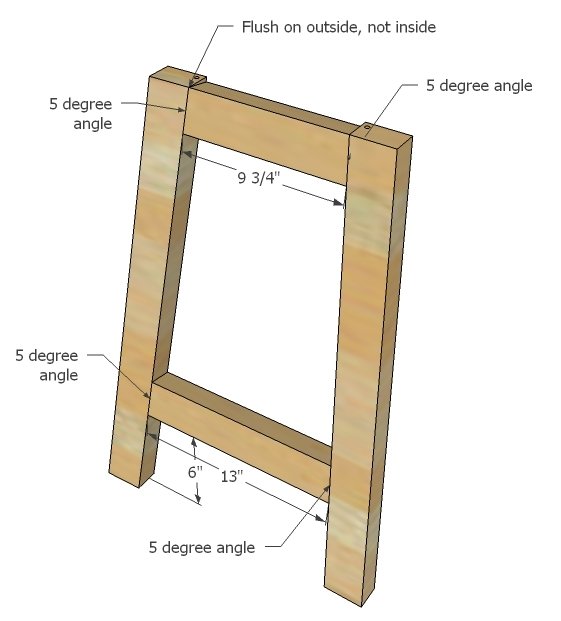
- 2 – 2x3 @ 9 3/4" (both ends cut at 5 degrees off square, ends NOT parallel, long point to long point)
- 2 – 2x3 @ 13" (both ends cut at 5 degrees off square, ends NOT parallel, long point to long point)
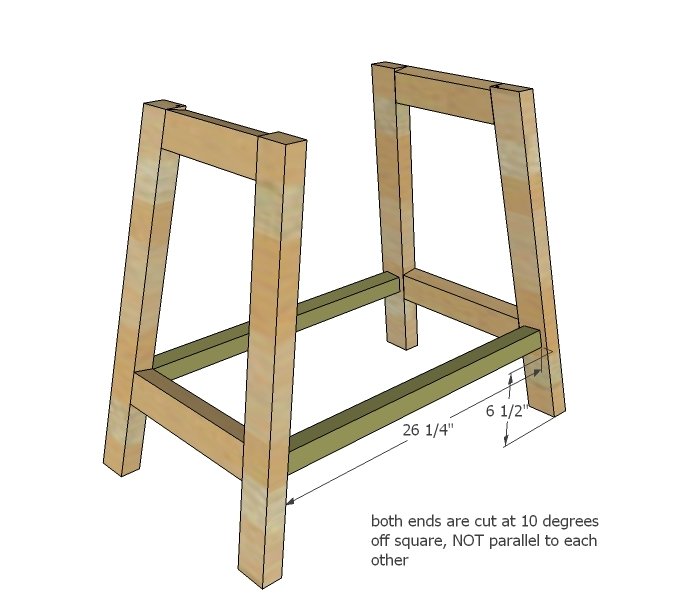
- 2 – 2x2 @ 26 1/4" (both ends cut at 10 degrees off square, ends NOT parallel, long point to long point)
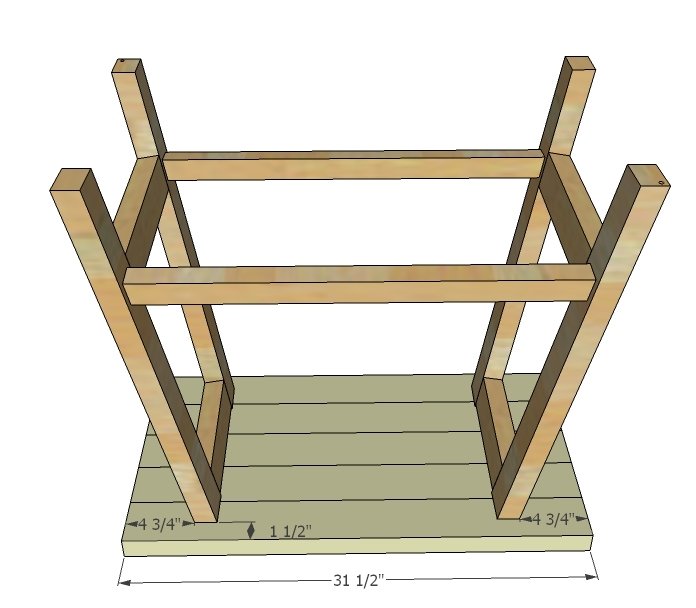
- 5 – 2x4 @ 31 1/2"
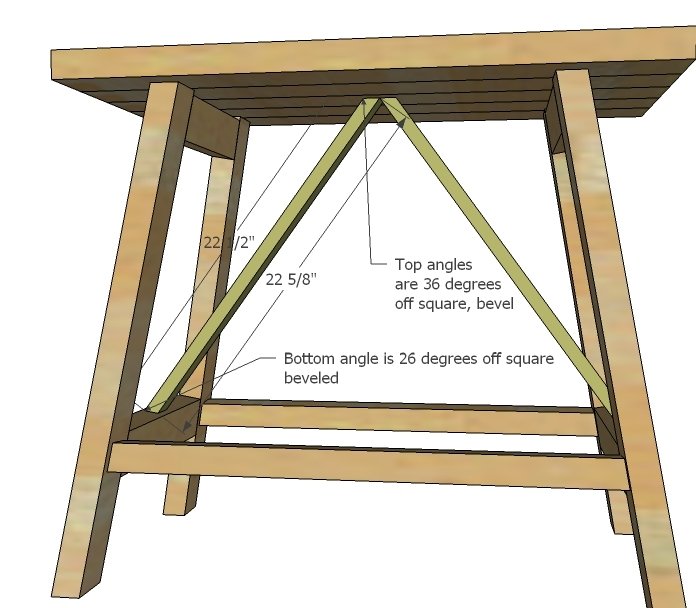
- 2 – 1x2 @ 24” (cut angles in last step)
Tools
- measuring tape
- square
- pencil
- safety glasses
- hearing protection
- kreg-jig
- drill
- compound miter saw
- sander
- level
- countersink drill bit
Step-by-step Instructions
Step 1
I always do this because with small angles - especially double angles - it will get confusing which way is which. It's the little things that save the time!
Step 2
With the legs marked, add the aprons. Pay close attention to this diagram. The top apron is flush on top to the outside, but will NOT be on the inside, which is hidden under the seat. Build two that are identical. NOTE: Pocket hole users may wish to drill 1 1/2" pocket holes along top INSIDE edge of each end for attaching top in step 4.
Step 3
Once you have the ends built, it's time to add the side supports.
Step 4
I recommend building your tabletop first with pocket holes - 1 1/2" PH with 2 1/2" PH screws - and then attaching to leg sides.
Step 5
Step 6
For more photos and tips, and finishing information, please visit Ashley at Shanty 2 Chic.
Finishing
Sand all surfaces, starting with a medium grit and finishing with fine. Wipe off the dust, fill any holes or gaps with wood filler, and sand smooth once dry. Apply primer if you're painting, then finish with your choice of paint or stain and seal with a durable clear topcoat. For outdoor projects, use exterior-rated primer, paint or stain, and sealer so the piece stands up to the weather.
Source (temporary): https://www.ana-white.com/woodworking-projects/truss-end-table