Tryde Console Table
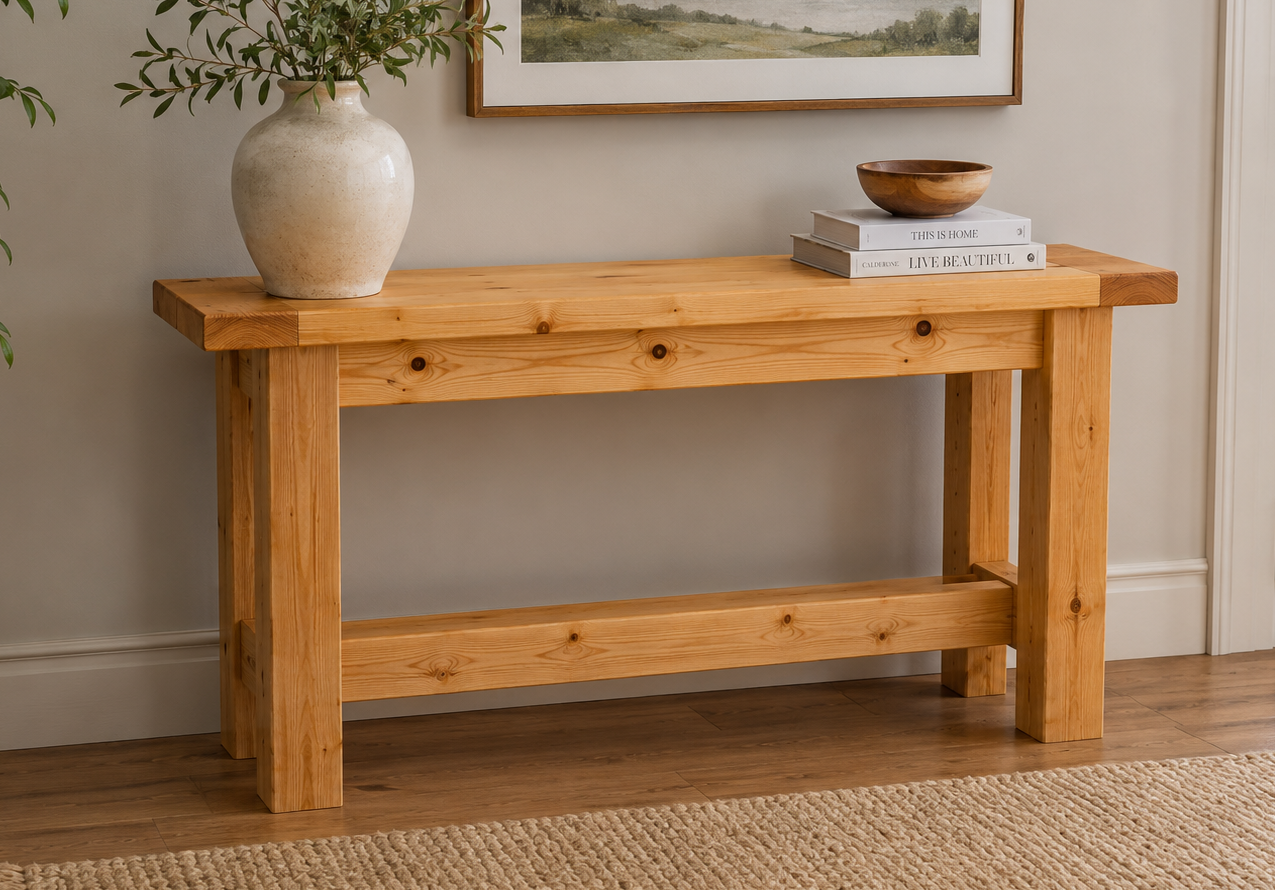
Build your own rustic console table! This beautiful solid wood table is made using pine lumber, so it's full of texture and made with soft, less expensive wood. This is a DIY project plan with step by step diagrams, shopping and cut list - everything you need to build your own console table! RELATED: Build the matching coffee table and end table from
Specifications
| Project type | Console Table Plans |
|---|---|
| Room | living room |
| Style | Farmhouse Furniture |
| Difficulty | Intermediate |
| Estimated cost | $50 - $100 |
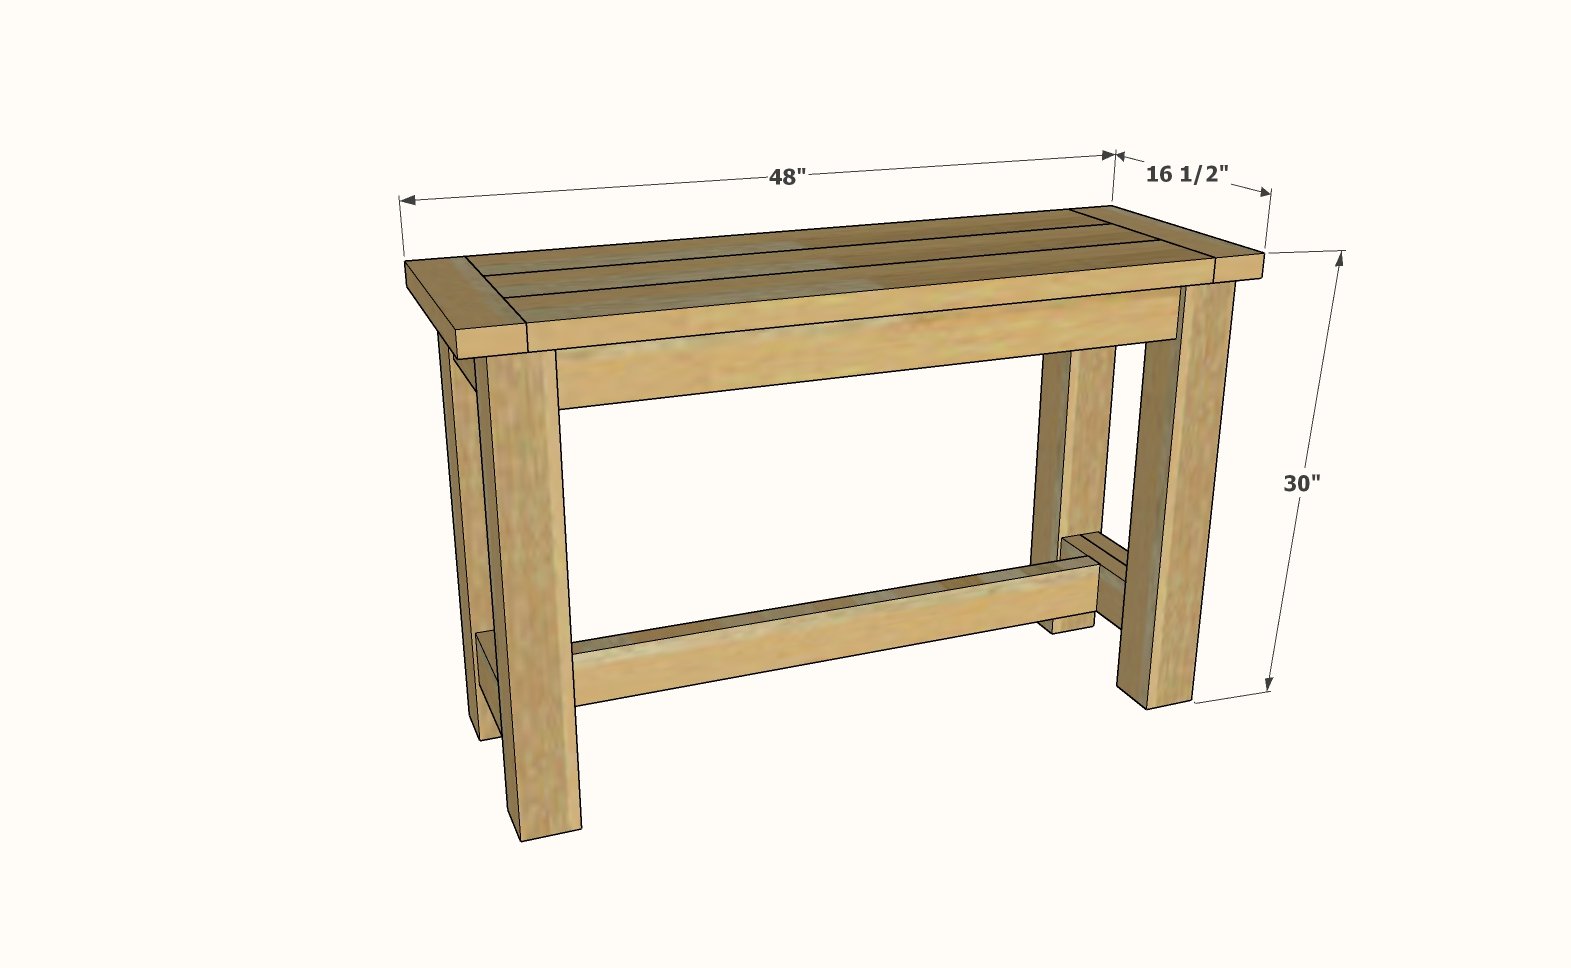
Dimensions
Use the size-specific shopping and cut lists below.
Shopping List
- 1 - 4x4 @ 10 feet long
- 1 - 2x6 @ 12 feet long (can cut into a 4 foot and 8 foot piece for transport)
- 2 - 2x4 @ 10 feet long
- 2-1/2" pocket hole screws (about 50)
- 120 grit sandpaper
- wood glue
- wood stain and top coat
- right angle drill
Cut List
- 2 – 2×4 @ 16-1/2″ (Breadboard Ends) (You may wish to measure and cut these to get a perfect fit as you build)
- 3 – 2×6 @ 41″ (Tabletop)
- 4 – 4×4 Posts @ 28 1/2” (Legs)
- 6 – 2×4 @ 8-1/2″ (End Aprons and Stretcher)
- 2 – 2×4 @ 38″ (Side Aprons)
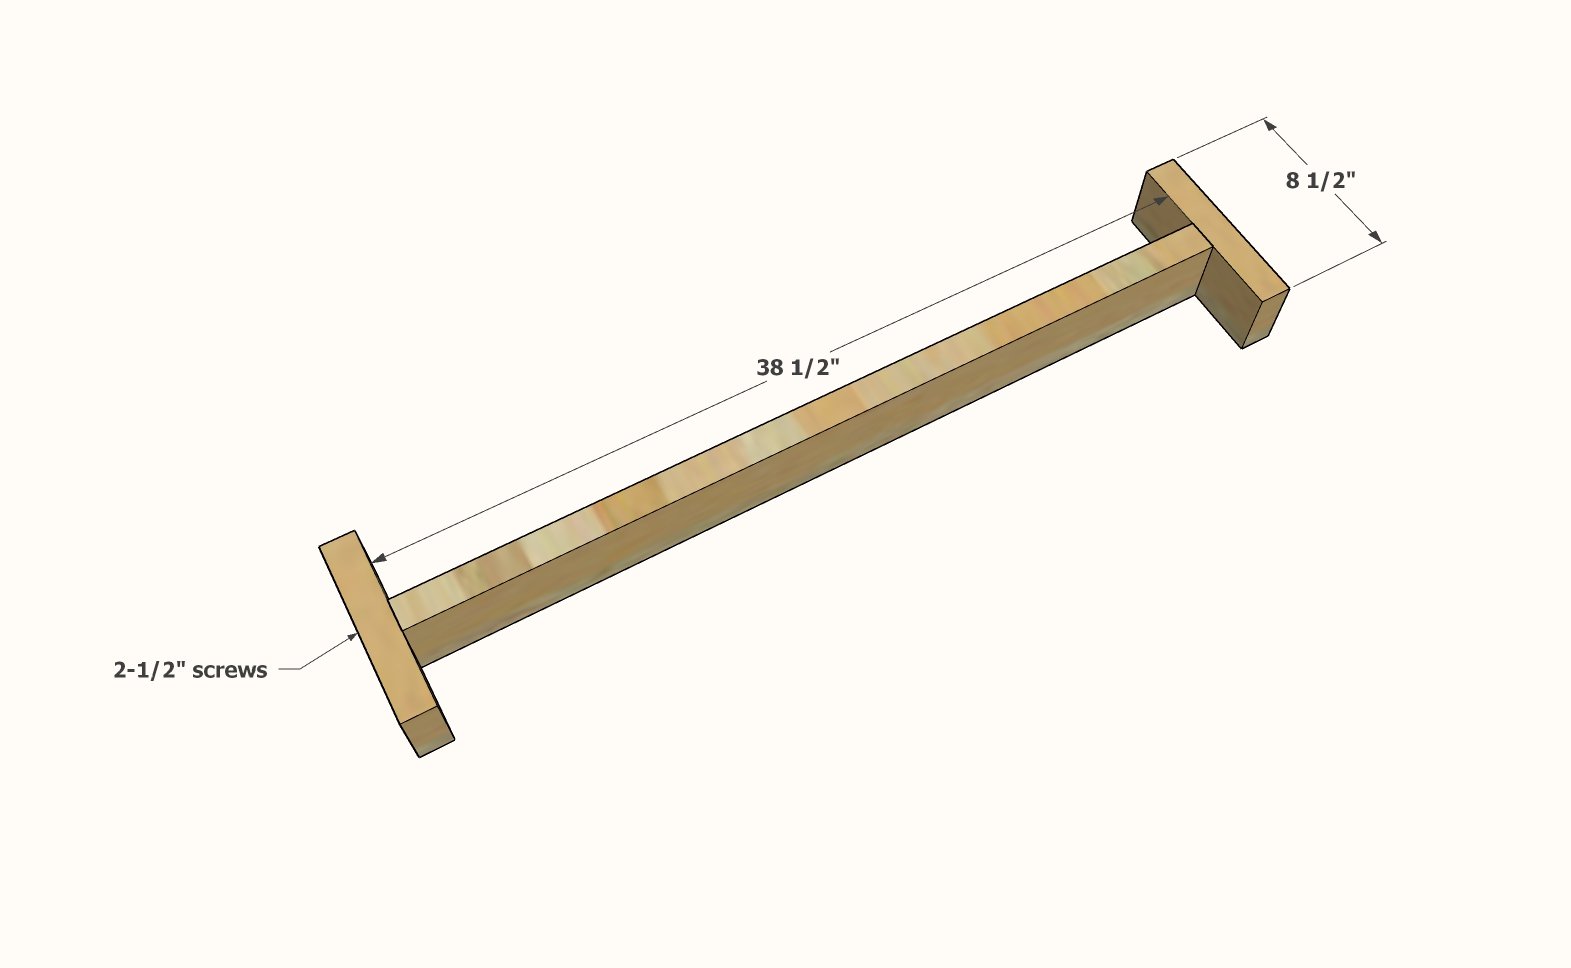
- 1 - 2x4 @ 38-1/2" (Stretcher)
Tools
- measuring tape
- square
- pencil
- safety glasses
- kreg-jig
- drill
- compound miter saw
- sander
Step-by-step Instructions
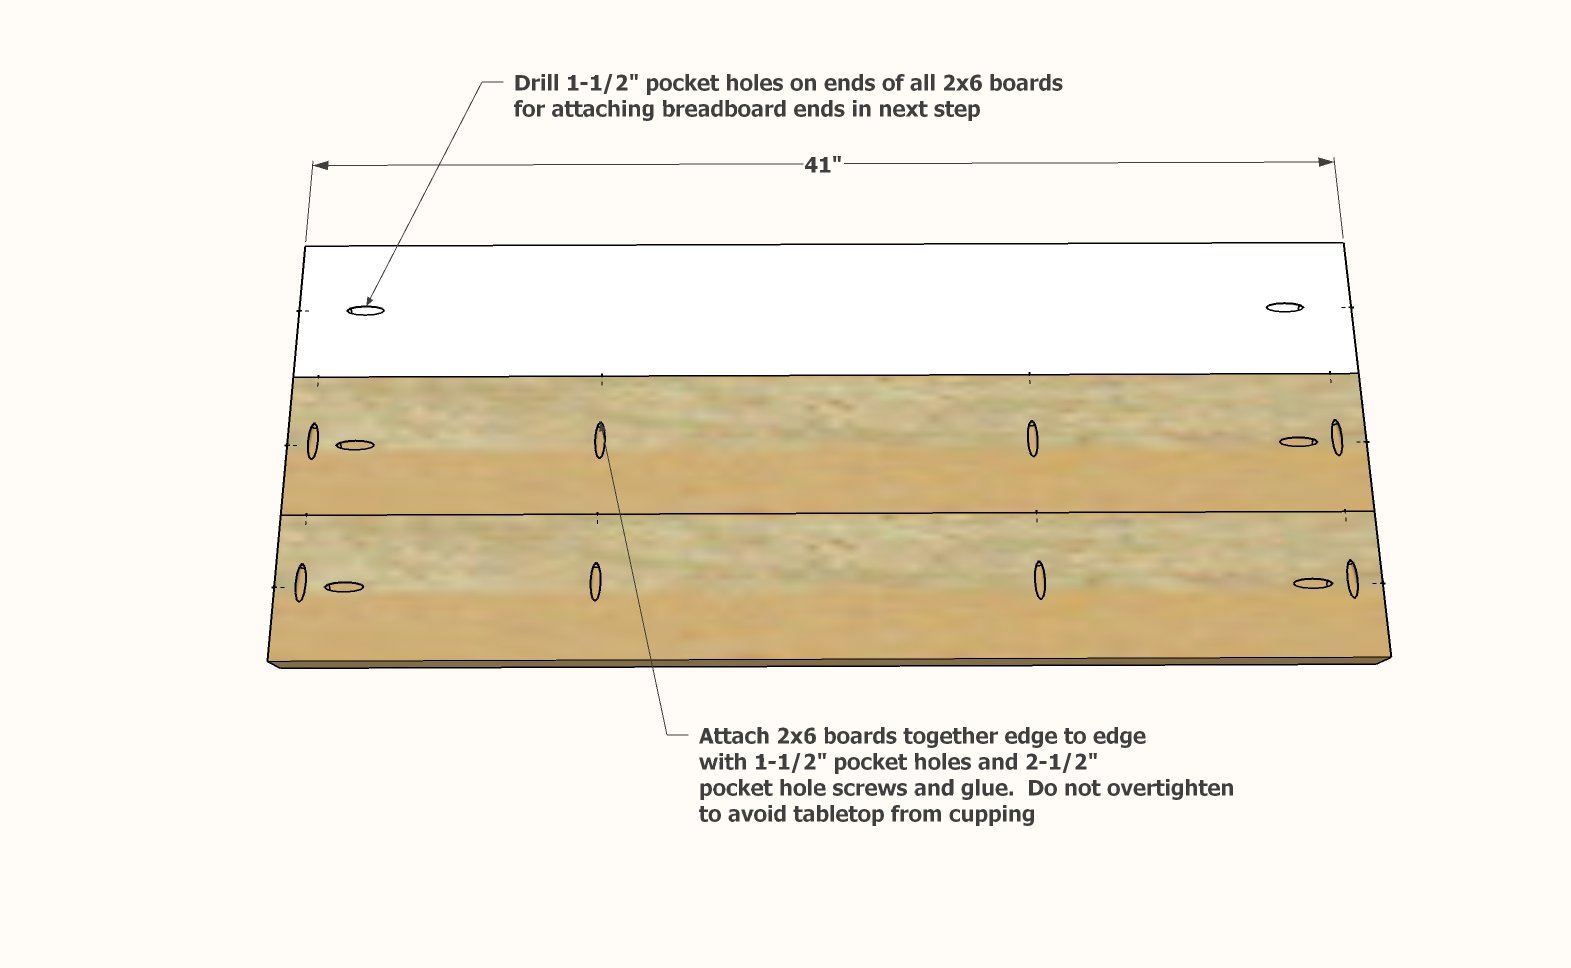
Prepare the tabletop boards by cutting and then drilling a 1-1/2" pocket hole on each end as shown.
Then on two of the 2x6 boards, drill 1-1/2" pocket holes along one long edge. Attach with 2-1/2" pocket hole screws and glue.
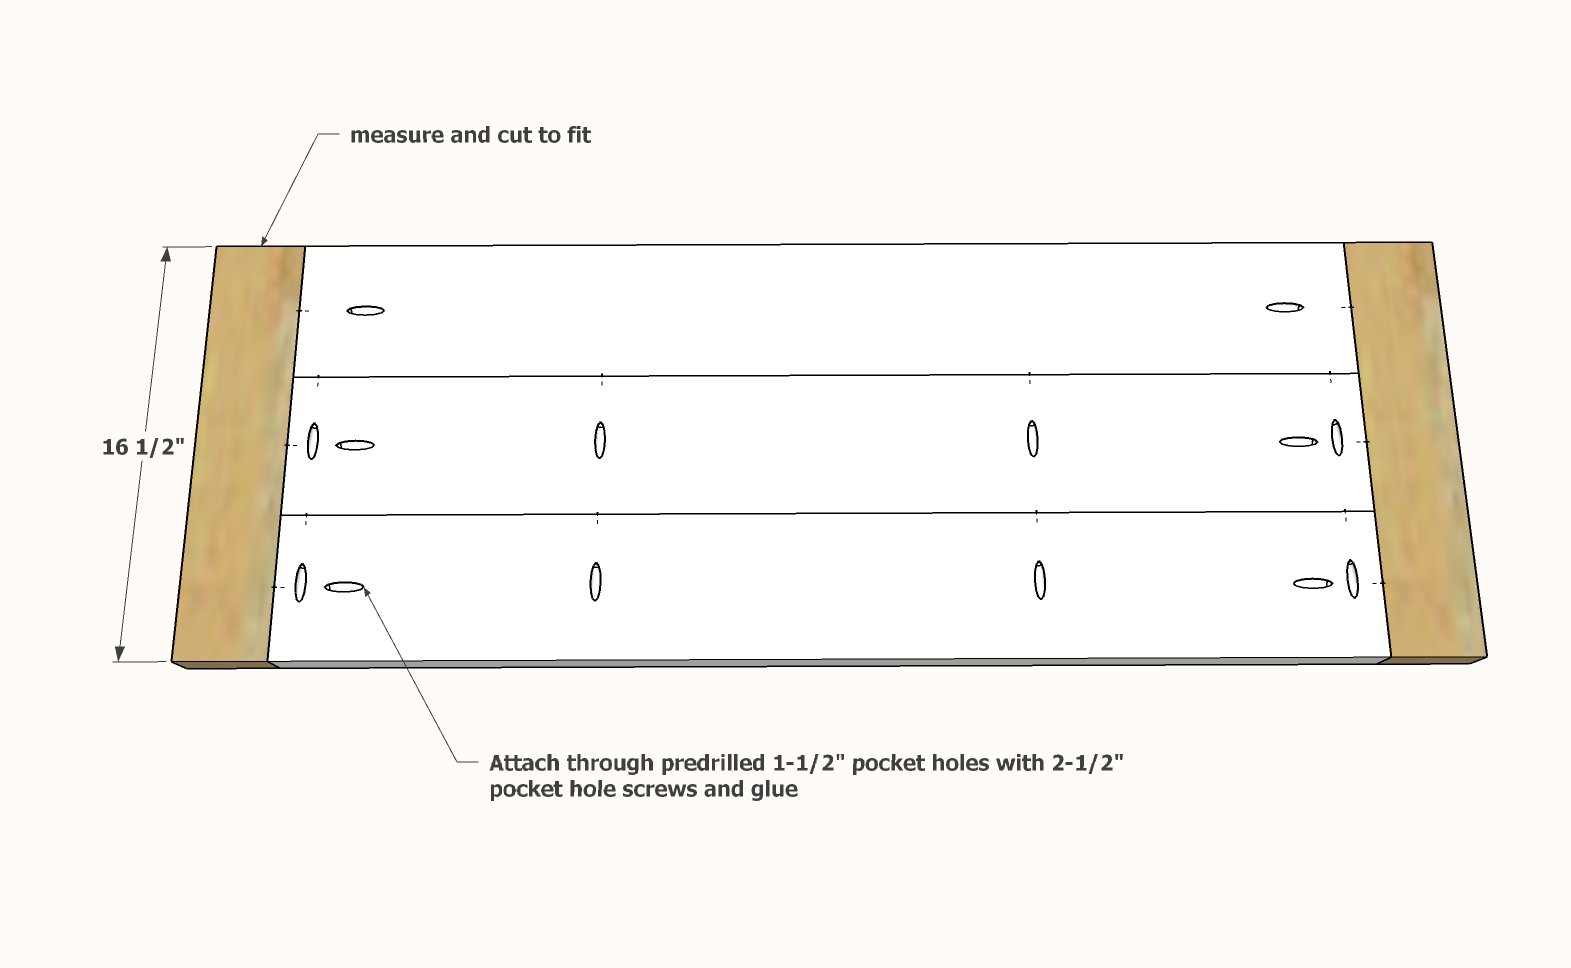
Measure and cut the 2x4 breadboard ends.
Attach the 2x6 center panel to the 2x4 breadboard ends with 2-1/2" pocket hole screws.
Step 3
Prepare two of the 2x4 @ 8-1/2" long by drilling 1-1/2" pocket holes on each end, and then 1-1/2" pocket holes upwards for attaching the tabletop in later steps. Prepare two more of the 2x4 @ 8-1/2" long by drilling 1-1/2" pocket holes on each end (to be used at the bottom stretcher) Build two leg sets by attaching the short 2x4 pieces in between with 2-1/2" pocket hole screws.

Step 4
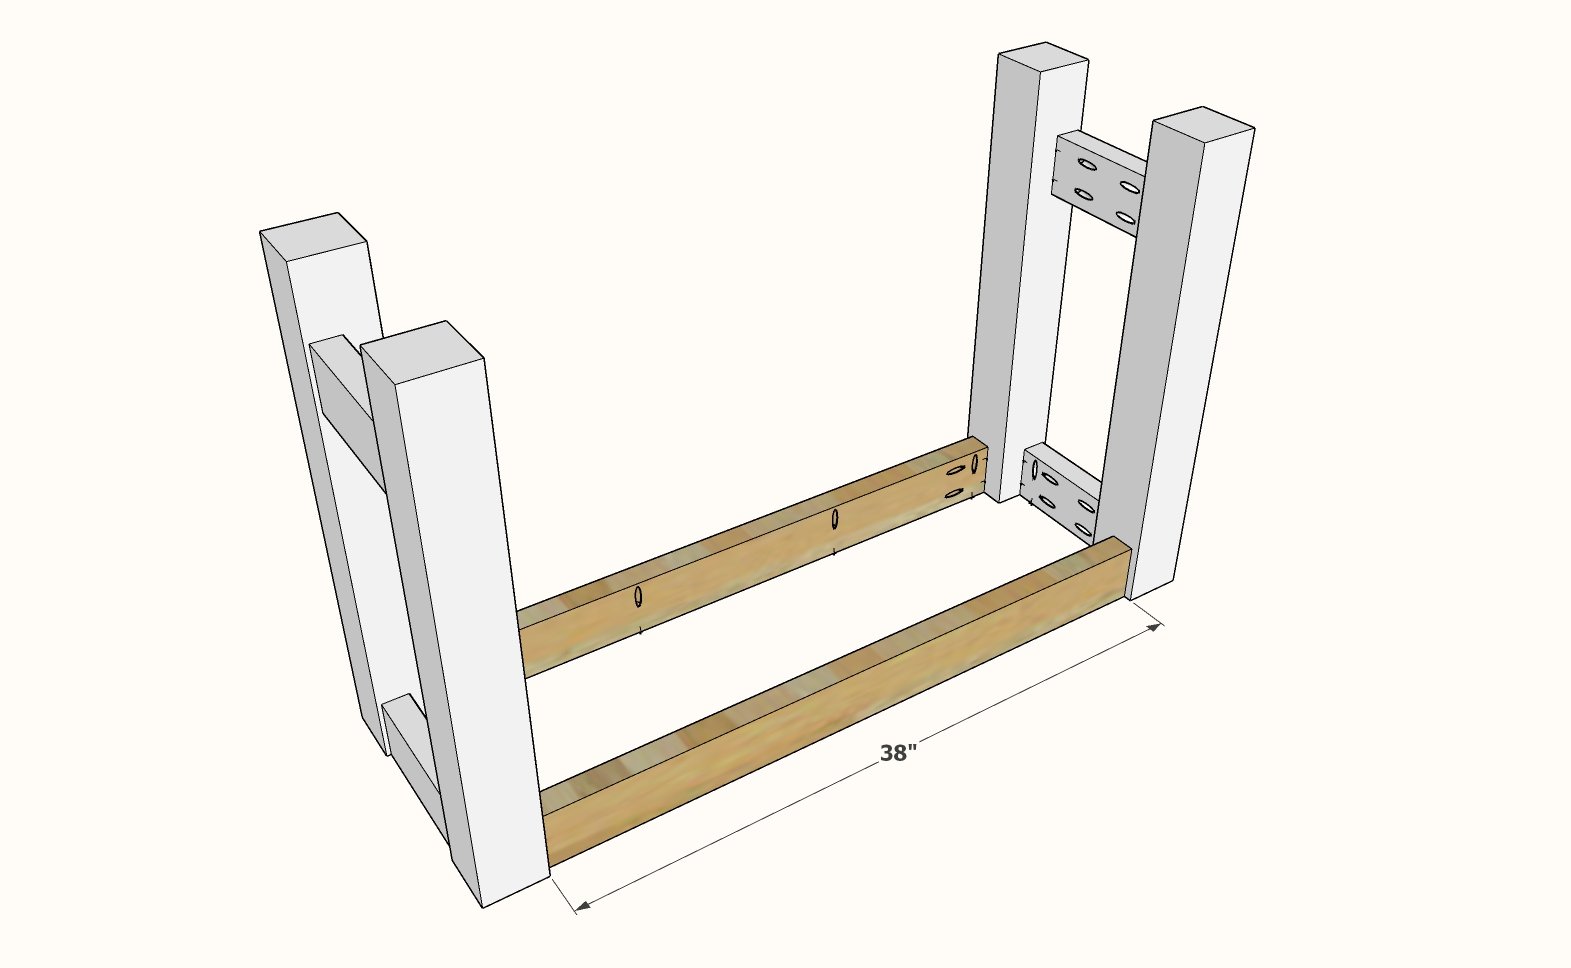
Prepare the two side aprons with 1-1/2" pocket holes on each end, and also facing upward for attaching the tabletop in later steps. Attach the two leg sets with the side aprons using 2-1/2" pocket hole screws.
Step 5
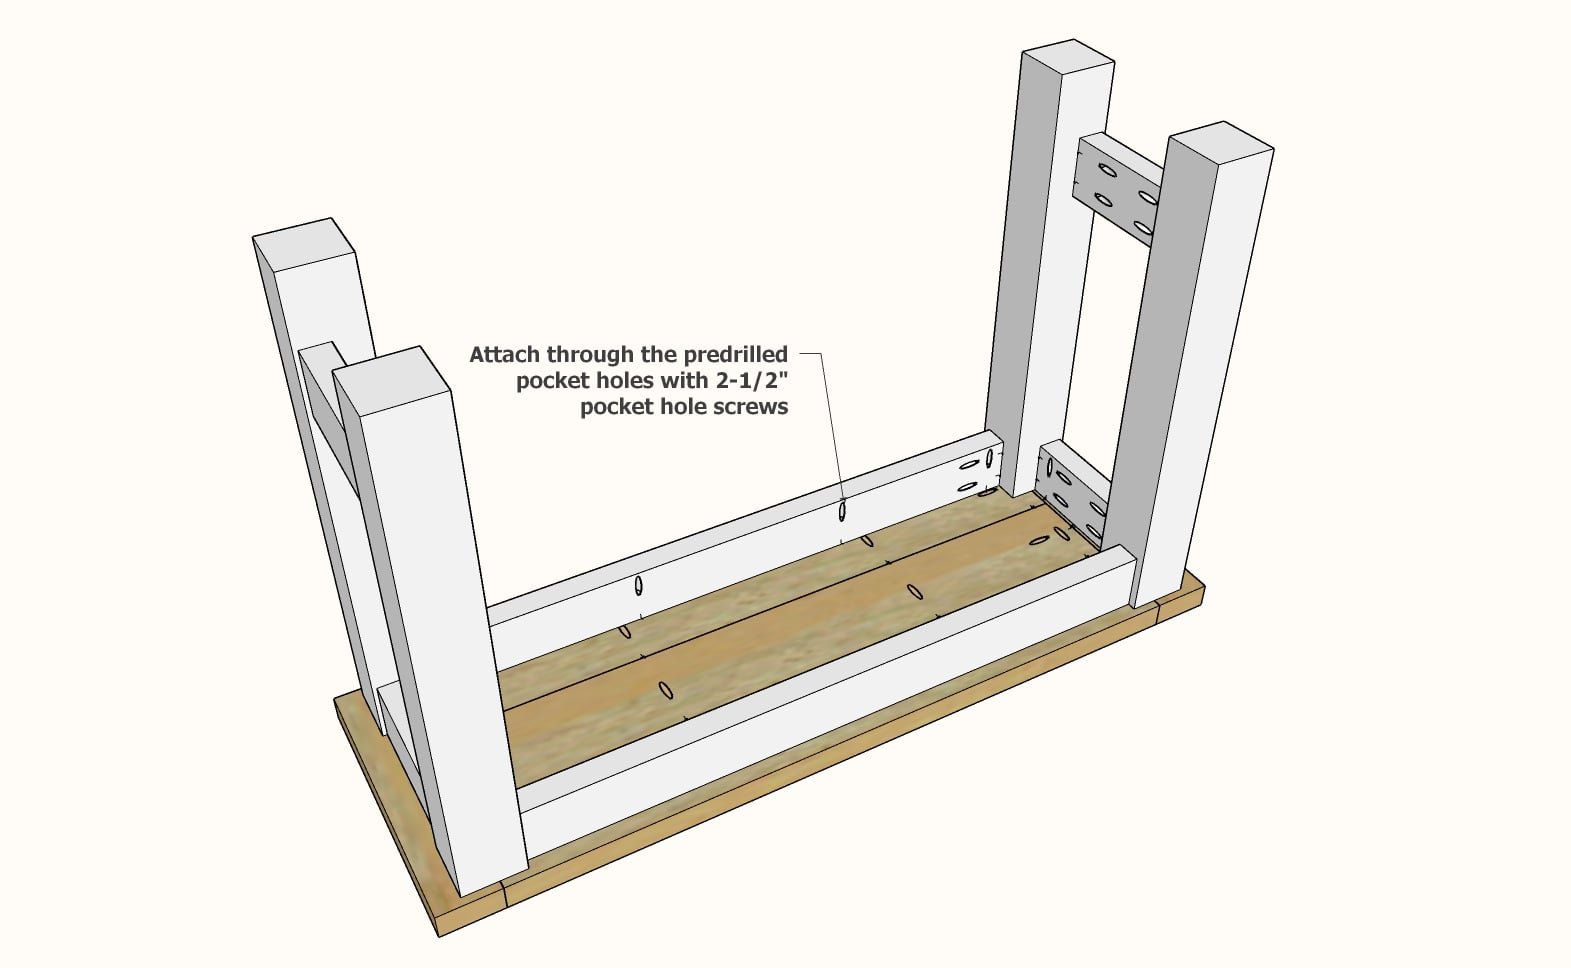
Attach the base to the underside of the tabletop through the predrilled pocket holes in the aprons with 2-1/2" pocket hole screws.
Step 6
Build the stretcher with 2-1/2" screws - you can use pocket hole screws, just predrill so the head of the screw is sunken below the surface of the wood.
Step 7
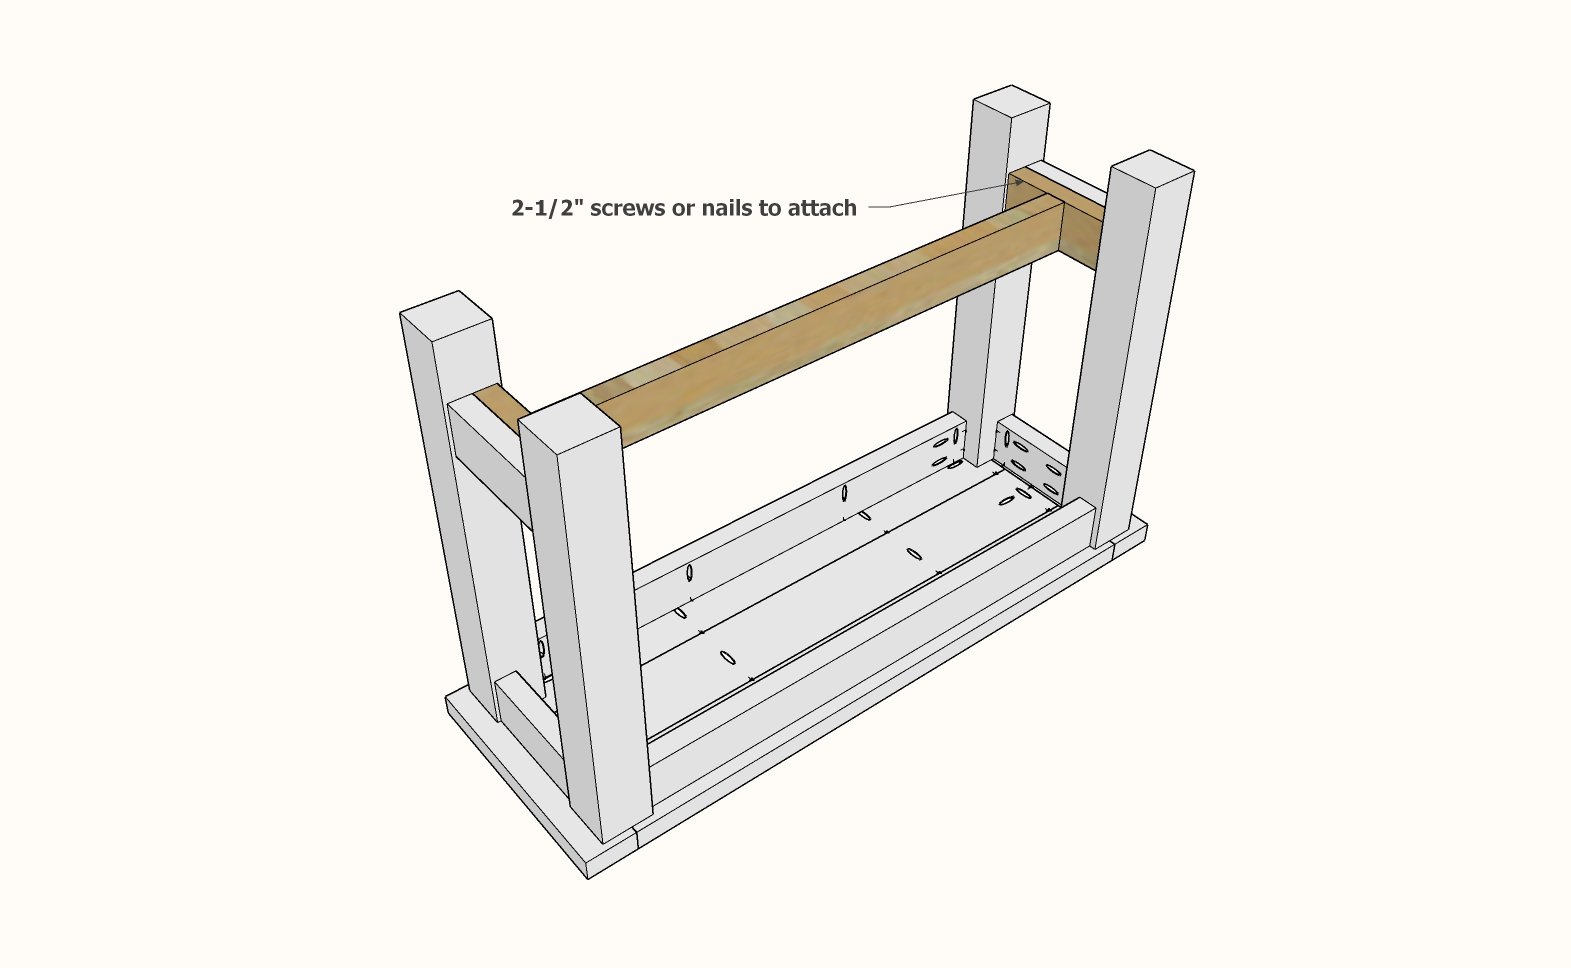
Place the stretcher inside the legs and attach with a couple of 2-1/2" screws (or can use 2" nails to hide better)
Finishing
Sand all surfaces, starting with a medium grit and finishing with fine. Wipe off the dust, fill any holes or gaps with wood filler, and sand smooth once dry. Apply primer if you're painting, then finish with your choice of paint or stain and seal with a durable clear topcoat. For outdoor projects, use exterior-rated primer, paint or stain, and sealer so the piece stands up to the weather.
Source (temporary): https://www.ana-white.com/woodworking-projects/tryde-console-table