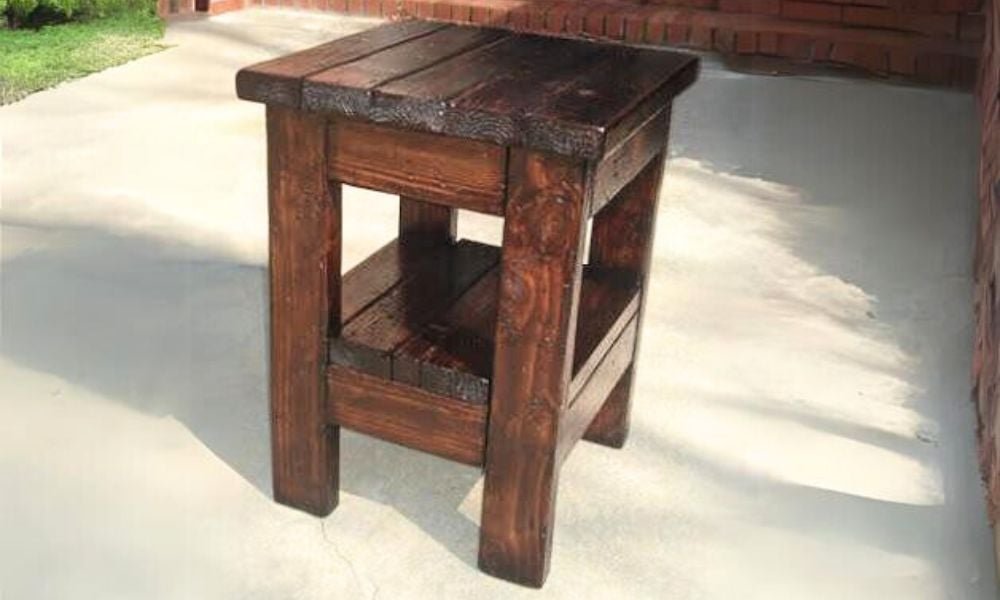
Tryde End Table with Shelf
to build an end table with shelf out of 5- 2x4s! From
Specifications
| Project type | Side and End Table Plans |
|---|---|
| Room | living room |
| Style | Farmhouse Furniture |
| Difficulty | Intermediate |
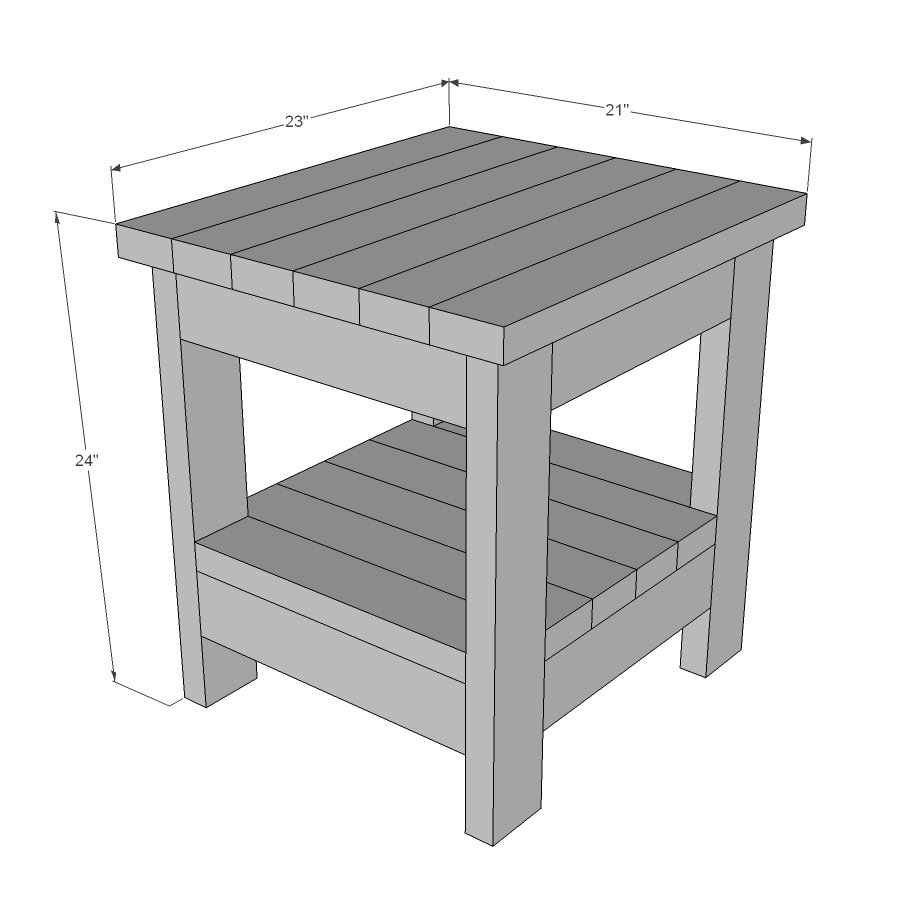
Dimensions
Use the size-specific shopping and cut lists below.
Shopping List
- 5 - 2x4 @ 8 feet long
- 2-1/2" pocket hole screws
Cut List
- 4 - 2x4 @ 22 1/2" (legs)
- 4 - 2x4 @ 14" CUT TO FIT WIDTH OF 4 - 2x4s (shorter aprons)
- 4 - 2x4 @ 16" (longer aprons)
- 2 - 2x4 @ 16" (bottom shelf shorter pieces)
- 4 - 2x4 @ 19" (bottom shelf longer pieces)
- 6 - 2x4 @ 23" (tabletop boards)
Tools
- measuring tape
- square
- pencil
- safety glasses
- hearing protection
- kreg-jig
- drill
- circular saw
- sander
Step-by-step Instructions
Step 1
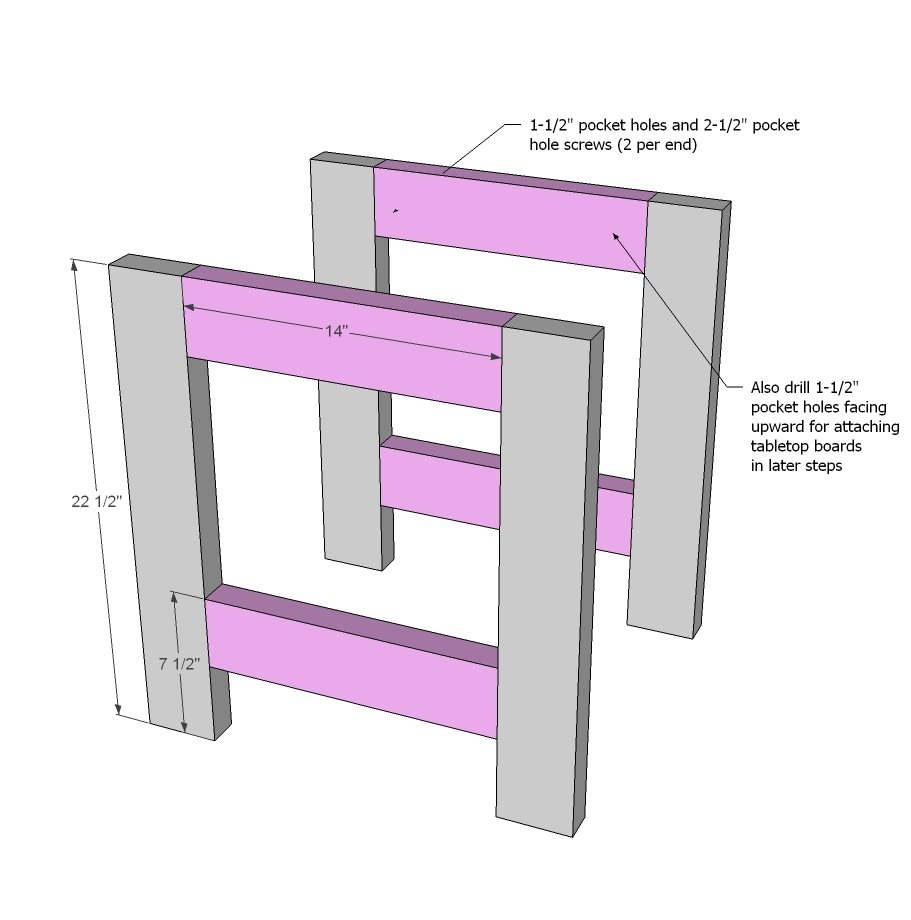
Place your four longer bottom shelf boards together and measure the overall width of the shelf. This measurement should be close to 14". Cut your shorter aprons to this length. Then drill (2) 1-1/2" pocket holes on each end of each of the apron boards and attach to legs to build the two end leg sets. NOTE: You'll want to also drill 1-1/2" pocket holes (about 2 per apron facing upward, bottom aprons too) for attaching the shelf/tabletop in later steps.
Step 2
Drill 2 1-1/2" pocket holes per end of each of the longer apron boards and attach to the legs with 2-1/2" pocket hole screws. NOTE: You'll want to also drill 1-1/2" pocket holes (about 2 per apron facing upward, bottom aprons too) for attaching the shelf/tabletop in later steps.
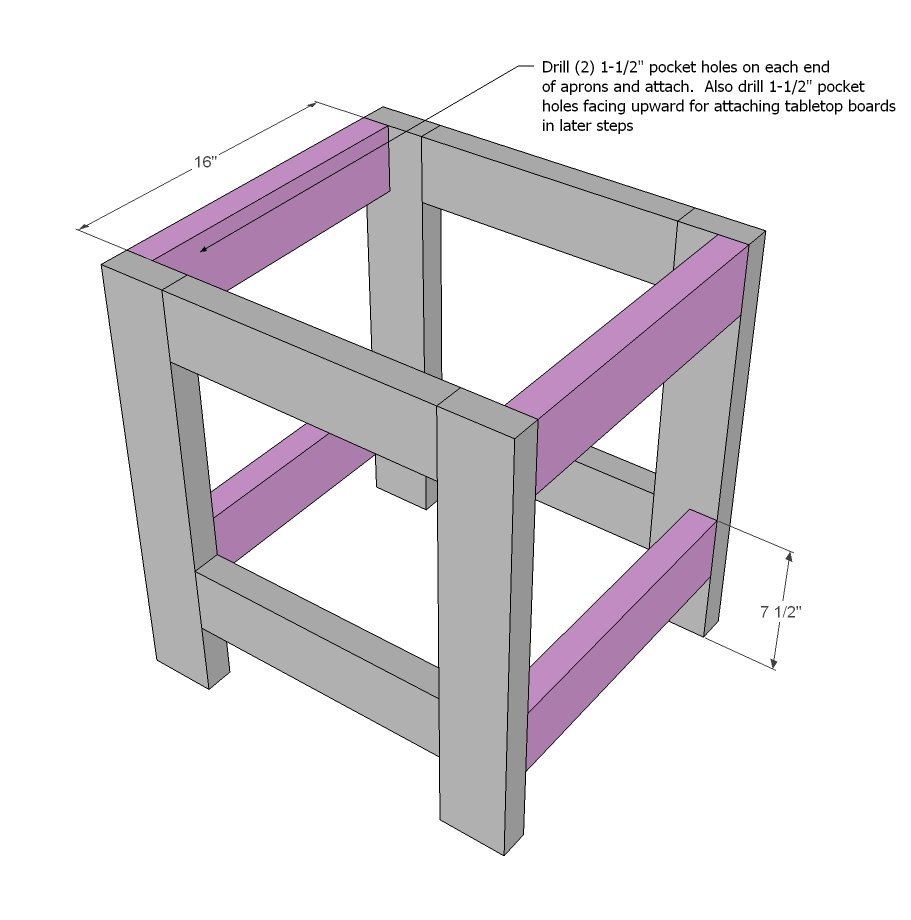
You may wish to attach the tabletop first for easier access to the underside (see next step).
Build your bottom shelf first with 1-1/2" pocket holes and 2-1/2" pocket hole screws. Then fit inside and attach through the predrilled pocket holes in aprons with 2-1/2" pocket hole screws.
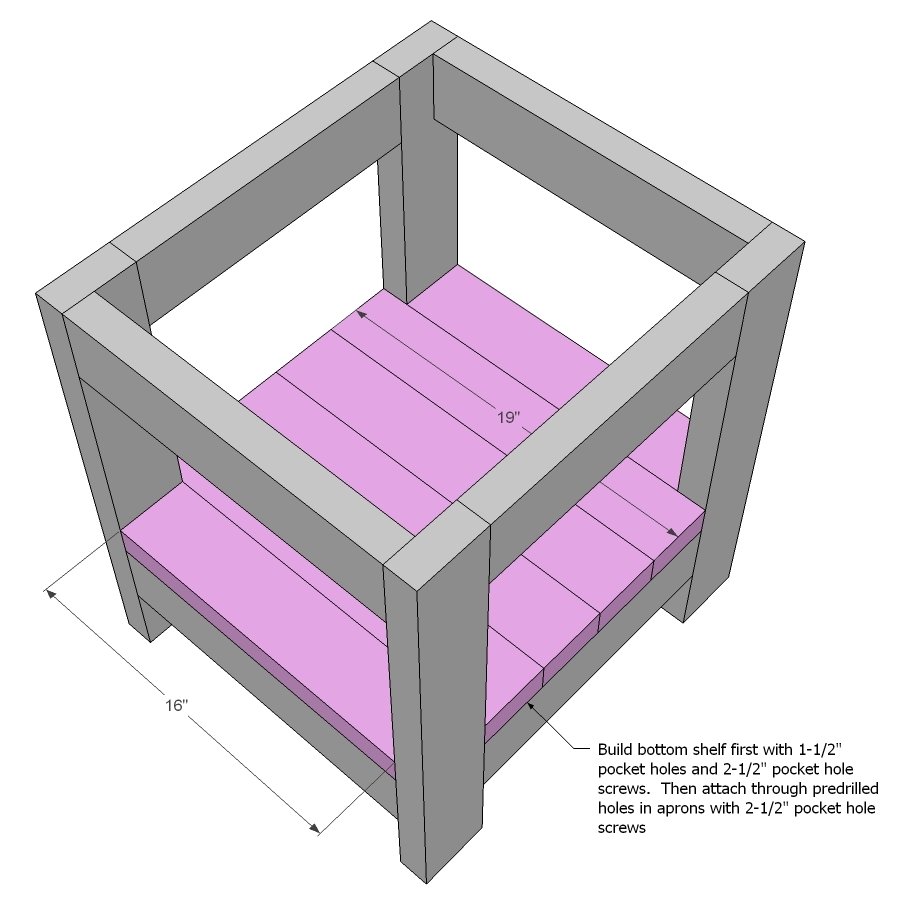
Step 4
Build tabletop first, then attach completed tabletop to the base through pocket holes on underside, as you did the bottom shelf.
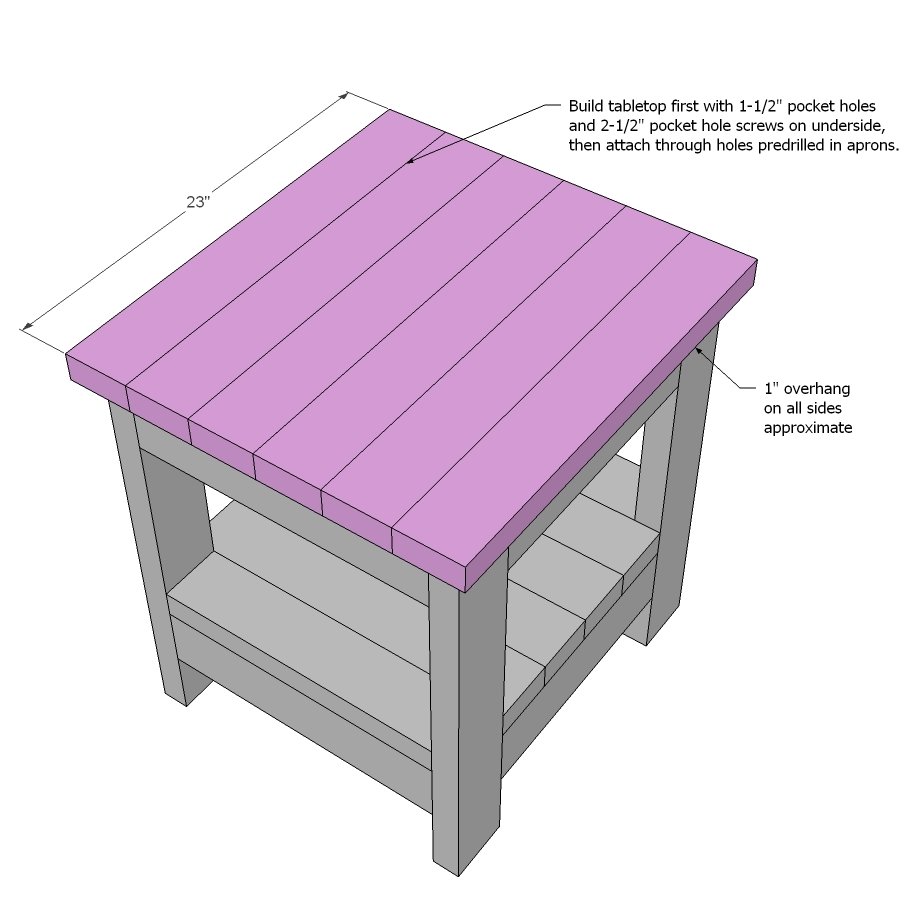
Finishing
Sand all surfaces, starting with a medium grit and finishing with fine. Wipe off the dust, fill any holes or gaps with wood filler, and sand smooth once dry. Apply primer if you're painting, then finish with your choice of paint or stain and seal with a durable clear topcoat. For outdoor projects, use exterior-rated primer, paint or stain, and sealer so the piece stands up to the weather.
Source (temporary): https://www.ana-white.com/woodworking-projects/tryde-end-table-shelf-updated-pocket-hole-plans