Turned Leg Coffee Table
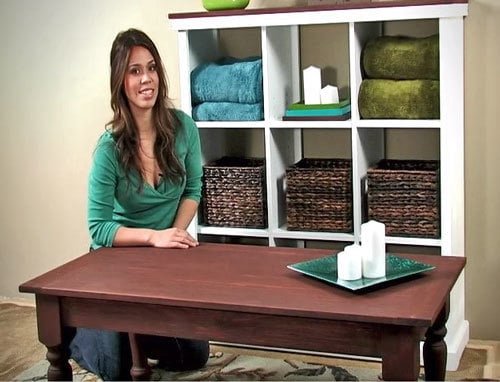
How to build a turned leg coffee table. Step by step plan included video tutorial to build coffee table.
Specifications
| Project type | Coffee Tables |
|---|---|
| Room | living room |
| Style | Farmhouse Furniture |
| Difficulty | Beginner Projects |
| Estimated cost | $50 - $100 |
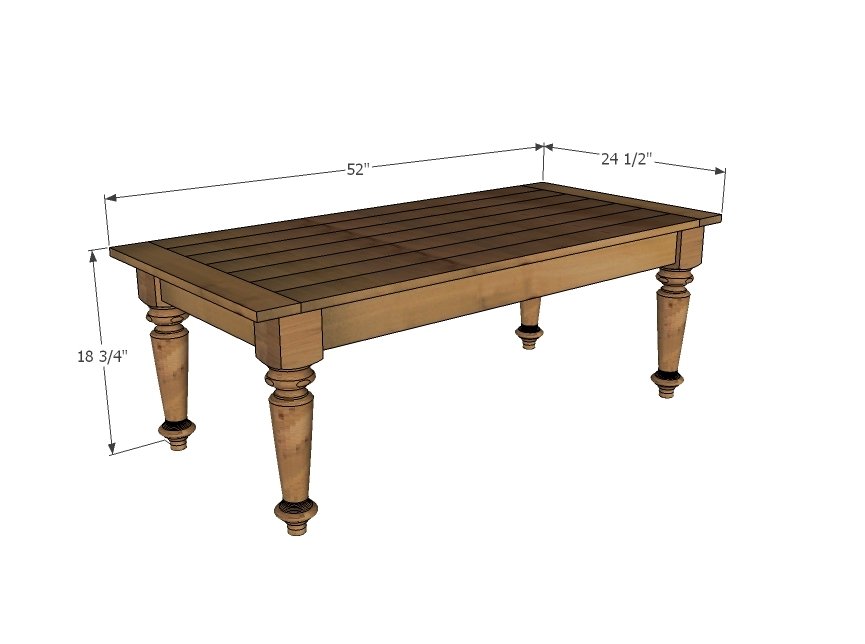
Dimensions
Use the size-specific shopping and cut lists below.
Shopping List
4 - 3 1/2" turned coffee table legs 6 - 1x4 @ 8 feet long
Cut List
- 7 - 1x4 @ 45" long (tabletop boards)
- 2 - 1x4 @ 24 1/2" (breadboard ends)
- 2 - 1x4 @ 16 1/2"
- 2 - 1x4 @ 41"
Tools
- measuring tape
- square
- pencil
- safety glasses
- hearing protection
- kreg-jig
- drill
Step-by-step Instructions
Step 1
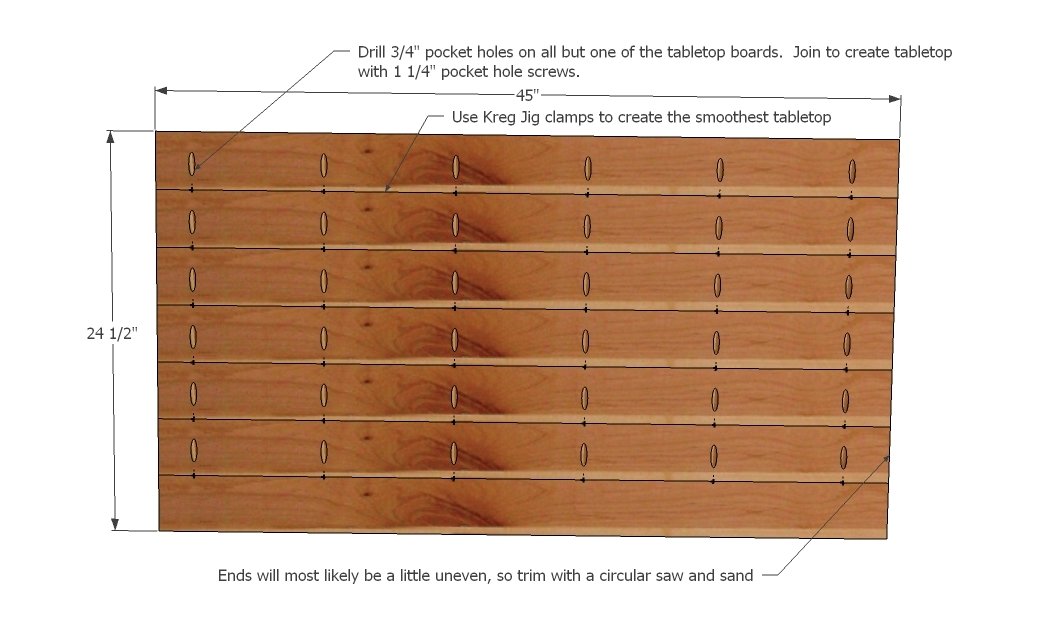
The key to a great tabletop is making sure all of your tabletop boards are cut to the exact length, and then joined with pocket holes from underneath. I like to clamp every screw just to make sure we are getting the smoothest edge to edge joint possible. If you are using glue, be very careful not to let glue dry on the tabletop and stain the surface. If your ends are not perfectly straight, there is no shame in trimming with a circular saw. It's about getting a great finished project! Another consideration is to try to alternate the grain of the boards so the boards aren't all facing bark side up or bark side down. This is done to prevent your tabletop from warping in one direction.
Step 2
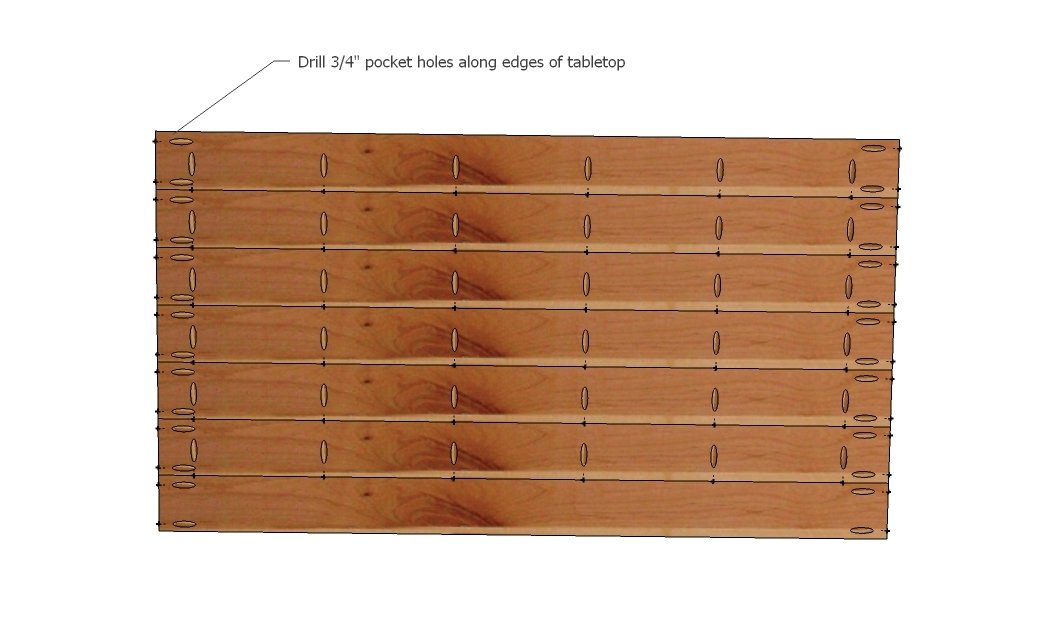
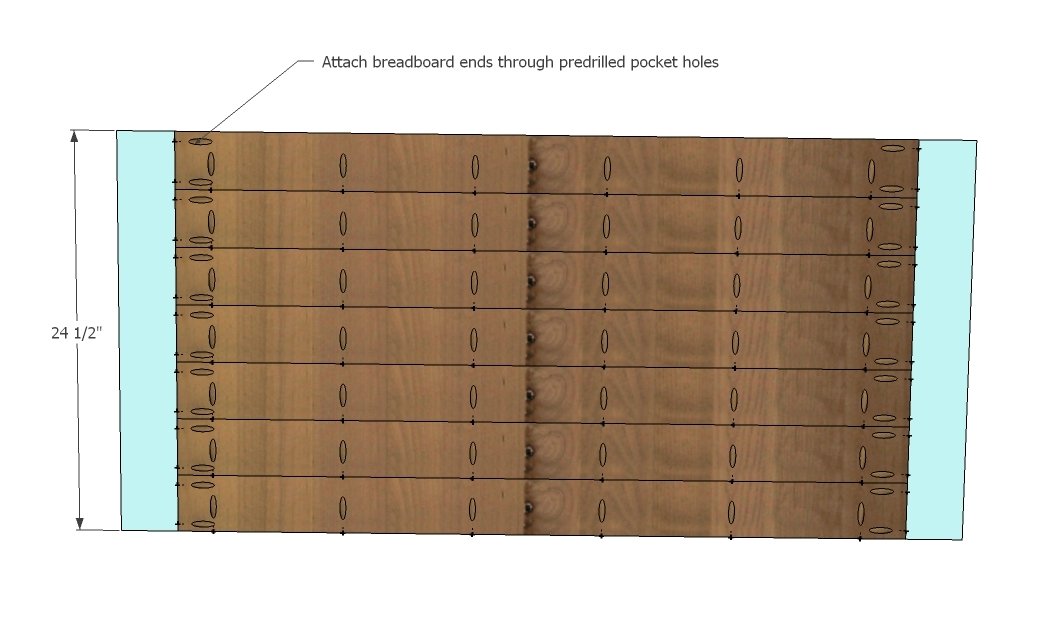
Once your main top is straight and square, drill 3/4" pocket holes on ends for attaching breadboard ends.
Step 3
Then attach breadboard ends with 1 1/4" pocket hole screws. Take a second to admire your tabletop and set aside:)
Step 4
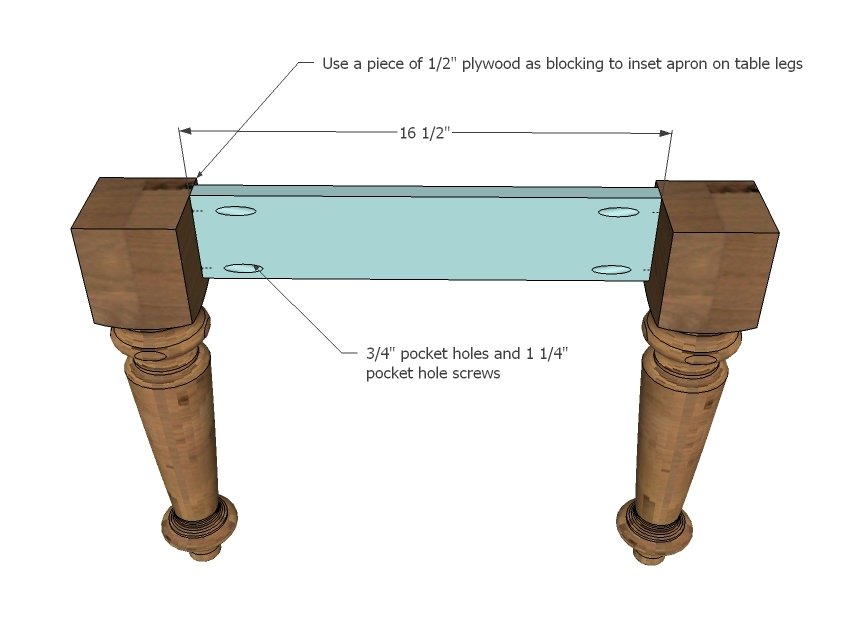
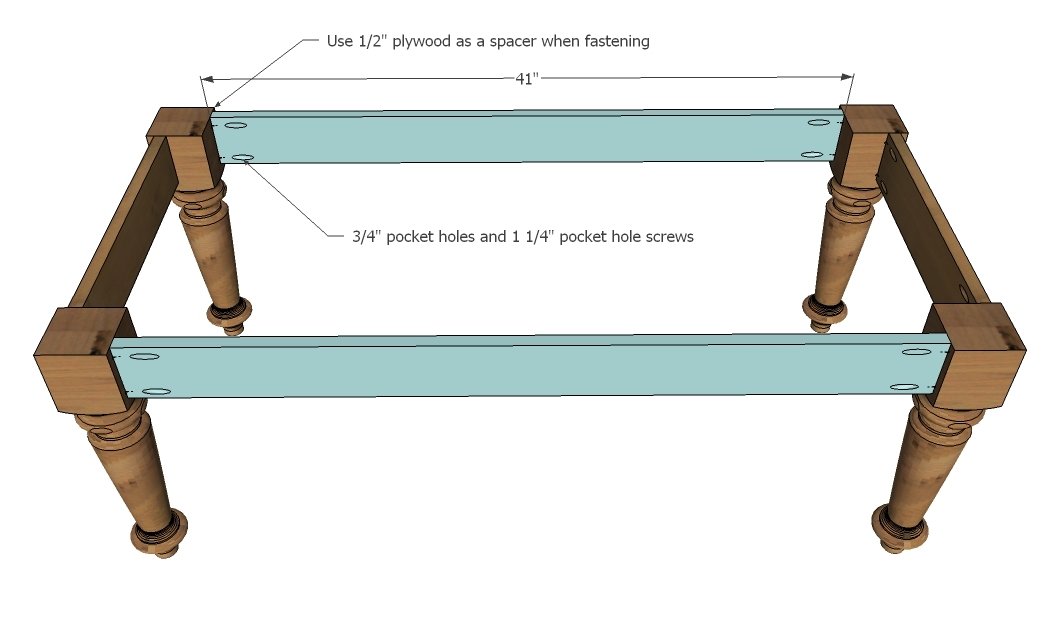
Attach legs to end aprons. I like to use a scrap piece of plywood as a spacer to elevate the apron - just makes life easier! TIP: to avoid any screw holes on tabletop, drill 3/4" pocket holes on aprons facing upward for attaching top in later steps.
Step 5
Step 6
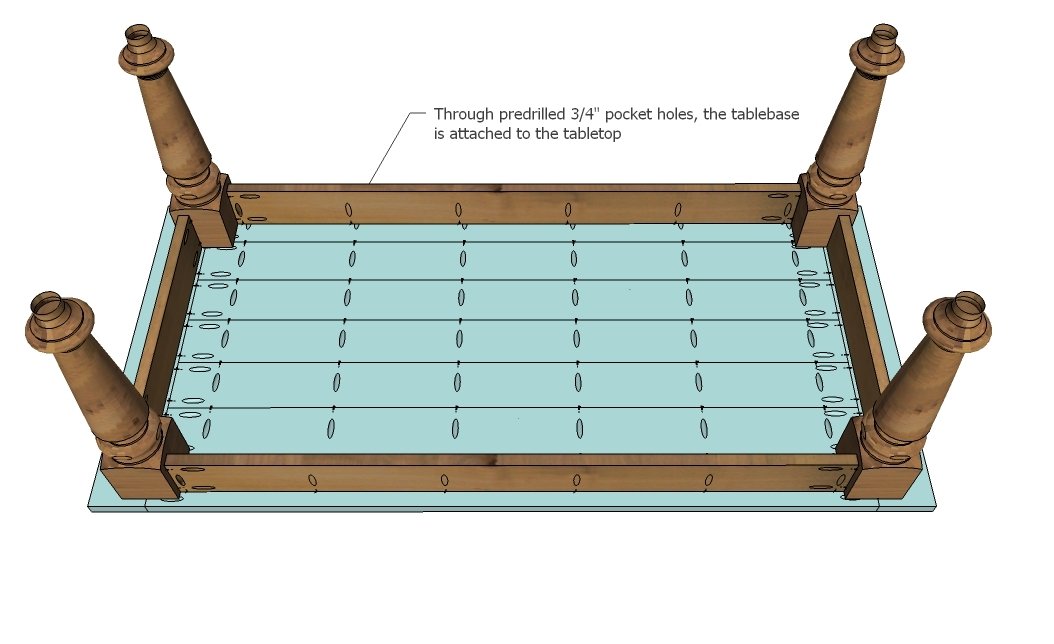
If you drilled the pocket holes in aprons, simply attach through aprons into underside of tabletop with 1 1/4" pocket hole screws and glue. Otherwise, attach through top into aprons.
Finishing
Sand all surfaces, starting with a medium grit and finishing with fine. Wipe off the dust, fill any holes or gaps with wood filler, and sand smooth once dry. Apply primer if you're painting, then finish with your choice of paint or stain and seal with a durable clear topcoat. For outdoor projects, use exterior-rated primer, paint or stain, and sealer so the piece stands up to the weather.
Source (temporary): https://www.ana-white.com/woodworking-projects/turned-leg-coffee-table